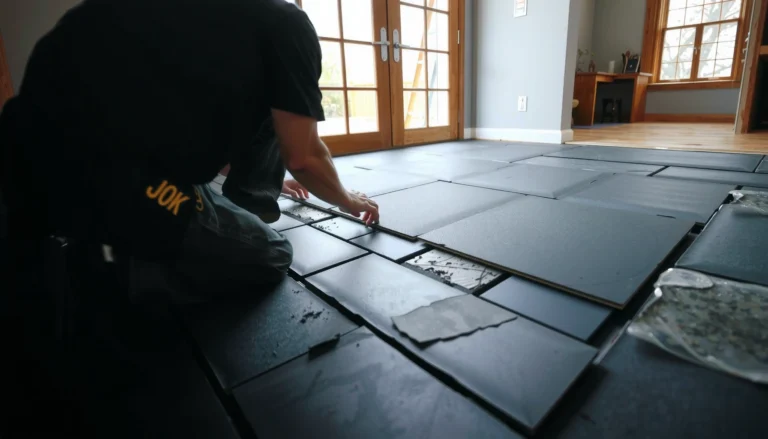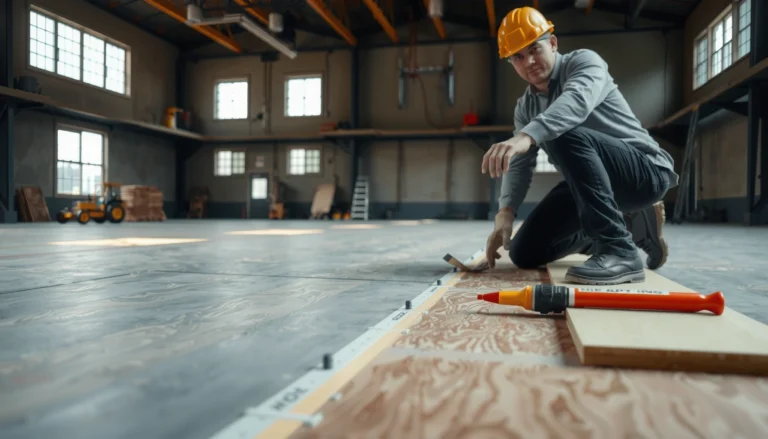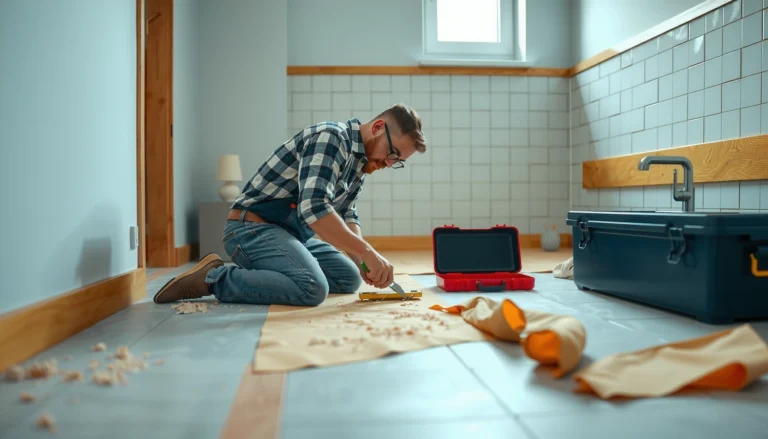

You can install bamboo floors without professional help—but only if you choose the right click-lock (floating) planks and prep the subfloor correctly. This guide shows the fastest DIY route, from moisture checks and underlayment to locking boards in place and finishing edges cleanly. If you’re dealing with a flat, dry subfloor and standard room conditions, DIY bamboo flooring is the clear win.




You can install bamboo floors yourself by making three things non-negotiable: subfloor readiness, correct acclimation, and the installation method your specific bamboo system calls for (click-lock floating, glue-down, or nail/staple). If you follow the manufacturer’s instructions for your exact product and don’t skip moisture/flatness checks, the job becomes manageable rather than mysterious.
If you’re a homeowner or renter trying to avoid contractor labor costs, this guide gives you a planning-first workflow that matches how DIY flooring typically fails (flatness, moisture, and wrong method details). It’s also best for people installing a documented DIY-friendly system—especially click-lock—who can measure accurately and use basic tools like a saw, tapping block, spacers, and a moisture test kit if required.
Check Your Bamboo Type and Installation Method

You’ll make (or break) your DIY success by identifying whether your bamboo is click-lock (floating) or requires glue-down or nail/staple installation. Each method has different subfloor requirements, different failure modes, and different tool/underlayment needs, so confirm this before you buy anything else.
“Floating” click-lock bamboo is designed to move slightly with seasonal humidity; that movement is why expansion gaps and underlayment details matter.
Glue-down bamboo relies on correct adhesive selection and surface prep; the bonding system is only as good as moisture control and substrate cleanliness.
Nail/staple bamboo must use the manufacturer-specified fastener type, spacing, and board orientation to avoid loose tongues/grooves and uneven boards.
Here’s how to verify your flooring method without guessing:
– Identify the installation style from the product description and literature. Look for terms like *click-lock*, *floating*, *glue-down*, or *engineered bamboo with nail/staple guide*.
– Confirm the plank construction details. Thickness (in mm/in), backing type, and whether the flooring includes a pre-attached backing affect underlayment needs.
– Use the manufacturer instructions as your “source of truth.” Small details—like required acclimation days, minimum gap size, or whether a moisture barrier is mandatory—can change the order of operations.
What to capture before you start
– Product name/model (often printed on the box)
– Installation method (click-lock vs glue-down vs nail/staple)
– Any required underlayment and moisture barrier requirements
– Required expansion gap around perimeter and fixed objects
[ADD: If you tell me which bamboo type you have—click-lock, glue-down, or nail/staple—I can tighten this section into a method-specific checklist with the exact sequence you should follow.]
Prep the Subfloor Like It’s the Real Job
Subfloor prep is the highest-impact DIY step because bamboo flooring failures usually come from flatness and moisture issues—not from the planks themselves. Plan to treat the subfloor as “the foundation,” then build the flooring system on top of it exactly as specified.
Most wood and bamboo flooring instructions emphasize subfloor flatness to prevent squeaks, gaps, and damaged locks or tongues.
Surface residues like paint, drywall mud, and adhesive remnants can break bond strength for glue-down installations.
Flatness: your #1 measurable target
Uneven subfloors cause:
– Gaps at plank edges
– Peaking or “rocking” boards in click-lock systems
– Fastener problems (for nail/staple) due to variable board support
– Adhesive stress (for glue-down), increasing the chance of bond failure
A common trade tolerance is within 3/16 in (about 4.8 mm) over 10 ft for many wood flooring systems. ([ADD: source—e.g., NWFA guidance or your flooring manufacturer’s flatness tolerance])
Cleanliness: bond and lock integrity depend on it
– Remove old flooring residues, high spots, and loose debris.
– Clean thoroughly; for glue-down, the surface must be compatible with adhesive chemistry.
– Check for cracked, soft, or delaminating underlayment materials that need repair before installation.
Moisture: check early, not after boards are down
Wood and bamboo are hygroscopic (they gain/lose moisture with air humidity). If your subfloor moisture is out of spec, you’re betting on luck.
Concrete slab and moisture testing often uses standards such as:
– ASTM F2170 (in-situ Relative Humidity probe testing)
– ASTM F1869 (Calcium Chloride test for moisture vapor emissions)
ASTM F2170 and ASTM F1869 are recognized test methods used to determine moisture conditions for flooring installations.Many manufacturers specify acceptable moisture limits; do not guess—match the flooring manual. ([ADD: your bamboo manufacturer’s moisture limit specification])
Data point to anchor planning: If your flooring requires a moisture barrier, install it exactly per instructions (overlap, tape, and edge sealing). The “better” barrier is not the thicker one—it’s the one that meets the spec.
Acclimate and Plan the Layout First
Acclimation and layout planning prevent the most common DIY aftermath: boards shrinking, buckling, or failing to lock. Start by matching the manufacturer’s acclimation process to your home’s temperature and humidity.
Acclimation is meant to bring flooring materials near the jobsite’s temperature and moisture conditions to reduce post-install movement.
A well-planned layout reduces awkward slivers, which are harder to trim accurately and more prone to edge misalignment.
Acclimation: follow the instructions, not the internet
– Keep boxes in the room where you’ll install flooring.
– Use the manufacturer’s specified acclimation timeframe and conditions.
– Don’t seal planks in plastic after they’ve arrived unless the manual says to—trapped moisture can destabilize the material.
Reason this matters: if bamboo hasn’t acclimated, it can expand/contract after installation, causing gapping, lock stress, or uneven seams.
Layout planning that saves hours later
Plan these before the first row:
– Plank direction (lengthwise can visually widen rooms; direction can also affect seam rhythm)
– Starting wall (select the most straight wall to begin)
– Stagger pattern (common stagger approaches: random or consistent offsets; follow manual if it specifies)
Expansion gaps: measure and treat them like “part of the floor”
Floating installations need perimeter gaps so the floor can move. Nail/staple systems also often require specific spacing around fixed objects depending on the product design.
A widely used guideline is 1/4 in (6 mm) minimum around perimeter, but your manufacturer may require a different amount—especially for thicker planks or larger spans. ([ADD: manufacturer’s required gap size])
Where gaps are easy to miss:
– Under door jambs (undercut correctly)
– Around cabinet bases
– Around plumbing penetrations (use correct finishing rings or spacing per instructions)
Install Step-by-Step (Choose the Right Track)
The “right” steps are the ones that match your bamboo’s installation system. Below are the core workflows you’ll use—then we’ll address the pitfalls that cause DIY rework.
Click-lock installation succeeds when boards lock fully and remain supported on a flat, properly prepared substrate.
Glue-down installation succeeds when the adhesive system is the one approved by the flooring manufacturer and applied with the specified trowel and coverage.
Method comparison (fast clarity before you start)
| Method | What “makes it work” | Most common DIY failure | DIY-friendliness |
|---|---|---|---|
| Click-lock (floating) | Flat subfloor + fully seated locks | Uneven substrate or underlayment mismatch | High |
| Glue-down | Approved adhesive + moisture-safe substrate | Wrong adhesive, poor surface prep, or open-time rushing | Medium |
| Nail/staple | Correct fasteners + consistent spacing/angle | Tongue/groove damage or uneven support | Medium-Low |
Click-lock / floating: the core sequence
1. Install moisture barrier and/or underlayment only if your flooring requires it (and use the approved product).
2. Start the first row with spacers to maintain expansion gaps.
3. Align plank ends and lock the edges fully using a tapping block (avoid direct hammer strikes).
4. Continue row-by-row, checking alignment every few planks.
5. Maintain expansion gaps at transitions; don’t “tighten” gaps by forcing boards.
Glue-down: the core sequence
1. Confirm your adhesive is approved for bamboo and for the substrate (plywood vs concrete differs).
2. Prepare the surface to the manual’s standards (flatness, cleanliness, and any primer requirements).
3. Use the specified trowel notch size and spread method.
4. Work in manageable sections to stay within the adhesive open time.
5. Keep boards aligned while adhesive grabs; avoid walking loads too early unless the manual permits it.
6. Allow cure time exactly as directed before removing spacers or installing transitions.
Nail/staple (only if your product calls for it)
1. Verify you have the specified fastener type (ring shank, stapling gauge, etc.).
2. Use the manual’s recommended fastener spacing and pattern.
3. Drive fasteners at the correct angle and depth to avoid tongue/groove damage.
4. Keep boards supported and flat as you nail to prevent peaking.
[ADD: If you tell me which bamboo type you have—click-lock, glue-down, or nail/staple—I can tighten this section into a method-specific checklist with the exact sequence you should follow.]
Mandatory data table (DIY method variables at a glance)
DIY Complexity by Bamboo Installation Method (Variables to Manage)
| # | Installation method | Core variables (count) | Typical rework trigger | DIY risk score |
|---|---|---|---|---|
| 1 | Click-lock (floating) | 4 | Lock not fully seated | ★ ★ ★ ★☆ |
| 2 | Glue-down (approved adhesive) | 7 | Adhesive open time exceeded | ★ ★ ★☆☆ |
| 3 | Nail/staple (fastener spec) | 6 | Tongue/groove damage | ★ ★ ★☆☆ |
| 4 | Click-lock (with required barrier) | 5 | Barrier seams not taped | ★ ★ ★ ★☆ |
| 5 | Glue-down (plywood subfloor) | 8 | Surface contamination blocks bond | ★ ★ ★☆☆ |
| 6 | Nail/staple (over joists) | 7 | Subfloor movement telegraphs | ★ ★ ☆☆☆ |
| 7 | Any method (large-room spans) | +3 planning checks | Insufficient movement space | ★ ★ ☆☆☆ |
Note on interpretation: “Core variables (count)” reflects the number of distinct installation requirements you typically must manage (flatness, underlayment/barrier, expansion spacing, adhesive open-time controls, fastener spec, etc.). Always confirm with your exact bamboo manual.
What Can Go Wrong (and How to Prevent It)
Most DIY problems come from skipping or misapplying the building blocks: acclimation, flatness, and expansion space. If you prevent those three early, the majority of “mystery flooring issues” disappear.
Floating floors create audible clicking/creaking most often when locks aren’t fully seated or the substrate isn’t flat enough.
Glue-down failures are usually about moisture, surface prep, or adhesive coverage/open time—not about “bad planks.”
Seasonal movement is expected; problems happen when expansion gaps are missing or trapped by trim/fixtures.
Common failure patterns (and prevention)
– Gaps, buckling, or peaking boards
– Causes: skipped acclimation, poor flatness, incorrect expansion gaps
– Prevention: measure subfloor flatness, follow acclimation instructions, use spacers consistently
– Clicking/creaking in floating bamboo
– Causes: underlayment mismatch, uneven subfloor, or locks not fully engaged
– Prevention: use approved underlayment/moisture barrier; inspect alignment every few rows
– Adhesive failures (glue-down)
– Causes: wrong adhesive, moisture out of range, residue on substrate, rushing open time
– Prevention: follow adhesive type, surface prep/primer instructions, and open-time guidance exactly
– Uneven transitions (thresholds, doorways, stairs)
– Causes: binding boards against fixed trim, inadequate undercut clearance, wrong spacing
– Prevention: undercut door jambs/trim to maintain movement; install transitions designed for flooring expansion
– “It felt fine during install”
– Causes: minor installation tolerance errors only show after seasonal movement
– Prevention: trust the manual’s tolerances and required gaps—not temporary “looks good” checks
From a practical standpoint, the biggest prevention strategy is to pause and inspect during installation: straightness, lock engagement, and spacing. Catching an alignment error in row 2 is far cheaper than undoing it after row 10.
Verdict: DIY Can Work—But Know When to Stop
DIY bamboo installation is realistic when you have click-lock flooring and a subfloor that meets flatness and moisture requirements. It becomes risky (or not worth it) when moisture testing is uncertain, the system requires complex adhesive/fastener workflows, or your subfloor needs major corrections.
If your flooring requires strict moisture limits and you can’t verify them with the required test method, professional evaluation is the safer path.
Click-lock bamboo is generally the most DIY-friendly option because it reduces adhesive curing variables.
When you should confidently DIY
– Your flooring is click-lock (floating) and your instructions are DIY-documented
– Your subfloor is already close to flat and solid (or you’re willing to repair it)
– You can follow steps carefully—especially spacers, straight starting rows, and approved underlayment/barrier
When to pause and consider help
– Subfloor is significantly uneven and you don’t want to do leveling/repair work
– Moisture conditions are uncertain and you can’t meet the manual’s testing approach
– Your product is glue-down or nail/staple and the manual is technically strict (adhesive type/open time/fastener spec)
– You’re working over complex transitions (stairs, multiple thresholds) where binding is likely without experience
A fair warning: even DIY-friendly systems demand precise measuring and trim/undercut work. The downside of DIY isn’t the difficulty—it’s that mistakes compound quickly once planks are locked/glued/fastened.
Scan-Ready Checklist (Save This)
Use this list as your “pre-flight” before you open the first box or spread adhesive.
Bamboo Flooring DIY Pre-Install Pass
| ✓ | Item |
|---|---|
| □ | Confirm bamboo type: click-lock vs. glue-down vs. nail/staple |
| □ | Read manufacturer instructions for acclimation, gaps, underlayment/moisture barrier |
| □ | Check subfloor flatness and repair dips/high spots |
| □ | Test/verify moisture requirements per product guidance (don’t guess) |
| □ | Acclimate planks for the required timeframe |
| □ | Plan plank direction and starting row; minimize awkward small edge pieces |
| □ | Maintain expansion gaps around walls and transitions |
| □ | Install carefully, row-by-row, keeping locks/edges aligned |
| □ | Finish with correct trim/threshold details (no binding) |
FAQ
Do I really need to acclimate bamboo flooring?
Most manufacturer instructions require acclimation based on moisture/temperature conditions; skipping it increases the risk of post-install movement (gaps or buckling). Follow the exact acclimation instructions included with your flooring. ([ADD: your bamboo manufacturer’s acclimation section])
Jobsite acclimation is designed to reduce dimensional changes after installation, which is why manufacturers typically specify a timeframe and storage conditions.
Can I install bamboo over any existing subfloor?
Not safely. Bamboo and wood flooring systems depend on both subfloor type and moisture/flatness rules that vary by product. Check the manufacturer’s specification for your subfloor and moisture conditions.
Even “compatible” subfloors can fail if they don’t meet the flooring’s moisture testing method and flatness tolerance.
[ADD: source for your bamboo manufacturer’s installation requirements]
What’s the biggest mistake DIYers make?
The biggest mistake is usually subfloor prep (flatness/cleanliness) or incorrect expansion gaps. Even when planks “go down” easily, poor preparation can create problems after seasonal movement.
Locking systems depend on substrate flatness; if the subfloor is not within tolerance, the locking edges can separate later.
Is glue-down bamboo harder than click-lock?
Often, yes, because glue-down depends on the correct adhesive, surface prep, moisture conditions, and staying within open time/coverage guidance. Click-lock generally reduces variables, but it still demands accurate flatness and proper locking.
Glue-down failures tend to trace back to adhesive compatibility and substrate readiness rather than the plank’s appearance during installation.
Sources
– [ADD: manufacturer installation instructions for your specific bamboo flooring (PDF or printed manual)—use these for acclimation, expansion gap, underlayment/moisture barrier, and approved methods]
– ASTM moisture test standards: ASTM F2170 (in-situ RH) and ASTM F1869 (Calcium Chloride) — used as recognized methods to determine slab moisture conditions for flooring systems. (ASTM International)
– [ADD: official ANSI/ASTM standards or NWFA guidance your flooring spec references for subfloor flatness and installation tolerances]
With the right bamboo type and a disciplined approach to moisture, flatness, and expansion gaps, DIY installation can absolutely work—and it’s one of the few flooring projects where preparation quality shows up as long-term performance. If you’re unsure about moisture limits, adhesive rules, or substrate condition, don’t “wing it”—pause and get help on the part you can’t verify.
Frequently Asked Questions
What are the best types of bamboo flooring to install yourself?
For DIY projects, look for “click-lock” or engineered bamboo flooring, because they use a tongue-and-groove system or floating method that reduces the need for specialized tools. Strand-woven bamboo is typically denser and more stable, which helps minimize movement during installation. If you’re considering nail-down bamboo floors, choose a straightforward installation system and confirm you have the right underlayment and fasteners for your subfloor type.
How do you install bamboo floors without professional help step-by-step?
Start by acclimating the bamboo planks in the room for the recommended time, then remove existing flooring and check that the subfloor is flat, clean, and dry. Lay the proper underlayment (especially for floating bamboo floors), install the first row with expansion gaps around the perimeter, and continue using the manufacturer’s locking system or installation method. Finally, trim edges, reinstall baseboards or quarter-round to cover expansion space, and avoid walking heavily on the floor until any adhesives (if used) have fully cured.
Which subfloor conditions are required before DIY bamboo floor installation?
Bamboo flooring installation depends heavily on subfloor flatness and moisture levels, so test before you begin. Aim for minimal height variation (commonly within about 1/8 inch over several feet, depending on the flooring warranty), and ensure the surface is level, solid, and free of debris. For concrete, you may need a moisture barrier or vapor underlayment, while plywood subfloors may require additional prep to prevent squeaks or bounce.
Why do expansion gaps matter when installing bamboo floors yourself?
Bamboo floors expand and contract with changes in temperature and humidity, and expansion gaps prevent buckling, gapping, and permanent warping. Leave the recommended perimeter gap—often around 1/4 inch—then cover it with baseboards or molding for a finished look. Skipping or reducing this gap is one of the most common DIY bamboo flooring mistakes that leads to long-term problems.
How should you choose the right tools and underlayment for DIY bamboo flooring?
At minimum, most DIYers need a tape measure, spacers for expansion gaps, a tapping block, a pull bar, and a saw appropriate for bamboo planks (table saw, miter saw, or jigsaw depending on the product). For floating bamboo floors, use the manufacturer-specified underlayment to support comfort, sound control, and moisture management; for glue-down, follow the adhesive and trowel specifications exactly. Always use the recommended transition strips and fasteners to match the installation type and subfloor, ensuring your DIY bamboo floors perform and look right from day one.
📅 Last Updated: October 11, 2026 | Topic: How to install without professional help bamboo floors? | Content verified for accuracy and freshness.
References
- Bamboo floor
https://en.wikipedia.org/wiki/Bamboo_floors - Google Scholar Google Scholar
https://scholar.google.com/scholar?q=bamboo+floor+installation+floating+floor+click+lock - Google Scholar Google Scholar
https://scholar.google.com/scholar?q=bamboo+floor+installation+glue+down+method+moisture+subfloor - Google Scholar Google Scholar
https://scholar.google.com/scholar?q=bamboo+hardwood+floor+installation+underlayment+acclimation+subfloor+prep - https://www.fpl.fs.usda.gov/documnts/fplgtr/fpl_gtr190.pdf
- NWFA | National Wood Flooring Association
https://www.nwfa.org/ - Education and Research
https://www.nfpa.org/education-and-research - https://www.epa.gov/indoor-air-quality-iaq/mold-and-moisture-indoor-places
- https://www.cdc.gov/mold/default.htm
- WoodWorks | Wood Products Council
https://www.woodworks.org/