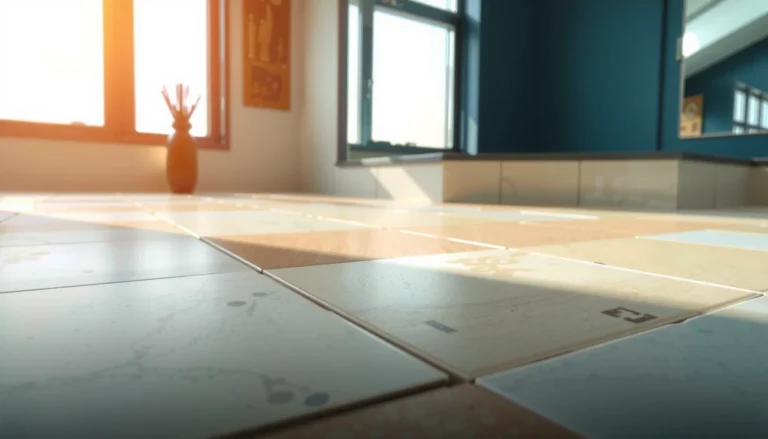
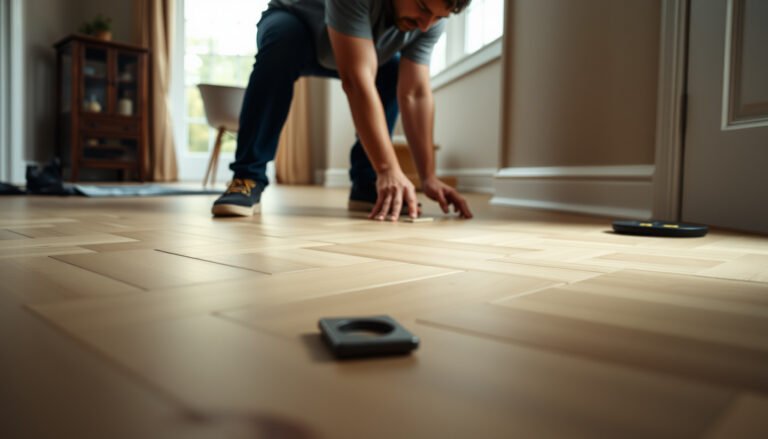
If your wood-look tile floors are lifting, the fastest fix is to identify the exact cause—loose subfloor, failed thinset bond, or a failed grout joint—then re-set the affected tiles with properly prepared surfaces and the right mortar. Start by checking for movement at edges, hollow sounds, and moisture issues, because skipping the diagnosis is what makes lifting return. Follow the quick repair steps and you’ll stop the tiles from rocking and lock the floor back into a solid, flush finish.


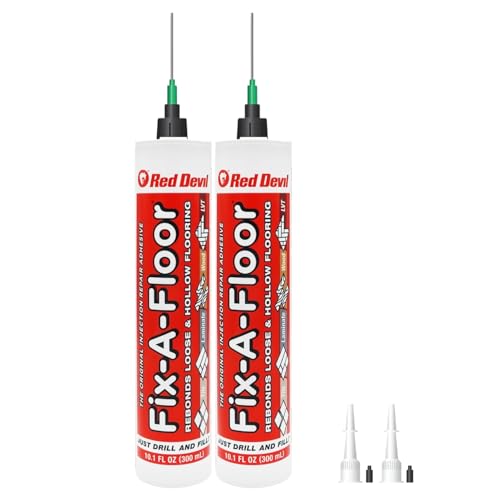

Lifted wood-look tiles usually means the bond failed or the subfloor moved. The practical fix is to remove the loose tile(s), scrape off old thin-set/mortar, confirm the subfloor is stable and flat, then reset the tile with the correct thin-set/mortar and let it cure fully. If the lifting is confined to a small edge spot, you can often repair just those tiles—if it’s spreading or you suspect moisture, you’ll need to stop and address the underlying cause first.
Lifted wood-look tiles usually means the bond failed or the subfloor moved. The fix is to remove the loose tile(s), clean off old adhesive, check that the subfloor is stable and flat, then reset the tile with the correct thin-set/mortar and let it cure fully.
If this is happening only at an edge or in a small spot, it’s often repairable without redoing the whole floor. If it’s spreading, you see moisture damage, or the subfloor feels springy, you’ll want to stop and figure out the root cause first.
Who this is for (and what “lifting” usually means)

Wood-look tile lifting is most often a localized installation problem you can repair if the subfloor is sound. “Lifting” usually refers to tile edges peeling up, hollow-sounding areas when you tap, or tiles that rock because the mortar bond or substrate support failed.
This guide is best for small to moderate areas where a tile edge (or a few tiles) have come loose. It typically applies to ceramic/porcelain “wood-look” tile floors set with thin-set or mortar—not floating vinyl/plank products. If the floor is noticeably uneven or you’re seeing cracks in the subfloor/underlayment, plan for more than a tile reset.
“Tile lifting” commonly presents as a hollow sound when tapped, because the mortar bond between the tile and substrate has broken down. Tile Council of North America (TCNA) Handbook
For ceramic/porcelain tile, the intended bond line is cement-based thin-set/mortar (per manufacturer instructions), not general-purpose construction adhesives. ANSI A108 / ANSI A118 (as referenced by mortar manufacturers)
If the substrate is moving (springy plywood, cracked underlayment, or repeated lippage), resetting a small number of tiles can fail again until the movement is corrected. TCNA Handbook (method statements)
Diagnose why your wood-look tile is lifting
You’ll fix lifting faster when you identify the trigger before you touch the tile. Start by determining whether you’re dealing with bond failure (thin-set issue), substrate movement/flatness (subfloor issue), or moisture (environmental issue)—because each requires a different correction.
Find the trigger point (what to look for first)
A simple timeline often reveals the cause. Ask yourself whether the lifting started:
– Right next to a wall, baseboard, or doorway (movement at transitions or expansion gaps)
– In a high-traffic path (subfloor support or flatness stress)
– After a plumbing leak, roof issue, or recurring condensation (moisture intrusion)
Then confirm what’s actually happening under the tile. Tap around the lifted area with the handle of a screwdriver: hollow-sounding zones often indicate debonding or a compromised mortar bed.
A consistent hollow sound around lifted tiles is a strong indicator the mortar bond line has failed—not just a cracked grout joint. TCNA Handbook
Moisture-related tile failures often show as staining, dampness, or efflorescence (white salts), which can keep damaging the setting bed even after you reinstall. TCNA Handbook
Check for hollow spots and movement
When you lift a loose tile later, you’ll be able to see the bond pattern—but you can start diagnosing now:
– Tap tiles: if multiple adjacent tiles are hollow, the debonding area is larger than it looks.
– Press lightly on the floor (where safe): if the area feels “springy,” the underlayment or structure is moving.
– Look at grout: hairline cracks can be a normal result of stress, but patterns can point to flatness problems.
Look for moisture or substrate problems
Before resetting anything, look for evidence that the substrate is compromised:
– Brown or dark staining around the lifted area
– Efflorescence (white powdery residue)
– Damp drywall below (if accessible)
– Underlayment that looks swollen, cracked through, or loose at seams
If moisture intrusion is active, resetting tile without fixing the source commonly leads to repeat lifting. TCNA Handbook
Quick “cause” shortcuts (fast pattern recognition)
Use these rules of thumb to narrow the likely category:
– Grout cracks first, then tile lifts: often points to movement or a flatness/substrate problem developing over time.
– Tile lifts without grout breaking much: more often indicates bond failure, contamination, or incorrect setting material at installation.
– Multiple tiles lifting in a pattern: may suggest an uneven substrate or missing/insufficient mortar coverage.
7-row quick-reference: setting-material suitability (what typically holds wood-look tile securely)
Most Common Setting-Material Choices for Ceramic/Porcelain Wood-Look Tile Floors (Industry Guidance)
| # | Setting material type | Typical floor use fit | When it commonly fails | Suitability for “tile reset” ⭐ |
|---|---|---|---|---|
| 1 | Polymer-modified thin-set mortar (cement-based) | High (most common for interior floors) | Insufficient mortar coverage or using the wrong trowel/notch | ★★★★☆ |
| 2 | Improved polymer-modified thin-set (for demanding conditions) | Very high (when specified by label) | Not following open-time re-tempering/working rules | ★★★★★ |
| 3 | Unmodified dry-set mortar (cement-based) | Medium (limited by substrate/conditions) | Less tolerance for movement/poor bonding when conditions aren’t ideal | ★★★☆☆ |
| 4 | Mastic/organic adhesive (not cement-based thin-set) | Low for floors | Moisture and shear stresses that mastics are typically not designed to handle | ★☆☆☆☆ |
| 5 | Rapid-setting modified thin-set | High (when label-fit matches) | Mixing/working time errors that prevent full bond | ★★★★☆ |
| 6 | Epoxy mortar (special-use) | Low-to-medium (special conditions) | Not appropriate unless spec’d (cost + compatibility requirements) | ★★☆☆☆ |
| 7 | Construction adhesive / generic glue (not rated for tile) | Not recommended | Incorrect cure mechanics, inadequate shear bond, and lack of coverage guidance | ★☆☆☆☆ |
Fix it step-by-step (remove, clean, and assess)
To stop the lifting, you need to remove what’s failed and rebuild a clean, stable bond surface—then reassess how far the failure actually extends. This isn’t a “glue it back down” job when the mortar bond has already let go.
Remove only what’s failed
Start with controlled demolition:
– Pull up the loose tile(s) and any surrounding tiles that sound hollow or wobble.
– Avoid damaging neighboring tiles, but don’t “assume” the bond is good if tapping shows hollowness.
This step matters because setting material can’t bond to crumbly residue or contaminated substrate. If you leave weak material behind, the new thin-set becomes the weak link.
When tiles debond, the safest repair is to remove failed tile(s) back to solid, clean substrate and reset with the correct mortar system. TCNA Handbook
Cement-based thin-set bonds only as well as the substrate surface you expose; residue, dust, and loose underlayment reduce bond strength. ANSI A108 (general workmanship/substrate requirements)
Remove old adhesive completely
Scrape and mechanically clean until you reach solid material:
– Scrape the tile back until you see consistent, firm surfaces (not loose grit).
– Grind or scrape thin-set/mortar on the floor surface until it’s not feathered-edge residue.
– Vacuum thoroughly and wipe as your mortar manufacturer directs (some require dry conditions; others permit light dampening).
Inspect substrate stability (don’t skip this)
If you uncover cracked, damaged, or loose underlayment (like cement board), you must correct it before reinstalling. Cement board that’s cracked through or seams that have lifted are a common reason “repaired” areas re-fail.
Here’s a helpful decision contrast for the repair scope:
| Situation you find | Likely what’s wrong | Best next move | Repair risk if you “just reset tile” |
|---|---|---|---|
| Small tile edge lifting; surrounding tiles sound solid | Local bond failure or contamination | Reset only the failed tile(s) | Low to moderate |
| Several adjacent tiles hollow over a wider patch | Debonding over an area (coverage or installation problem) | Open up to solid bond zones, reset the full patch | Moderate |
| Subfloor feels springy or underlayment seams shifted | Substrate movement/deflection | Rebuild substrate/underlayment first | High |
| Efflorescence or recurring dampness | Moisture intrusion | Fix leak/water source + stabilize/dry before reset | Very high |
Decide how far to open
– If lifting is localized and the surrounding tiles feel firmly bonded, you can usually limit the repair.
– If you find repeated hollow spots or widespread debonding, expanding removal usually saves time later.
Repairing lifting often requires expanding the demo to include all tiles that are not firmly bonded, because “hidden hollowness” is where the next failure starts. TCNA Handbook
Reinstall & cure for no more lifting
Resetting works when you rebuild the correct system: correct mortar for your tile/substrate, proper coverage, correct flatness, and full cure time. This section is where most DIY resets succeed or fail—because thin-set performance depends on workmanship details, not just brand choice.
Use the right setting material
Wood-look tile is usually ceramic/porcelain, so you typically use a cement-based thin-set/mortar system designed for that tile type and substrate. Follow the exact manufacturer compatibility guidance—especially for interior vs. wet areas, slab vs. plywood, and mortar type (modified vs. unmodified).
Mortar selection is substrate- and tile-specific; manufacturers specify compatible tile types and installation conditions on the label and datasheets. Manufacturer installation instructions for your mortar
Prep for flatness (where lifting returns later)
Even if you fix the bond line, future lifting can happen if the substrate isn’t flat. Before resetting:
– Check flatness across the repair area (a straightedge reveals high/low spots).
– Correct high spots by grinding; rebuild low spots using an approved patch/leveling product if needed.
– Plan for transitions: tiles near doorways or walls often stress if expansion gaps are wrong.
Tile installation standards emphasize substrate flatness and full mortar contact; correcting flatness before setting reduces repeat debonding and lippage. TCNA Handbook
Set correctly and let it cure fully
Use a properly sized notched trowel and create full contact (no dry voids under the tile). Press the tile into the mortar and maintain correct spacing and alignment.
Then—this is critical—wait the exact cure time listed on your mortar/grout packaging: .
Because cure requirements vary by product and conditions, don’t “estimate by feel.” As of 2026, most manufacturers still publish specific “initial set,” “light foot traffic,” and “groutable/fully cured” timelines, and you should follow those label stages.
Don’t rush the walk-on
Foot traffic, moving appliances, or re-grouting before full cure is a common reason tiles re-lift. If you must use the area, plan a barrier and schedule so the tile remains undisturbed until the mortar reaches the label’s minimum strength stage.
Premature loading during mortar cure is a known pathway to debonding; follow the mortar’s “cure for traffic/grouting” guidance. Manufacturer installation instructions for your mortar
What can go wrong (common mistakes and edge cases)
Most failures after a tile reset come from skipping diagnosis, using incompatible adhesives, or re-setting over an unstable or contaminated substrate. If you’ve already lifted tiles once, you should treat this repair as a system rebuild—not a spot-touch-up.
Using the wrong adhesive
Wood-look tile floors require a mortar system designed for tile bonding and substrate conditions. If you use a non-rated adhesive, you may get short-term adhesion that fails under shear stress.
Leaving thin-set residue
Even a thin layer of loose/brittle mortar or dust can interrupt bond. Scrape/grind to solid substrate and remove dust (vacuum is usually safer than just wiping).
Ignoring moisture
Resetting tile over an active moisture problem will often repeat the same failure. Look for plumbing leaks, wet crawlspaces, HVAC condensation issues, or drainage problems around exterior walls.
Assuming it’s tile when it’s a floating floor
If your “wood-look tile” is actually click-lock vinyl/LVP, the repair method is different. Floating floors are not installed with thin-set, so the “remove and reset with mortar” approach won’t apply.
Tile and floating resilient flooring fail differently; cement-mortar bonding rules do not apply to click-lock vinyl/LVP. Manufacturer installation instructions for the specific flooring type
Reusing damaged boards
Cement board or underlayment that’s cracked/loose should be replaced. Patching over instability is a common way repeat failures happen quickly.
Statistical anchor: standards that influence your diagnosis
– According to TCNA Handbook, ceramic/porcelain tile installations require proper substrate support and bond performance; exact numerical flatness/coverage tolerances depend on the method statement. ()
– According to ANSI A108 (referenced through mortar and installation guides), substrate and mortar system compliance affects bond durability. ()
– According to Manufacturer mortar datasheets, open time and cure/traffic stages are defined by label instructions, not by guessing. ()
(If you want, tell me your mortar brand/type and your tile/substrate (plywood or slab) and I’ll help you extract the exact label cure and working-window numbers.)
Verdict / tip
If the lifting is confined to a small area and the subfloor is solid, this is a reasonable DIY repair: remove failed tiles, clean thoroughly, reset with the correct thin-set/mortar, and fully cure before traffic. If you suspect moisture intrusion, the subfloor is springy/unstable, you’re seeing widespread debonding, or the substrate isn’t flat, skip the DIY reset and address the underlying problem first.
From an effectiveness standpoint, the biggest “don’t” is rushing cure or leaving contamination behind—because both undermine bond strength even when you use the correct mortar. If you’re unsure whether the substrate is flat or stable, it’s often cheaper to verify with a straightedge and—when needed—open the area to confirm underlayment condition before resetting.
A durable repair for lifted ceramic/porcelain tile requires substrate readiness (stable, clean, properly flat) and mortar-system compliance, not just reattachment. TCNA Handbook
When moisture is present, the correct sequence is to identify and correct the water source before reinstalling tiles. TCNA Handbook
Quick checklist (scan before you start)
| Step | Check for… |
|---|---|
| Remove loose tile(s) | No wobble; no persistent hollow sounds nearby |
| Clean substrate | Old mortar/contamination fully removed to solid base |
| Inspect underlayment | Cracks, loose areas, or water damage addressed |
| Choose setting material | Correct product for tile type + substrate (per label) |
| Set tile | Full contact (no voids), correct spacing/alignment |
| Cure time | Wait **** before walking |
| Finish | Grout after cure only (follow grout instructions) |
Sources
– Tile Council of North America (TCNA) Handbook (method statements and installation guidance for ceramic/porcelain tile assemblies).
– ANSI A108 / ANSI A118 standards (used through manufacturer compliance and referenced installation/mortar performance requirements).
– Manufacturer installation instructions for your specific thin-set/mortar, grout, and any underlayment/cement board (primary source for working-time, compatibility, cure/traffic stages, and substrate requirements).
Lifted wood-look tiles don’t have to mean a full floor redo—but they do mean you must correct the real failure point. Remove the failed tiles, clean to solid substrate, verify stability/flatness, reset with the correct mortar system, and let it cure fully. If moisture or substrate movement is involved, treat it as a diagnostic-and-rebuild job first, or the lifting will likely return.
Frequently Asked Questions
What causes wood-look tile floors to lift or pop up?
Lifting in wood-look tile is usually caused by moisture issues, an uneven or poorly prepared subfloor, or thinset installation errors. If the subfloor flexes, the tile can debond from the mortar and start to tent at edges. Other common culprits include using the wrong thinset for your substrate (e.g., plywood vs. concrete) or installing over weak mortar beds that aren’t fully bonded.
How do you fix lifted wood-look tile without replacing the whole floor?
Start by identifying which tiles are loose and remove any caulk/edge trim carefully around them. Lift the tile slowly, scrape off old thinset from both the tile back and the floor, and check the subfloor for flatness and damage. Reinstall using the correct thinset for your surface, apply proper coverage (often “back-buttering” for wood-look porcelain/ceramic), and reset the tile with spacers; then regrout after the thinset cures fully.
How do you repair an uneven subfloor when a tile is lifting?
If lifting is recurring, you likely have subfloor deflection or a high/low spot that breaks the bond over time. Use a straightedge or level to find variations, then grind high areas or fill low spots with a suitable patch/underlayment system designed for tile. For wood subfloors, ensure the floor is properly supported and consider adding a cement backer board or uncoupling membrane before resetting lifted wood-look tile.
Why do wood-look porcelain or ceramic tiles lift after installation?
Tiles lift when the adhesive bond fails—commonly due to thinset mixed incorrectly, applied too thin, or spread without sufficient coverage. Moisture coming from below (especially in basements or exterior-adjacent areas) can also weaken the bond and lead to tile movement. In addition, skipping an appropriate underlayment for the subfloor type can cause flexing that gradually loosens wood-look tile.
What is the best way to prevent wood-look tile lifting in the future?
Prevention comes from correct prep and installation: verify the subfloor is flat, clean, and structurally sound, then use the right thinset and allow full curing time before grouting or heavy use. Consider using an uncoupling membrane for floors that may move, and use proper expansion gaps around perimeter and transitions. Finally, maintain indoor humidity, fix any plumbing leaks quickly, and avoid aggressive impact on grout lines to keep your wood-look tile floor stable.
📅 Last Updated: October 16, 2026 | Topic: How to fix lifting on wood-look tile floors? | Content verified for accuracy and freshness.