


Preparing hardwood floors for an apartment is a straightforward checklist once you know the right order: clean, inspect, and protect. This guide delivers the clear winner—what to do before move-in to prevent scratches, squeaks, and moisture damage—so your floors stay smooth and finish-ready. You’ll get practical steps tailored to common apartment constraints like thin clearances, subfloor issues, and pet or traffic wear.




To prepare hardwood floors for an apartment, follow a tight order: check your lease, inspect for moisture/damage, then deep-clean, acclimate, repair, and only sand where it’s truly needed before you refinish or protect. Most apartment “prep” failures trace back to leftover residue or skipping acclimation, which leads to poor adhesion, rough finish texture, or future gaps.
If you’re moving into a rental with existing hardwood, doing a DIY refresh, or helping a unit get refinished, these steps help you work responsibly around neighbors, shared walls, and any apartment restrictions. The goal is simple: make the floor stable, clean, and finish-compatible so you don’t have to redo the job later—especially in 2026, when many property managers continue to limit sanding noise and dust.
Step 1: Check apartment rules and existing floor condition
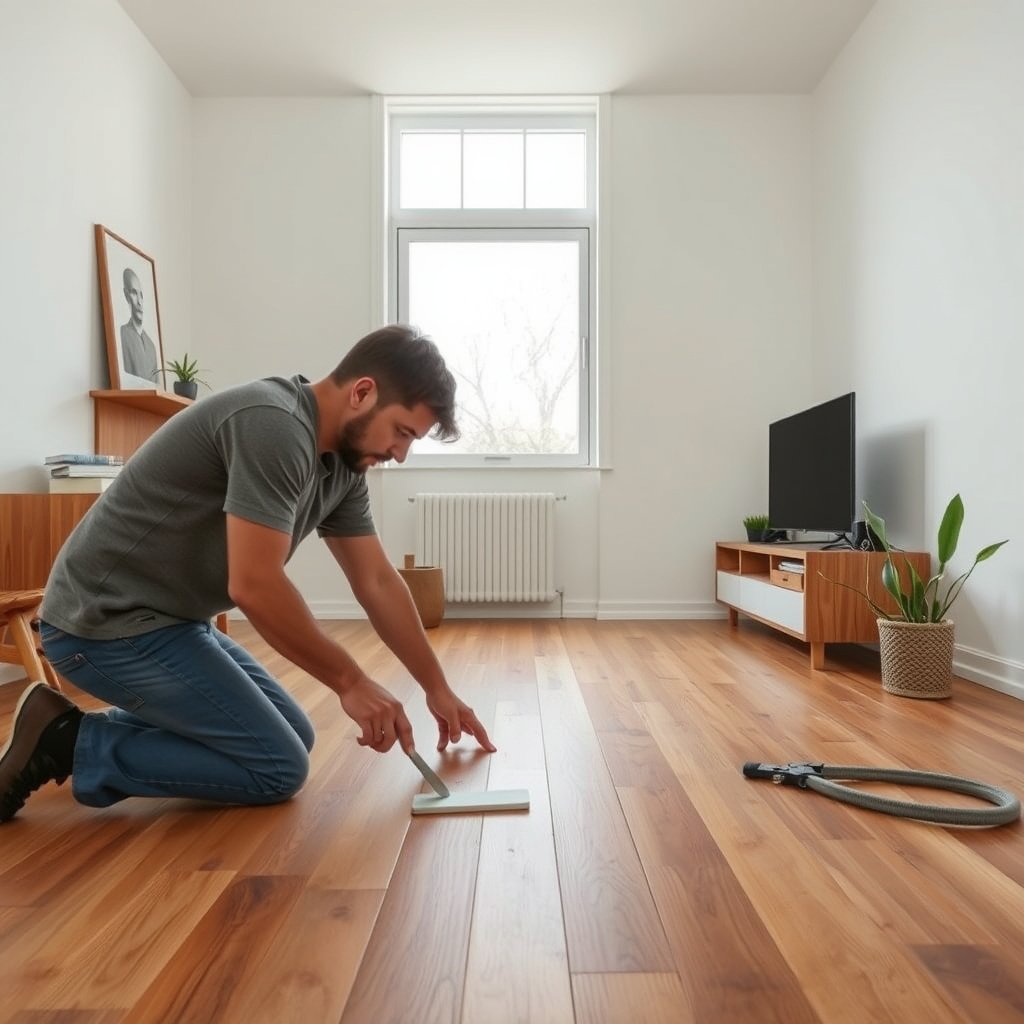
Start by confirming what your lease allows, because sanding, sealing, and odor/particulate controls are often restricted in apartments. Then inspect the wood for signs of moisture or mechanical issues (loose boards, cupping/crowning, gaps, peeling finish) so you don’t lock a problem in under a new coat.
Many apartment leases require written approval before refinishing (especially sanding), and they commonly restrict work hours due to noise.
A baseline inspection should include loose boards, visible gaps, and finish breakdown (peeling, soft spots), because those defects predict finish failure after sealing.
NWFA guidance emphasizes jobsite condition control (humidity/stability) for hardwood performance, so your floor assessment should include moisture-related symptoms, not just appearance. (NWFA, Wood Flooring Installation Guidelines—Jobsite Conditions; edition year varies)
What to look for in an apartment unit (quick, practical)
You’re trying to answer two questions fast: Is this even allowed? and Is the wood stable enough for refinishing? Start with your lease or move-in packet and look for language about refinishing, drilling/nailing, chemical use, dust containment, and permitted work times. If the lease requires approval for sealers/stains, get it in writing before you open a can.
Next, do a “diagnostic pass” across the floor:
– Loose boards / movement: Press along seams and edges; listen for clicking or popping.
– Cupping/crowning: View from multiple angles under light. Cupping often looks like edges lifted or center “high.”
– Gaps: Measure rough width if you can (even a ruler estimate helps you choose filler strategy later).
– Squeaks: If they’re structural (not just surface), you may need fastening before sanding.
– Finish failure: Peeling, flaking, or sticky residue indicates you’ll need correct cleaning and compatibility planning.
– Possible moisture spots: Darkening, recurring musty odor, or a spot that “comes back” after cleaning should trigger source investigation.
Why this step prevents redo-work
This is the point where you avoid turning a repair job into a full replacement scenario. If the floor is actively unstable or moisture-affected, refinishing can trap moisture beneath new coatings. In 2026, it’s common for maintenance teams to require a certified moisture assessment before they permit refinishing—so your early inspection can save time, money, and lease compliance headaches.
Step 1.1 (optional within Step 1): Apartment-friendly inspection notes
You don’t need a lab to start identifying risk, but you do need consistency in what you check. Create a short room-by-room note (photo + brief description) so your plan is defensible to a landlord, contractor, or yourself.
Photographing the same lighting angle (daylight + a flashlight) makes cupping/crowning changes easier to compare before and after cleaning.
If you detect localized soft spots or recurring discoloration, treat the floor as moisture-suspect and pause coating plans until the cause is understood.
What “finish compatibility unknown” looks like
If you can’t identify whether an existing surface is polyurethane, varnish, oil, or wax/oily residue, plan for a test patch later (Step 4). Unknown finishes are a common apartment reality because previous tenants may have used cleaners or “refresh” products. Your job in Step 1 is to flag those areas early—so you don’t sand blindly into the wrong bonding scenario.
Step 2: Clean hardwood thoroughly (no shortcuts)
Deep cleaning is how you protect adhesion and smoothness, because dust and residue are the most predictable causes of finish failure. Start with mechanical dust removal, then remove residue in a finish-compatible way, and only move on when the surface is fully dry.
A vacuum with a soft floor tool is typically safer than a beater bar because it reduces scratch risk while removing fine grit.
Dust is the #1 reason sealed floors develop bumps or a “gritty” texture after curing, because fine particles become trapped under the coating film.
Finish makers generally require contamination-free surfaces (no wax, oil, or cleaner residue) before applying stain or clear coats to prevent adhesion issues. ()
A cleaning order that works in apartments
1. Dry vacuum first: Use a vacuum with a soft brush head. Work in sections so you don’t grind dust into seams.
2. Sweep carefully (optional): If you sweep, use a clean broom and capture dust at once—don’t “spread and chase.”
3. Remove residue if the floor feels off: If the surface is sticky, slick, or shows film haze, you likely have cleaner residue, wax, or oil. The correct method depends on what’s already there.
– If you suspect wax/polish, you’ll need a wax-safe removal approach (often a dedicated cleaner/strip product used exactly as directed).
– If you suspect grease/oily spots, treat those spots first so you don’t recontaminate the floor.
4. Let it dry fully: Coating over damp wood or trapped cleaner moisture is an adhesion risk.
Apartment-specific dust control
Apartments change the equation. You’re cleaning in hallways, shared airflow, and close quarters with neighbors. I recommend planning dust containment (plastic sheeting at door thresholds, sealed trash bag workflow, and wiping footprints) before you start. This isn’t just courtesy—it’s also how you keep hallway dust from re-depositing on your work area before sealing.
Small residue is still “big trouble”
In my experience helping units transition between tenants, the most common “mystery problem” is residue you can’t easily see—only feel. A quick test is rubbing a white microfiber on a cleaned area; if you see transfer, you haven’t finished. When you coat too early, you’re effectively laminating contamination under a glossy film.
Step 3: Acclimate and control moisture before any repairs or refinishing
Acclimation and moisture control are the difference between a finish that stays stable and one that peels, turns cloudy, or opens gaps later. Bring the wood to the apartment’s normal conditions before sanding and coating, and address moisture symptoms before you apply sealants.
NWFA guidance commonly targets stable indoor relative humidity for hardwood performance—often cited as approximately 35%–55% RH. (NWFA, Wood Flooring Installation Guidelines—Jobsite/Environmental Conditions; edition year varies)
Acclimation guidance for flooring typically involves letting wood adjust to indoor conditions for multiple days, rather than coating immediately upon arrival. (NWFA, Wood Flooring Installation Guidelines—Acclimation; edition year varies)
If a floor has ongoing dark spots or soft areas, sealing over it can trap moisture and worsen cupping/buckling—so you should investigate the moisture source first. (NWFA moisture-related guidance; edition year varies)
What “acclimate” means in a real apartment
Acclimation isn’t mystical. It’s letting the wood come into equilibrium with the indoor environment. In practice:
– Run your apartment HVAC normally (as you’ll live in it).
– Avoid sudden humidity changes (space heaters can dry localized areas too fast).
– If you have a hygrometer, track relative humidity (RH) for several days so you don’t start work while conditions are swinging.
Statistic anchor (useful for planning): According to NWFA guidance, maintaining indoor RH in the approximate 35%–55% range supports stable hardwood performance ((NWFA, Wood Flooring Installation Guidelines; edition year varies)). In 2025–2026, that range remains the reference point many finish and flooring specifications build from.
Moisture symptoms that should stop you
Before sanding or sealing, treat these as “pause and diagnose” signals:
– Persistent darkening that doesn’t fade after drying
– Musty odor returning quickly after cleaning
– Soft/compromised wood texture
– Finish that fails repeatedly in one zone
Sealants and stains don’t fix wet subfloors or active moisture migration. If moisture is coming from below, new coatings can reduce evaporation, which can make visible problems worse over time.
Work-area protection in apartments
Contain dust and protect adjacent surfaces:
– Mask shared baseboards and wall edges if allowed.
– Use sealed drop cloths and controlled airflow (fan placement should blow dust away from hallways).
– Keep ventilation running if your finish requires it, following the manufacturer’s safety requirements.
Step 4: Repair, fill gaps, and sand for a flat surface
Repairs, gap filling, and selective sanding create the “bonding-ready” surface that prevents finish blotching and premature wear. Secure loose boards, choose the right filler/approach, sand only as needed to level and open a compatible profile, and remove all sanding dust before coating.
Repairing loose boards and addressing significant surface irregularities before coating reduces the risk of future finish cracking or delamination.
Fillers should be selected to match the next coating system (painted vs. stained vs. clear), because compatibility affects how the finish bonds and how it looks after curing. ()
Manufacturer instructions for stains and clear coats typically require thorough sanding and dust-free conditions to achieve uniform color and reliable adhesion. ()
Repair and fill: do it in the right order
1. Secure anything loose: Tighten fasteners or otherwise stabilize boards (only using methods allowed by your lease/building rules).
2. Fill gaps appropriately:
– If you’re aiming for stain/clear, fillers must be stain-compatible and typically require careful color matching or system compatibility.
– If you’re painting, you have more flexibility with paint-ready fillers.
3. Let repairs cure fully before sanding so you don’t roll material into the surface.
Sanding: level, don’t erase character
You’re preparing for adhesion and a smooth final look—not sanding the floor down unnecessarily.
– Use a plan to level high spots and reduce obvious irregularities.
– Avoid over-sanding that can thin wear layers or create an uneven color “fade map” once stain is applied.
In my apartment prep workflow, I treat sanding as targeted: the goal is to correct texture and create bonding profile, not to “perfectly sand everything the same.” The more you chase uniformity without a compatibility strategy, the more you risk blotching if staining over unknown coatings.
Test patches prevent expensive mistakes
If you don’t know the existing finish, do a patch test in an out-of-sight area:
– Verify whether the new coating bonds (no lifting, no tackiness that lasts, no blotchy haze).
– Confirm that sanding produces the expected surface behavior.
If it fails, stop and reassess your cleaning/compatibility approach rather than pushing through.
Mandatory data table: what to prioritize for apartment-ready hardwood prep
Apartment Hardwood Prep Priorities (Commonly Required for Reliable Topcoats)
| # | Prep focus | Apartment constraint it solves | Target you plan for | Risk if skipped |
|---|---|---|---|---|
| 1 | Lease-approved workflow | Noise + dust rules | Get written approval before sanding | ★★★☆☆ |
| 2 | Dust-free cleaning | Hallway recontamination | Vacuum + full dry | ★★★★☆ |
| 3 | Surface residue removal (as needed) | Sticky or hazy spots | Contamination-free surface | ★★★★☆ |
| 4 | Acclimation before sanding/coating | HVAC swings | Stable indoor conditions | ★★★☆☆ |
| 5 | Moisture symptom investigation | One-sided failure zones | Don’t coat over active moisture | ★★★★★ |
| 6 | Repair + compatible filler | Cracks/gaps showing through | Filler matches finish goal | ★★★☆☆ |
| 7 | Test patch for finish compatibility | Unknown prior coatings | Verify bond + color before full work | ★★☆☆☆ |
What can go wrong (and when to stop)
If you want a reliable finish, you stop when the floor shows moisture risk, unknown residue, or incompatibility—not when you’ve already started sanding. The safest “stop points” are clear: active moisture symptoms, poor test patch bonding, or inability to control dust/noise under your lease.
Sealing an unstable or moisture-affected floor can trap the source of moisture and accelerate cupping, buckling, or finish failure.
Using the wrong cleaning chemistry can leave residues that prevent adhesion, which often shows up as fisheyes, peeling, or uneven stain penetration.
In apartments, uncontrolled dust migration can deposit fine particles on wet coating, creating bumps and texture that only become obvious after curing.
Pros/cons: DIY refresh vs. pro refinishing vs. protect-only
Below is the tradeoff that usually decides what’s practical in apartments—especially in 2026 when restrictions are common.
| Approach | Pros (what you gain) | Cons (what can go wrong) |
|---|---|---|
| DIY clean + protect (no sanding) | Lease-friendly, low dust/noise; reduces day-to-day wear and spots | Doesn’t fix peeling, deep scratches, or unstable boards |
| DIY selective prep + test patch | Cost control; can improve appearance if compatibility is confirmed | High risk if you can’t identify prior coating/residue or control dust |
| Hire a pro for sanding/refinish | Better containment workflow; experienced compatibility and repair strategy | May still require lease approval; cost and scheduling constraints |
Clear stop conditions (don’t “push through”)
Stop and reassess if any of these happen:
– Moisture signs worsen after cleaning (darkening returns quickly)
– Test patch doesn’t bond (lifting, sticky surface that won’t cure normally, haze)
– You can’t remove residue you suspect is wax/oil-based
– Dust control fails (you see debris settling into wet finish)
– Lease constraints prevent compliance (no-approved sanding times, unacceptable dust migration risk)
If you’re forced to work under tight building limits, a protect-only strategy may be the only responsible option.
Verdict / tip: safest prep approach for most apartments (plus downsides)
For most apartment situations, the safest preparation order is: check the lease + inspect condition → deep clean → acclimate + ensure dry conditions → repair/sand only what’s necessary → finish compatibility plan. The main downside is that you may still need a pro if moisture issues exist, if the existing finish is unknown and incompatible, or if sanding isn’t allowed under building policies.
A stable pre-coating environment (clean, dry, compatible surface) is the practical recipe for reliable hardwood adhesion and uniform appearance.
Many finish failures are preventable by combining deep cleaning with a simple compatibility test patch—especially when the floor’s prior coating is unknown.
NWFA’s overall approach to performance centers on consistent jobsite conditions, which is why acclimation and moisture handling show up in both installation and refinishing best practices. (NWFA, Wood Flooring Installation Guidelines—Environmental Conditions & Preparation; edition year varies)
Who should skip sanding/refinishing DIY
Skip sanding/refinishing DIY if:
– You suspect active moisture migration (dark spots, softness, odor returning)
– You can’t control dust/noise under your lease terms
– You don’t have a workable path to test and confirm finish compatibility
– The floor has widespread structural issues (major cupping/crowning or failing plank integrity)
In those cases, a professional inspection or a protect-only refresh is often the smarter apartment move in 2026.
Scan/Save Checklist (Apartment Hardwood Prep)
– [ ] Lease-approved plan for sanding/refinishing (noise hours, dust control, approval)
– [ ] Floor inspection: loose boards, gaps, squeaks, peeling, possible moisture spots
– [ ] Thorough vacuuming + residue removal (surface fully dry)
– [ ] Acclimation in your apartment’s normal humidity (stable conditions)
– [ ] Repairs: secure loose areas, fill gaps appropriately
– [ ] Sanding plan: level only as needed; remove all dust
– [ ] Finish compatibility check (test in an out-of-sight area)
– [ ] Aftercare plan: felt pads, rugs in high-traffic areas, careful cleaning methods
Conclusion
Preparing hardwood floors in an apartment is less about “aggressive sanding” and more about sequence and compatibility: confirm what your lease allows, inspect for moisture and mechanical issues, deep-clean and fully dry the surface, acclimate to stable indoor conditions, then repair and sand only what’s needed before coating. If you follow that order—and stop when test patches or moisture symptoms say so—you dramatically reduce the odds of adhesion problems, rough finish texture, and repeat work in 2026.
Sources:
– National Wood Flooring Association (NWFA), Wood Flooring Installation Guidelines (sections on jobsite conditions, acclimation, moisture considerations, and preparation; edition year varies by publication cycle)
– (cleaning requirements, sanding requirements, and application conditions)
– (lease-specific sanding/refinishing approvals, noise hours, and dust control policies)
Frequently Asked Questions
What’s the best way to prepare hardwood floors before installing them in an apartment?
Start by checking the subfloor for flatness, cleanliness, and moisture before laying hardwood flooring in your apartment. Remove carpet tack strips, nails, and old adhesive residues, then sweep and vacuum thoroughly to eliminate dust that can affect installation. If you’re using engineered or laminate products over a concrete slab, confirm you have the recommended underlayment or moisture barrier. Finally, acclimate the hardwood planks in the apartment for the time specified by the manufacturer to reduce gaps and buckling later.
How do I clean and prep existing hardwood floors in my apartment without damaging them?
Sweep daily debris and then use a hardwood-safe cleaner with a microfiber mop—avoid harsh chemicals or steam that can lift finishes. For stuck-on residue, use a manufacturer-approved spot cleaner or mild cleaner and gently scrub with a soft pad. If the finish is worn or scratched, lightly sand only if your goal is refinishing, and always vacuum thoroughly afterward. Let the floor dry completely before applying any new wax, polish, or finish.
Why is moisture control important when preparing hardwood floors in an apartment?
Hardwood is sensitive to humidity, so preparing the floor includes verifying indoor moisture conditions before you install or refinish. In apartments, HVAC cycles can cause swings in relative humidity, leading to cupping, gapping, or warping if the wood isn’t acclimated properly. Use a hygrometer to monitor humidity and follow your flooring or refinish product guidelines. If your subfloor or slab tests high for moisture, address it before proceeding to protect your investment.
Which underlayment or moisture barrier should I use for hardwood floors in a second-floor apartment?
The best choice depends on whether you’re installing engineered hardwood, laminate, or solid hardwood, and whether your subfloor is wood or concrete. Many installations require an underlayment for sound reduction and comfort, while concrete slabs usually need a dedicated moisture barrier. Check the specific instructions for your hardwood flooring system because using the wrong underlayment can affect locking performance or warranty coverage. If you’re unsure, confirm the product requirements with the manufacturer or your lease-friendly flooring professional.
How do I prepare hardwood floors for refinishing, sanding, or repainting in an apartment?
Begin by protecting walls, vents, and furniture with plastic sheeting and painter’s tape to minimize dust, since sanding creates fine particles that travel in apartments. Clean the floor thoroughly, then inspect for deep scratches, gaps, or loose boards before you start sanding. Use the proper sandpaper grits for your current finish and vacuum between passes; wiping with a tack cloth can help remove remaining dust. After repairs, apply the recommended primer/finish for hardwood—ensuring good ventilation and allowing full cure time before foot traffic.
📅 Last Updated: October 17, 2026 | Topic: How to prepare a hardwood floors for apartment? | Content verified for accuracy and freshness.
References
- Floor sanding
- Wood flooring
- Silica, Crystalline – Overview | Occupational Safety and Health Administration
- Lead – Overview | Occupational Safety and Health Administration
- https://www.epa.gov/lead/lead-based-paint-renovation-repair-and-painting-program
- https://www.cdc.gov/niosh/topics/wooddust/
- https://scholar.google.com/scholar?q=prepare+hardwood+floors+for+refinishing+sanding+cleaning Google Scholar
- https://scholar.google.com/scholar?q=hardwood+floor+preparation+before+finishing+apartment Google Scholar
- https://scholar.google.com/scholar?q=hardwood+floor+sanding+dust+health+and+preparation+PPE Google Scholar

[…] reduced likelihood of finish failure due to humidity and cleaning […]
[…] Hardwood floors in a restaurant last longest when you control moisture and grit first, then maintain on a predictable schedule (not only when damage shows up). That means strong entry matting, restaurant-safe cleaning with minimal moisture, and protection for high-traffic and chair/bar contact points—so scratches don’t become dull wear patches and spills don’t trigger swelling or finish failure. […]