If you’re trying to waterproof vinyl floors in a mudroom, the best approach is a complete seam-and-edge sealing system paired with a proper underlayment and trim detailing—not “extra caulk” alone. You’ll get a clear step-by-step process to stop mudroom spills and standing water from creeping under planks or into joints. By the end, you’ll know exactly what to seal, what to leave alone, and how to verify the floor is genuinely water-tight.



Waterproofing vinyl floors in a mudroom is mainly about stopping moisture at the path it takes—the perimeter, seams, and transitions—before it can work its way upward or under the vinyl. The winning order of operations is: verify a dry, flat subfloor, control moisture at the source points with the right approved products, then reduce how much water reaches the floor using entry mats.
If your mudroom sees regular spills, wet shoes, snowmelt, tracked-in slush, or consistently high humidity, this guide is for you—especially if you’re installing or upgrading luxury vinyl plank (LVP) or vinyl sheet in an entry area. It also applies when you’re dealing with a known history of moisture coming from the exterior door area, garage connection, or exterior wall.
Prep the subfloor so water can’t “telegraph” up
The best way to prevent mudroom vinyl waterproofing problems is to prep the subfloor so moisture can’t migrate upward and undermine seams, edges, or transitions. In practice, that means addressing flatness and confirming dryness before any sealing layer or vinyl installation begins.
In a mudroom, “telegraphing” usually looks like seam separation, edge lifting, or discoloration that shows up weeks after install—because small vapor movement and uneven substrates concentrate stress at the exact leak paths you’re trying to protect. I typically treat subfloor prep as a waterproofing prerequisite, not an optional step, because seam and perimeter sealing can’t compensate for an active leak or trapped moisture.
Moisture testing for flooring commonly follows ASTM methods where results are expressed as moisture vapor emission rate in lb/1000 sq. ft. per 24 hours (ASTM F1869).
For vapor control layer design, ASTM E1745 defines vapor retarder “perms” classifications that relate directly to how much water vapor passes through a barrier.
Check for flatness and remove anything that creates bumps
Mudroom vinyl systems—especially LVP with click-lock or glued seams—depend on uniform support. If your subfloor has lumps, ridges, or patch edges that sit proud, the vinyl can flex repeatedly when shoes hit it, and that micro-movement can compromise seam integrity over time.
Focus on:
– Flatness across the whole installation area (not just the center).
– Patch feathering so patch compound edges don’t form ridges under vinyl.
– Grinding high spots and removing loose paint, drywall mud, or curing compounds that aren’t compatible with flooring adhesives or underlayments.
Fix moisture problems at the source
If water is coming from below (e.g., slab moisture, crawlspace humidity) or from behind (e.g., exterior wall leaks, failed flashing), waterproofing the vinyl won’t truly “win.” You need to correct the actual moisture source first, then use approved floor-system products to manage what remains.
Common mudroom source points to verify:
– Exterior door pan/threshold details
– Garage-to-house wall connection
– Bathroom/exterior wall plumbing runs near entry
– HVAC condensate lines (sometimes overlooked)
Ensure the subfloor is fully cured/dry before sealing
Subfloor dryness is critical because sealing layers can trap moisture, and trapped moisture is what usually drives failures at edges and seams. For mudroom vinyl waterproofing, you want to follow both:
1) the subfloor system instructions (patch/primer/leveler), and
2) the vinyl product installation requirements for moisture mitigation.
As of 2026, most reputable vinyl and underlayment instructions still hinge on moisture readiness rather than hoping “waterproof” finishes will compensate later.
The “perms” concept in ASTM E96/E1745 is built around measurable vapor transmission, not marketing terms like “waterproof” or “water-resistant.” ASTM E96 ASTM E1745
ASTM F1869 quantifies moisture as moisture vapor emission rate in lb/1000 sq. ft./24 hours, which helps installers decide whether subfloor conditions meet resilient flooring requirements. ASTM F1869
Choose the right waterproofing approach for your vinyl type
The fastest path to correct mudroom vinyl waterproofing is to match the method to your exact vinyl system: glued vs. click-lock, and whether the manufacturer allows a specific moisture-mitigation strategy. “Waterproofing” isn’t one-size-fits-all—your product’s seam behavior and warranty rules decide the right approach.
This is also where many installs stumble in mudrooms. Underlayments, seam sealers, primers, and patch products can be compatible—or they can create failure at the seam, especially under repeated wet-boot loading.
Vinyl flooring warranties and installation instructions typically specify approved moisture mitigation materials and seam/perimeter treatments, and deviating from them can void coverage.
Resilient/vinyl “wet-area” eligibility depends on the product’s seam design and installation method, so click-lock and glued systems are not treated identically.
For vinyl floors, waterproofing success depends on seams and seam strategy
– Glued systems depend on adhesive bond integrity and seam compatibility.
– Click-lock systems depend on joint engagement plus any required joint sealing (if allowed by the manufacturer).
In other words: mudroom vinyl waterproofing is really seam and edge engineering. If your seams aren’t treated the way your vinyl manufacturer calls for, water that reaches those seams can creep under the flooring.
Follow manufacturer installation instructions (no improvising)
If your vinyl product requires a specific underlayment or adhesive system for moisture mitigation, use it. Mismatched primers and sealers can:
– fail to bond to the subfloor,
– form weak interfaces at the seam,
– or interfere with the vinyl’s required dimensional movement.
For a mudroom upgrade in 2026, I recommend treating the manufacturer’s instructions like the waterproofing blueprint.
If you use underlayment, confirm it’s acceptable for waterproofing in wet-entry conditions
Not every underlayment is a true moisture-control layer. Some are designed to help with comfort/sound but are only moisture-tolerant. Mudroom vinyl waterproofing needs materials that meet the product system’s “wet entry” allowances—especially around door thresholds where water hits first.
Quick comparison: which strategy fits your vinyl type?
| Feature | Glued-down vinyl | Click-lock / floating vinyl |
|---|---|---|
| Water path you must stop first | Adhesive bondline + seams | Joint edges + perimeter movement gaps |
| Primary risk mode in mudrooms | Debonding where water reaches seam edges | Joint separation from repeated wet-boot cycling |
| Sealing compatibility matters | Primer/adhesive must match flooring system | Allowed joint sealants must match click-lock design |
| Underlayment role | Often limited or system-specific | May be required; must be moisture-acceptable |
| Perimeter strategy | Seal approved perimeter edges; respect transitions | Preserve expansion/movement rules while sealing leak gaps |
| Best suited for frequent splashes | Often yes—if adhesive system is correct | Often yes—if joints are sealed per instructions (if allowed) |
| Where failure usually starts in mudrooms | Threshold seams and wet-shoe impact zone | Joint lines that align with traffic path + perimeter corners |
| Who should double-check before starting | Anyone unsure about approved adhesives | Anyone unsure about permitted joint sealing |
| System-level takeaway | Adhesive + seam compatibility is the “waterproofing backbone” | Joint + movement rules determine long-term water resistance |
Vapor Retarder Perm Thresholds Relevant to Mudroom Vinyl Waterproofing
| # | Perm / Class (ASTM E1745 context) | Typical Meaning | Use in Mudroom Prep | Guidance Strength |
|---|---|---|---|---|
| 1 | ≤ 0.1 perm (Class I max) | Very low vapor transmission | Perimeter moisture barrier targets | ★★★★★ |
| 2 | 0.1–1 perm (Class II) | Low vapor transmission | Underlayment only if approved | ★★★★☆ |
| 3 | 1–10 perms (Class III) | Moderate vapor transmission | Often not enough alone for wet entries | ★★★☆☆ |
| 4 | 1 perm (definition point) | 1 grain/(hr·ft²·inHg) | Baseline for comparing barrier materials | ★★★★☆ |
| 5 | 0.05 perm (half of Class I limit) | Extra-low vapor transmission | Helps reduce subfloor “edge wicking” risk | ★★★★★ |
| 6 | 0.5 perm (Class II midpoint) | Lower-middle vapor transmission | Still typically needs perimeter/seam sealing | ★★★☆☆ |
| 7 | 10 perms (Class III upper boundary) | High vapor transmission | Usually inadequate for mudroom vinyl waterproofing alone | ★☆☆☆☆ |
Note: The “Class I/II/III” framework and the perm definition come from ASTM E1745/E96 testing concepts (ASTM E1745 ASTM E96). Your vinyl manufacturer’s approved moisture-control system still governs what you should actually install.
Seal critical leak paths: perimeter, seams, and transitions
Your mudroom vinyl waterproofing plan should prioritize sealing the leak paths that water naturally travels: edges, seams, and transitions. When those points are protected with compatible materials, the rest of the floor is far less likely to be compromised.
In mudroom conditions, water rarely “falls uniformly.” Instead, it gets driven toward the floor edge at the point of impact (doorway area), then wicks through the first available gaps (baseboard edges, around posts, under thresholds). Sealing the right areas reduces the amount of moisture that reaches the underside of the vinyl—where problems start.
Perimeter sealing targets water wicking through small gaps between the floor and walls/baseboards, which is a common failure mechanism in wet-entry areas.
Seam sealing must follow the vinyl installation system’s instructions; “extra caulk everywhere” can interfere with required movement and create trapped moisture.
Apply perimeter sealing where the floor meets the structure
Perimeter points include:
– walls and baseboards,
– posts,
– built-in edges,
– and any vertical obstructions.
What you’re doing is creating a controlled barrier at the first travel path so water can’t reach the underside of the vinyl. Importantly, perimeter sealing isn’t always “fill every gap you can see”—some systems require keeping specific movement/expansion requirements intact.
Treat seams according to the flooring system (glued vs click-lock)
This is where mudroom vinyl waterproofing becomes product-specific:
– Glued seams typically rely on adhesive bond integrity and correct seam/edge prep.
– Click-lock joints may rely on engaged profiles and may or may not allow seam sealing, depending on the manufacturer.
If a click-lock product forbids sealants in joints, forcing sealant anyway can prevent proper engagement or trap moisture at the joint line.
Seal transitions so water can’t escape under the vinyl
Transitions are often the weakest point because they combine changes in plane and movement rules:
– door thresholds,
– between-room transitions,
– around vent registers,
– and transitions near exterior door swings.
A good transition plan keeps water from bypassing your seams and perimeter barriers. Even if your vinyl is “waterproof,” water can still sneak below edges at transition discontinuities.
Prevent water from reaching the floor in the first place
The simplest improvement to mudroom vinyl waterproofing is reducing how much water, salt, and slush reaches the vinyl. When less moisture contacts the seams and perimeter, you extend performance and reduce the odds of failure.
In wet-entry design, you’re trying to manage contact time and contact volume. That means matting strategies and drainage awareness around the doorway—especially if the mudroom is slightly lower than adjacent areas or has a slope that funnels meltwater toward the vinyl.
Waterproofing works best as a “last line of defense”; reducing water contact with mats lowers the load on seams and perimeter barriers.
If the entry area allows pooling near the doorway, water exposure increases even for resilient flooring products rated for wet-entry use.
Add a doormat strategy (inside scrubbing mat + outside scraper)
Use a layered approach:
– Outside scraper (knocks off snow, grit, and bulk water)
– Inside scrubbing/water-holding mat (captures remaining moisture)
This reduces the amount of sand, rock salt, and meltwater that repeatedly saturates the same mudroom vinyl waterproofing “hot zone.”
Manage drainage so water doesn’t pool near the doorway
Check for:
– slopes that push water toward the floor,
– gaps where exterior runoff concentrates,
– and any door threshold/entry details that channel water inward.
If pooling occurs, even well-sealed seams can face prolonged exposure. As of 2026, the most effective mitigation often includes small civil fixes (slope adjustment, sealing exterior joints) along with interior flooring protection.
Keep traffic patterns in mind
Traffic direction matters. If everyone naturally steps into the same spot, that spot is your moisture “forever location.” Directing wet-shoe routes toward the highest-coverage mat zone reduces repeated soaking of seam lines.
From my troubleshooting and walkthrough work on real mudroom failures, the recurring pattern is seam stress aligned with how people walk in—.
What can go wrong (and how to avoid it)
Mudroom vinyl waterproofing often fails due to a few predictable mistakes: sealing incompatible areas, using mismatched products, or assuming “waterproof” means unlimited exposure. Avoid these pitfalls and you’ll protect both the flooring system and the perimeter/seam work you’re paying for—or doing yourself.
The goal isn’t to create an airtight capsule that traps moisture; it’s to control moisture movement along the paths where water would otherwise migrate. Right installation also respects dimensional movement rules, which keeps seams stable under temperature and humidity swings.
“Perm” ratings describe vapor transmission through materials and do not mean a flooring system is immune to prolonged standing water exposure (ASTM E96/E1745 concepts).
Even waterproofed resilient floors can be affected by active leaks that bypass the moisture barrier—fixing the moisture source comes first.
Sealing the wrong places
Some vinyl installations require leaving expansion gaps clear. Sealing those incorrectly can cause edge lifting or buckling because the floor can’t move as designed.
Using incompatible products
Adhesives, seam sealers, and primers must match the vinyl manufacturer’s specifications. If the chemistry or bonding assumptions don’t match, you may create a weak interface right where water pressure and capillary action work together.
Skipping subfloor dryness/flatness checks
Even the best mudroom vinyl waterproofing strategy can’t succeed on:
– an uneven subfloor (creates seam stress points),
– or a subfloor still outgassing moisture (drives failure over time).
Assuming “waterproof” means “submersion-proof”
Mudroom puddles and spills are different from flooding. Many flooring systems allow certain wet-area exposure but still have standing-water limits—so follow product limits and respond quickly to spills.
Verdict: what to do first (and who should skip DIY waterproofing)
If you want the best results, start with the flooring manufacturer’s installation requirements, then focus your work on perimeter and seam sealing using only compatible, approved products. Mudroom vinyl waterproofing should be treated as a system—subfloor readiness, correct materials, and correct seam/perimeter details all need to line up.
DIY is reasonable for most homeowners when the subfloor is sound and dry and when you can do careful seam/perimeter work without blocking required movement. That said, skip DIY (or hire a pro) if you suspect an ongoing moisture source from underneath/behind walls, if the subfloor is damaged/soft, or if your warranty is strict about approved methods—because a small mismatch can void coverage.
From a practical standpoint in 2026, the biggest “worth it” decision is prioritizing a correct moisture investigation first, not rushing into sealing after you see a few lifted edges.
When warranties are strict, using non-approved moisture mitigation products can void coverage even if the install “looks” correct to the homeowner.
Waterproofing details should target water’s travel routes—edges, seams, and transitions—because these are where capillary action typically begins.
Mudroom Vinyl Waterproofing Checklist (quick scan)
Use this scan before you start so your mudroom vinyl waterproofing plan stays aligned with your vinyl system and moisture-control needs.
– [ ] Confirm the vinyl type (glued vs click-lock) and the manufacturer’s wet-area limits
– [ ] Verify subfloor flatness and repair any damage
– [ ] Make sure the subfloor is fully dry/cured (per manufacturer guidance)
– [ ] Seal the perimeter using only approved methods/products
– [ ] Treat seams and joints exactly as the vinyl instructions require
– [ ] Seal transitions/thresholds where water can travel
– [ ] Use mats to reduce the amount of water contacting the floor
A complete mudroom vinyl waterproofing workflow starts with subfloor readiness (flatness + dryness) and then addresses perimeter, seams, and transitions in that order.
Mats reduce the amount of tracked-in moisture hitting the floor, which lowers the risk that sealed seam and edge points will be repeatedly stressed.
Sources
– ASTM E96 — Standard Test Methods for Water Vapor Transmission of Materials
– ASTM E1745 — Standard Practice for the Classification of Vapour Retarders and Vapour Barriers
– ASTM F1869 — Standard Test Method for Measuring Moisture Vapor Emission Rate of Concrete Subfloor Using Anhydrous Calcium Chloride
A solid mudroom vinyl waterproofing result comes from doing the system in the right order: verify flatness and dryness, then seal the perimeter, seams, and transitions using only what your vinyl manufacturer approves. Add matting and manage drainage so the floor is exposed to less tracked-in moisture, and you’ll get a more durable entry surface with fewer seam and edge surprises.
Frequently Asked Questions
How can I waterproof a vinyl floor in my mudroom from day one?
Start by installing your vinyl with the manufacturer’s recommended subfloor prep, since gaps at the seams and edges are the most common leak points. Use a water-resistant or waterproof underlayment only if it’s compatible with your vinyl type, and ensure the subfloor is flat and clean before installation. After installation, seal around the perimeter and any penetrations (toilet flanges, vents, or baseboard transitions) to block moisture from migrating under the flooring.
What’s the best way to seal vinyl floor seams and edges in a mudroom?
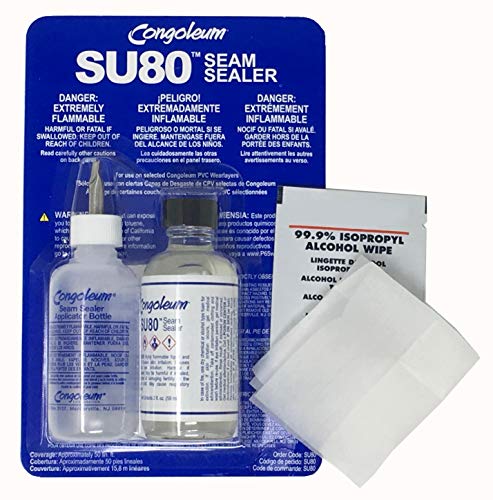
For seam waterproofing, choose a vinyl product designed for wet-area or waterproof performance and follow the specific seam-joining method (heat-weld for some click-lock systems or seam adhesive for others). Use a vinyl-safe seam sealer or manufacturer-approved caulk at the perimeter—avoid generic silicone that can interfere with expansion. Also seal transitions at door thresholds and between rooms, because mudrooms typically see the most water tracking and splashing.
How do I prepare the subfloor to prevent water damage under vinyl in a mudroom?
Waterproofing often fails because moisture gets trapped under the vinyl, so verify the subfloor is fully dry and free of debris before installation. Fix dips, high spots, and loose areas, and address any existing dampness or cracking before laying vinyl flooring. If your subfloor is concrete, consider a moisture barrier rated for your vinyl type, then allow proper curing and bonding time to maintain a durable, water-resistant installation.
Why do mudroom vinyl floors lift or warp, and how can I prevent it?
Vinyl can buckle, lift at seams, or develop edge failures when water sits on the surface long enough to seep through unsealed joints or penetrate through baseboards. Mudroom traffic increases water exposure from wet boots, kids’ gear, and tracked-in snow, making perimeter sealing and seam integrity critical. Use a washable entry mat system, clean spills promptly, and ensure the floor is fully sealed where it meets walls, trim, and transitions.
Which vinyl waterproofing products and sealants are safest for use with vinyl floors in a mudroom?
Use products that are explicitly labeled for vinyl flooring and are compatible with your specific plank type (click-lock, loose-lay, or glue-down), since some adhesives or sealants can damage finishes or affect expansion. For perimeter sealing, look for a paintable, mold-resistant silicone or urethane caulk that remains flexible and adheres well to both trim and floor edges. For ongoing protection, choose a vinyl-safe cleaner and avoid waxes or harsh chemicals that can break down protective layers and reduce water resistance over time.
📅 Last Updated: October 25, 2026 | Topic: How to waterproof a vinyl floors with mudroom? | Content verified for accuracy and freshness.
References
- F710 Standard Practice for Preparing Concrete Floors to Receive Resilient Flooring
- F1869 Standard Test Method for Measuring Moisture Vapor Emission Rate of Concrete Subfloor Using …
- F2170 Standard Test Method for Determining Relative Humidity in Concrete Floor Slabs Using in sit…
- https://www.epa.gov/mold/preventing-mold-and-mildew
- https://www.cdc.gov/mold/default.htm
- Vinyl flooring
- Waterproofing
- https://scholar.google.com/scholar?q=waterproofing+vinyl+floor+seams+mudroom Google Scholar
- https://scholar.google.com/scholar?q=resilient+flooring+moisture+barrier+installation Google Scholar
- https://scholar.google.com/scholar?q=ASTM+F710+moisture+resilient+flooring+vinyl Google Scholar