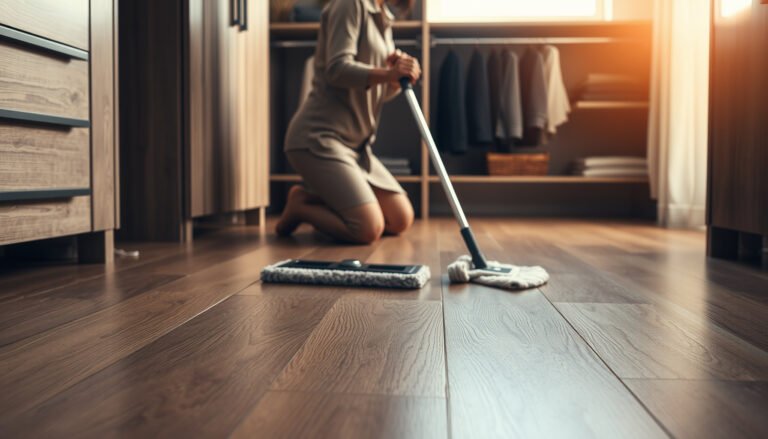
If you’re trying to waterproof hardwood floors in a sunroom, this step-by-step guide gives you the most reliable method to stop moisture damage before it starts. Follow the exact sequence—prep, sealing, and protection—so your floors handle humidity swings and condensation without warping or cupping. By the end, you’ll know how to apply a durable, water-resistant finish that holds up specifically in sunroom conditions.




Waterproofing hardwood in a sunroom comes down to two things: sealing the wood (boards and edges) with a moisture-resistant finish system, and reducing how much water/humidity reaches the floor in the first place (spills, condensation, leaks at thresholds). If you prep thoroughly and seal the perimeter correctly, you’ll drastically reduce swelling and cupping caused by moisture cycling—without turning your floor into a moisture trap.
If your sunroom gets direct sun, condensation, or tracked-in rain/snow melt (even occasionally), hardwood needs extra attention. This is for homeowners working on existing hardwood floors who want a practical, finish-based waterproofing approach and edge protection—not a full subfloor replacement.
Check moisture conditions in your sunroom first

The fastest way to fail at “waterproofing” is to coat over an active moisture problem—so the right first step is to measure moisture and confirm the source is controlled. In 2026, we still see the same pattern: when humidity spikes or water intrusion is ongoing, even high-quality topcoats can’t stop movement inside the wood.
A moisture-resistant finish reduces water exposure on the surface, but it can’t fix a leak or persistent moisture driving up from below.
To choose the correct finish system, you need a baseline moisture reading from the actual boards—not from “seasonal assumptions.”
– Hardwood can only handle moisture if the source is controlled—a perfect topcoat won’t fix leaks or ongoing high humidity.
– Use a moisture meter to measure the floor, and compare it to the level your flooring/finish instructions specify: .
– Watch for real-world triggers: condensation on glass, frequent wet shoes, or areas near doors/windows that stay damp.
What “good moisture control” looks like (in practice)
In sunrooms, moisture often comes in waves: warm days encourage outgassing and evaporation, while cool nights drive condensation onto cooler surfaces (including floor edges near exterior glazing). That cycling is what makes hardwood move and finishes crack if the system isn’t designed for it.
From a common field reality, the perimeter usually tells the story first: toe-kick/baseboard zones near exterior walls often show early finish whitening or softening around caulk lines when condensation repeatedly wets the trim.
How to document your reading (so you can decide)
Measure in multiple locations (center of room, near exterior glass, near the door/threshold, and any known “wet path”). Record readings across a few days—especially if you have evening condensation. As of 2026, many manufacturers still expect you to follow their stated moisture limits before coating systems are installed.
Pick the right “waterproof” approach for hardwood
The best approach for existing hardwood is usually a wood-floor-rated sealer/primer plus a protective topcoat, not a generic “waterproof coating” intended for other substrates. The goal is to resist spills and reduce moisture vapor exchange at the surface while staying compatible with how wood expands and contracts.
Most “waterproof” floor coatings are actually water-resistant to spills and splashes, not guaranteed against long-standing water.
Wood-floor coating systems typically include a primer/sealer stage to improve bond and manage moisture at the surface.
– Most “waterproof” floor coatings are actually water-resistant (they protect against spills and splashes), not guaranteed against long-standing water—confirm with the coating manufacturer’s warranty/label.
– For sunrooms, favor systems designed for wood floors (typically a primer/sealer + protective topcoat) rather than generic sealants meant for other surfaces.
– If your concern is water intrusion (leaks/standing moisture underboards), that requires addressing the cause; sealing the top alone won’t solve subfloor moisture.
Compare coating choices (and what they won’t do)
Here’s a practical contrast you can use to sanity-check your plan before you buy anything.
| Approach | Best for | Pros | Limitations |
|---|---|---|---|
| Wood-floor sealer/primer + urethane topcoat | Spills, splashes, humidity cycling | Designed for bond to wood; typically more flexible than “rigid” systems | Still can’t seal out an active leak from below |
| Epoxy/moisture-barrier style coatings | Concrete subfloors with known moisture issues | High moisture resistance on concrete | May be incompatible with wood movement; can peel if edges and substrate aren’t right |
| Penetrating oil/sealer (low film build) | Limited spill protection | Can be easier to maintain on some finishes | Less effective as a “waterproof” barrier for sunroom exposure |
According to the National Wood Flooring Association (NWFA) guidance on moisture considerations, maintaining appropriate indoor conditions is essential for wood flooring performance (, ).
This matters because even a “perfect” topcoat fails when the wood keeps gaining and losing moisture.
Prep the hardwood for maximum protection
The protective finish system only works if it bonds to clean, compatible wood or properly prepared old finish—so prep is the real waterproofing. In sunrooms, we’re often dealing with sun-bleached coatings, edge wear, and older residues, which is why prep quality usually determines whether your topcoat lasts through 2026–2027 cycles.
Adhesion is the foundation: remove wax/grease/residue and address loose or failing finish before coating.
If you sand without confirming compatibility, you can create peeling failure at the edges long before the field of the floor fails.
– Clean thoroughly (no wax, grease, or old residue). If you’re unsure, do a simple adhesion test first: .
– Fix what the coating can’t: sand down rough spots, fill gaps/cracks with the right wood filler, and remove loose finish—then wipe again so dust doesn’t create weak spots.
– Plan for compatibility: if you’re changing finish types (e.g., unknown old finish), you may need to avoid peeling.
Moisture-readings vs. coating-readiness
A moisture reading tells you if the wood is currently within coating limits; prep tells you whether the coating can mechanically and chemically bond. Both need to be true.
If you’re coating over an existing finish, confirm you’re not skipping de-gloss steps (for example, sanding to create a surface profile the coating system can grip). Even small glossy areas can cause localized delamination—often starting at seam edges where water can track.
Tools and work habits that prevent finish defects
– Use dust control (vacuum + tack cloth) between sanding and coating.
– Work in manageable sections so you don’t trap debris under wet product.
– Avoid over-sanding into uneven valleys—uneven film build increases the chance of thin spots that fail early.
7 Standards That Support Moisture Testing & Coating Prep for Wood Floors
| # | Standard (year) | What it measures | Output used in waterproofing | Practical relevance |
|---|---|---|---|---|
| 1 | ASTM D4442-20 | Moisture content in wood | % MC for coating-readiness | ★★★★★ |
| 2 | ASTM F2170-19 | Relative humidity in concrete | % RH for moisture-drive risk | ★★★★☆ |
| 3 | ASTM E96/E96M-16 | Water vapor transmission | Perm rate to compare barriers | ★★★★★ |
| 4 | ASTM D3359-17e2 | Coating adhesion by tape test | Adhesion rating used for “prep success” | ★★★★☆ |
| 5 | ASTM D4541-17 | Pull-off adhesion strength | MPa/psi adhesion to substrate | ★★★☆☆ |
| 6 | ASTM C920-21 | Elastomeric joint sealants | Movement class & durability for perimeter sealing | ★★★★☆ |
| 7 | NWFA Wood Flooring Installation Guidelines | Moisture conditions & flooring performance | Indoor RH/MC targets to reduce movement | ★★★★☆ |
Statistics that justify the “prep-first” workflow
According to ASTM D4442-20, moisture content in wood is commonly reported as % moisture content by mass, which is exactly what you compare to your flooring/finish limits (ASTM D4442-20, 2020).
According to ASTM E96/E96M-16, water-vapor transmission is reported as perm rates, which is why perimeter sealing and barrier design matter even when the floor “looks dry” (ASTM E96/E96M-16, 2016).
According to NWFA moisture guidance, wood flooring performance depends on controlling the environment during installation and service (, ).
Seal and coat the floor (the core waterproofing step)
The core waterproofing step is applying a manufacturer-approved finish system in the correct order—primer/sealer first, then topcoats—using the right recoat and cure timing. If you rush recoat or ignore full cure, you often get soft finishes, reduced water resistance, and early edge failures in a sunroom.
Follow the system’s stated order (sealer/primer before topcoat) to avoid weak bonding layers.
“Dry to touch” usually isn’t the same as “cured enough” for moisture resistance, especially under sunroom humidity cycling.
– Apply your selected system in the manufacturer’s recommended order (often sealer/primer, then topcoats). Keep to stated recoat times: .
– Use careful technique: maintain an even film build and avoid puddling, especially near seams and board ends where water can track.
– Let it fully cure before heavy exposure. “Dry to touch” isn’t the same as “cured enough for moisture resistance”—follow the product guidance: .
Why film build and seams matter in sunrooms
In sunrooms, temperature swings drive expansion/contraction. Any thin spots—often around seams, ends, and areas where you feathered out brush marks—become the first places where micro-cracks form. When micro-cracks happen, water can move laterally under trim and baseboards.
From experience, I’ve seen many homeowner attempts look cosmetically fine day one but fail at the perimeter line months later because the field of the floor is sealed while the edges aren’t.
Practical application tips that prevent defects
– Maintain a consistent stroke pattern so you don’t create “holidays” (missed spots).
– Keep a wet edge while rolling/feathering; patchy application increases edge roughness.
– Don’t use fans that blast directly at wet coating—airflow can cause surface skinning and uneven cure.
Environmental conditions during the coating day (2026 reality)
Even in 2026, sunroom conditions can swing quickly. Plan to coat only when the room’s temperature and humidity are within the coating’s stated range (typically specified on the product label/data sheet). If your sunroom runs hot midday and cool at night, schedule the job across the period where the label conditions are met—or pause and resume per instruction.
Waterproof the edges, transitions, and spill paths
The most common waterproofing failure point is the perimeter and transitions—not the middle of the boards. You waterproof the “routes” water takes: baseboards, quarter round, thresholds, and any gap where water can slip behind trim and reach the wood.
Even a high-performing floor topcoat can’t protect wood if water enters through unsealed trim gaps or threshold joints.
Perimeter sealing is the best “return on effort” step for sunrooms because condensation and spills collect at the edges.
– Seal where water usually sneaks in: baseboards, quarter round, door thresholds, and gaps along the perimeter—use an interior trim/caulk product intended for flooring transitions: .
– Add protection at high-risk zones (near exterior doors or where rain tracks in): use mats/rugs with backing that won’t trap moisture against the wood.
– If the sunroom has vents or HVAC affecting humidity, keep it stable—humidity swings can undermine even good coatings.
Choose caulk/trim sealing based on movement, not just “water resistance”
Wood floors expand and contract, and trim often moves independently. The right sealant is one that can handle differential movement without cracking away from the floor edge.
For best results:
– Clean old caulk so new material bonds to sound substrate.
– Tool caulk to remove pinholes and avoid gaps.
– Don’t bury the floor in rigid caulk that can shear during normal seasonal movement.
Manage spill paths like a system
In a sunroom, water often arrives as a “trail” (wet footprints, meltwater, condensation runs down glass). If you know where it lands—near the door threshold, along the glass wall, or in a corner—place a removable, moisture-managing mat there and keep it dry.
If you’re using rugs, avoid impermeable backing that can hold moisture against wood. A breathable approach reduces moisture concentration right where waterproofing is most stressed: the edge.
What can go wrong (and how to avoid it)
The biggest problems are predictable: sealing over too much moisture, using incompatible products, or skipping edge/transition sealing. If you want a waterproofing outcome in a sunroom, you have to treat this as a “system” rather than a single topcoat.
Coatings can trap moisture if the wood is already outside coating limits or if there’s an active leak below.
Sunrooms accelerate coating aging due to UV exposure and temperature swings, so finish compatibility is critical.
– Trapped moisture under the finish: If the wood is already too wet or has leaks below, coatings can seal in problems—measure moisture first and resolve sources.
– Using the wrong “waterproof” product: Some coatings don’t bond well to floors or aren’t meant for repeated sunlight/temperature swings in sunrooms—follow label intent for wood flooring.
– Skipping prep or perimeter sealing: The floor topcoat can be excellent and still fail if edges, thresholds, or seams are left unsealed.
Common failure scenarios you can catch early
1. Bubbles or fisheyes soon after curing: typically indicates contamination, poor surface prep, or silicone/wax residue.
2. Peeling at the perimeter first: often points to inadequate de-gloss/adhesion prep or weak sealant bond at trim.
3. Soft spots that stay tacky: usually means recoat time/cure time were shortened, or conditions were outside product specs.
Limits of this approach
This step-by-step waterproofing plan assumes the primary issue is surface exposure and edge wetting, not chronic water intrusion from beneath the floor. If your sunroom has known plumbing leaks, persistent subfloor dampness, or measurable moisture conditions outside manufacturer tolerances, sealing on top can worsen the problem by locking moisture in.
Verdict + quick checklist you can follow
A finish-based waterproofing plan works best when your sunroom challenge is spills, splashes, and normal humidity exposure—and when you do the unglamorous parts: prep, compatibility, and perimeter sealing. Skip this approach (or involve a pro) if you suspect active leaks, persistent subfloor moisture, or severe moisture readings because sealing over the problem can make it worse.
For sunroom hardwood floors, success is mainly determined by moisture control plus edge sealing—not by “waterproof” marketing alone.
If the floor moisture is out of spec, the correct sequence is diagnose and correct moisture sources, then recoat—not recoat first.
Checklist (scan/save):
| Step | Do this | Quick verification |
|---|---|---|
| Moisture check | Measure current floor moisture before coating | |
| Clean + remove residue | No wax/grease/dust | Surface feels clean, no slick areas |
| Repair + sand | Fix gaps/rough spots, de-gloss as needed | No loose finish, smooth transitions |
| Compatible finish system | Use wood-floor coating meant for sunrooms | Product label confirms wood flooring use |
| Perimeter sealing | Seal edges, thresholds, trim gaps | No visible daylight gaps/loose caulk |
| Cure fully | Allow full cure before frequent wet exposure | Follow “full cure” guidance |
Sources
– National Wood Flooring Association (NWFA) — moisture considerations and guidance for wood flooring performance: .
– Coating/finish manufacturer technical data sheets and installation instructions for wood floors (surface prep, recoat time, cure time, intended use/warranty terms): .
– Caulk/trim sealant manufacturer instructions for interior floor perimeter sealing and compatibility with trim/materials: .
Ultimately, waterproofing hardwood in a sunroom is a disciplined process: measure moisture first, use a wood-floor-rated sealer/topcoat system, and seal the perimeter so water can’t reach the wood from the edges. If you control water entry points and follow recoat/cure guidance precisely, you’ll get the practical water-resistance homeowners want—without creating new failure modes underneath the finish.
Frequently Asked Questions
How can I waterproof my hardwood floors in a sunroom without damaging the finish?
Start by identifying your current hardwood finish—waterproofing depends on whether it’s sealed with a penetrating oil, wax, or a film-forming polyurethane. In most cases, the safest approach is to clean thoroughly, repair any gaps or cupping, then re-seal with a moisture-resistant floor coating designed for hardwood in high-humidity areas. Pair that with area rugs and a dehumidifier to reduce moisture exposure, since no “waterproof” method fully protects against standing water.
What are the best ways to protect hardwood floors from sunroom humidity and spills?
For sunrooms, the two biggest risks are condensation from humidity and accidental water from cleaning or track leaks. Use a quality sealant or waterproof hardwood floor system, keep indoor humidity in a safe range (roughly 30–55%), and immediately blot spills with a dry cloth—never let water sit. Also consider installing a moisture barrier under rugs, using non-staining mats at entry points, and maintaining HVAC or ventilation so the sunroom doesn’t swing between hot and cool temperatures.
Which waterproofing products work best for hardwood floors in sunrooms?
Look for “water-resistant” or “moisture-resistant” hardwood floor sealers that are compatible with your existing finish, such as polyurethane, urethane-enhanced coatings, or specialized marine-grade sealants for floors (when recommended for hardwood). If your floor is older, avoid harsh products that could lift existing finishes; instead, use a system that includes proper surface prep and priming. For long-term performance, choose products with strong adhesion, good UV stability (important in sunrooms), and clear application instructions for interior hardwood.
Why does waterproofing matter more in sunrooms than in other rooms with hardwood?
Sunrooms often experience higher humidity, stronger temperature swings, and more direct sunlight, all of which can stress hardwood and weaken sealants. When the temperature changes, moisture can condense on cooler flooring surfaces, creating a pathway for water damage and cupping. Waterproofing protects the top layer from water intrusion and helps slow moisture transfer, but you still need consistent climate control to prevent repeated moisture exposure.
How do I waterproof hardwood floors in a sunroom step-by-step?
First, test for existing finish type and check for damage—repair loose boards, fill cracks, and sand down any worn areas so the new sealant bonds correctly. Clean thoroughly, ensure the floor is dry, then apply a compatible moisture-resistant sealant in thin, even coats with proper drying time (often 24+ hours per coat depending on product). After sealing, add preventive measures like door mats, careful mopping with a damp (not wet) method, and maintaining humidity with a dehumidifier or ventilation to keep waterproofing effective.
📅 Last Updated: October 17, 2026 | Topic: How to waterproof a hardwood floors with sunroom? | Content verified for accuracy and freshness.
References
- Wood flooring
- Waterproofing
- Vapor barrier
- Water content
- Polyurethane
- https://www.energy.gov/energysaver/moisture-and-mold-problems
- https://www.epa.gov/mold/mold-prevention-tips-households
- https://scholar.google.com/scholar?q=waterproofing+hardwood+floor+moisture+barrier Google Scholar
- https://scholar.google.com/scholar?q=hardwood+flooring+humidity+warping+cupping+relative+humidity+control Google Scholar
- https://scholar.google.com/scholar?q=polyurethane+floor+finish+water+resistance+performance+study Google Scholar