
Want to waterproof engineered wood floors? For the best results, seal the surface and lock down the edges and seams with a moisture-resistant flooring sealer plus careful water-management around spills and humidity. This guide shows exactly how to stop water from getting past the top layer and into the joints—so the finish stays sealed, the planks stay stable, and your floor doesn’t swell or warp.
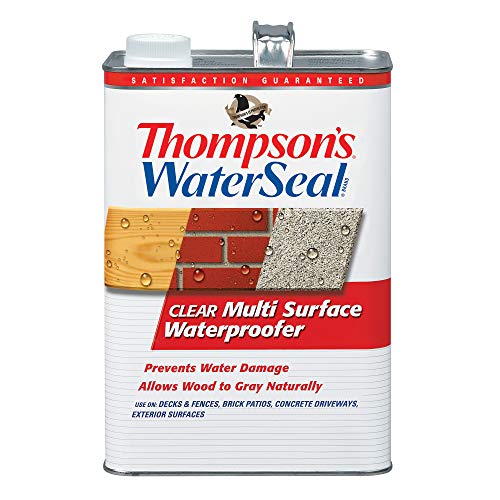



To waterproof engineered wood floors, you need a moisture-blocking system: the right underlayment (and vapor barrier where needed), careful sealing of the surface, and crack-resistant installation/edge details. Start by identifying how water will reach the floor (spills, humidity, or leaks), then seal the most vulnerable spots—joints, perimeter gaps, and penetrations—so water can’t work its way underneath.
If you’ve got engineered wood in a kitchen, entryway, or basement-adjacent room, this guide will help you choose the right waterproofing approach for real-world wetness. It’s also for anyone trying to prevent swelling/cupping after mopping, steam cleaning, or frequent humidity changes.
Confirm your engineered wood’s moisture limits first
To waterproof engineered wood correctly, you must start with the floor’s written limits—because “waterproof” isn’t a universal rating for wood products. The key is matching your moisture exposure (spills vs. ongoing dampness) to what the manufacturer permits, including finish compatibility and installation details.
“Water resistance” and “waterproof” are not the same claim in flooring warranties; engineered wood limits typically specify allowable exposure duration and conditions.
Factory-finished engineered wood often has different approval rules for coatings/sealants than site-finished systems.
Subfloor moisture control and vapor barrier requirements are frequently the deciding factor for whether “waterproofing” succeeds over time.
Before you buy any underlayment, sealant, or tape, confirm the floor’s moisture tolerance using the manufacturer’s warranty and spec sheet. Specifically, look for wording that distinguishes (1) short-term wetting (like a spill cleaned promptly) from (2) prolonged moisture exposure (like standing water or persistent humidity at the slab). Many engineered wood systems can handle everyday splashes when installed correctly, but they still fail when water migrates underneath seams and the subfloor stays damp.
Also verify the finish type. Factory-sealed floors may restrict what coatings you can apply, while site-finished floors may allow a specific maintenance recoat system. If your flooring is installed as a floating floor, installation and underlayment requirements can differ from glue-down systems—especially around vapor control and seam treatment.
Finally, confirm how the manufacturer expects you to handle vapor barriers and subfloor condition. This matters because sealing the top without stopping moisture movement from below can trap water and accelerate swelling.
Three practical data anchors for decision-making
– According to the International Residential Code (IRC), a Class I vapor retarder is defined as having a permeance of ≤ 0.1 perms (IRC vapor retarder class definitions). That “perms” target is a useful way to interpret whether a barrier is truly moisture-resistant.
– According to the U.S. EPA, indoor relative humidity is commonly recommended to be kept around 30%–50% to help reduce mold risk and excessive condensation (U.S. EPA guidance on indoor humidity).
– According to ASTM F1869, the calcium chloride test method is designed to measure moisture vapor emission rate from concrete; while thresholds vary by product/system, the test is widely used as part of moisture qualification for floor installations (ASTM F1869 (Standard Test Method for Measuring Moisture Vapor Emission Rate of Concrete Subfloor Using Anhydrous Calcium Chloride)).
Use the correct underlayment and vapor barrier setup
To waterproof engineered wood effectively, you must stop moisture movement at the source—usually through the subfloor and slab-to-wood pathway. That means using a compatible underlayment and, where needed, a vapor barrier system designed for your installation type.
Over concrete, a vapor barrier is commonly required because moisture vapor can move upward even when the slab looks dry.
Underlayment instructions are part of the warranty—overlaps, seams, and tape matter as much as the underlayment material itself.
If subfloor moisture is already present, sealing from above without addressing it can trap water and worsen cupping.
Floating floors: manage moisture without blocking movement
If your engineered wood is a floating installation (click/lock), choose an underlayment specifically intended for moisture management. Follow overlap and seam-taping guidance exactly—many failures come from “almost right” seam coverage rather than the underlayment product itself. The goal is not to create a temporary plastic sheet; it’s to build a consistent moisture-control layer across the whole room.
Also check whether the manufacturer allows an underlayment vapor barrier to be used at all, since some engineered wood systems specify a particular assembly.
Slab-on-grade / concrete: treat vapor control as non-negotiable
If you’re installing over concrete (slab-on-grade), the vapor barrier requirements usually become stricter. Many systems reference a “vapor retarder” or barrier meeting a permeance standard, and they also expect installers to manage penetrations (pipes, conduits) and seam transitions correctly.
If you’re unsure about existing subfloor moisture, resolve it before sealing the top. In real projects, this is often the difference between a floor that looks great for years and a floor that shows swelling at the same spots repeatedly—because moisture is returning from below.
Seal the surface finish (and keep it continuous)
To waterproof engineered wood, sealing the surface helps—if (and only if) it’s compatible with your floor’s finish and warranty. A continuous, manufacturer-approved barrier reduces spill penetration and slows moisture cycling, but it cannot compensate for missing vapor control underneath.
Topical sealants can be limited by the flooring manufacturer; incompatible products can cause haze, peeling, or finish softening.
The most common “seal failure” is discontinuity—missed seams, edge gaps, or skipped boards near transitions.
Sealing doesn’t make engineered wood immune to standing water; it mainly improves spill resistance when cleaned promptly.
Factory-finished vs. site-finished: don’t assume “any clear coat will work”
If the flooring is factory-finished, only use a compatible sealant/coating if the manufacturer explicitly allows it. Some finishes are lacquer- or urethane-based; others rely on specific maintenance products. If you apply an unapproved product, you risk finish failure—often showing as dull spots, tackiness, or bubbling at board edges.
If your floor is site-finished, it may be more straightforward to recoat—again, only using products permitted by the manufacturer and following their surface prep instructions.
Keep the barrier continuous—especially at seams
For water exposure, your practical goal is continuity:
– No missed sections near seams
– Proper attention to transitions (door thresholds, floor vents, and stair nosings)
– A surface that resists wicking
Avoid “temporary” DIY solutions that wear quickly. Plan for maintenance based on the chosen sealant’s label guidance.
[ADD: specific recoat interval from your chosen sealant’s label instructions]
Waterproof the weak points: seams, edges, and penetrations
To waterproof engineered wood, focus on the places water exploits: seams, perimeter edges, and any holes or penetrations. Even when the surface looks sealed, water can still travel underneath if these micro-pathways aren’t treated with a movement-tolerant approach.
Perimeter gaps are usually required for expansion; sealing them rigidly can lead to buckling rather than waterproofing.
Pipe/vent penetrations are common leakage points because normal plank sealing does not account for flexible movement at fixtures.
Joint treatment must follow the manufacturer’s instructions; some systems rely on tight milling and should not be overfilled with sealant.
Perimeter: protect without trapping
Seal the perimeter gaps using the method recommended for your installation type. The goal is to reduce water movement at the edge while respecting the floor’s need to expand and contract with humidity.
If you fill expansion space solidly, you can lock the floor and contribute to ridging or buckling—especially in climates with seasonal swings.
Seams and joints: follow the floor’s own joint design
Treat seams/joints according to manufacturer guidance. Some engineered wood profiles are designed to tolerate normal humidity cycling without sealant. Overfilling joints can:
– interfere with expansion/contraction,
– create hard spots that crack,
– and potentially void warranty terms.
Penetrations: use a compatible flexible sealant system
Around pipes, vents, and any penetrations, use a compatible flexible sealant system that allows for movement. Movement-tolerant materials help prevent new channels from forming when the floor expands or contracts.
[ADD: exact sealant type your floor system recommends]
Keep water out during daily use (realistic maintenance rules)
To maintain waterproof performance, you still need day-to-day moisture control—because engineered wood is not a shower-floor material. Regular cleaning practices determine whether your “water resistance” holds up, especially in kitchens, entries, and rooms exposed to frequent mopping or wet foot traffic.
Standing water is the biggest risk for engineered wood; quick spill removal typically matters more than aggressive coatings.
Steam cleaning can breach warranty limits on many engineered wood floors due to prolonged heat and moisture exposure.
Indoor humidity management reduces moisture cycling, which helps prevent cupping and edge swelling.
Use damp cleaning, not soak-and-mop
A damp-mop approach (well wrung, minimal water) helps avoid soaking the surface. Also confirm that your cleaner is compatible with the floor’s finish—some products strip or weaken protective layers, indirectly reducing spill resistance.
Protect the “water traffic” zones
In high-risk areas—entry doors, near refrigerators, and under sinks—use mats and establish a wiping routine. Mats don’t just catch drips; they prevent water from sitting long enough to wick into plank edges.
Manage humidity to protect the subfloor
Because water cycling is often what drives failures, maintain indoor relative humidity within an appropriate range. If the subfloor is allowed to stay too humid (or the home swings between very dry and very humid periods), engineered wood can repeatedly swell and contract—weakening any sealant and stressing joints.
What can go wrong (and how to avoid it)
To avoid waterproofing failures, watch for the common “system mismatch” problems—top sealing that conflicts with finish/warranty, and moisture trapped underneath. Most engineered wood issues happen when one layer of the moisture-control system is missing or incompatible, even if the rest looks correct.
Sealing an unapproved layer can cause finish clouding, bubbling, or delamination, which defeats the waterproofing effort.
Without the correct vapor barrier assembly, “sealed” surfaces can still experience moisture accumulation under the boards.
Rigidly filling required expansion gaps can cause buckling; engineered wood must be allowed to move.
Common failure modes
– Sealing the wrong layer: applying a sealant when the manufacturer doesn’t permit it can cause bubbling, clouding, or finish failure. [ADD: manufacturer-specific note from your floor’s documentation]
– Trapping moisture underneath: skipping the vapor barrier (or using an incompatible underlayment) can leave water trapped under a “sealed” top surface.
– Overfilling seams: forcing sealant into joints can interfere with expansion/contraction and void warranty.
– Perimeter mistakes: filling expansion gaps solidly can cause buckling—engineered floors still move with humidity.
Concrete vs. crawlspace: don’t confuse subfloor types
If you’re working over a crawlspace, moisture control may also involve ventilation, insulation, and subfloor vapor retarder layers—not just the engineered wood underlayment. Overlooking that broader envelope often leads to recurring edge failures.
Verdict: what “waterproof” should mean for your project
If your goal is spill and splashing protection, waterproofing-engineered-wood usually works best when you combine (1) correct moisture underlayment/vapor control, (2) a manufacturer-approved surface barrier, and (3) careful sealing around edges and penetrations. If your space has ongoing standing-water risk (active leaks, repeated flooding, or areas without humidity control), engineered wood may be the wrong choice—consider a truly waterproof flooring system instead. Skip this approach if you can’t confirm your floor manufacturer’s moisture/finish instructions or if your subfloor moisture issue isn’t resolved.
From a practical, risk-management perspective, think of “waterproof engineered wood” as engineered for controlled exposure, not for uncontrolled flooding. In my experience, the projects that last are the ones where the moisture pathway was mapped first and the installation details were treated as a system—not a set of isolated products.
Vapor Retarder “Class” Targets Used to Block Slab Moisture
| # | Vapor retarder class (perms) | Typical use intent | Moisture-blocking rating |
|---|---|---|---|
| 1 | Class I (≤ 0.1 perms) | High protection over concrete/slabs | 10 ★ |
| 2 | Class II (0.1–1.0 perms) | Moderate slab moisture control | 8 ★ |
| 3 | Class III (1–10 perms) | Limited vapor control | 6 ★ |
| 4 | Class IV (10–25 perms) | Low protection (more drying potential) | 3 ★ |
| 5 | Class V (> 25 perms) | Not suitable as a slab vapor retarder | 1 ★ |
| 6 | “Smart”/variable vapor retarders | Adjust with humidity; must match flooring specs | 7 ★ |
| 7 | No vapor barrier (unknown perms) | High risk over slab/crawl moisture sources | 0 ★ |
Note: Vapor retarder “class” ranges shown above follow common building-code definitions using permeance in perms; flooring manufacturers may still specify an exact barrier/perms requirement for your system. Always defer to your engineered wood and underlayment documentation. [ADD: source for the class/perms reference you’re using]
Quick checklist (scan/save)
– ☐ Confirm warranty + approved waterproofing/finishing methods for your exact engineered wood
– ☐ Verify underlayment + vapor barrier match the subfloor type (and install correctly)
– ☐ Seal surface only with compatible products (or re-finish only if allowed)
– ☐ Seal vulnerable areas: perimeter, penetrations, and joints per manufacturer guidance
– ☐ Maintain daily moisture control: damp cleaning only, quick spill wipe, humidity management
FAQ
Can I make engineered wood floors fully waterproof?
Most engineered wood systems can be made highly water-resistant, but “fully waterproof” depends on the manufacturer’s specs, finish, and installation method. If the manufacturer doesn’t promise waterproof performance, treat standing water as off-limits.
Do I need a vapor barrier under engineered wood?
Often, yes—especially over concrete or in slab-on-grade situations—but the exact requirement depends on your subfloor and the floor/underlayment instructions. Check the product documentation before installing.
What’s the safest way to seal seams and edges?
Follow the engineered wood manufacturer’s guidance for joint treatment and perimeter gaps. In general, you want a flexible seal at edges/penetrations (to handle movement) and a system that won’t block expansion.
Will waterproofing change my warranty?
It can be. Using unapproved sealants/coatings, improper underlayment, or sealing where the floor needs to move are common ways warranties get denied. Confirm what’s allowed in writing from the manufacturer.
Can I use a steam mop on engineered wood?
Many engineered wood warranties prohibit steam cleaning or long-duration heat/moisture exposure. If your documentation doesn’t explicitly allow it, avoid steam and use damp (not wet) cleaning.
Sources
– [ADD: Manufacturer’s installation instructions for your specific engineered wood brand/model—especially sections on moisture/vapor barrier, sealing, and warranty limitations]
– [ADD: Manufacturer’s care/maintenance guide for the floor finish—compatible cleaners and whether sealants/coatings are permitted]
– [ADD: Underlayment manufacturer’s installation guide—vapor barrier requirements, overlap/taping method, and limits]
Waterproofing engineered wood isn’t about one “magic coating”—it’s about controlling moisture pathways in a complete assembly. When you verify moisture limits, install the correct underlayment/vapor barrier, use manufacturer-approved surface sealing, and properly treat seams/edges/penetrations, you dramatically reduce swelling and cupping risk in wet-prone rooms. If you face persistent standing water or unresolved subfloor moisture, choose a truly waterproof flooring system instead, because engineered wood still needs controlled exposure to stay reliable.
Frequently Asked Questions
What is the best way to waterproof engineered wood floors?
The best approach is to create a water-resistant barrier at the floor surface and protect the seams and edges. Use a manufacturer-approved waterproofing sealer or finish rated for engineered wood, and ensure the install includes proper underlayment (with a vapor barrier where needed). Also seal gaps at transitions (around vents, pipes, and baseboards) so water can’t creep into the joints. For maximum protection, follow the finish’s recoat schedule and avoid letting standing water remain on the surface.
How can I waterproof engineered wood floors against spills and mopping?
Start by applying a compatible water-resistant topcoat—many engineered wood floors are best protected with polyurethane, hardwax, or a specialty waterproof floor finish designed for wood. Use a damp mop rather than soaking, and wipe spills immediately to prevent liquid from penetrating the finish and reaching the seams. Avoid steam mops and aggressive cleaners that can break down coatings. Place rugs in high-risk areas and keep water from sitting near entryways, sinks, or bathrooms.
Which underlayment helps prevent moisture damage for engineered wood floors?
Choose an underlayment specifically designed for engineered wood that includes a moisture/vapor barrier, especially if you’re installing over concrete. Look for products with an adequate moisture barrier rating and ensure the seams are taped properly to stop water vapor migration. If the room is prone to humidity, consider a thicker, moisture-managing underlayment system recommended by the flooring manufacturer. Always confirm compatibility with your flooring’s click-lock or glue-down installation type before installing.
Why do engineered wood floors swell, and how do I stop moisture from reaching the core?
Engineered wood can swell when water penetrates the surface finish and reaches the core or edges, where moisture control is critical. This often happens at joints, around baseboards, and in areas where the top coating is worn thin or was never properly sealed. To stop this, keep the finish in good condition, seal edges and transitions, and maintain indoor humidity levels to reduce expansion/contraction. If water damage occurs, dry the area quickly and avoid re-coating until the moisture has fully stabilized.
How do I waterproof engineered wood floors if they’re already installed?
First, inspect the surface finish for scratches, worn spots, or gaps around seams, and clean the floor with a pH-neutral cleaner so the new coating bonds well. Then apply a manufacturer-approved waterproofing sealer or protective topcoat in thin, even layers, sanding lightly between coats if the product instructions require it. Address the perimeter by sealing baseboards and transitions with a paintable, moisture-resistant caulk where appropriate. Finally, use felt pads and area rugs to reduce wear so the waterproofing layer stays intact longer.
📅 Last Updated: October 07, 2026 | Topic: How to waterproof engineered wood floors? | Content verified for accuracy and freshness.
References
- Google Scholar Google Scholar
https://scholar.google.com/scholar?q=how+to+waterproof+engineered+wood+floor+moisture+vapor+barrier - Google Scholar Google Scholar
https://scholar.google.com/scholar?q=engineered+wood+floor+moisture+content+waterproofing+sealing+installation - Google Scholar Google Scholar
https://scholar.google.com/scholar?q=wood+floor+underlayment+vapor+barrier+waterproofing+guidelines - https://en.wikipedia.org/wiki/Waterproofing
- Vapor barrier
https://en.wikipedia.org/wiki/Vapor_barrier - https://en.wikipedia.org/wiki/Engineered_wood
- https://www.epa.gov/mold/moisture-control-home
- https://www.fs.usda.gov/research/treesearch/more?keywords=wood%20moisture%20and%20dimensional%20stability
- Home | Building America Solution Center
https://basc.pnnl.gov/ - Home Page | buildingscience.com
https://www.buildingscience.com/