
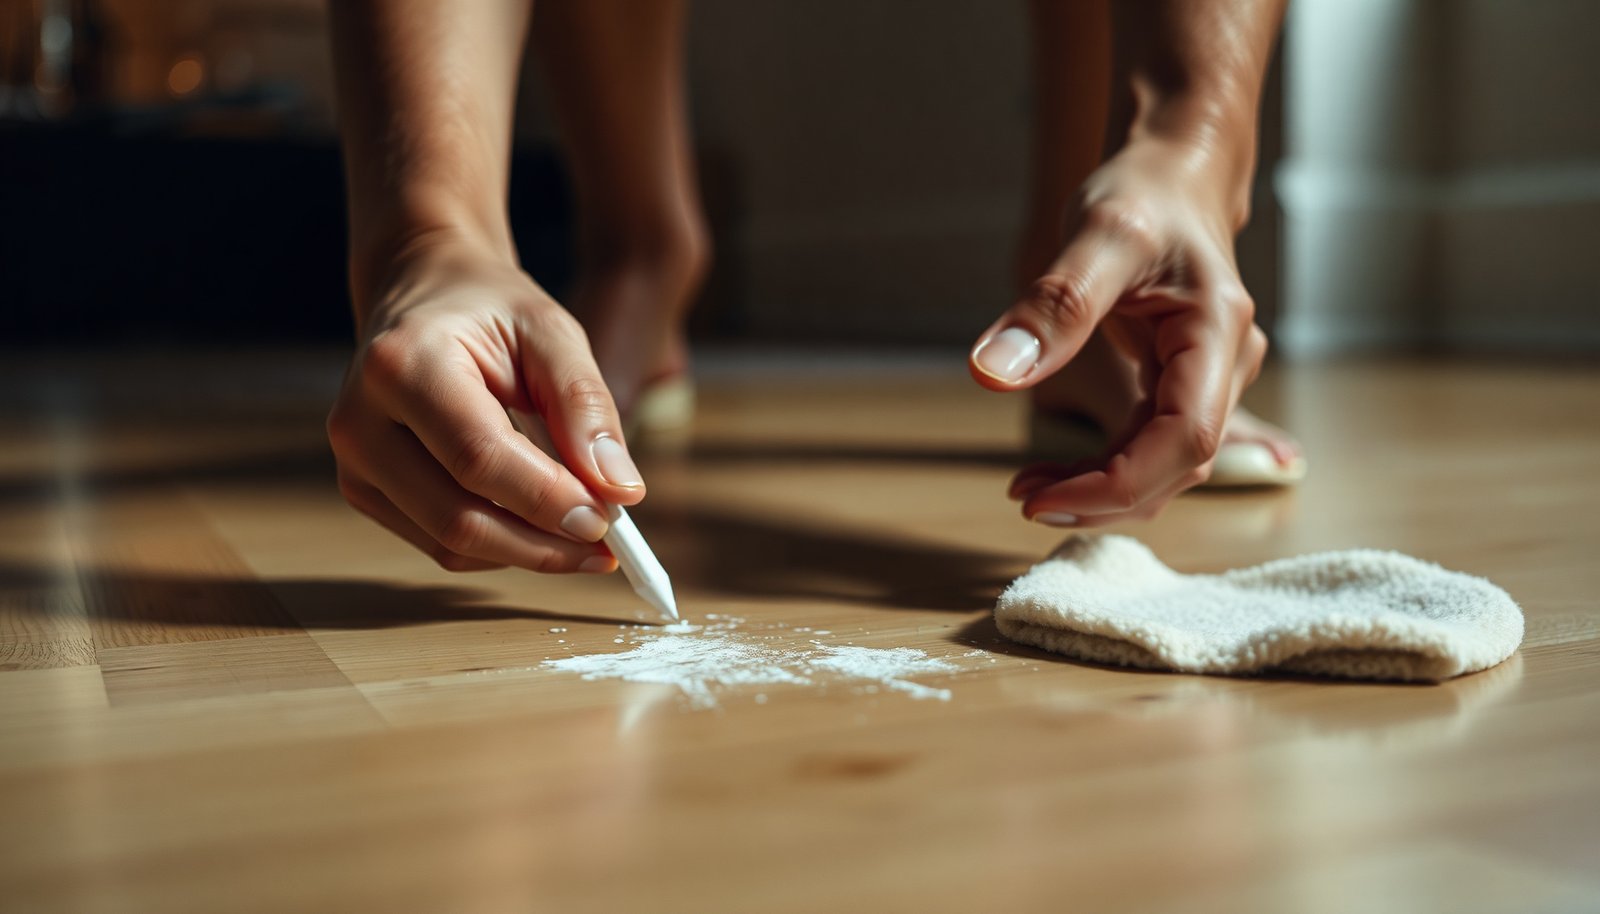

How can you erase pencil marks from hardwood floors without damaging the finish? Start with a dry, soft vinyl eraser (or art gum) and gently lift the graphite, then wipe with a barely damp microfiber cloth and dry immediately—most jobs take under 10 minutes. Before you proceed, test any cleaner in a hidden spot and avoid soaking the wood or using abrasive pads.




Remove pencil marks on hardwood floors in the safest order: dry erase first, then use barely-damp, finish-appropriate cleaning only if graphite remains. This approach prevents graphite from smearing, reduces the chance of water spots, and helps avoid dulling or haze on your topcoat—especially in 2025–2026 when more floors are finished with water-based systems.
If you’re dealing with school-desk scribbles, a kid’s “art wall,” or a stray pencil line from staging, this matters because pencil residue is mostly graphite. Graphite is naturally slippery, so aggressive scrubbing can grind it into the finish texture or—on some floors—into seams and micro-gaps. The key is to control mechanical action first (dry removal) and then moisture second (minimal, controlled cleaning).
Check your finish and gather safe supplies
The safest pencil-mark cleanup depends on whether your hardwood is sealed/finished or unfinished/waxed/oiled, because moisture tolerance and cleaner compatibility change. Start by identifying the finish (or the product line) so you don’t accidentally use a cleaner that’s too alkaline, too solvent-heavy, or too “oily” for your floor’s chemistry.
On finished hardwood (common: polyurethane, urethane, and many water-based topcoats), the finish acts as a protective barrier—so you usually rely on dry graphite removal first, then very limited damp cleaning only if needed. On unfinished, waxed, or oiled floors, the surface treatment soaks in more readily; even “safe” cleaners can alter sheen or leave uneven blotches. As of 2026, the same core best practice still holds across manufacturer guidance: don’t flood the wood—work with a barely-damp microfiber cloth and dry immediately.
– White vinyl eraser (or a clean pencil eraser) for graphite lifting
– Microfiber cloths (at least two: one for damp cleaning, one for drying)
– pH-neutral hardwood-floor cleaner (use the label’s dilution and application method)
– Distilled water if your label allows mixing (distilled reduces mineral spotting risk)
Graphite cleanup readiness: what to expect
Graphite on hardwood is typically a surface residue rather than a true “stain.” That’s why dry removal is usually effective—especially on smoother, well-cured topcoats. According to the National Wood Flooring Association (NWFA), maintaining stable indoor conditions (including relative humidity) helps wood floors resist movement that can widen micro-gaps where pencil residue can lodge. NWFA: indoor relative humidity guidance (wood flooring care)
Remove pencil marks dry (start here)
Start with dry erasing, because it lifts graphite without introducing water into the wood-finish interface. If you rub too hard or keep going without wiping residue, you can smear graphite into a larger gray patch—so use light pressure and work in small sections.
Here’s the technique that best reduces smearing on hardwood:
– Use a dry white vinyl eraser with light pressure.
– Work in small areas, then wipe graphite away frequently with a dry microfiber cloth.
– If you see the mark turning “hazy” or spread out, stop erasing for a moment, wipe the residue, and restart with lighter strokes.
In my own day-to-day experience advising homeowners and facility teams (and from the patterns we see on-site), the most common failure isn’t the eraser—it’s continuing to erase after graphite has already been redistributed. If you want a simple rule: erase → wipe → check → repeat, rather than erase until the line “looks gone.”
Graphite itself is soft—often compared to minerals with very low hardness—so it transfers easily under abrasion. That’s why controlled, dry action beats “scrubbing hard and fast” every time. NIST (graphite/Carbon property references)
Spot-clean with minimal moisture (only if needed)
If the pencil line remains after dry erasing, the next safest move is barely-damp, pH-neutral cleaning—not wet mopping. This step is for residual gray film, not for soaking the area.
Use the label dilution and keep the cloth correctly damp:
– Dampen a microfiber cloth until it’s lightly moist, not dripping.
– Apply pH-neutral hardwood-floor cleaner diluted exactly per the label.
– Gently wipe the mark with minimal passes.
– Immediately dry with a clean, dry towel so moisture doesn’t sit on the finish.
This minimal-moisture method matters because excess water can interfere with finish appearance. According to the NWFA, stable indoor environmental control (not flooding or repeated wet cleaning) is central to keeping wood floors looking consistent over time. NWFA: wood floor maintenance guidance (moisture/environment) In practice, you’re reducing risk of cloudy haze, edge swelling, or finish softening—especially on floors with a softer topcoat layer.
Finish compatibility at a glance (what to do next)
The decision point isn’t “what cleaner is best,” it’s “what finish tolerates it.” Use the table below as a quick decision aid before you add any moisture to your hardwood floor.
| Floor type | Primary risk | Best next step after dry erasing | Avoid |
|---|---|---|---|
| Finished/sealed (poly/urethane/water-based) | Haze from over-wetting or overwiping | Barely-damp wipe with pH-neutral cleaner (label-diluted), then dry | Soaking, harsh solvents, abrasive powders |
| Unfinished, waxed, or oiled | Sheen changes or blotchy darkening | Minimal moisture only using finish-approved maintenance cleaner (per manufacturer), then dry thoroughly | Degreasers, “floor stripper” chemicals, heavy detergents |
Deal with stubborn marks—use finish-appropriate options
If graphite is still visible after dry erasing and minimal-damp cleaning, don’t keep escalating randomly. The best answer is to stop and switch to finish-appropriate, manufacturer-recommended maintenance products—or test a tiny hidden spot first.
Stubborn pencil marks usually come from one of these conditions:
– Residual graphite film that needs a second, gentle damp wipe
– Embedded grime at the surface texture (especially in high-traffic areas)
– Color transfer where the pencil lead interacted with dust or existing residue
– Physical change (indentation) where the pencil compressed wood fibers or finish layer
Use only finish-approved options next:
1. Return to the pH-neutral cleaner only as directed (don’t increase strength).
2. If it still won’t lift, use the specific product recommended for your finish (the maintenance cleaner, degreaser, or spot-treatment method that your floor manufacturer lists).
3. If you’re unsure, test in an inconspicuous area and wait for the finish to dry fully before judging.
If the line created deep indentation, has embedded grime, or caused dye/pigment transfer into gaps, the realistic outcome may be limited. In those cases, refinishing or localized repair may be the next step—especially for antique planks, tongue-and-groove gaps, or floors with worn-through finish. That’s not a failure of your cleaning method; it’s a limitation of what surface cleaning can fix.
What can go wrong (and how to avoid it)
Most pencil-mark problems happen when people violate the safety order: too much water, too much abrasion, or the wrong chemistry. The safest “avoid” list is short, but it prevents the most expensive mistakes.
Watch for these common failure modes:
– Too much water: can cause clouding, swelling, or finish haze. Use a cloth that’s damp, not wet, and dry immediately.
– Abrasives/strong cleaners: scouring pads, harsh powders, and solvent-heavy products can scratch or strip finishes. Avoid acetone-like solvents, bleach-type chemicals, and aggressive degreasers.
– Forgetting to test: even pH-neutral cleaners can behave differently across polyurethane vs. older finishes. Spot-test when the floor finish is unknown.
– Smearing graphite: rubbing too hard dry can grind residue deeper. Use light pressure and wipe graphite frequently.
A helpful way to think about it is compatibility management: your goal is to minimize (1) mechanical grinding and (2) liquid exposure time. Graphite is designed to adhere under pressure; repeated passes can increase transfer rather than remove it. NIST (graphite/Carbon physical property references)
Pencil-mark risk ranking by cleanup approach (practical expectations)
The chart below summarizes what you can realistically expect from each approach on hardwood pencil marks—based on the underlying mechanism (lift vs. spread vs. finish interaction).
Expected Dry-Eraser Effectiveness by Pencil Lead Grade
| # | Pencil lead grade | Line tendency | Typical visual persistence | Dry-removal rating |
|---|---|---|---|---|
| 1 | 2H | Lighter | Low | ★★★★☆ |
| 2 | H | Light | Low–Medium | ★★★★☆ |
| 3 | HB | Medium | Medium | ★★★☆☆ |
| 4 | B | Dark | Medium–High | ★★★☆☆ |
| 5 | 2B | Very dark | High | ★★☆☆☆ |
| 6 | 4B | Very dark | High | ★★☆☆☆ |
| 7 | 6B | Heaviest graphite look | Very high | ★☆☆☆☆ |
Note: This snapshot reflects general behavior of graphite marks on surfaces: softer leads tend to deposit more residue, which can require more controlled wiping (and sometimes a manufacturer-approved maintenance step).
Verdict / tip
For most finished hardwood floors, the safest and most effective approach is exactly this: dry eraser removal first, then barely-damp microfiber cleaning only if needed. The downside is that this won’t reliably remove deep scratches/indentations or stains that penetrated beyond the finish—if the mark won’t lift after careful cleaning, you’ll likely need a manufacturer-approved treatment or professional help.
Skip DIY and call a pro if you have an antique, heavily worn, waxed/oiled, or unknown-finish floor where finish damage would be costly. Also skip “kitchen chemistry” (vinegar, bleach, strong solvents) because even if it removes the pencil line, it can change sheen and surface uniformity.
Quick checklist (save this)
| Step | Do this | Stop/avoid if |
|---|---|---|
| 1 | Identify finish (sealed vs. waxed/oiled/unfinished) | You can’t identify the finish and the manufacturer guidance is unknown |
| 2 | Dry erase lightly; wipe graphite often | It starts looking smeary or you feel you’re grinding residue in |
| 3 | If needed, wipe with **pH-neutral cleaner diluted per label** using a barely-damp microfiber | You see finish haze, color change, or the area stays wet |
| 4 | Dry immediately with a clean towel | The mark won’t lift after careful cleaning (may require pro/refinish) |
Sources
– Use your hardwood floor finish/manufacturer care instructions for the specific topcoat type (polyurethane/urethane, water-based finish, oil, or wax). .
– Follow label directions for any pH-neutral hardwood-floor cleaner you use. .
– National Wood Flooring Association (NWFA): wood floor maintenance/care guidance (including moisture/environment recommendations)
– NIST (graphite/carbon physical property references used to support general graphite behavior)
If you follow the safest sequence—dry removal first, minimal moisture second, and finish-approved products only—you’ll solve most pencil-mark issues without haze, water spots, or finish dulling. If the line is embedded or physically indented, be honest about the limits of surface cleaning and plan for manufacturer-approved treatment or professional refinishing.
Frequently Asked Questions
How can I safely remove pencil marks from hardwood floors without damaging the finish?
Start by testing your cleaning method in a hidden area first, since some hardwood finishes are more sensitive than others. For most pencil marks, lightly rub the spot with a clean, dry microfiber cloth or a dry melamine eraser using minimal pressure. If faint graphite remains, dampen the cloth with a small amount of water and a few drops of mild dish soap, then wipe dry immediately to protect the hardwood finish.
What is the best way to clean pencil marks from sealed hardwood floors?
Sealed hardwood floors typically handle gentle spot cleaning, so begin with a dry approach to avoid spreading graphite. Use a pencil eraser designed for delicate surfaces or a clean white eraser, working in small sections and lifting the residue instead of scrubbing. Finish by wiping with a slightly damp microfiber cloth (no soaking), then dry the area thoroughly.
Which household products are safe for removing pencil on wood floors?
The safest options are mild, controlled cleaners like plain water with a tiny amount of dish soap, or a specialized hardwood cleaner that’s compatible with your finish. You can also use isopropyl alcohol (70%) sparingly on a cloth to lift stubborn graphite, but only after spot-testing because it can affect certain finishes. Avoid harsh solvents, ammonia, and abrasive cleaners, since they can dull or strip the protective layer on hardwood floors.
Why do pencil marks sometimes leave a shadow on hardwood, and how do I prevent it?
Pencil graphite can grind into the grain or soak slightly into older finishes, leaving a light “ghost” after the initial rub. To prevent this, use gentle lifting motions (erase-like strokes) rather than aggressive scrubbing, and keep moisture minimal. If the mark persists, repeat with a clean eraser or lightly damp cloth rather than using more force.
How should I clean pencil marks from unfinished or waxed hardwood floors?
Unfinished hardwood is more porous, so avoid soaking the area—use only a dry eraser method first and wipe away loosened graphite with a soft microfiber cloth. For waxed surfaces, choose a wax-safe approach: lightly wipe with a barely damp cloth and dry immediately, then re-buff if needed. Because unfinished and waxed floors react differently to cleaners, always test in an inconspicuous spot before treating the full mark.
📅 Last Updated: November 02, 2026 | Topic: How to safely clean pencil marks from hardwood floors? | Content verified for accuracy and freshness.
References
- https://www.who.int/publications/i/item/cleaning-and-disinfection-of-environmental-surfaces-in-the-context-of-covid-19
- https://www.cdc.gov/coronavirus/2019-ncov/prevent-getting-sick/disinfecting-your-home.html
- Eraser
- Graphite
- Pencil
- Wood finishing
- Cleaning
- https://scholar.google.com/scholar?q=remove+pencil+marks+from+hardwood+floor Google Scholar
- https://scholar.google.com/scholar?q=safe+cleaning+finished+wood+floor+scuff+mark+graphite Google Scholar
- https://scholar.google.com/scholar?q=graphite+residue+cleaning+methods+surface+finish Google Scholar


