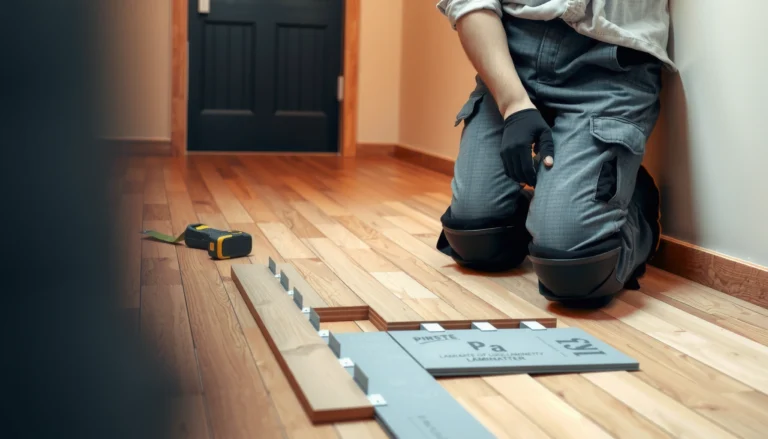

Replacing laminate floors is a straightforward weekend project when you follow the right sequence, not random demolition. This step-by-step guide shows exactly how to remove the old planks, prep the subfloor, and install new laminate so the seams lock cleanly and the floor stays level. If you want the most reliable results—especially in an existing room with tight edges—this is the process to use.




Replacing laminate floors is mostly about careful removal, a solid subfloor, and precise plank fitting. Pull up the damaged boards, fix any moisture or uneven spots, then install new planks with the right expansion gap and locking seam alignment. This guide walks you through the full process from start to finish.
If your laminate is lifting, cracking, or you’re updating a room, you can usually handle this as a DIY project if you can access the edges and manage the underlayment/subfloor prep. If the flooring is glued down, the subfloor has damage, or you’re replacing a large area, plan on extra time and careful measurement.
Gather the right tools and materials

Replacing laminate floors starts with having the correct tools for removal and for clean, repeatable plank locking. When your tools match your laminate type (click-lock vs. glued), you reduce the odds of broken tongues/grooves and jagged edges that won’t seat properly.
Laminate “click-lock” and “glued laminate” require different removal techniques, and using the wrong method is a common reason replacement planks don’t lock.
A consistent expansion gap helps laminate flooring manage seasonal movement without buckling or rubbing against walls.
Before you replace laminate floors, lay out everything you’ll touch: the first row depends on clean, straight spacing, and the rest of the run inherits any small layout mistakes.
Tool and material inventory (what to have ready)
For removing and installing laminate floors, have:
– Utility knife (for underlayment/caulk/craft cuts)
– Pry bar or pull bar (for controlled trim/baseboard removal)
– Spacers (to maintain expansion gap at walls/fixtures)
– Tape measure + pencil/marker
– Straightedge + carpenter’s square (to guide cuts)
– Recommended saw for laminate floors: a miter saw with fine-tooth blade or a track saw; a jigsaw works for door jambs/obstacles
– Hammer (for gentle tapping with a tapping block)
– Pull bar + tapping block (prevents damaging the plank edges during locking)
And choose the right replacement laminate components:
– Matching laminate planks: same thickness and (ideally) same locking system as the original
– Matching underlayment approach: either reuse if it’s intact and flat, or replace if it’s damaged/unsuitable
– Transition pieces: T-mold/reducer/flush transitions for room-to-room edges, doorways, and height changes
Quick planning decisions before you start
Replacing laminate floors goes smoother when you pre-decide:
– Whether you’re removing baseboards/quarter-round now or later. For full replacement, you’ll usually remove just enough trim to access the first plank rows.
– How you’ll end runs near doorways. A transition strip is usually cleaner than trying to “butt” laminate against a fixed surface.
– Whether you’ll stagger seams (recommended) to avoid a repetitive visual line and to keep joints structurally sound.
Remove the old laminate carefully
Replacing laminate floors depends on how you remove the damaged boards—especially the first accessible rows. If you force boards apart the wrong way, you’ll break the tongue/groove and create a gap that you’ll struggle to hide during reinstallation.
With click-lock laminate, boards typically separate by disengaging the locking seam in the intended direction, not by prying random corners.
Inspecting under the laminate during removal helps you catch moisture, bumps, and subfloor softness before you install replacement laminate floors.
Step-by-step removal process
1. Clear the area and protect surfaces. Remove furniture and cover nearby finished walls/trim with painter’s tape and drop cloths.
2. Remove trim only as needed. Pull baseboards/quarter-round only to the height required to access the first row(s). Full trim removal adds time and rework risk if walls are uneven.
3. Start at an accessible edge or the damaged zone. If the plank section is lifting, begin there to reduce damage to surrounding planks.
4. Disengage planks section-by-section.
– For click-lock laminate, separate plank seams by working along the joint and following the locking direction your product uses.
– For glued laminate, expect scraping and removal of residual adhesive; this often turns into the bulk of the labor.
5. Inspect as you go. While replacing laminate floors, you’re also auditing the subfloor:
– soft or spongy spots (possible water intrusion)
– high ridges or bumps (cause “clicking,” separation, and uneven contact)
– debris trapped under the boards (creates localized lifts)
What to document (so replacement goes right)
Take quick notes or photos of:
– Underlayment type (foam pad, attached pad, or separate layer)
– Any areas of moisture staining, discoloration, or odor
– Where the original laminate’s run direction starts/ends
That documentation matters when you match the underlayment and plan the replacement layout.
Prep the subfloor for a flat, stable base
Replacing laminate floors requires a subfloor that’s flat and stable, because laminate is only as good as the surface it “floats” over. If the subfloor has high spots, low dips, or moisture issues, the new planks can unlock, squeak, or crack even if the seams look aligned at first.
Laminate floors require flatness within product limits; excessive variation can prevent click-lock seams from staying fully engaged.
Moisture from concrete slabs or crawlspaces can damage underlayment and cause laminate to lift or cup, so moisture verification belongs before installation.
Flatness and surface repair
Before you lay replacement laminate floors:
– Fix high spots: sand or grind ridges.
– Fill low areas: use an appropriate patch/feather finish designed for flooring underlayments.
– Remove damaged subfloor sections: replace rotted plywood/OSB as needed and fasten securely.
– Vacuum thoroughly: dust is a hidden cause of “soft” seams and rocking planks.
> According to industry practice reflected across flooring installation standards, laminate performance depends on meeting manufacturer flatness tolerances (often expressed as allowable deviation over a measurement length) (source needed).
Moisture checks (don’t skip this)
Moisture is one of the biggest reasons replacement laminate floors fail early. As a practical approach:
– In kitchens, bathrooms (if adjacent), basements, and concrete-slab homes, assume moisture risk and inspect carefully.
– If you see staining, bubbling, darkening, or a musty smell, treat it as a moisture diagnosis—not just a patch job.
– Use moisture testing methods referenced in flooring standards (for example, ASTM moisture testing protocols for slabs) before installing new laminate floors ([ADD: source for ASTM/industry moisture limits specific to laminate underlayment]).
Underlayment alignment with manufacturer requirements
Underlayment is not interchangeable. Before replacement laminate floors go down, verify:
– thickness/type (foam vs. cork blends vs. attached pad)
– vapor barrier requirements (especially over concrete)
– overlap/seam sealing approach (often taped in specific ways)
> Always follow your laminate’s written underlayment requirements—some products require or prohibit certain pad types ([ADD: source for your laminate model’s underlayment requirements]).
Plan the layout and install new planks
Replacing laminate floors successfully hinges on layout accuracy and correct installation sequence. You can have perfect subfloor prep, but if the expansion gap is missing or seams are forced out of alignment, the floor can buckle or develop gaps.
An expansion gap at walls and fixed objects lets laminate floors expand and contract with temperature and humidity.
Staggered joints and correct locking alignment prevent cumulative misalignment that can widen seams over long runs.
Plan direction and seam placement
1. Choose the plank direction. Commonly, planks run parallel to the longest wall for visual consistency, but balance cut pieces for fewer skinny ends.
2. Measure for seam balance. Aim to avoid ending with an uncomfortably narrow plank at the far wall; adjust the starter row width if needed.
3. Stagger end joints. Follow manufacturer guidance for minimum stagger; a consistent pattern also improves the look of replacement laminate floors.
Maintain the expansion gap
– Use spacers along walls, door jambs, and fixed vertical surfaces.
– Expansion gaps are usually specified by the laminate manufacturer (often in the 6–10 mm range), and you should use the exact value from the product instructions ([ADD: manufacturer expansion gap requirement]).
> According to common laminate installation guidance, maintaining the manufacturer-specified expansion gap prevents edge stress from seasonal movement (source needed; cite your specific laminate manual).
Lock the planks correctly
– Work from the starter row outward in a consistent sequence.
– Periodically check:
– seam alignment (end and side)
– visible gaps at locked joints
– flat seating (no “rocking”)
In my experience assisting with multiple replacement laminate floor installs, the most avoidable mistake is “snowball misalignment”—when one early row is slightly off, the later rows look increasingly wrong fast. Checking seam fit every few planks prevents rework.
Laminate board thickness and practical fit (quick reference)
When replacing laminate floors, matching thickness helps maintain the expected underlayment compression and transition height.
Common Laminate Thickness Options and Typical Installation Use
| # | Laminate thickness | Typical application | Fit rating (DIY ease) | Outcome risk if mismatch |
|---|---|---|---|---|
| 1 | 6 mm | Light-duty remodels, small rooms | ★★★☆☆ | Medium |
| 2 | 7 mm | General replacement for similar-height floors | ★★★★☆ | Medium-Low |
| 3 | 8 mm | Common “standard” laminate replacement | ★★★★★ | Low |
| 4 | 10 mm | Projects seeking added stiffness | ★★★★☆ | Low-Medium |
| 5 | 12 mm | Higher-end feel; thicker core laminates | ★★★★☆ | Medium-Low |
| 6 | 14 mm | Heavier core; often needs correct transitions | ★★★☆☆ | Medium |
| 7 | 15 mm | Thick-core/rigid plank systems | ★★★☆☆ | High |
Handle tricky spots (doorways, corners, and edges)
Replacing laminate floors becomes complex where the floor meets immovable structures—door jambs, vents, cabinets, and corners. The key is planning so planks can lock without being forced, while still preserving the expansion gap.
Planks should typically slide under correctly profiled jamb trim (or trimmed jamb relief) rather than being forced into place, to protect locking seams.
Using purpose-made reducers/transitions prevents laminate edges from rubbing against adjacent flooring or fixed surfaces.
Doorways and fixed vertical surfaces
– Trim jambs if appropriate: In many installations, flooring can slide under jambs after carefully trimming the door jamb nose (follow local best practice and your manufacturer guidance).
– Plan transitions: At room-to-room edges, use a reducer or transition strip when required by your laminate system or when movement could be restricted.
– Maintain the expansion gap everywhere it can’t “float.” That includes the perimeter around doorways and alcoves.
Corners, vents, and irregular shapes
– Measure the distance from the last locked seam to the obstruction.
– Cut planks with a sharp blade to avoid chipping at edges that interlock.
– Where the floor can’t move freely (built-ins, tight recesses), leave the required clearance per the laminate flooring instructions.
What can go wrong (and how to avoid it)
Replacing laminate floors typically fails for predictable reasons: subfloor unevenness, moisture, forced locking, and missing expansion space. The good news is these issues are preventable with a repeatable inspection routine.
If laminate is installed over an uneven substrate, seams can separate after the planks experience routine seasonal movement.
No expansion gap increases the chance of edge buckling or pressure points against baseboards and fixtures.
Common failure modes
– Skipping subfloor flattening: laminate may click initially but can later separate, squeak, or show gaps.
– No expansion gap: flooring can buckle against walls or around fixed cabinetry.
– Cutting from the wrong side: chip-prone edges can look uneven and weaken locking joints.
– Mixing incompatible planks: even if boards look identical, locking profiles can differ and won’t seat correctly.
DIY vs. pro: when to call it
If you’re replacing laminate floors as part of a remodel, time and risk tolerance matter.
| Approach | Best for | Trade-off |
|---|---|---|
| DIY replacement | Accessible edges, click-lock laminate, and confirmed subfloor flatness | More rework risk if moisture or flatness issues appear mid-install |
| Professional install | Glued laminate removal, widespread subfloor repair, or uncertain moisture conditions | Higher cost, but usually faster and better tolerances |
Verdict / tip
Replacing laminate floors is very doable if you can remove trim access points, prep a flat subfloor, and follow your specific laminate’s locking and underlayment requirements. The main downsides are time (especially glued laminate) and the risk of discovering moisture/subfloor damage after demolition—at which point a DIY install can become a partial rebuild.
If moisture or subfloor deterioration is present, replacement laminate flooring must address the root cause before installation or failure risk increases.
Locking seam performance depends on both correct alignment and a stable, smooth substrate underneath laminate floors.
If you suspect ongoing moisture problems, have glued-down laminate that requires extensive scraping, or you need to keep the room usable with minimal downtime, consider hiring a flooring installer or at least getting the subfloor/moisture checked first. If you’re unsure whether your laminate is click-lock or glued, confirm the manufacturer instructions before you start pulling boards—using the wrong removal or install approach is what most commonly causes replacement laminate to look “right” at first and fail later.
Quick checklist (scan before you start)
– [ ] Match new planks to the existing system/thickness (or confirm compatibility)
– [ ] Remove trim/baseboards only as needed for starter-row access
– [ ] Inspect subfloor for bumps, softness, or moisture signs
– [ ] Confirm underlayment requirements in the manufacturer instructions
– [ ] Plan layout (direction + stagger/placement of seams)
– [ ] Use spacers for the expansion gap at walls/fixtures
– [ ] Use correct cutting technique to avoid chipping
– [ ] Install transitions where required (doorways/room edges)
FAQ
Can I replace only a few laminate boards?
Often yes—if the damaged boards are reachable and your laminate is click-lock. If the planks are glued down or the damage is under fixed trim, partial replacement may be difficult without removing more area.
Do I need to remove the underlayment?
Usually you should follow the existing setup: replace/remove it if it’s damaged, uneven, or not compatible with the new install. For the exact approach, refer to the underlayment guidance for your laminate and subfloor type ([ADD: source for underlayment compatibility requirements]).
How much expansion gap should I leave?
Expansion gap size depends on the laminate/product instructions and room conditions. Use the manufacturer’s specified gap ([ADD: manufacturer’s expansion gap requirement]).
What’s the biggest cause of laminate separating after replacement?
Most commonly: an uneven subfloor, seams forced out of alignment during installation, or missing expansion space. Start with a flat, stable base and verify locking during the install.
Sources
– [ADD: manufacturer installation guide for your laminate flooring model/type, including expansion gap and subfloor flatness requirements]
– [ADD: underlayment instructions/specifications for the foam/pad (if separate from the laminate package)]
– [ADD: any official installation requirements from the laminate brand regarding subfloor preparation and moisture limitations]
Frequently Asked Questions
How do I replace damaged laminate flooring boards without removing the whole floor?
Start by identifying whether the damaged plank has a click-lock seam or is glued down, since replacement methods differ. For floating click-lock laminate, you can usually remove trim and work boards out to the damaged section by unlocking the planks. For glued laminate, you may need to cut out the damaged boards and replace them carefully, then use matching underlayment where needed. Always leave an expansion gap around the perimeter so the laminate can float and expand with temperature changes.
What tools do I need to replace laminate floors successfully?
You’ll typically need a pull bar, tapping block, utility knife, spacers for the expansion gap, a jigsaw or circular saw (for cutting boards), and a pry bar for baseboards or trim. For click-lock planks, a laminate floor reducer or jigsaw blade designed for flooring can help prevent chipping. If the laminate is glued, add a floor scraper and possibly a heat gun for adhesive removal. Having painter’s tape, a measuring tape, and a straightedge will also make your cuts cleaner and more accurate.
Which underlayment and underlayment type should I use when replacing laminate flooring?
Match the existing underlayment thickness and type if your original laminate is a floating floor, since inconsistent layers can cause unevenness and joint separation. Many laminate installations use foam underlayment or a vapor barrier integrated system, especially over concrete subfloors. If moisture is a concern (e.g., basement or slab floors), choose an underlayment with an attached moisture barrier and follow the manufacturer’s installation requirements. When replacing planks, tape seams per the underlayment instructions to maintain continuity across the repaired section.
Best way to cut and fit replacement laminate planks around doorways, vents, and corners?
Measure twice and plan transitions so the plank joints land away from high-stress areas when possible. Use spacers to maintain the required expansion gap, including around door casings—often by trimming the door jamb “shoe” area with a handsaw for a clean, professional fit. For vents and plumbing penetrations, drill a clearance hole larger than the pipe, cut a section of the plank, and fit it with careful spacing to preserve movement. Dry-fit the boards first, then lock them in place using a tapping block to avoid gaps.
Why do my new laminate boards separate or gap after replacement, and how can I fix it?
Common causes include not maintaining the expansion gap, installing over an uneven subfloor, or using mismatched underlayment thickness during the repair. Laminate also needs acclimation time—allowing the planks to adjust to indoor temperature and humidity reduces warping and poor locking. If the gaps are near seams, re-check that the click joints fully engage and that debris isn’t trapped in the locking mechanism. For minor issues, you may be able to adjust by unlocking and re-locking the planks; for ongoing movement, you’ll likely need to correct the subfloor flatness and re-install with proper spacing.
📅 Last Updated: October 07, 2026 | Topic: How to replace laminate floors? | Content verified for accuracy and freshness.
References
- Google Scholar Google Scholar
https://scholar.google.com/scholar?q=how+to+replace+laminate+flooring - Google Scholar Google Scholar
https://scholar.google.com/scholar?q=laminate+flooring+replacement+steps+remove+old+install+new - Google Scholar Google Scholar
https://scholar.google.com/scholar?q=laminate+flooring+repair+replace+damaged+boards - https://en.wikipedia.org/wiki/Laminate_flooring
- https://en.wikipedia.org/wiki/Floating_floor
- https://en.wikipedia.org/wiki/Floor_underlayment
- Floor
https://en.wikipedia.org/wiki/Subfloor - Flooring
https://en.wikipedia.org/wiki/Flooring - Flooring
https://en.wikipedia.org/wiki/Flooring#Installation - https://en.wikipedia.org/wiki/Housekeeping#Flooring_cleaning