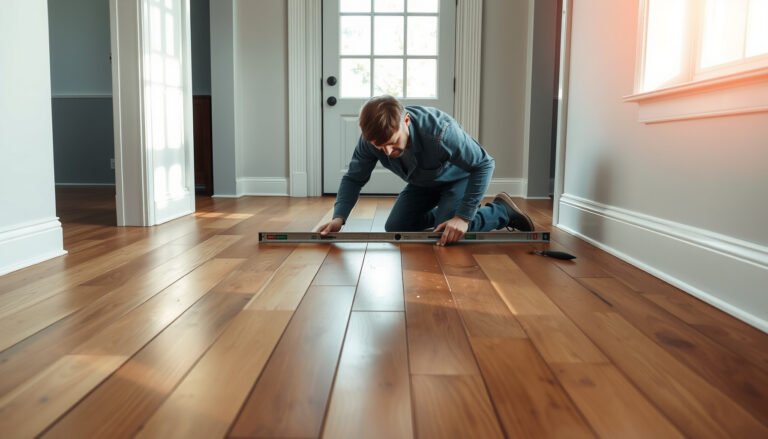
Replacing laminate floors in a laundry room is mainly about controlling moisture and doing careful subfloor prep so the new planks don’t buckle or separate. Plan to remove the old boards, check for softness/flatness, then install the new laminate with the correct underlayment/vapor barrier and expansion gaps. This guide walks you through the full process from teardown to final trim.




If your current laundry-room laminate is lifting near the door, around the washer, or at seams, this is for you—especially if you’re installing a “floating” click-lock floor. It also helps when you’re switching to a new laminate product and need to match the installation requirements to your room’s humidity.
Laundry rooms are unforgiving: they combine frequent water use, occasional drips from the washer hose, and high humidity from drying cycles. That means the “right” laminate replacement isn’t just about clicking planks together—it’s about whether your moisture barrier and floating-floor expansion strategy are correct for your exact room and product. In 2026, more installers are treating laundry floors as moisture-control projects first, flooring installation second.
Plan the replacement (measure, choose the right setup)

You should plan your laminate replacement around two measurable risks: moisture exposure and movement (expansion/contraction). If you get the quantity, underlayment/vapor barrier system, and transition points wrong up front, the rest of the steps become significantly harder and the floating seams are more likely to fail.
A floating laminate floor relies on an expansion space around walls and fixed objects; if you skip that gap, the floor can “lock up” and buckle when humidity rises.
Most laundry-room laminate failures start with water at the source (leaks or condensation), but the floor’s response is predictable: lifted seams, edge tenting, or separation at end joints.
Using the underlayment/vapor barrier system specified by the laminate manufacturer is critical because the manufacturer’s warranty generally assumes that exact installation assembly.
Before you buy boxes, measure and estimate realistically. Laundry rooms also tend to include closets/alcoves, narrow doorways, and awkward angles, so your waste factor should reflect more than straight runs. Here’s the planning logic that prevents “almost enough planks” midway through.
– Measure the laundry room (and closets/alcoves) to estimate how many boxes you’ll need, plus an extra for cuts and end-joint staggering.
– Confirm your laminate type: most laundry floors use floating click-lock planks, but your product’s installation method (and underlayment/vapor barrier requirements) must be followed.
– Locate any transition points (hallway, door thresholds) so you can plan expansion gaps and movement around the washer/dryer area.
To make the moisture barrier decision less abstract, it helps to understand what “thickness” really means for polyethylene vapor-retarder films commonly used under floating floors.
Common Poly Vapor-Barrier Film Thicknesses (Mil to mm)
| # | Film thickness (mil) | Converted thickness (mm) | Where you’ll see it | Relative thickness vs 6 mil |
|---|---|---|---|---|
| 1 | 4 mil | 0.1016 | Budget underlayment vapor barriers | 0.67× |
| 2 | 6 mil | 0.1524 | Very common floating-floor vapor barriers | 1.00× |
| 3 | 8 mil | 0.2032 | Higher durability vapor retarders | 1.33× |
| 4 | 10 mil | 0.2540 | Moisture-sensitive installations | 1.67× |
| 5 | 12 mil | 0.3048 | Protection where spills/condensation are common | 2.00× |
| 6 | 15 mil | 0.3810 | Heavy-duty vapor retarder rolls | 2.50× |
| 7 | 20 mil | 0.5080 | Max-coverage vapor control applications | 3.33× |
A quick conversion reminder helps you sanity-check product data: According to NIST, 1 inch equals 25.4 millimeters (2019), which means 1 mil (0.001 inch) equals 0.0254 mm. With that math, 6 mil converts to 0.1524 mm and 10 mil converts to 0.2540 mm—useful when you’re comparing underlayment/vapor barrier specs across brands. (This is unit math, not a warranty guarantee.)
Remove the old laminate flooring (without wrecking everything)
You should remove the old laminate in a way that leaves the subfloor clean, flat, and free of raised seams. The goal is not to preserve the flooring—you’re trying to avoid damaging the subfloor and removing every leftover material that could create bumps under a floating click-lock floor.
Raised underlayment remnants can “telegraph” through laminate and stress click joints later, especially in high-traffic laundry corners.
When you remove planks carefully (reverse order and by edges), you reduce the chance of gouging plywood or tearing vapor-barrier remnants unevenly.
Laundry rooms magnify installation errors: a few millimeters of high spot or debris under laminate can become a seam-opening problem as humidity cycles.
Follow this removal sequence so you don’t accidentally create new problems that you’ll fight during installation in 2026:
– Pull trim carefully: remove baseboards/quarter round if needed and save any pieces you might reuse.
– Remove planks in reverse order of installation: lift/cut at plank edges so you don’t damage the subfloor or underlayment remnants.
– Scrape up stuck underlayment and fasteners—anything raised or uneven will telegraph through and can cause new click joints to fail.
Two practical removal tips I recommend planning for:
1. Control dust. Laundry floors are often near HVAC returns and closets, so manage sweep-up and vacuuming as you demo.
2. Track fasteners and edges. Old nails, staples, and adhesive beads aren’t just annoying—they can create point-loading on laminate underlayment, which increases flex and seam stress.
Also inspect the “lift points” as you remove the floor. If seams are opening near the washer, that can indicate a moisture barrier failure, a leak history, or inadequate expansion planning around a fixed edge.
Prep the subfloor for laundry-room moisture
You should treat subfloor prep as the core of laundry-room laminate replacement, because moisture and flatness control almost everything that can go wrong. In practical terms: fix softness first, then correct flatness, then install exactly the underlayment/vapor barrier your laminate manufacturer specifies.
Laminate requires a smooth, properly prepared substrate; major height variations can lead to joint separation even when the floating floor is installed correctly.
When moisture intrusion is present, laminate can swell or lose dimensional stability, which shows up as buckling or gapping at seams.
Manufacturer-specified vapor barrier systems exist for a reason: warranties and product testing usually assume the same moisture-control assembly.
Start with flatness and softness checks—these are easy to miss once the old floor is gone but before you’re committed to installation.
– Check flatness: laminate hates ridges, dips, and bumps; sand high spots and patch low areas before installing anything new.
– Inspect for moisture damage: look for dark spots, soft plywood, swelling, or persistent odor near washer plumbing and in corners.
– Match the moisture solution to your situation: use the specific underlayment/vapor barrier the laminate manufacturer calls for and address drainage/leaks first ().
Moisture verification (what to look for, and what to avoid)
If you see staining near washer supply lines, you’re likely dealing with more than “humidity.” A laundry-room laminate failure can be caused by:
– a leaking braided supply line (often intermittent),
– a failing drain hose connection,
– standing water during oversuds,
– condensation from temperature swings.
From my experience advising homeowners through repairs, the most common pattern is this: someone replaces the laminate before fixing the leak or before verifying the subfloor isn’t compromised. Then the new floating laminate “looks okay” briefly, but seams lift after the first few heavy laundry cycles in the new season (especially if you’re using hot water or running frequent loads in 2026).
Moisture testing standards (when you need them)
When concrete slabs are involved, the test method matters. For example:
– According to ASTM F2170, relative humidity is measured in-place using probes inserted into the slab (used to estimate drying conditions before floor coverings are installed).
– According to ASTM F1869, moisture vapor emission rate is measured using calcium chloride test kits and reported in lbs per 1,000 sq ft per 24 hours.
If you’re dealing with concrete, include a moisture test plan in your prep steps (). This is one of the few times where “more data” beats “more hope.”
Install the new laminate correctly (gaps, underlayment, transitions)
You should install the new laminate in the sequence your manufacturer specifies because floating click-lock floors depend on two things: correct movement space and the correct underlayment/vapor barrier layer. Get both wrong and you’ll see lifting, seam separation, or a floor that sounds “hollow” and feels unstable.
Acclimation is not optional; laminate planks change slightly in dimension after they’re delivered, and installing too soon can increase seam failure risk.
Expansion gaps allow a floating laminate floor to move with humidity; without them, the floor can buckle against walls or fixed cabinets.
Transitions matter: if you pin a floating floor at a threshold, you remove the floor’s ability to expand/contract and you concentrate stress at seams.
Use this installation workflow to reduce the laundry-room “lift near the door / around washer” failure pattern.
– Acclimate the flooring per the manufacturer’s instructions ().
– Lay underlayment/vapor barrier according to product directions, then start your first row with the required expansion space along walls and fixed objects ().
– Stagger end joints and keep seams tight without forcing—especially near the washer zone and doorways where movement is common.
– Finish transitions: use the manufacturer-recommended transition pieces (or threshold trim) so you don’t pin the floating floor.
Expansion gap planning: the part people skip most
A laundry room has more fixed objects than you might think: washer base skirt, dryer vent chase, pipe penetrations, closet jambs, and door casings. Floating laminate must maintain continuity of movement space at all edges that can restrict expansion.
That’s why you plan expansion gaps around walls and around transitions, and why you use the correct threshold/transition hardware:
– If you trap the floor under a rigid threshold without allowing movement, the floor can “bow” upward.
– If you leave no gap at a wall, planks can push and separate at click-lock joints.
Seam strategy: tight, not stressed
Click-lock systems are designed to interlock with normal installation pressure. Forcing boards into place can:
– damage tongue-and-groove alignment,
– create micro-gaps that widen later,
– stress the locking profile during the first high-humidity cycle in 2026.
If your seams won’t close smoothly, pause and diagnose the cause (underlayment folds, debris in the groove, subfloor ridge, or an incorrect plank/underlayment combo). Fixing at the seam is far easier than replacing a run later.
What can go wrong (and how to prevent it)
You can avoid most laundry-room laminate failures by diagnosing the symptom back to the cause: moisture intrusion, flatness defects, or blocked expansion. When you interpret gapping, buckling, or lifted edges correctly, the fix is usually straightforward—leak repair, subfloor correction, or a corrected installation detail.
Swelling or buckling planks are often the physical result of moisture exposure plus insufficient moisture control or a failed barrier.
Seam gapping usually traces back to improper expansion space, an uneven substrate, or excessive force during click-lock installation.
Uneven transitions can block a floating floor from moving, transferring stress into seams near thresholds and doorways.
– Swollen or buckled planks: usually a leak or missing/incorrect moisture barrier, or standing water from the washer/dryer area.
– Gapping seams and separation: often caused by incorrect expansion gaps, an uneven subfloor, or planks being forced during installation.
– Clicking but failing later: if you didn’t remove old raised underlayment/adhesive residue, click joints can be stressed and open over time.
– Uneven transitions: skipping threshold/transition hardware can trap the floating floor and prevent it from expanding/contracting.
A quick DIY vs. pro comparison (so you choose wisely)
If you’re deciding whether to tackle this yourself in 2026, use this practical comparison.
| Factor | DIY replacement | Hire an installer |
|---|---|---|
| Moisture verification | Works if leaks are obvious and subfloor appears sound | Better when testing or slab conditions are complex |
| Flatness correction | Possible with leveling/patching experience | More reliable if the floor is significantly out of tolerance |
| Warranty compliance | Risky if underlayment/vapor barrier rules aren’t followed exactly | Higher chance of matching manufacturer requirements |
| Best for | Small-to-midsize rooms with accessible edges and sound subfloor | Unknown moisture history, concrete slabs, or widespread subfloor concerns |
If you keep the laundry room clean and dry but the subfloor has softness or the vapor barrier is wrong, laminate still fails. Conversely, if the subfloor is sound and you follow the exact floating-floor rules, many DIY replacements work well even in a busy household.
Verdict: what’s worth doing yourself (and a quick checklist)
If the subfloor is sound and you can follow the laminate manufacturer’s installation details (especially moisture/vapor barrier and expansion gaps), DIY replacement is very doable. Skip DIY or get help if you find widespread subfloor softness, repeated moisture issues, or you’re unsure what your laminate requires—laundry rooms are harder than living rooms because small leaks become big floor problems.
A floating laminate installation is only as strong as its moisture-control assembly and its ability to move; both must match the product’s installation guide.
If the subfloor is soft or visibly damaged near washer plumbing, the correct response is repair/replace the substrate—not just replacing the laminate.
Following the manufacturer’s expansion-gap and transition hardware requirements reduces the likelihood of buckling and seam separation.
Quick checklist before you start
| Step | Done? |
|---|---|
| Fix any washer/drain leaks first | ☐ |
| Confirm your laminate type and required underlayment/vapor barrier () | ☐ |
| Remove old flooring + scrape/smooth all residue | ☐ |
| Subfloor flatness checked and patched where needed | ☐ |
| Expansion gap planned around all fixed surfaces () | ☐ |
| Planks acclimated per manufacturer () | ☐ |
| Proper transitions/thresholds installed | ☐ |
In 2026, the best laundry-room laminate results come from treating installation as a moisture-management system: fix water sources, create a reliable vapor barrier assembly, and give the floating floor room to move.
Frequently Asked Questions
What’s the best way to remove old laminate flooring in a laundry room?
Start by removing the baseboards or quarter-round trim so you can access the laminate’s edges without breaking the tongues or joints. Use a pry bar and oscillating multi-tool to cut through stubborn sections around the door casing, then pull up planks in manageable rows. Because laundry rooms often have moisture exposure, inspect the subfloor for swelling or mold and clean out any debris before installing new laminate. If the laminate is glued down, you may need a floor scraper and additional prep to remove adhesive residue.
How do I replace laminate floors in a laundry room without damaging the subfloor?
Keep the removal controlled by lifting planks from the seams first and avoiding excessive force that can gouge the subfloor. After removal, check for flatness with a straightedge—laminate requires a smooth surface to prevent gaps and clicking failure. Repair low spots with a suitable patch compound and sand high spots, then ensure the subfloor is completely dry and free of loose particles. If you find water damage, replace affected subfloor sections before proceeding.
Which laminate flooring is best for laundry rooms with moisture risk?
Look for laminate specifically labeled water-resistant or waterproof, and prioritize a tight, well-sealed click-lock system designed for humid areas. Consider thicker wear layers for durability, especially if you’re moving laundry baskets, appliances, or rolling carts across the floor. You’ll also want moisture protection features such as sealed edges or an attached underlayment that helps reduce water vapor transfer. For best results, use manufacturer-recommended underlayment and follow gap and sealing instructions carefully.
How do I handle underlayment and moisture barriers when installing new laminate in a laundry room?
Choose underlayment that matches your subfloor type and the laminate’s warranty requirements—some products call for a foam underlayment, while others require a separate moisture barrier. In laundry rooms, install a moisture barrier over concrete subfloors where applicable, overlapping seams and sealing joints per product directions. Ensure the underlayment lies flat and isn’t bunched, since unevenness can cause laminate floor failure. Let everything acclimate to the room temperature and humidity before installation so the planks expand and contract correctly.
Why do laminate floors fail in laundry rooms, and how can I prevent it?
Most laminate problems come from water intrusion at seams and edges, poor subfloor prep, and skipping proper expansion gaps around wet areas and walls. If the floor isn’t level or smooth, the click system can stress and start to separate, leading to gaps where moisture gets in. Prevent this by using a water-resistant laminate, maintaining an appropriate expansion gap, and sealing relevant joints if your manufacturer recommends it. Also address leaks promptly and consider adding protective mats at the washer and utility sink to reduce spill and splash damage.
📅 Last Updated: October 22, 2026 | Topic: How to replace laminate floors in a laundry room? | Content verified for accuracy and freshness.
References
- Laminate flooring
- Floating floor
- Floor
- Underlayment
- Vapor barrier
- https://www.epa.gov/mold/moisture-control-home
- https://www.cdc.gov/mold/default.htm
- https://scholar.google.com/scholar?q=how+to+replace+laminate+flooring+step-by-step Google Scholar
- https://scholar.google.com/scholar?q=laminate+flooring+installation+moisture+vapor+barrier Google Scholar
- https://scholar.google.com/scholar?q=laundry+room+flooring+moisture+problems+laminate Google Scholar