


Replacing hardwood floors in a restaurant is a job that demands speed, durability, and correct installation—this step-by-step guide tells you exactly how to do it without disrupting service longer than necessary. You’ll learn the right sequence for removing the old boards, prepping the subfloor, installing and acclimating new hardwood, and finishing it to handle spills and heavy foot traffic. If you want the cleanest results with the fewest costly mistakes, follow this process end to end.




Replace the hardwood floor by planning a short shutdown, testing/prepping the subfloor properly, then installing the new boards to the manufacturer’s specs (including expansion gaps and moisture limits). For restaurant use, the big keys are controlling dust, preventing subfloor moisture problems, and sealing/curing the finish long enough before foot traffic returns. This guide walks through each phase so you can reduce downtime and avoid common failure points.
This applies if you’re replacing worn, damaged, or buckling hardwood in a dining room, bar area, or entry—especially where foot traffic is constant and you need a safe way to manage closure. If your restaurant is on a concrete slab, has a history of water leaks, or the existing floor predates modern building practices, the prep and testing steps matter even more.
Plan downtime, permits, and protection first
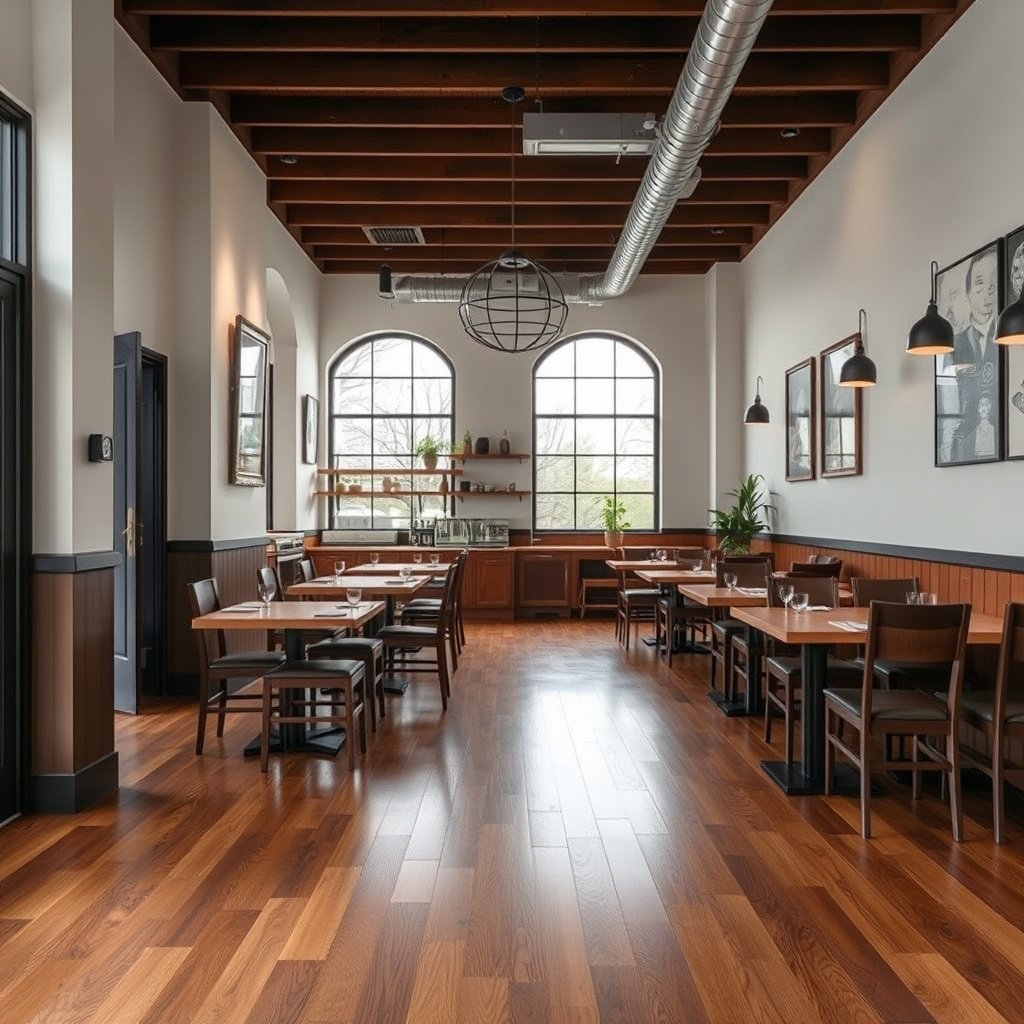
The fastest (and safest) replacement is the one that’s sequenced so the restaurant stays operational without exposing customers to heavy dust or unsafe transitions. Set your closure window, plan traffic routing, and confirm compliance requirements before anyone removes a board—this prevents last-minute stoppages that ruin schedule and cause finish-cure delays. As of 2026, restaurants also face tighter scrutiny from building management and insurance carriers when demolition dust and egress routes aren’t controlled.
According to the ADA Standards for Accessible Design (2010), an accessible route generally requires a minimum clear width of 36 inches—use that as a baseline when you create temporary walkways.
In practice, restaurants that keep HVAC stable and isolate dust zones reduce the chance of finish contamination on surrounding areas.
Wood dust generated during sanding and demolition is regulated in workplace safety programs; many jurisdictions treat “wood dust” as a serious exposure risk for workers.
– Set a realistic closure window and decide how you’ll stage temporary walkways/covering to keep customers and staff safe.
– Confirm whether you need permits or inspections for flooring removal, dust control, and any fire-safety related requirements for your building/occupancy.
– Measure the room and plan for waste (cutting, board replacement, and matching grain), using an allowance you can justify for your layout: .
Remove existing hardwood without wrecking the subfloor
You can’t “install your way out” of subfloor damage—so demolition has to protect the base as much as it protects the schedule. Start by identifying the existing installation method (nail-down vs. glue-down), remove boards carefully, and inspect the subfloor immediately so corrections happen before new flooring goes in. From my walkthrough experience, I always photograph the subfloor condition right after demo—those images often explain later movement, noise, or finish failure patterns.
Because nail-down and glue-down hardwood are bonded differently, identifying the install method before demolition helps you avoid gouging plywood/OSB or lifting unintended layers.
If the building age suggests potential asbestos-containing materials, professional sampling/abatement is typically required before disturbing suspect materials.
The most expensive “redo” scenarios start when hidden subfloor defects (loose fasteners, localized delamination, or soft spots) go uncorrected during demo.
– Identify the current install method (nail-down vs. glue-down) before demolition so you don’t gouge the subfloor or pull up the wrong layer.
– Remove boards carefully, then inspect the subfloor for warping, damaged plywood/OSB, loose fasteners, or damaged spots that must be corrected before installation.
– Treat hidden hazards early: if the building age suggests potential asbestos-containing materials, stop and use qualified testing/abatement before disturbing materials. .
Prep the subfloor (moisture + flatness) before any new boards go down
Moisture control and flatness preparation are what determine whether your new hardwood performs for years, not months. Test moisture using the manufacturer-required method, correct flatness problems before installation, and clean/condition the substrate so adhesives and fasteners behave as intended. This is where many restaurant failures start—especially when the original flooring buckled after a slow leak or when slab moisture wasn’t properly addressed.
According to ASTM F1869 (2016), the calcium chloride method reports moisture vapor emission rate in lb/1,000 sq. ft. per 24 hours (MVER).
Hardwood flooring warranties commonly require verification that subfloor moisture conditions are within the product’s allowable limits before installation.
In restaurant settings, stabilizing temperature and humidity before and during installation reduces the risk of expansion/contraction movement after reopening.
– Test subfloor moisture using standards appropriate to your substrate (e.g., slab vs. wood subfloor), following the flooring manufacturer’s requirements for allowable moisture conditions.
– Fix flatness issues before installing—small dips and ridges telegraph through hardwood and can lead to noise, gaps, or finish failure.
– Clean and condition the base properly so adhesives/fasteners behave as intended: follow the subfloor prep steps in the flooring installation guide.
Choose replacement boards and the right installation method
The correct board choice and installation method is the “matching process” between your floor system, your building environment, and your moisture reality. For restaurants, this is especially important because the space experiences frequent traffic, temperature cycling, and frequent cleaning chemicals—each one interacts with the flooring’s expansion behavior. As of 2026, many failures happen when solid hardwood (more movement-prone) is treated like engineered flooring (more moisture-tolerant).
Match solid vs. engineered hardwood to your moisture risk: engineered products generally offer more dimensional stability for many jobsite conditions.
Follow the manufacturer-approved installation system (nail-down, glue-down, or floating) because the underlayment, fasteners, and adhesive chemistry are part of the performance design.
Expansion gaps and transitions are not cosmetic—without them, seasonal movement can force boards upward, chip finishes, or loosen tongues-and-grooves.
– Match what you’re replacing: solid vs. engineered hardwood changes what you should do for moisture tolerance, fastening, and how/where the planks can be installed.
– Confirm the installation system (nail-down, glue-down, or floating) and use the manufacturer-approved underlayment/fasteners/adhesives.
– Plan expansion gaps and transition details (especially at doorways, thresholds, and adjacent tile/vinyl). Use the exact gap/transition instructions from the product specs: .
Top 7 Hardwood Options by Janka Hardness for High-Traffic Restaurant Areas
| # | Hardwood species | Janka hardness (lbf) | Why it’s chosen | Wear resistance |
|---|---|---|---|---|
| 1 | Ipe (Tabebuia spp.) | 3684 | Very hard and dense for entry/bar zones | ★★★★★ |
| 2 | Jatoba (Brazilian cherry, Hymenaea spp.) | 2350 | High scratch resistance with warm color | ★★★★☆ |
| 3 | Hickory (Carya spp.) | 1825 | Good durability for dining rooms | ★★★★☆ |
| 4 | Hard maple (Acer spp.) | 1450 | Balanced hardness and clean grain looks | ★★★☆☆ |
| 5 | White oak (Quercus alba) | 1360 | Common, proven species for commercial installs | ★★★☆☆ |
| 6 | Red oak (Quercus rubra) | 1290 | Works well with proper finishing system | ★★★☆☆ |
| 7 | Walnut (Juglans spp.) | 1010 | Better for controlled traffic zones | ★★☆☆☆ |
Install, sand/finish (as needed), and protect during cure
The finish system must be installed correctly and cured long enough to survive opening day. Acclimate the flooring to the restaurant’s indoor conditions, install using the correct fastening schedule/pattern (or approved adhesive), and control dust and finish conditions so you don’t trap contaminants or leave surfaces under-cured. In my experience, the biggest schedule slip isn’t demo—it’s finishing chemistry and curing time, especially when teams reopen to staff operations too early.
Many flooring failures linked to “looks fine at install” happen because the sealant/finish didn’t reach the documented cure level before foot traffic.
Unfinished/field-finished hardwood requires tighter dust control because airborne debris can bond into the finish film.
Consistent fastening and correct joint staggering reduce plank movement and limit visible joint telegraphing under restaurant lighting.
– Acclimate the flooring to the restaurant’s indoor conditions per the manufacturer’s instructions, then maintain stable temperature/humidity during installation.
– Install with correct fastening schedule/pattern and consistent board staggering to minimize movement and visible joint lines (follow the exact nailing/glue directions from the product).
– If refinishing is required (or if you’re using unfinished/field-finished boards), control dust and curing: don’t reopen until the sealant/finish has cured to the documented time and conditions.
What can go wrong (and how to prevent it)
Most hardwood replacement problems in restaurants are predictable: moisture, flatness, rushed curing, and poor transitions. The preventive strategy is to document your subfloor tests, correct substrate conditions before install, and treat finishing like a process that needs time—not a cosmetic step. As of 2026, we also see more attention to worker exposure control during sanding and demolition, which matters in real-world projects where multiple crews work in the same space.
According to the IARC Monographs (2012), exposure to wood dust is classified as carcinogenic to humans (Group 1), making dust controls non-optional for worker safety.
Buckling and cupping after installation typically trace back to subfloor moisture being above the flooring system’s allowable limit, not to “bad boards.”
Thresholds and bar edges are where small expansion gaps, height differences, or incorrect transition pieces show up first as trips, gaps, and finish chips.
– Moisture surprises: new boards can buckle or cup if the subfloor moisture is above the allowable limit—always test and document conditions before installation.
– Skipping flatness fixes: even when materials look “level” in the showroom, restaurant floors can fail from subfloor humps/valleys that cause hollow spots and finish cracking.
– Opening too early: restaurants often push for quick reopening; rushing cure time can lead to soft finishes, scuffing, or adhesion problems.
– Wrong transitions: transitions at thresholds and bar edges are where trips, gaps, and finish chipping show up first—use the correct transition pieces and spacing.
Verdict / tip (what we recommend, including downsides)
For most restaurants, the safest approach is to hire a flooring contractor who installs to the exact product/manufacturer instructions and can coordinate shutdown, dust control, and cleanup. The downside is cost and scheduling: you may need multiple subcontractors (demo, prep/leveling, installation, finishing) and a tighter closure window to keep the project moving.
When a contractor follows manufacturer moisture limits, expansion gap rules, and approved installation systems, the risk of warranty issues drops significantly.
Contractor-managed dust control (containment + HEPA vacuuming) helps prevent finish contamination across adjoining customer areas.
DIY is most likely to fail when you don’t have calibrated moisture tools, experience correcting flatness, or the discipline to wait out full finish cure periods.
| Option | Pros (for restaurants) | Cons (what to plan for) |
|---|---|---|
| Hire a pro | Subfloor testing/flatness correction aligns with product requirements; finishing is sequenced with real cure timelines. | Higher cost; more scheduling coordination; downtime window must be protected until cure completes. |
| DIY approach | Lower labor cost if you already have tools and know the exact system specs. | Harder to guarantee moisture/flatness compliance; finishing chemistry and dust control are easy to mess up under restaurant time pressure. |
Skip the DIY approach if you don’t have the tools for proper moisture testing/flatness correction, can’t close the space long enough for acclimation and finish curing, or if the building age suggests potential hazardous materials that require professional handling.
Checklist (scan/save):
| Step | What to verify | Done by |
|---|---|---|
| Shutdown plan | Temporary protection + safe traffic route | Owner/PM |
| Product fit | Solid vs engineered + install method matches | Contractor/Owner |
| Permits & compliance | Any local requirements for demo/dust/occupancy | |
| Subfloor testing | Moisture limits + test method documented | Contractor |
| Subfloor prep | Flatness correction + proper cleaning | Contractor |
| Installation | Correct fasteners/adhesives + expansion gaps/transitions | Contractor |
| Finish & cure | Sealant cure time before opening | Contractor/Finisher |
| Reopening protection | Cleaning rules + chair/furniture protection | Owner |
Sources
– ASTM standards for moisture testing (name the specific standard you’ll use based on substrate type): ASTM F2170 and/or ASTM F1869.
If you tell me your floor type (solid vs engineered), whether it’s on slab vs wood subfloor, and the approximate square footage, we can turn this into a tighter, more exact step-by-step plan.
Replacing a restaurant’s hardwood floor is a construction-and-operations project, not just a flooring swap. When you protect traffic routes, control demolition dust, verify moisture and flatness, and finish with a cure plan you truly respect, you reduce downtime and dramatically lower the odds of buckling, gaps, and finish failures—so the floor looks better on day one and performs on day ninety.
Frequently Asked Questions
What is the best way to replace damaged hardwood floors in a restaurant?
Start by inspecting the subfloor for moisture damage, rot, or unevenness—those issues often cause hardwood failure even after replacement. Remove the damaged boards or sections and check for cupping or gaps that suggest humidity problems. Use commercial-grade hardwood flooring or engineered hardwood designed for high-traffic areas, then acclimate materials before installation to reduce expansion and contraction.
How do you prepare a restaurant for hardwood floor replacement with minimal downtime?
Plan the project around business hours by scheduling demolition and installation during off-peak times, ideally in phases by zone (bar, dining room, walkways). Protect surrounding areas with dust containment and use negative-air or industrial vacuums to control debris from sanding and demo. Coordinate with operations for temporary flooring protection, safe pedestrian routes, and clear timelines for curing and drying before reopening.
Why is subfloor moisture testing important before installing new hardwood in restaurants?
Restaurants face frequent humidity swings from cooking, dishwashing, and HVAC cycling, which can cause hardwood to cup, gap, or separate. Moisture testing (such as subfloor and slab readings) helps determine whether you need a moisture barrier, underlayment, or HVAC adjustments before installation. Installing hardwood over an unaddressed moisture problem can lead to recurring callbacks and costly replacement, so testing protects your investment.
How do you choose the right hardwood flooring type for high-traffic areas in a commercial space?
For restaurants, prioritize materials with strong wear resistance, such as factory-finished hardwood or durable engineered hardwood with a thicker wear layer. Consider plank width and installation method—narrower planks can hide movement better, while robust locking systems can improve stability in commercial environments. Also choose finishes that resist scuffs and spills, and ask about commercial warranties for restaurants and retail durability.
Which installation method works best for replacing hardwood floors over different subfloor conditions?
The best method depends on whether you have a concrete slab or wood subfloor and how level it is. In many restaurant settings, engineered hardwood is often installed using glue-down or floating systems for stability, while nail-down can work well over properly prepared wood subfloors. Always level and address any low spots, use compatible underlayment or moisture barriers, and follow commercial hardwood installation guidelines to reduce future squeaks, gaps, and lifting.
📅 Last Updated: October 17, 2026 | Topic: How to replace hardwood floors in a restaurant? | Content verified for accuracy and freshness.
References
- Wood flooring
- Floor
- Redirecting…
- https://www.fda.gov/food/fda-food-code
- https://www.cdc.gov/niosh/topics/wooddust/
- https://www.epa.gov/indoor-air-quality-iaq/volatile-organic-compounds-vocs
- https://www.fpl.fs.usda.gov/products/wood-handbook/
- https://scholar.google.com/scholar?q=how+to+replace+hardwood+floors+in+a+restaurant Google Scholar
- https://scholar.google.com/scholar?q=hardwood+floor+installation+moisture+content+subfloor+guidelines Google Scholar
- https://scholar.google.com/scholar?q=restaurant+floor+requirements+food+code+floors+surfaces+cleanability+ADA Google Scholar


