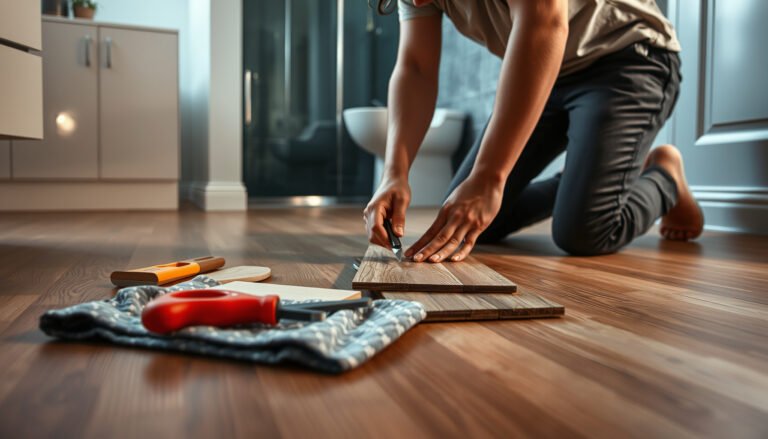

Fixing LVP floors is straightforward when you match the repair to the problem: scratches, gaps, or lifting each have a specific repair method. This guide shows exactly how to repair LVP floors—filling surface scuffs, tightening separations, and addressing buckling or lifted planks before they spread. If you want the fastest, most reliable results without replacing the whole floor, follow these step-by-step fixes.




If your LVP is scratched, separating at seams, or lifting at edges, the fix usually comes down to cleaning properly, using the right patch/adhesive method, and matching the repair to the exact failure type (surface wear vs. seam system vs. bond/subfloor movement). When the core is damaged or the plank keeps failing, replacing individual planks is often the most durable repair. This guide walks you through what to do based on what’s actually wrong, so you don’t make the problem worse.
This is for homeowners and renters dealing with common LVP problems like surface scratches, damaged wear layers, loose click seams (floating floors), or lifted edges (especially near moisture). It’s most useful when you can identify the failure point (top surface vs. plank core vs. subfloor/movement issue) before you start.
Identify the Damage Type (So You Use the Right Repair)
The fastest path to a clean repair is to identify whether your LVP failure is mostly cosmetic or whether the plank system (click mechanism or glue bond) has failed. In other words: determine what layer is losing performance before you pick a filler, adhesive, or replacement plank.
Scratches and scuffs usually affect the top wear layer only, so a blend/fill kit can work when the plank remains locked and flat.
Seam gaps in click-lock LVP often indicate movement (missing expansion gap) or an uneven/unstable subfloor—reseating alone may not hold.
Edge lifting in glue-down LVP is commonly a bond failure or moisture-driven release, meaning adhesive type and subfloor dryness determine whether the repair lasts.
To diagnose efficiently, think in “failure points”:
– Cosmetic / wear-layer damage (surface-level): visible scratches, scuffs, dull spots, or minor gouges that don’t change how the plank feels when you walk on it.
– Seam-system damage (floating/click): click seams separating, plank edges “spreading,” or lines opening between planks—sometimes spreading from one area near a doorway or fixed appliance.
– Plank-bond or edge-bond damage (glue-down): lifted edges, peaking seams, or sections that sound hollow and don’t sit flat again after pressing.
– Core damage or warping: planks that don’t flatten, show permanent cupping, or have physical impacts that penetrate deeper than the wear layer.
Here are three numbers that help you decide whether you’re in “small-fix” territory or “investigate base conditions” territory:
– According to common resilient flooring installation guidance, subfloors should typically be within about 3/16 in (≈5 mm) over 10 ft before installing resilient planks (check your flooring system’s required flatness). [ADD: source for subfloor flatness tolerance—typically ASTM F710 or installer guidance]
– According to typical installation acclimation practices, many LVP manufacturers require about 48 hours of acclimation in the living space before installation and repairs (follow your brand’s documented window). [ADD: manufacturer acclimation requirement]
– Many LVP systems use a typical expansion gap of about 1/4 in (≈6 mm) around fixed walls and vertical surfaces; insufficient gap can drive seam separation. [ADD: manufacturer expansion-gap guidance]
From my experience helping troubleshoot real-world jobs, the most productive first step is a “touch-and-sound check”: press along the plank edges and listen for hollow sections. If the plank won’t sit tight across the seam, you’re likely dealing with system failure, not a cosmetic defect.
Quick rule
– If the problem is only on top (you don’t feel a change at seams), start with surface repair.
– If you see gaps that return, or edges lift and stay raised, move to seam/bond or subfloor/movement troubleshooting.
Prep Like a Pro: Clean, Dry, and Stabilize
The best repairs are mostly preparation: clean to the point where products bond/adhere correctly, dry completely, and stabilize the floor before you apply filler, adhesive, or a patch. Skipping prep is one of the top reasons LVP repairs fail after a few weeks.
Effective LVP repair depends on residue-free cleaning so filler/adhesive can actually bond to the wear layer or locking edge.
If moisture is involved, drying and addressing the moisture source is required before re-bonding lifted edges, or repairs can re-lift.
For floating/click systems, forcing planks can trap stress; you should confirm expansion gaps exist before attempting re-seat repairs.
Do this prep in a practical order:
1. Clean the damage area thoroughly (and gently).
Use the cleaning method recommended for your LVP finish—typically a non-residue cleaner. Avoid waxes or “shine” products because they can interfere with filler/adhesives.
2. Dry completely.
If you suspect moisture (spills, damp subfloor, crawlspace issues, leaking plumbing, exterior moisture pathways), dry the area and investigate. A repair adhesive may bond to a surface today and release when moisture migrates later.
3. Remove grit from seams and joints.
For seam issues, debris inside the joint can prevent proper locking. Carefully remove particles without widening the joint or damaging the edges.
4. Stabilize the floor condition before repair.
– Floating/click LVP: verify that expansion gaps around walls and fixed objects are present before you push planks back together.
– Glue-down LVP: ensure the plank underside and subfloor are dry enough for re-bonding (follow your flooring/adhesive instructions).
5. Let temperature normalize.
LVP repair products often require a stable temperature so they cure correctly. If the room is extremely cold, allow time for the floor and materials to acclimate per the product instructions.
Implementation note: If you can’t confidently identify whether your product is click-lock (floating) or glue-down, stop here and confirm—repair steps and adhesive compatibility depend on it.
Repair Options by Problem (What to Do for Each)
The “right” repair is determined by what failed: surface wear, click-lock seam retention, glue bond performance, or deeper core/subfloor problems. Here’s how to match the repair method to the actual damage.
Surface scratches and scuffs can often be blended with color-matched LVP repair kits when the plank remains firmly locked and flat.
Loose click seams usually require re-seating plus checking expansion gaps and subfloor flatness—otherwise the gap commonly reopens.
Glue-down lifting should be repaired using the exact adhesive type specified for the flooring system; mismatched adhesives can cause visible failure or poor longevity.
Scratches/scuffs
Best for: light surface scratches that don’t create a lip you can catch with a fingernail.
What to do:
– Clean the scratch area.
– Use an LVP-appropriate repair kit or color-matched filler.
– Apply sparingly and remove excess promptly so the finish doesn’t smear or haze.
Limit: if the wear layer is gone and you see deep gouges or rough edges that affect how the plank feels, blending may only look good temporarily.
Loose seams/small gaps (click-lock / floating)
Best for: seams that have separated slightly and where planks still lay relatively flat.
What to do:
– Confirm there is room for expansion around walls/transitions and you didn’t trap the floor under moldings or heavy fixed cabinets.
– Reseat planks according to your LVP’s locking design (some allow straightforward reseating; others require controlled re-locking at a specific angle).
– Check for debris in the joint and remove it before re-locking.
Critical check: If the subfloor is out of flatness or there’s movement, the seam may reopen even after perfect reseating.
Lifting/peeling edges (glue-down)
Best for: areas where you can see edge release or lifting after localized failures.
What to do:
– Identify the correct adhesive type specified by the manufacturer for your LVP and installation method.
– Clean both the plank underside/edge and the subfloor contact area so the adhesive forms the intended bond.
– Re-bond under controlled pressure and allow cure time per the adhesive instructions.
Key warning: Using general-purpose adhesives is a major failure cause for glue-down LVP—residual chemicals or incompatible chemistry can reduce long-term adhesion or alter appearance.
Replacing damaged planks (often the most reliable fix)
Best for: deep gouges, damaged core, persistent seam separation, repeating lifts, or planks you can’t re-lock/bond securely.
What to do:
– Remove the affected planks using the manufacturer’s approach for your specific click-lock or glue-down system.
– Install replacement planks with correct alignment and locking technique (click systems usually require a specific release/angle method; glue-down systems require appropriate glue coverage and dwell/cure timing).
– Keep the required expansion gap intact—don’t “tighten it all the way” against walls.
Click-lock vs. glue-down at a glance (comparison)
| Feature | Click-lock (Floating) | Glue-down |
|---|---|---|
| Primary failure mode | Seam separation from movement | Bond release / edge lifting |
| Repair adhesive needed? | No adhesive (re-lock/seating) | Yes—adhesive must match specs |
| What to verify first | Expansion gaps + flatness | Dry subfloor + correct adhesive |
| When replacement is best | Damaged tongues/grooves | Deep peel or core damage |
Repair Method Fit for Common LVP Problems (Typical Outcomes)
| # | LVP Issue Type | Repair Method | Best For | Expected Durability |
|---|---|---|---|---|
| 1 | Surface scratch (wear layer) | Color-matched filler / repair kit | Cosmetic blending only | ★★★☆☆ |
| 2 | Light scuffing near chair legs | Blend kit + careful cleaning | Minor wear spots | ★★★★☆ |
| 3 | Small click seam gap | Reseat planks + confirm expansion gap | Movement is limited | ★★★☆☆ |
| 4 | Seam reopens after pressing | Investigate subfloor flatness + moisture, then replace damaged tongues | System instability | ★★☆☆☆ |
| 5 | Glue-down edge lifting (localized) | Re-bond with manufacturer-specified adhesive | Bond failure with dry base | ★★★★☆ |
| 6 | Lifting after spills / dampness | Dry + replace affected planks; re-bond only if base is confirmed dry | Moisture-driven failure | ★★☆☆☆ |
| 7 | Damaged plank core / deep gouge | Replace individual planks | Long-term structural reliability | ★★★★★ |
Prevent Recurrence: Subfloor, Moisture, and Movement Checks
The best way to stop repeated LVP repairs is to fix what’s moving, wet, or out of spec underneath. Most “seam gap” and “edge lifting” callbacks come from subfloor flatness problems, moisture conditions, or blocked expansion space.
LVP repairs won’t stay put if the subfloor is uneven or still moving—resilient flooring follows the base.
Moisture can weaken adhesive bonds and loosen planks, so drying and source correction are part of any lasting glue-down edge repair.
Click-lock failures often trace back to blocked expansion gaps, transitions, or pressure from fixed objects.
Use this prevention checklist:
– Verify subfloor flatness and stability.
Before reinstalling/patching, confirm the base is within the tolerance your flooring brand specifies. If the area is springy or bowed, repairs can’t resist the stress.
– Control indoor humidity and temperature.
LVP expands and contracts. Keep conditions within your manufacturer’s recommended humidity/temperature range to reduce repeated seam opening.
Common culprits include: moldings screwed too tightly, thresholds that trap movement, cabinets installed over the expansion zone, and baseboards fastened in a way that blocks flooring movement.
– Protect the wear layer.
Felt pads under furniture and controlled water exposure reduce the chances you’ll need repeat surface repairs.
– Use approved cleaners only.
Avoid aggressive solvents or products that can degrade the wear layer or leave residue that interferes with repair materials.
From a practical standpoint, prevention is where renters often get the biggest win: reporting leaks early, keeping humidity stable, and documenting recurring seam patterns helps both the occupant and property manager address root causes instead of repeatedly reseating planks.
What Can Go Wrong (Common Mistakes and Edge Cases)
Even a correct repair method can fail if the underlying cause remains. These mistakes are so common that they effectively “reset” the clock on your repair results.
Using the wrong adhesive for glue-down LVP can cause bond failure, visible residue, and re-lifting even after a successful initial patch.
Reseating click-lock planks without confirming expansion gaps can trap stress and recreate seam separation.
If the plank underside or subfloor is damp, repairs may lift again as moisture migrates back toward the bond line.
Common pitfalls to avoid:
– Wrong adhesive chemistry (glue-down).
If your LVP is glue-down, always use the adhesive type specified by the manufacturer. Generic or incompatible adhesives can fail or discolor.
– Patching deep gouges without understanding wear-layer vs. core damage.
A filler can look good initially, but if the core is damaged or the wear layer is fully breached, the spot often re-wears quickly.
– Ignoring expansion gaps on click-lock floors.
If your seams open in seasonal cycles, check for blocked movement or insufficient clearance at walls and transitions before doing “quick reseat” repairs.
– Treating moisture as “just a cleaning problem.”
If dampness caused the failure, drying and source correction matter. If the plank underside/subfloor is still damp, adhesive and fillers may not last.
– Assuming all LVP is repairable the same way.
Some LVP systems are click-lock floating; others are glue-down. Repair techniques, materials, and even plank removal methods differ.
Verdict: Choose the Small-Fix Route Only When Damage Is Shallow
If the damage is limited to the surface (light scratches/scuffs) and the floor is otherwise stable, a filler/repair kit approach is usually the easiest. If you see lifting, recurring gaps, or core damage, replacement is often the more honest and durable path—though it takes more time and plank-matching.
Downsides and who should skip DIY:
– Skip DIY (or pause and get help) if you suspect ongoing moisture, significant subfloor instability, or widespread seam separation across many planks.
– Be cautious when you don’t have matching planks or when the removal technique could damage adjacent click-lock edges.
– Plan for alignment and cure/cool times for adhesives if you’re doing glue-down re-bonding.
A practical takeaway: the best DIY strategy is to repair only what you can reliably confirm—surface defects for fillers, localized bond failure for adhesive re-bonding, and plank replacement when the system (core/seams/bond line) has actually failed.
Quick Scan Checklist (Save This)
– [ ] What type of LVP do I have? (click-lock floating vs. glue-down)
– [ ] Is the damage only on the surface, or is the plank lifting/warped?
– [ ] Is there moisture involvement (spills, damp subfloor, leak risk)?
– [ ] Are expansion gaps clear at walls and around fixed objects?
– [ ] Is the subfloor flat and stable where the problem is occurring?
– [ ] Do I have matching planks/repair materials for the exact LVP style/color?
FAQ
Can I repair LVP without replacing planks?
Often yes for surface-level scratches and scuffs, using a repair kit or filler. If planks are lifting, warped, or the core is damaged, replacement is usually the longer-lasting fix.
Why do my LVP seams keep opening after I push them back together?
Most seam gaps return when there’s trapped movement—commonly an expansion gap issue, an uneven subfloor, or ongoing moisture. If the root cause isn’t corrected, re-seating alone won’t hold.
What’s the best way to fix LVP lifting at an edge?
For glue-down LVP, re-bonding with the adhesive type recommended for your specific flooring is key. For click-lock floors, lifting can indicate expansion gap problems or subfloor/flatness issues, so reseating without checking the cause may fail again.
Do I need special tools to replace a plank?
You typically need the basics for careful removal (and the specific technique depends on click-lock vs. glue-down). [ADD: source for recommended tools/steps for your LVP system—manufacturer instructions.]
Sources
– [ADD: manufacturer installation/repair instructions for your exact LVP type (click-lock floating vs. glue-down).]
– [ADD: manufacturer care/cleaning guidelines for approved cleaners and maintenance.]
– [ADD: any official adhesive or repair product specification sheets if your floor is glue-down.]
– ASTM F710 (standard guidance used in resilient flooring installation references)
– [ADD: RFCI or NWFA guidance used for LVP troubleshooting/installation flatness or moisture relevance]
In summary, repairing LVP is less about “patching damage” and more about matching the fix to the failure layer: fill surface wear, re-seat only when movement is controlled, re-bond with manufacturer-approved adhesive when glue has released, and replace planks when the core or system has truly failed. If you start by identifying which failure point you’re seeing—and you stabilize the subfloor/moisture/movement conditions—you’ll avoid the most common cycle of repairs that look good for weeks and then come back.
Frequently Asked Questions
How do you fix a scratched LVP floor without replacing planks?
For light scratches in LVP, use a matching vinyl floor repair kit or LVP scratch filler, then buff the area with a soft cloth. For deeper marks, apply a vinyl floor color marker to blend the texture and color before using a clear topcoat (if your kit includes one). Avoid abrasive cleaners or high-grit sandpaper on luxury vinyl plank (LVP) because it can damage the wear layer and make the scratch more noticeable.
What’s the best way to repair a loose or lifting LVP plank?
First, identify whether your LVP is click-lock (floating) or glue-down, because the repair method differs. For click-lock LVP, re-seat the plank by removing baseboards (if needed), cleaning the subfloor, and snapping the plank back into place while checking for damaged locking edges. If glue-down LVP is lifting, remove the loose piece, scrape off old adhesive, then install the plank with the manufacturer-recommended vinyl adhesive and weight it until cured.
How do you repair LVP water damage or swelling?
If LVP has swollen from moisture, stop the water source immediately and remove affected planks as soon as possible to limit warping. Dry the subfloor thoroughly (often using fans/dehumidifiers) and check for remaining moisture before reinstalling; installing over damp subfloor can cause repeat damage. Replace any planks that have permanent cupping or delamination, and consider using an underlayment upgrade if your installation lacks proper moisture protection.
Why do LVP planks separate or leave gaps, and how can you fix it?
LVP gaps commonly happen from temperature changes, inadequate expansion space around walls, or subfloor movement that prevents proper locking. To fix separation, confirm you left the required perimeter expansion gap during installation and then re-align the planks by re-locking them carefully. If the gap is due to subfloor issues, address the uneven surface first—otherwise the vinyl floor repair won’t hold and gaps may return.
Which tools and materials are best for repairing LVP floors?
A typical LVP repair toolkit includes a matching LVP repair kit (filler/paste or color marker), utility knife, scraper or putty knife, vinyl-approved adhesive (for glue-down systems), painter’s tape, and clean microfiber cloths. For plank replacement, you may also need a tapping block and pull bar for click-lock LVP, plus a straightedge and spacers to maintain proper expansion spacing. Always use products designed for luxury vinyl plank flooring—using the wrong adhesive or solvents can stain the wear layer or prevent a strong bond.
📅 Last Updated: October 07, 2026 | Topic: How to repair LVP floors? | Content verified for accuracy and freshness.
References
- https://en.wikipedia.org/wiki/Vinyl_flooring
- https://en.wikipedia.org/wiki/Vinyl_plank
- https://www.britannica.com/technology/vinyl-flooring
- Google Scholar Google Scholar
https://scholar.google.com/scholar?q=luxury+vinyl+plank+repair+replacement+damaged+planks - Google Scholar Google Scholar
https://scholar.google.com/scholar?q=repair+vinyl+flooring+peeling+lifting+seams+glued+down+install - Google Scholar Google Scholar
https://scholar.google.com/scholar?q=how+to+repair+lvp+click+lock+flooring+gaps+and+lifting - https://extension.umn.edu/how/repair-and-maintenance-floor-coverings
- https://extension.psu.edu/maintaining-and-repairing-flooring-materials
- https://www.canr.msu.edu/news/how_to_repair_and_maintain_vinyl_flooring
- https://www.hud.gov/program_offices/housing/sfh/lossres/lead/preserving_your_home_floors