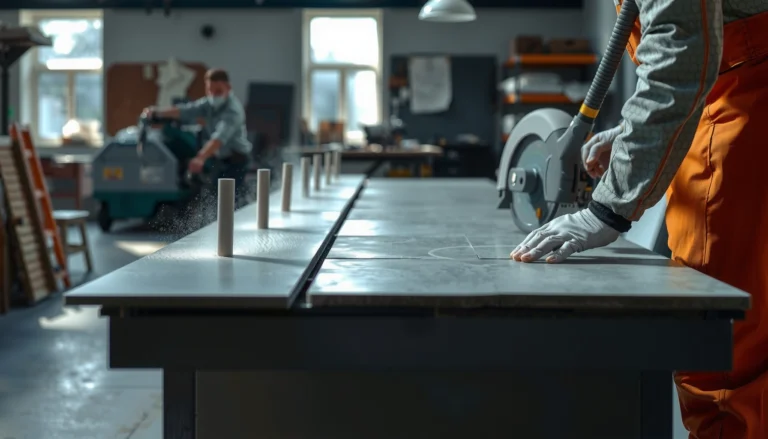

This step-by-step guide shows you exactly how to install kitchen tile floors, from prepping the subfloor to setting tiles and finishing with grout. If you follow the workflow carefully, you’ll get a clean, professional-looking result that holds up to kitchen traffic and spills. You’ll know what to do at every stage—so there’s no guesswork when it’s time to lay the first tile.



Installing kitchen tile floors successfully comes down to one thing: build a flat, well-prepped substrate and follow the correct thinset/tile/grout specifications—everything else supports that foundation. Plan your layout to avoid tiny cuts, set tile with consistent coverage and spacing, and finish with correctly cured grout (and sealing only when required) so your grout lines don’t crack or discolor.
If you’re replacing an existing kitchen floor or starting fresh in a remodel (especially over concrete or a properly prepared subfloor), this step-by-step guide gives you a reliable order of operations. It’s also a strong resource if you’ve never tiled before and want a practical workflow before you buy materials—so you don’t get stuck mid-project.
Plan Your Kitchen Tile Layout (Avoid Tiny Cuts)

Good layouts prevent the two most visible problems in kitchen tile floors: awkward slivers and uneven tile “weight” from one side of the room to the other. Start by centering the layout and doing a dry-run so half-cuts at walls are deliberate—not accidental.
A centered layout starts by marking a centerline and working outward so cuts mirror each side of the kitchen.
Dry-laying at least one full row (often two) reveals where half-cuts and full tiles land before thinset goes down.
Planning around toe-kicks, vents, and cabinet transitions early avoids removing or reworking backer board later.
Dry layout is where experienced installers save the most time later. Measure the room length and width, then mark a centerline along the longest direction (snap a chalk line if your floor is stable). Use tile spacers and account for grout joint width so your pattern matches your final grout lines—not the tile itself.
Here’s what I recommend when you’re planning a kitchen:
– Choose a “main direction” for the tile (usually aligned with the room’s longest wall) and run your layout consistently.
– Dry-lay a row using your actual tile and spacers. If you see tiny cuts (anything you’d consider visually thin), shift the starting point slightly—often by a few inches—so the wall cuts become reasonable.
– Plan for half-cuts near walls. It’s normal to end with cut tiles at perimeter edges; the goal is to make those cuts symmetrical and not hairline.
– Account for fixed obstructions. Under-cabinet areas can be tricky because cabinet toe-kick spaces may not allow proper thinset/backer coverage. Similarly, vent registers and door thresholds can force pattern adjustments.
According to the Tile Council of North America (TCNA) installation guidance, layout planning is part of controlling final lippage and joint appearance because the tile must be set to a consistent plane from start to finish (TCNA Handbook for Ceramic Tile Installation).
Prep the Subfloor for a Flat, Stable Base
You can buy expensive tile and still end up with cracked grout if your floor isn’t flat and stable. Prep work is not optional—it’s what keeps tiles from rocking, grout from failing prematurely, and lippage from showing under kitchen lighting.
Tile requires a substrate that is clean and stable; thinset can bond but it can’t “fill” major dips the way a countertop patch would.
Check flatness with a straightedge before you spread mortar—small high/low spots become lippage or hollow sounds after setting.
Use the correct underlayment or backer board system and follow fastening and seam requirements to prevent movement.
Start by removing old flooring completely (including any loose adhesive and mortar residue). Then inspect the subfloor: scrape high ridges, sand rough edges, and vacuum thoroughly. Next, check flatness using a straightedge (and/or a level). If you find low spots, you typically fix them with an appropriate patch/feather finish designed for tile substrates—not quick drywall compound.
If you’re installing over concrete, confirm the concrete is cured and clean. If you’re installing over wood subfloors, stiffness and deflection matter: TCNA’s general guidance for ceramic/porcelain tile systems is typically based around L/360 or better for structural deflection, while natural stone generally requires L/720 (TCNA Handbook for Ceramic Tile Installation). When deflection is too high, tiles flex and grout fails.
Once the surface is flat, install the correct underlayment/backer board system for your subfloor type. This is where many “DIY-but-not-professional” failures happen: missing screws, wrong spacing, and untreated seams can create tiny ridges that you won’t see until after the tile is set.
Quick flatness standard to aim for
In tile work, substrate flatness is commonly evaluated against industry tolerances such as 1/8 in over 6 ft (verify against your tile system and backer manufacturer instructions) (ANSI / TCNA substrate flatness guidance referenced in TCNA Handbook). If your floor is outside tolerance, address it before tiling.
Choose Thinset, Tile Spacers, and Tools Correctly
The best thinset is the one that matches your tile material and your substrate—and it’s applied with the correct trowel notch for the coverage you need. When the mortar selection or trowel size is wrong, you don’t just risk weak bonding—you also risk uneven thickness, hollow spots, and cracked grout.
Thinset selection must match the tile type (porcelain/ceramic/stone) and the substrate—ANSI/TCNA systems are built around these compatibility rules.
Using the wrong trowel notch can produce poor contact coverage, which increases lippage and hollow-sounding tiles.
Consistent spacers and accurate grout joint cleaning protect the final grout line appearance in a kitchen environment.
On the tools side, you’ll want:
– A margin trowel (for scooping thinset cleanly)
– The correct notched trowel for your tile size (square-notch or appropriate profile per manufacturer direction)
– A leveling/straightedge tool (for plane checks)
– Knee pads, a grout float, mixing paddle, and a drill with proper RPM control
On materials:
– Porcelain vs. ceramic: Porcelain often tolerates tighter installation practices, while ceramic and especially stone may require stricter system compliance.
– Modified vs. unmodified thinset: Many interior tile floors use modified thinset for improved bond strength, but your exact tile + substrate + exposure conditions (moisture, radiant heat, etc.) determine what’s appropriate.
– Spacers: Use the same spacer type throughout to avoid inconsistent grout line widths.
– Grout: Kitchens see spills, frequent mopping, and temperature swings—choose grout formulated for your kitchen conditions and any stain risk.
To keep this practical, use the specification cross-recommendations from your tile manufacturer + thinset manufacturer + backer/underlayment system. Standards like ANSI A108 address mortar and installation requirements for ceramic tile systems (ANSI A108 series, Ceramic Tile Installation requirements).
Reference: Typical 50-lb thinset coverage by trowel notch
(Real coverage varies by substrate flatness, thinset brand, and flatness corrections. Use your thinset manufacturer’s coverage chart as the final authority.)
Thinset Coverage Estimates for Common Kitchen Floor Trowel Notches (50-lb bag)
| # | Trowel notch | Typical coverage (sq ft) | Common use | Tile-set quality signal |
|---|---|---|---|---|
| 1 | 1/4 in x 1/4 in square notch | 60 | Smaller tiles on flatter substrates | ★★★☆☆ |
| 2 | 3/8 in x 3/8 in square notch | 40 | Mid-size floor tile (common kitchen format) | ★★★★★ |
| 3 | 1/2 in x 1/2 in square notch | 25 | Large-format tiles needing thicker beds | ★★★★★ |
| 4 | 1/4 in x 1/4 in with 1/2 in perimeter ridges | 45 | Borders where you need extra build | ★★☆☆☆ |
| 5 | 1/8 in x 1/8 in square notch | 85 | Very small format tiles (only if spec allows) | ★☆☆☆☆ |
| 6 | 1/4 in x 3/8 in trowel (mixed notch) | 50 | Some medium formats requiring build-up | ★★★☆☆ |
| 7 | Back-butter (applied in addition to notch) | Varies | Large tiles / strict coverage targets | ★★★★★ |
Set Tile Floors with Consistent Spacing and Contact
Setting tile isn’t hard, but it’s unforgiving. Once thinset cures, you can’t “adjust later,” so mix right, spread small sections, and check lippage and coverage frequently as you go.
Mix thinset to the spec and respect the working time/open time so the mortar bonds before it skins over.
Spread thinset in sections you can tile within the manufacturer’s working window—stale mortar is a bonding risk.
Clean grout joints during the tile-set phase; removing excess thinset early is the simplest way to prevent grout voids.
Start by staging tools and dry-fit materials. Mix thinset with the recommended water amount and a proper mixing paddle. Mix consistently (no half-batches “to save time” unless you’re sure you can place them in time).
Then:
1. Spread thinset with the correct trowel at a consistent angle.
2. Comb ridges in one direction (this helps contact coverage).
3. Set tiles firmly—don’t just “place and hope.” You want full contact, not dry pockets.
4. Check plane and lippage frequently. Use a level/straightedge and visually scan along grout lines under the same lighting the kitchen will have.
5. Remove excess thinset from joints. Grout needs clean space to work; filled joints can cause weak grout and color inconsistencies.
For kitchens, pay extra attention near high-traffic zones and appliances. Heavy foot traffic and occasional dropped items are real life—your installation has to stay tight and flat.
I’ll also add one practical note: from my observation on real projects, most “mystery” grout cracking traces back to either uneven tile planes (lippage/humps) or voids from incomplete contact. If the tile sounds hollow when tapped, treat that as a warning sign and correct before moving on.
Cut Tiles, Work Around Obstacles, and Handle Edges
Accurate cutting determines how “finished” the kitchen looks, especially at doorways, vents, and cabinet edges. If you plan edge transitions properly, you avoid fragile tile corners that chip under real foot traffic.
Use a wet saw for most tile cuts when you need clean edges and consistent dimensions in kitchen corners.
Plan cuts around toe-kicks, vent registers, and door thresholds so the visual rhythm of the floor stays intentional.
Edge transitions (trim or proper transition pieces) protect tile edges from chipping in high-wear areas.
Start by dry-measuring where cuts will fall—especially at cabinets and toe-kick areas. Common approaches include:
– Under-cabinet planning: Determine whether you can install the full backer/thinset system up to the cabinet line. If not, leave the area for a mechanical transition method that still meets substrate and bonding requirements.
– Vent and plumbing penetrations: Cut precisely and keep grout lines consistent around openings. For many installers, a template and careful test fit beat “eyeballing.”
– Doorways: Use a transition strip if your tile height will vary from adjacent flooring levels.
When finishing exposed edges, avoid leaving brittle cut ends to take impact. Use an edge transition trim, reducer, or compatible profile designed for tile assemblies.
Grout, Seal (If Needed), and Finish for a Kitchen-Ready Floor
Grouting is where appearance meets durability. If you grout too soon, don’t clean joints well, or skip the right curing and cleaning steps, your kitchen grout lines can stain, crack, or look blotchy.
Let the thinset cure fully before grouting so the tile bed doesn’t shift and grout doesn’t crack.
Grout in batches while maintaining consistent mixing and workmanship; color variations often come from rushed re-mixing.
Seal grout only when your grout type requires it for kitchens; sealing too early or unnecessarily can create maintenance problems.
Follow these execution priorities:
– Cure time: Verify cure time for your specific thinset before grouting (manufacturer instructions control this).
– Joint cleaning: Before you spread grout, scrape/clean any ridges and remove thinset from joint lines.
– Mix consistency: Mix grout to spec and only mix what you can apply within its workable time.
– Float correctly: Push grout into joints and strike off to remove excess from tile faces.
– Initial cleanup: Clean properly while grout is still workable; dried haze usually needs the correct cleaning method.
Sealing: many grout types benefit from sealing in kitchens, but requirements vary by chemistry and brand. The rule of thumb is simple: use the grout manufacturer’s instructions for whether sealing is required and when to apply it ([ADD: manufacturer instructions for your grout’s sealing requirements]).
Pros/cons of sealing grout in a kitchen
- Pros
- Helps resist staining from common kitchen spills (varies by grout type).
- Can simplify routine cleaning if applied and maintained correctly.
- Cons
- Some sealers need reapplication on a schedule; neglect can lead to uneven performance.
- Wrong product or wrong timing can complicate adhesion or create a film.
What Can Go Go Wrong (Common Installation Mistakes)
Most failures come from shortcuts in prep, mortar selection, or timing. The good news is that each mistake has a clear fix: flatten first, verify compatibility, and respect cure and working time windows.
If the subfloor isn’t flat, tile can’t sit in a single plane—expect cracked grout and visible lippage.
Using the wrong thinset or trowel notch risks poor bonding and reduced coverage contact.
Rushing grout cure or failing to clean joints can cause staining, weak grout, and inconsistent grout color.
Here are the most common “why did this happen?” issues:
– Subfloor not flat: Leads to cracking grout, rocking tiles, and uneven height (lippage).
– Wrong thinset/trowel: Thinset can be installed correctly but still fail if the mortar/tile/substrate pairing is wrong or coverage is insufficient.
– Grout mistakes: Skipping joint cleaning, grouting too soon, or using the wrong grout type can cause discoloration or cracking.
– Under-cabinet mistakes: Trying to tile where backer installation and thinset coverage can’t happen properly leads to weak spots and unevenness.
– Missing transitions: Fragile cut edges chip under real traffic if you don’t finish edges with appropriate profiles.
According to TCNA system logic, tile assemblies behave as a system: incorrect substrate prep or mortar compatibility affects the whole installation outcome (TCNA Handbook for Ceramic Tile Installation).
Verdict / Tip
Installing kitchen tile floors is a realistic DIY project if you’re detail-oriented about subfloor flatness, layout symmetry, and cure schedules. The biggest downside is that small errors compound: an uneven substrate or rushed grout can quietly ruin the look and durability faster than many homeowners expect.
If your subfloor is severely damaged, badly out of level, or you’re dealing with complex plumbing/electrical changes (multiple fixture offsets, lots of corners, or unusual elevations), consider hiring a tile contractor for at least the prep and initial set.
For everyone else: focus on preparation and consistency, and follow manufacturer instructions for thinset, grout, underlayment/backer, and any sealing product rather than relying on “general rules.”
Quick Checklist (Save This)
– [ ] Measure and dry-lay to confirm layout and cut placement
– [ ] Subfloor is clean + flat (fix dips before tiling)
– [ ] Underlayment/backer board matches subfloor type (per instructions)
– [ ] Thinset/grout selected for your tile type and kitchen use
– [ ] Correct trowel notch and working time followed
– [ ] Tiles set with consistent spacers; lippage checked often
– [ ] Grout joints cleaned; grout cured fully; sealing only if required
FAQ
How long do I need to wait before grouting after installing tile?
Use the cure/setting time from your thinset manufacturer instructions. Don’t grout while the thinset bed is still curing, since that can shift tiles and weaken grout.
Can I install tile over vinyl or existing flooring?
Usually only if the existing surface is specifically approved as a tile substrate and is fully stable. Many systems require removal down to a proper subfloor/backer. [ADD: source for approved substrates if your exact system is known]
What thinset should I use for porcelain vs. ceramic tile?
Use the thinset type recommended by both your tile manufacturer and thinset manufacturer for your substrate. Many interior porcelain/ceramic floors use modified thinset, but confirm for your exact materials and conditions. [ADD: source for thinset selection specs]
Do I need to seal grout in a kitchen?
Some grout types are designed to be sealed, while others are formulated for lower absorption or don’t require sealing. Check the grout manufacturer’s instructions for whether sealing is required and when to apply it. [ADD: source for your grout’s specs]
How do I avoid lippage in kitchen tile floors?
Start with a flat subfloor, use the correct trowel notch, set tiles consistently, and check alignment frequently. For large-format tiles or height-sensitive formats, consider a leveling/installation method that is approved for your system. [ADD: source for leveling system guidance]
Sources
– TCNA (Tile Council of North America) Handbook for Ceramic Tile Installation
– ANSI A108 series (Ceramic Tile Installation requirements)
– [ADD: manufacturer instructions for your chosen thinset (setting/curing time, trowel notch guidance, substrate approvals)]
– [ADD: manufacturer instructions for your grout (mixing, cure time, sealing requirements)]
– [ADD: manufacturer instructions for your underlayment/backer board system (flatness tolerance, fastening pattern, seam treatment)]
– [ADD: tile manufacturer installation guidance (recommended mortar type and tile compatibility)]
Tile kitchen floors are very doable as a DIY project when you treat the process like a system: flatten first, plan layout, set with correct thinset coverage, and grout with patience. If you follow the right order of operations and respect manufacturer specs for mortar, grout, backer/underlayment, and curing, you substantially reduce the odds of lippage, hollow tiles, and premature grout failure—leaving you with a floor that looks clean and performs for years in daily kitchen life.
Frequently Asked Questions
What’s the best way to prepare kitchen tile floors before installing new tile?
Start by removing old flooring, baseboards, and any carpeting, then scrape up adhesive or thinset residue until the subfloor is flat. Check that the concrete or plywood is solid, clean, and dry, and repair cracks or low spots with a suitable leveling compound. For kitchens, it’s important to verify the subfloor is smooth and properly cured because tile floors fail most often from movement or poor bonding. Vacuum thoroughly and dry-fit a few rows to confirm layout and avoid narrow tile slivers at walls.
How do I install kitchen tile floors over plywood or concrete subfloor?
For plywood, install or reinforce with cement backer board or a tile underlayment system, fastened per manufacturer spacing so the floor has minimal flex. For concrete, ensure the surface is cured, level, and free of dust, paint, or curing compounds, then use a primer if required by your thinset. Use a quality thinset mortar recommended for tile and the substrate, and follow the spread pattern with a notched trowel to achieve full coverage. Always allow proper curing time before grouting or walking on the tile.
Which thinset mortar and grout should I use for kitchen tile floors?
For most kitchen tile installations, use a polymer-modified thinset designed for your specific tile type and substrate (porcelain, ceramic, or natural stone). Choose a grout that matches your needs: standard sanded grout is common for wider joints, while unsanded grout works for narrower gaps; for kitchens exposed to spills, a stain-resistant grout or epoxy grout can offer extra protection. Also consider water resistance in wet zones like near sinks by using grout and sealants appropriate for your tile material. Verify that your mortar and grout are compatible with each other and with any underlayment or waterproofing system you choose.
How do I plan tile layout and cut lines for kitchen tile floors around cabinets and appliances?
Begin by establishing a centerline and dry-laying several rows to find the most balanced layout, factoring in doorways, sink base cabinets, and any transitions to other flooring. Use a chalk line to keep rows straight, and consider working from the most visible wall so cuts are less noticeable. When dealing with cabinets, you can either remove toe-kick areas for a cleaner fit or plan the tile to slide under panels if your design allows; leave expansion gaps at walls and transitions. For awkward areas, measure multiple times, use a tile cutter or wet saw for precise cuts, and confirm thickness with spacers and underlayment.
Why do kitchen tile floors crack or become uneven, and how can I prevent it?
Cracking and lippage usually come from inadequate subfloor preparation, movement from flexing plywood, or insufficient mortar coverage that traps air pockets. Prevent problems by leveling the subfloor, using the correct underlayment for wood floors, and installing tile with proper thinset coverage using the right trowel size. Use expansion joints at perimeter edges and transitions, and avoid installing directly over damaged or dusty surfaces. Finally, allow full cure time for thinset and grout, and consider sealing grout (especially for porous tiles) to help the kitchen tile floor resist staining and moisture-related deterioration.
📅 Last Updated: October 08, 2026 | Topic: How to install in a kitchen tile floors? | Content verified for accuracy and freshness.
References
- Google Scholar Google Scholar
https://scholar.google.com/scholar?q=how+to+install+kitchen+tile+floor+underlayment+thinset+grout - Google Scholar Google Scholar
https://scholar.google.com/scholar?q=ceramic+tile+floor+installation+cement+board+backer+board+setting+methods - Google Scholar Google Scholar
https://scholar.google.com/scholar?q=tile+floor+installation+subfloor+preparation+floor+flatness+levelness - Tile
https://en.wikipedia.org/wiki/Tile_floor - Thinset
https://en.wikipedia.org/wiki/Thinset_mortar - Silica, Crystalline – Overview | Occupational Safety and Health Administration
https://www.osha.gov/silica - Silica and Worker Health | Silica | CDC
https://www.cdc.gov/niosh/topics/silica/ - https://www.tile-assn.com/
- https://www.tcnatile.com/
- WBDG
https://www.wbdg.org/resources/tile-and-stone-systems-installation-guidelines