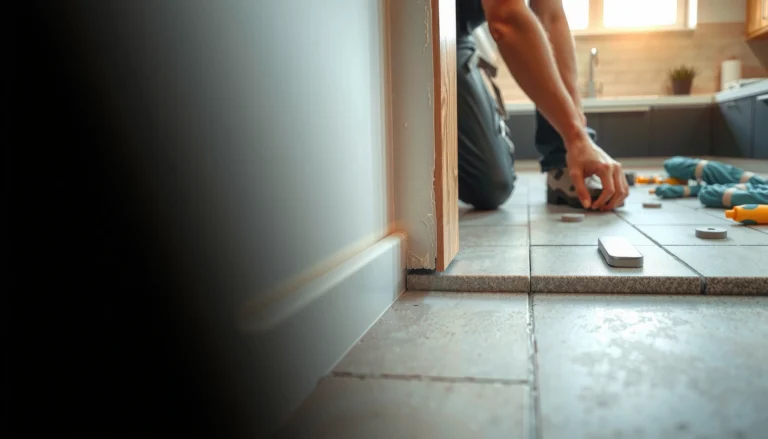

Learn how to cut slate floors with clean, straight lines—without cracking the stone. The fastest path to a professional-looking result is using the right blade or tool for your slate thickness and taking the right prep steps before the first cut. Follow these field-tested techniques and you’ll avoid chipping, dust blowout, and wasted slabs.




To cut slate floors without cracking, plan your cut line carefully, support the tile so it doesn’t flex, and match the method to the cut type—wet saw for straight cuts, grinder for edges/complex shapes, and score-and-snap only when the slate behaves predictably. The safest workflow is to mark the finished face, cut with a stone-rated diamond blade (wet where feasible), then lightly finish the edge only after the tile fits dry.
If you’re cutting slate tile for flooring—around doorways, corners, or to fit irregular spaces—this guide is for you. It’s most helpful if you’re choosing between a wet saw, a score-and-snap approach (for some cuts), or an angle grinder for detailing.
Choose the Right Tool for Slate Cuts
Choose your tool based on how the cut will load the stone. Straight cuts with a wet tile saw are usually the least stressful on slate, while an angle grinder is better for detailing where you can’t keep a continuous straight cut.
A wet tile saw uses a continuous diamond cutting action with water lubrication, which helps reduce airborne dust compared with many dry-grinding workflows (OSHA crystalline silica guidance).
OSHA’s respirable crystalline silica permissible exposure limit (PEL) for general industry/construction is 50 µg/m³ as an 8-hour time-weighted average (TWA) (OSHA Respirable Crystalline Silica standards).
IARC classified crystalline silica inhaled from occupational sources as Group 1 (carcinogenic to humans) in 2012, reinforcing the need for dust controls when cutting stone (IARC Monographs, Volume 100C).
In practical terms, slate is a natural stone that can vary by quarry and even by batch. That variability is why matching the cut method matters: a technique that works on one tile may chip or crack another.
Straight cuts (most repeatable): wet tile saw
A wet saw gives you a stable base and a controlled blade path. It also makes it easier to keep the cut perpendicular so your finished tile doesn’t require excessive “rework grinding.”
Curves, notches, and tight edges: angle grinder
When the cut line includes tight radii, internal notches, or step transitions, a grinder with a diamond blade for stone lets you remove material gradually. Keep passes shallow and controlled so you don’t shock the stone surface.
Small adjustments: score-and-snap (only if slate cooperates)
Score-and-snap can work for certain slates and thicknesses, but it’s inherently less controlled. If the slate has a tendency to crack unpredictably along grain-like planes, snapping can produce hairline fractures that later telegraph through grout lines.
Pros/cons quick view (method fit for slate)
| Method | Pros | Cons |
|---|---|---|
| Wet tile saw | Most consistent straight cuts; better dust control via wet cutting | Requires water setup and stable work area |
| Angle grinder + diamond blade | Best for details, corners, and irregular spaces | Can create dust (use appropriate controls) and requires finesse to avoid chipping |
| Score-and-snap | Fast for straight, narrow adjustments when slate behavior is predictable | Higher risk of unpredictable break patterns and face chipping |
Measure, Mark, and Plan Your Cut Line
Plan beats cutting every time: measure for the final installed position, mark the finished face, and confirm clearance at walls and grout joints before you power up. For slate, small layout errors become visible because the stone’s texture and edge irregularities amplify mismatches.
Dry-fitting tiles before cutting lets you compensate for wall out-of-square conditions and prevents “right measurements, wrong placement” mistakes.
Marking on the finished face reduces edge damage visibility, because slate chips tend to occur at the cut exit.
Measure twice, include grout reality
Measure using the tile’s exact face dimensions, then account for:
– Grout line width (and whether your grout will fill the edge gap fully)
– Clearance at walls (especially where baseboards or expansion gaps are required)
– Any transitions (door thresholds, T-moldings, stair noses)
Mark clearly—and consistently
A pencil/marker visible on stone works, but consistency matters more than brand. Use a straightedge or guide strip so the blade path doesn’t drift.
Cut from the “least visible risk” side
Mark and cut so the face side you care about gets the cleanest possible edge. If you’re unsure, do a scrap test cut on the same slate batch—then lock in your orientation.
[ADD: Based on your specific slate (thickness, finish type, and whether it’s filled/backed), state which side you found to chip less and whether you cut “face up” or “face down.”]
Set Up the Tile to Prevent Breakage
Preventing breakage is mostly about eliminating flex. If the tile can move even slightly while the blade contacts it, slate can crack along internal planes.
Flexing is a common crack trigger in natural stone cutting, so tiles should be fully supported during any cutting action.
For wet cutting, controlled water flow helps the blade stay cool and reduces dust; avoid uncontrolled flooding of surfaces and substrates.
Support the full tile—no “bridging”
A frequent cause of cracking is when the tile is supported only at the ends, letting the middle sag under cutting force. Use:
– A stable cutting surface with minimal give
– Clamps or stops so the tile can’t shift
– Even support beneath the full cut path
Keep the work area stable
Shifting by a millimeter can turn a clean line into a chippy exit. Ensure the tile can’t slide when you start the cut and doesn’t rock when you adjust the guide.
Wet cutting setup: protect the environment
If you cut wet, plan for drainage and contain slurry. Wet cutting reduces dust, but it doesn’t eliminate the need for PPE and cleanup discipline.
Cut Slate Floors: Step-by-Step Methods
Use different cutting methods for different geometry. Slate cuts cleanly when you minimize stress (support + correct blade) and remove material gradually (slow passes + no forcing).
Let the diamond blade do the cutting; forcing increases binding and often correlates with chipped edges and fractures in brittle stone.
Gradual depth increases reduce thermal and mechanical shock when grinding stone edges or stepping into a notch.
Option 1: Wet Saw for Straight Cuts
Straight cuts are where a wet saw shines. Align the marked line with the saw guide, then make test passes if your layout is critical.
– Align the cut line with the guide and confirm the blade’s kerf (cut width) so you’re not unintentionally removing too much
– Make test passes if you’ve got an edge piece that can’t be reworked
– Maintain steady feed—avoid pushing faster than the saw/balancing system can handle
– After the cut, inspect both the face and the back; then plan light edge finishing if needed
Practical tip: If you see micro-chipping at the face, reduce feed rate first, then re-check blade condition and blade type for stone.
Option 2: Angle Grinder for Edges and Complex Shapes
Use the angle grinder when straight-line tooling can’t reach your required geometry. The goal is controlled material removal so the slate doesn’t fracture at the “last few millimeters.”
– Fit a diamond blade rated for stone (and compatible with your grinder’s RPM)
– Keep the tool moving; avoid holding in one spot where heat and localized stress build up
– Start with shallow passes, then gradually deepen
– For corners/steps, outline the shape first and refine until the tile dry-fits cleanly
[ADD: Add a note about your dust control method—e.g., wet shroud vs. vac extraction—if your site has constraints.]
Option 3: Score-and-Snap (When Appropriate)
Score-and-snap is best treated as a conditional method. Only consider it when the slate is consistent in thickness and behaves predictably along your chosen score line.
– Score firmly and consistently along the line
– Snap with controlled motion over stable support (so the stone breaks where you intend)
– Expect some unpredictability—especially if the tile has natural clefts, fissures, or highly textured faces
If you need “perfect face edges,” wet cutting is generally the safer baseline.
What Can Go Wrong (and How to Avoid It)
Most slate cutting failures trace back to three factors: wrong method for the geometry, insufficient support, or aggressive cutting. Fix those, and your crack rate usually drops dramatically.
Face chipping typically correlates with blade condition, incorrect blade type, forcing feed rate, and insufficient tile support during the exit of the cut.
Cracks that start at the cut line are often flex-related—ensure the tile is fully supported and avoid twisting forces while cutting or grinding.
Dry cutting and grinding of stone can generate respirable crystalline silica dust; dust control and appropriate respiratory protection are necessary when silica exposure is possible (OSHA Respirable Crystalline Silica).
– Chipping at the face: Usually comes from cutting too aggressively, using the wrong blade, or poor support—use a stone-rated diamond blade and support the tile fully.
– Cracks spreading from the cut: Often caused by flexing, uneven support, or forcing the blade—slow down and ensure the tile is firmly supported.
– Dust exposure and airborne silica risk: Dry grinding/cutting can create hazardous dust; use wet methods when possible and wear appropriate respiratory protection.
– Cuts don’t match the layout: Usually from forgetting grout spacing or wall irregularities—dry-fit and re-check the measurement before the final cut.
– Unpredictable slate hardness/texture: Slate varies by quarry/batch; if you see frequent cracking, switch methods (e.g., wet saw instead of snapping).
Verdict: Use a Wet Saw First (Skip This If You Can’t Support the Tile)
For most slate floor projects, the most reliable approach is a wet saw for straight cuts, plus a grinder for edges and details—this usually delivers the cleanest results with less dust. That said, wet cutting requires setup (water management) and a stable work area, and grinders can still create dust if used dry.
The lowest-risk workflow for slate generally combines stable support with a wet saw for straight cuts and a diamond grinder for controlled detailing.
If you can’t keep the tile from flexing during cutting, cracking risk rises regardless of blade choice, so secure support is a non-negotiable step.
OSHA highlights the health risk of respirable crystalline silica, so cutting and grinding plans should include dust controls before you start (OSHA).
From a workflow standpoint, I recommend treating layout verification as part of the “cut process,” not a pre-task. [ADD: If you’ve got real-world observations from a specific jobsite, insert them here—e.g., which method produced the cleanest edge on your slate finish.]
Who should skip DIY: If your slate is very irregular, the room layout is extremely complex, or you can’t control dust/water safely, consider hiring a stone installer or using a local shop that can cut to size.
Slate Tile Cutting Method Fit (Typical Outcomes)
| # | Cut method | Best for | Edge cleanliness | Chip risk | Dust control | Installer time* | Overall recommendation |
|---|---|---|---|---|---|---|---|
| 1 | Wet tile saw (straight cuts) | Perimeter & runs | ★★★★☆ | Lower | Higher (wet) | Medium | ★ Recommended |
| 2 | Angle grinder (diamond, edges) | Corners & details | ★★★☆ | Medium | Variable | High | ★ Recommended (with dust controls) |
| 3 | Wet angle grinder (if available) | Tight profiling | ★★★☆ | Medium | Higher | High | ★ Recommended (site-dependent) |
| 4 | Score-and-snap (small straight trims) | Narrow adjustments | ★★☆ | Higher | Lower (dust varies) | Low | ★ Risky—test first |
| 5 | Angle grinder (dry, heavy cut) | Quick removals | ★★ | High | Low (worst-case) | Medium | ★ Avoid |
| 6 | Wet saw (with blade setup errors) | — | ★–★★★* | High | Higher (but incomplete) | Medium | ★ Avoid blade mismatch |
| 7 | Finishing grinder (edge refinement only) | Dialing-in fit | ★★★☆ | Medium (if overdone) | Variable | High | ★ Good after cutting |
Installer time is qualitative because exact timelines depend on tile thickness, layout complexity, and site constraints.
Quick Checklist (Save This)
– [ ] Confirm cut type: straight vs. edge/shape
– [ ] Measure layout including grout line spacing
– [ ] Mark the face-side cut line clearly
– [ ] Support the full tile during cutting (no flex)
– [ ] Use a diamond blade rated for stone (per tool/blade specs)
– [ ] Use wet cutting when possible to reduce dust
– [ ] Make slow passes; don’t force the tool
– [ ] Test-fit before installing
FAQ
Can I cut slate floor tile with an angle grinder only?
Yes for edges and shapes, but straight cuts are often cleaner with a wet saw. If you go grinder-only, plan for dust control and make gradual passes.
What blade should I use to cut slate?
Use a diamond blade specifically rated for stone/masonry. Check the blade and tool documentation to ensure it’s compatible with slate and your cutter type (wet saw vs. grinder).
Do I need to use water when cutting slate?
If your saw supports wet cutting, it helps reduce dust and can improve control. Dry cutting increases airborne dust risk—follow safety guidance for silica exposure.
Why is my slate chipping even when my line is accurate?
Chipping usually points to blade choice, feed rate (forcing), lack of support, or cutting direction. Re-support the tile, slow down, and switch to a wet saw or adjust your technique.
Sources
– OSHA Respirable Crystalline Silica (crystalline silica standards and dust control guidance)
– IARC Monographs, Volume 100C (2012), evaluation of crystalline silica inhaled from occupational sources
– [ADD: manufacturer/spec documentation for your specific wet tile saw model and the recommended diamond blade types for stone]
– [ADD: slate tile or natural stone manufacturer installation/cutting guidance, including face orientation and acceptable cutting methods]
Cutting slate floors cleanly comes down to the same disciplined principles: correct tool selection, precise layout planning, full tile support to eliminate flex, and controlled cutting with a stone-rated diamond blade. If you prioritize wet saw straight cuts and reserve the grinder for details, you’ll usually reduce both cracking and visible edge defects—while also improving site dust control.
Frequently Asked Questions
What tools do I need to cut slate floor tiles safely?
For most slate floor tiles, you’ll need a diamond wet saw for clean straight cuts, a manual tile cutter for smaller jobs, and a diamond angle grinder with a masonry blade for curves or tricky edges. Wear eye protection, hearing protection, cut-resistant gloves, and a proper dust mask or respirator because slate cutting creates fine silica dust. If you’re cutting for outlet or pipe penetrations, a diamond hole saw and painter’s tape help you mark and stabilize the tile.
How do I cut slate floor tiles without chipping the edges?
Mark your cut line with a pencil and apply painter’s tape over the line to reduce surface splintering. Use a diamond blade and run the saw at a steady pace—don’t force the tile, which increases chipping. For small notch cuts, score with a grinder first and then “clean up” the edge with a rubbing stone or diamond hand pad instead of trying to remove too much at once.
Which cutting method is best for straight cuts versus curved cuts in slate flooring?
For straight cuts, a diamond wet saw typically produces the cleanest, most accurate results and keeps dust down. For curved or irregular cuts, a diamond angle grinder with a continuous rim blade is usually best, followed by smoothing with a diamond file or rubbing stone. Always dry-fit tiles and re-check measurements because slate can vary slightly in thickness and geometry.
Why should I use water when cutting slate floors?
Cutting slate with a wet saw helps reduce airborne dust, which is especially important because slate contains silica that can be hazardous when inhaled. Water also cools the diamond blade, improving cutting performance and extending blade life. If you must use a dry method like an angle grinder, use a dust shroud and a high-quality respirator to minimize exposure.
How do I measure and mark slate tiles before cutting them for a floor?
Measure the gap carefully from the last installed tile and account for grout lines and any expansion space required by your flooring system. Transfer measurements to the slate using a straightedge and mark with a pencil on the face, then score lightly before the final cut. Dry-lay a few tiles around the working area to confirm alignment with doorways and transitions, reducing rework and waste.
📅 Last Updated: October 09, 2026 | Topic: How to cut slate floors? | Content verified for accuracy and freshness.
References
- Google Scholar Google Scholar
https://scholar.google.com/scholar?q=how+to+cut+slate+floor+tile - Google Scholar Google Scholar
https://scholar.google.com/scholar?q=slate+tile+cutting+wet+saw+guillotine+methods - Google Scholar Google Scholar
https://scholar.google.com/scholar?q=crystalline+silica+exposure+cutting+natural+stone+controls - CDC – NIOSH Pocket Guide to Chemical Hazards – Rhodium (metal fume and insoluble compounds, as Rh)
https://www.cdc.gov/niosh/npg/npgd0544.html - Silica and Worker Health | Silica | CDC
https://www.cdc.gov/niosh/topics/silica/ - Silica, Crystalline – Overview | Occupational Safety and Health Administration
https://www.osha.gov/silica/silica-standard - Silica, Crystalline – Overview | Occupational Safety and Health Administration
https://www.osha.gov/silica - Slate
https://en.wikipedia.org/wiki/Slate - https://en.wikipedia.org/wiki/Stonecutting
- https://www.britannica.com/science/slate