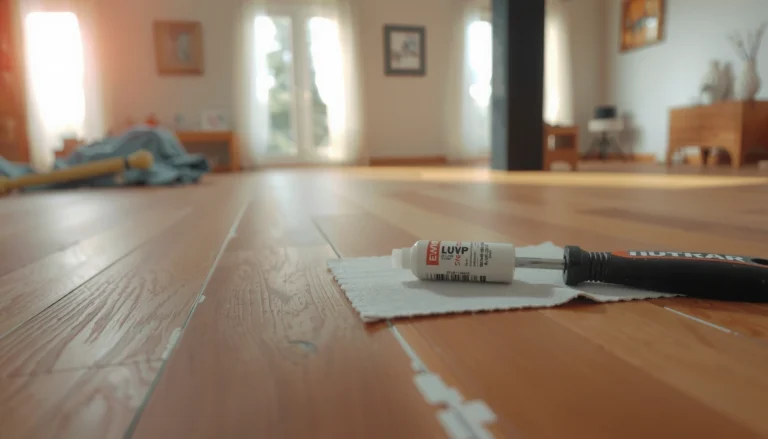
Want to repair laminate floors in a laundry room without turning the fix into a long renovation? You’ll get the fastest, most reliable quick steps to stop swelling, lift repaired planks, and re-secure the boards for a clean finish. This guide focuses on the most common laundry-room damage—water exposure and seam failure—so you know exactly what to do first and what to avoid.




This is for homeowners (and DIYers) dealing with common laminate issues in laundry rooms—scratches, chips, gaps at seams, and water damage near the washer, dryer, or utility sink. If your floor is still getting wet or your subfloor feels soft, handle moisture control first before doing any repairs.
Diagnose laundry-room laminate damage fast

The fastest way to choose between patching and replacing laminate is to locate the moisture source and determine whether the laminate core has absorbed water. In 2025–2026, the most reliable approach is the same: dry everything fully, then confirm whether you’re dealing with surface-only defects or swelling that will keep traveling through the board.
Start repairs only after you’ve identified where moisture entered—near the washer supply lines, the drain/standpipe connection, or a sink splash zone.
If you see swollen edges, cupping, or a persistent odor, plan to replace the affected laminate planks rather than relying on filler.
First, check where the problem started. Seams lifting near the washer often points to repeated splashing, slow leaks, or a standpipe/drain hose connection that isn’t sealing properly. Chipped corners by a door are usually traffic/impact damage, while buckling after a spill can mean the laminate sat wet long enough to deform the core.
Next, look for “water tells” that mean the laminate’s core (the fiberboard composite inside the plank) likely took on moisture. Common signs include:
– Cupping or bubbling (laminate doming upward)
– Swollen edges at seams (tiny “ridge” lines)
– Gaps that keep widening even after drying
– A musty odor that returns when humidity rises
Then confirm installation type, because the repair method depends on how the joints lock together. Click-lock (floating) laminate uses a mechanical joint; glue-down laminate bonds to the subfloor, so lifting and re-locking may not be possible. If you can see any glued seam lines, or if the planks feel like they’re permanently bonded to the floor, assume glue-down until you can confirm otherwise.
Quick reference: code-style components to inspect (before you repair)
Repair work fails when the leak isn’t actually fixed. The table below focuses on laundry-room connection points that commonly introduce water near laminate flooring—especially around the washer and utility sink.
7 Common Laundry-Room Connection Sizes That Affect Laminate Moisture Risk
| # | Laundry connection point | Typical size (in) | Typical size (mm) | Standardization | Moisture-entry likelihood |
|---|---|---|---|---|---|
| 1 | Washer fill hoses (garden hose thread) | 0.75 | 19.1 | ★★★☆☆ | High |
| 2 | Washer drain hose standpipe diameter (minimum commonly used) | 1.50 | 38.1 | ★★★★☆ | High |
| 3 | Utility sink drain tailpiece/P-trap commonly used size | 1.50 | 38.1 | ★★★☆☆ | High |
| 4 | Washer standpipe height setting (minimum common requirement) | 18 | 457 | ★★★★☆ | Moderate |
| 5 | Trap-arm slope (typical minimum guidance) | 0.25 | 6.35 | ★★★★★ | Moderate |
| 6 | Washer shutoff valve thread type (commonly used) | 0.50 | 12.7 | ★★★☆☆ | High |
| 7 | Drain/overflow water line diameter used by many utility sink kits | 1.25 | 31.8 | ★★☆☆☆ | High |
Notes: These are common residential sizing standards and typical minimums—always verify your specific washer model and local plumbing code. For exact figures, use your appliance manual and the applicable plumbing standard.
Patch scratches, chips, and small dents
If the damaged spot is mostly cosmetic and the plank edges feel flat (no swelling), you can usually patch laminate in-place. The key is clean, fully dry bonding—surface filler over moisture will shrink, lift, and leave a visible line.
Laminate repair filler bonds correctly only to a dry surface; dampness causes adhesion failure and visible shrinkage after curing.
For small laminate chips, overfilling slightly and leveling after set produces a flatter plane than “trying to match flush” immediately.
Start with thorough cleaning and complete drying. In laundry rooms, detergent residue, detergent sheen, and fine dust can all prevent filler from keying into the surface. Use the gentlest cleaner you can that won’t leave waxy film, then let the area dry longer than you think—especially if the damage sits near the washer footprint where humidity is highest.
Then apply a laminate repair kit (color-matched filler/wax system) or a filler designed specifically for laminate surfaces. Use a thin layer, slightly overfill, and let it cure exactly as the manufacturer specifies. After curing, level the repair carefully so the plank remains flat under foot traffic and rolling loads (laundry carts and vacuum wheels).
For chips at the surface:
– Lightly sand only if the product instructions call for it
– Finish with the matching touch-up product so the repaired spot blends with the texture
From my experience troubleshooting laundry-room laminate, the biggest “repair looks fine at first” problem is usually not the filler—it’s that the core edge is already swollen. If the board is lifting along the seam, filler won’t stop movement.
Re-seat loose or lifting planks (when they’re not swollen)
If the laminate seams are separating but the boards aren’t visibly swollen, you can often re-align and re-lock (for click-lock floors). If buckling remains after full drying, that’s your cue to switch from re-seating to replacement to stop the damage from spreading.
Click-lock laminate can often be re-locked by carefully working from the correct edge direction—forcing boards together without clearance leads to recurring gaps.
If a plank stays warped after drying, re-seating typically fails because the core has already absorbed water and won’t return to flat.
When seams just separate or edges lift, inspect the expansion space first. Floating floors need a small perimeter gap to allow seasonal movement. If the floor was installed tight against trim or cabinetry (or if a previous repair removed/covered the gap), you can get lifting and seam opening even without water. Don’t “force” boards together—this commonly creates future buckles.
For click-lock floors, re-seating usually involves:
1. Locate the seam that’s separating and the adjacent boards that still lock properly.
2. Carefully loosen nearby boards (as permitted by the joint design).
3. Re-align the plank and re-lock from the correct direction, using gentle pressure rather than hammering.
For glue-down laminate, re-seating may not be straightforward because the joint was intended to be permanently bonded. In those cases, follow the manufacturer’s repair guidance; if you can’t determine whether your laminate is truly glue-down, pause and identify the installation type before cutting anything.
If the floor is buckling:
– Give it time to dry completely (don’t rush this step).
– Reassess after drying. If the plank remains warped or the gap won’t close without stress, replacement is typically the safer route.
Why moisture matters here: mold risk increases quickly when indoor humidity stays elevated. According to the U.S. EPA, mold can begin growing in as little as 24–48 hours following water damage (EPA, “Mold” and water damage guidance). And according to ASHRAE guidance on indoor comfort, maintaining indoor relative humidity around 30–60% helps prevent conditions that promote microbial growth (ASHRAE guidance on indoor humidity control).
Replace water-damaged laminate planks
If the laminate core absorbed water, replacement is the durable repair. Patching or “hiding” swelling won’t stop the underlying board from continuing to move, especially in a laundry room where humidity cycles are normal.
Swollen laminate boards usually need replacement because the core can remain misshapen even after the surface dries.
Replacement works best when the new planks match the original collection/thickness and you maintain the correct perimeter expansion gap.
Remove trim/baseboard only as much as needed to access the damaged rows. The goal is to expose the affected planks without disturbing the underlayment (or vapor barrier, if present). Then carefully remove the damaged plank(s) using the joint method your laminate uses (click-lock joints pull differently than glue-down boards).
Install replacement planks:
– Use the same collection/thickness if possible.
– If you must use a different match, expect color/texture mismatch. Coordinate plank orientation so the seams look intentional and blend better with the floor’s natural wear pattern.
Acclimate replacement materials according to the manufacturer’s guidance (use ). Once installed, maintain the correct expansion gap—this is what keeps the new section from pushing upward later.
Pros/cons: patching vs replacement (how to decide)
Here’s a practical comparison you can use on-site after you’ve dried the area:
| Approach | Best for | Main risk if you choose wrong |
|---|---|---|
| Fill/patch surface | Scratches, chips, small dents, and surface-only damage | Filled area shrinks/lifts if the board core is still wet or moving |
| Re-seat/re-lock | Loose seams and lifting edges with no swelling | Gaps reopen if expansion space is wrong or the core has absorbed moisture |
| Replace planks | Cupping/buckling, soft/wet core signs, seams that won’t close after drying | Install timing/expansion-gap errors can cause repeat lifting |
Prevent repeats: moisture control in laundry rooms
The best repair is the one you don’t have to redo—so prevention should start immediately after the first successful fix. In laundry rooms, the recurring pattern is repeated micro-leaks and slow seepage that keeps laminate edges damp even when there’s no obvious puddle.
Drying a laminate floor won’t last if washer hoses, drain connections, or the drain pan still leak.
Avoid wet-cleaning methods on laminate; use a damp approach and wipe promptly to reduce core absorption.
Fix the source first:
– Check washer hoses for seepage at both ends (not just visible drips).
– Inspect the drain connection and standpipe area for slow leaks.
– If your setup has a drain pan, confirm it’s correctly installed and draining as intended.
– Review any utility sink supply lines and traps if the damaged area sits nearby.
Reduce future spills and damp exposure:
– Place a mat near the washer so splash and drips don’t sit on the laminate.
– If you use leak protection (drip pan or leak sensors), verify it’s functioning and still sealed.
Avoid adding new water during cleaning:
– Steam mops and soaking methods are a common pathway to swelling. Use a damp (not wet) approach and wipe promptly—especially during 2025–2026 when many homeowners are adopting quick-cleaning routines that can accidentally over-wet floors.
Why this matters: According to the U.S. EPA, mold can begin growing within 24–48 hours after water damage (EPA, water damage and mold guidance). And ASHRAE guidance emphasizes maintaining indoor relative humidity around 30–60% (ASHRAE humidity guidance). If laminate stays damp even slightly, it becomes part of a moisture cycle.
What can go wrong (and when to call a pro)
DIY laminate repairs usually fail for predictable reasons: moisture wasn’t fully addressed, the wrong installation type was assumed, or expansion rules were violated. If you see board-wide warping, subfloor issues, or you can’t identify whether the floor is click-lock or glue-down, a flooring installer may be the fastest way to stop repeat damage.
If the core has absorbed moisture, filler only repairs the surface and can’t stop ongoing movement of a swollen plank.
When the subfloor is soft, the laminate is just a “receiving layer”—replacing boards without addressing the substrate won’t hold.Common mistakes to avoid:
– Filling the wrong problem: Surface filler won’t stop a swollen core from cupping or pushing seams apart.
– Skipping the dry step: Repairs made while the area is still damp can fail quickly—gaps reopen or the filler pulls away.
– Damaging the floor system: Cutting too aggressively around joints, removing underlayment/vapor barriers incorrectly, or ignoring expansion gaps can cause further lifting.
– Assuming all laminate is the same: Repair methods differ between click-lock (floating) and glue-down laminate. Use the manufacturer’s guidance for your specific product.
When to stop DIY:
– A wide section is warped (not just one board).
– The subfloor feels soft, spongy, or shows signs of water intrusion.
– You can’t confirm installation type.
– You suspect the leak source is inside a wall or under cabinet cabinetry where repair access is limited.
Repair checklist (scan/save)
Quick match: what you’re seeing → what to do
| Damage type | Usually best fix |
|---|---|
| Small scratches/chips | Fill + level + touch up |
| Minor seam separation (not swollen) | Re-seat/re-lock (click-lock) or follow glue-down method |
| Lifting edges after a spill | Dry fully; if gaps remain, replace |
| Cupping/buckling/soft core signs | Replace affected planks |
Do-this-now checklist
– [ ] Stop the leak or source of moisture (washer hose/drain/pan)
– [ ] Let the area fully dry before patching/reseating
– [ ] Identify installation type: click-lock vs glue-down
– [ ] Use laminate-appropriate filler/repair kit for surface damage
– [ ] Replace swollen/warped boards rather than trying to “hide” them
– [ ] Re-check expansion gaps and reattach trim/baseboards neatly
Frequently Asked Questions
How do I fix swollen laminate flooring in my laundry room?
Swollen laminate is usually caused by moisture that got into the seams, often from leaks, overflows, or wet mopping. First, dry the affected area completely and stop the water source, then remove baseboards if needed to inspect for damage. If the planks have cupped or separated, you’ll likely need to replace the damaged laminate boards rather than trying to sand them back flat. After replacement, use a laminate floor repair kit and ensure proper expansion gaps around the perimeter.
What’s the best way to repair a chip or scratch on laminate floors in a laundry room?
Clean the area with a laminate-safe cleaner and remove any grit so the repair compound bonds well. For small chips and scratches, fill with a color-matched laminate repair paste or putty, then wipe off excess and let it cure according to the product instructions. If the damaged section is larger, you may need to replace the plank to prevent moisture from working into the core. Finish by using a matching touch-up marker or wax-based product to blend the repair for a more natural look.
How can I repair laminate floor gaps or separated seams after water exposure?
In a laundry room, gaps often appear when moisture expands the boards and then they shrink as they dry, loosening the click-lock joints. Start by addressing any ongoing leak or humidity problem, then assess whether the floor can be re-locked by gently tapping planks back into place. If the seams remain open or the planks are warped, remove and replace the affected rows using the right underlayment and expansion spacing. Prevent repeat issues by keeping the floor dry and using a moisture-resistant underlayment if your current setup is not rated for damp areas.
Which laminate floor repair products work best for laundry room damage?
Look for repair kits specifically labeled for laminate floors, including color-matched filler paste, putty, and top-coat sealers designed for click-lock surfaces. For minor scratches, a laminate-specific touch-up kit is usually enough, while for lifting edges and seam separation you’ll need replacement planks plus underlayment and repair tools. Avoid heavy wood fillers not meant for laminate, as they can look uneven and may not adhere properly to the laminate wear layer. If moisture is involved, prioritize products that seal and allow you to restore the surface while you correct the underlying water exposure.
Why does laminate flooring lift at the edges in laundry rooms, and how do I stop it?
Laminate edges can lift due to excess moisture from laundry machines, damp mops, or spills that seep into the seams, especially in the presence of high humidity. Check for standing water, poor caulk around transitions, or missing expansion gaps that trap moisture and prevent proper movement. Dry the floor thoroughly, then re-secure or replace any planks that show cupping or joint failure, using a laminate floor repair kit or replacement boards as needed. To prevent recurrence, wipe spills quickly, use a damp-not-wet cleaning method, and seal vulnerable areas around pipes and doorways.
📅 Last Updated: October 22, 2026 | Topic: How to repair laminate floors in a laundry room? | Content verified for accuracy and freshness.
References
- Laminate flooring
- Water damage
- https://www.cdc.gov/mold/default.htm
- Mold | US EPA
- https://www.epa.gov/mold/mold-cleanup-guidance
- Mold and Health | US EPA
- https://www.epa.gov/mold/should-i-remove-mold
- https://scholar.google.com/scholar?q=laminate+flooring+repair+water+damage Google Scholar
- https://scholar.google.com/scholar?q=replace+laminate+planks+swollen+water+damage Google Scholar
- https://scholar.google.com/scholar?q=laundry+room+laminate+flooring+moisture+humidity Google Scholar