


Need to repair laminate floors in a garage and want the fastest path to a clean, durable fix? This step-by-step guide tells you exactly what to do for the most common failures—lifting seams, swelling from moisture, and damaged planks—so you can restore the floor without guesswork. Follow the repair order, use the right materials, and avoid the mistakes that typically make laminate problems come back.




Stop the moisture first, then replace any laminate planks with a swollen core—filler “patching” usually won’t hold in a damp garage. For chips and scratches where the board surface is stable and dry, a laminate-specific repair kit can blend the damage and restore a smoother finish in the same day (but only if the core isn’t compromised). As of 2026, this moisture-first approach remains the most reliable way to keep a floating click-lock (click-together) garage floor from reopening gaps after repairs.
If your garage laminate is experiencing temperature swings, damp concrete, or standing water, you’re the right audience—especially if you have a floating “click-lock” install. The steps below assume common laminate planks over a concrete slab, but you’ll need to follow your specific product’s installation/repair instructions where they differ.
Assess the damage (patchable vs replaceable)
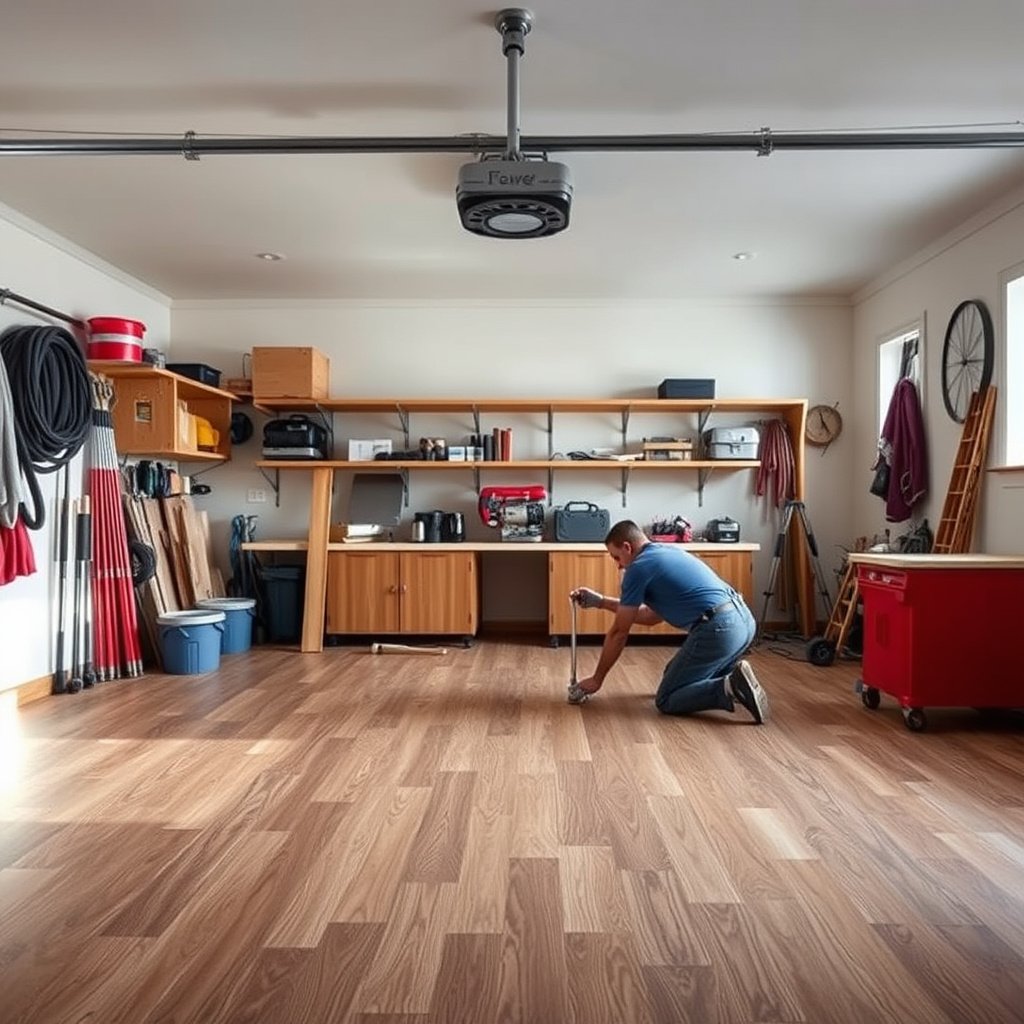
The fastest way to choose the right repair is to classify the laminate damage as cosmetic (surface only) or structural (moisture/subfloor-related). If you see lifting seams, buckling, or raised edges, plan on replacing affected planks; if the core is dry and stable, you can often blend small chips and scratches with a repair kit. In my experience walking through garage laminate failures, the “it looked small at first” cases usually turned out to be core swelling—so we treat early signs as meaningful signals, not cosmetic annoyances.
“Surface-only” laminate damage (chips/scratches) can be blended when the board core remains flat, tight, and dry.
When seams lift, buckling appears, or edges feel raised, the repair is usually limited by moisture and slab flatness—not the visible gap.
If the planks move when you press along seams, the failure mechanism likely includes moisture intrusion, poor subfloor flatness, or insufficient expansion control.
Before you remove anything, do a quick, methodical check:
– Check whether the problem is cosmetic (chips/scratches) or structural (gaps, lifting seams, buckling). Cosmetic damage won’t typically change how the plank joints seat.
– Press along seams and edges: if boards move, they may be failing due to moisture or poor subfloor flatness.
– Look for signs of water exposure (dark spots, raised edges, soft underlayment) before choosing a repair method.
– Confirm your install type: most garage laminate over slabs is either floating click-lock (not glued) or glued-down. Your layout assumes floating/click-lock—glued-down repairs can require different removal and adhesive compatibility checks.
Quick moisture reality check (concrete slab behavior)
Concrete can drive moisture into flooring systems even if the garage “looks dry” on the surface. ASTM testing methods help evaluate slab moisture in situ:
– ASTM F2170 uses in situ probes to measure relative humidity inside the slab at representative depth (commonly around 40% of slab thickness, depending on the protocol and slab thickness).
– ASTM F710 addresses concrete preparation such as achieving the right surface profile (it references ICRI Concrete Surface Profile targets used in practice).
– According to ASTM F2170, the point of the test is to measure what the slab is doing within the concrete—not what a coating or top surface looks like.
Stop moisture & prep the area
If laminate is swollen or lifting, the best “repair” starts by removing the moisture source and restoring dry conditions. Before you fill, patch, or replace planks, dry the affected area and identify whether the problem is a leak, splash/standing water, or slab vapor; then prep so the next steps don’t trap moisture under a cosmetic fix. In 2026, this still holds: a fast blend today can fail weeks later if the garage laminate continues to receive moisture.
Drying the area and eliminating the moisture source is the key dependency for both seam re-seating and long-lasting plank replacement.
A laminate repair kit blends surface defects only; it does not reverse swelling in the board core.
If swollen planks are already present, prioritize replacement to prevent hidden core breakdown from reopening gaps.
Do this in order:
1. Dry the area completely
– Use towels to remove standing water.
– Then allow airflow and time until the surface and surrounding materials feel dry. If the garage has active condensation, address that too (ventilation, dehumidification, or source control).
2. Figure out the moisture source
Common garage triggers include:
– Roof or wall leaks
– Door seals failing (rain intrusion after storms)
– Wet vehicles and splash zones
– Slab vapor passing through the concrete
– Condensation from temperature swings (warm air meeting a cooler slab)
3. Clear the floor and create a “dry work zone”
– Remove tools and anything that traps moisture near the boards.
– Keep fans (if you use them) pointed so air reaches seams, not just the top surface.
4. Verify cleanliness and dryness
– Dust and oily residue will prevent proper seating and adhesion of filler blends.
– If planks feel swollen, plan replacement rather than filling—swollen core layers can continue breaking down under normal loads and temperature changes.
5. Follow the laminate product’s instructions for expansion gaps
Laminate needs room to move. If you “over-close” seams during a repair, garage laminate can buckle later as seasons change (especially if the garage regularly shifts from freezing to warm conditions).
What can go wrong during prep?
Even careful prep can create new problems if you:
– Patch a seam without stopping active moisture (the gap returns).
– Try to sand swollen areas aggressively (you can damage core layers further).
– Keep a tight wall gap by forcing planks into place (this can cause future buckling).
Repair chips, scratches, and small surface gaps
For minor cosmetic damage, you can often repair laminate by blending the surface with a laminate-specific kit—but only when the plank core is not swollen. If your issue is a small seam gap and the boards feel tight/solid, you may be able to re-seat click-lock joints; if boards won’t seat without forcing, stop and investigate moisture or flatness before you damage the tongues/grooves.
Laminate repair fillers/wax kits work best for chips and scratches because they restore appearance, not structural integrity.
If your garage laminate is floating, minor gaps can sometimes be corrected by re-seating joints—provided the boards are dry and the expansion gap remains correct.
Don’t force tight click-lock seams during re-seat attempts; forcing can damage joints and create new movement points.
Here’s how to handle each “patchable” category:
For chips and scratches (surface-only)
1. Clean the damaged area so dust doesn’t interfere with the filler or wax.
2. Use a laminate repair filler/wax kit matched to your plank color (laminate-specific, not solid-wood putty).
3. Apply and level using the kit’s tool/method.
4. Wipe and blend per the kit directions—overfilling makes high spots that collect dirt and look worse over time.
For minor seam gaps (not swelling)
1. Check expansion space at the walls (garage laminate needs perimeter clearance).
2. Gently re-seat the plank seams if your floor is floating:
– Align the joint
– Click/seat without brute force
3. If joints won’t seat easily, stop and reassess:
– Moisture intrusion
– Subfloor high spots
– Damaged tongue/groove
Expansion space matters (especially in garages)
Laminate floors move with temperature and humidity. If you “over-close” seams while repairing, the floor may buckle later—particularly where garage laminate experiences rapid temperature swings.
Fix buckling, swelling, and water-damaged areas
If planks are raised, buckled, or visibly swollen, the reliable path is to stop moisture and replace the affected section—not to sand and re-fill. Swollen laminate core layers can continue failing even after surface repairs, and garage moisture can travel beyond the obvious stain line due to slab and underlayment behavior. As of 2026, moisture-correct-first planning is still the difference between a one-time fix and recurring failures.
Raised seams and buckling are structural symptoms that typically require plank replacement after moisture is corrected.
Sanding swollen laminate aggressively is rarely a durable fix because the core layers may already be degraded.
Water penetration can extend farther than the visible dark line, especially with concrete slabs and underlayment systems.
Step-by-step:
1. Don’t sand aggressively
– Swelling can be structural inside the plank.
– Aggressive sanding can thin the surface while the core remains compromised.
2. Identify the full affected area
– Check adjacent planks for edge lifting, “springiness,” or seam separation.
– Look beyond the stain: concrete and underlayment can distribute moisture laterally.
3. Dry thoroughly until conditions match manufacturer guidance
– Use the manufacturer’s recommended drying/acceptable moisture conditions where available.
– If swelling already occurred, replacement is usually the durable option.
4. Plan replacement strategy
– Replace enough planks to remove compromised materials, not just the most visible damage.
– For click-lock floors, replacement often involves removing trim selectively to maintain the correct perimeter expansion gap.
Comparison you can use: repair kit vs replacement (garage reality)
In a garage, garage laminate repairs succeed when the board core remains stable and dry. If moisture compromised the core, cosmetic blends won’t prevent future lifting.
| Feature | Laminate repair kit blend | Replace affected planks |
|---|---|---|
| Primary purpose | Appearance (surface-level) | Restore structure + correct seating |
| Works if core is swollen? | No (swelling persists) | Yes (remove compromised core) |
| Best for chips/scratches | Yes | Optional (usually not needed) |
| Best for lifted seams | Generally no | Yes, after moisture correction |
| Requires moisture source control | Yes (or it fails) | Yes (and then it lasts) |
| Time to finish | Often same day | Typically longer due to removal/reinstall |
| Risk of “reopening” later | High if moisture continues | Lower when replaced area is fully corrected |
| Surface flatness requirement | Moderate | High (subfloor issues must be addressed) |
| Cost sensitivity | Lower at the moment | Higher upfront (but prevents repeat work) |
| Long-term durability in garages | Good only when dry + surface-only | Best when core/subfloor issues exist |
| Best For | Superficial wear and blendable defects | Moisture-compromised or structurally failed areas |
Replace damaged laminate planks (garage-friendly approach)
If the boards are swollen or visibly lifted, replacement is the garage-friendly approach that restores both appearance and structural stability. For floating/click-lock floors, keep the perimeter expansion gap correct, remove trim only as needed, and replace planks by clicking/seating joints firmly (without glue unless your specific product requires it). As of 2026, this is also the most predictable way to stop future seam gaps from widening.
For floating click-lock laminate, replacement is usually the durable fix after swelling because it removes the compromised core.
Maintaining the correct expansion gap at walls prevents future buckling when garage humidity and temperature shift.
Avoid gluing click-lock joints unless the manufacturer’s instructions explicitly permit it.
Step-by-step for click-lock laminate over concrete:
1. Remove trim/baseboards only as needed
– Access the planks you need to remove.
– Do not eliminate the floor’s ability to move; you still need the correct wall expansion gap.
2. Remove the damaged row/section
– Disassemble carefully so you don’t destroy neighboring tongue/groove edges.
– Keep track of plank orientation (some planks have design direction).
3. Install new planks by clicking/seating joints
– Align the joints and seat firmly.
– Follow the flooring manufacturer’s guidance on tapping blocks, alignment, and joint seating—especially in garage environments with higher temperature swings.
4. Re-check flatness and seam alignment
– If the concrete slab is not flat enough, new planks can fail quickly.
– Address subfloor flatness issues if they’re obvious (high spots/voids) before continuing.
5. Restore perimeter clearance
– Confirm the expansion gap is not blocked by caulk, rigid barriers, or overcrowded trim.
Practical note on matching planks
In many garages, you won’t have extra full boxes from the original install. Matching can require multiple pieces due to color/texture variation. If you can’t match reliably, consider whether a wider replacement section is the more honest option.
Verdict: repair what you can, replace what’s compromised
Repair is worth it for superficial, surface-stable damage when garage laminate feels dry and the core isn’t swollen. Replacement is the honest route when you see swelling, persistent lifting, or moisture-affected material—surface patching typically reopens the problem because the underlying failure mechanism continues. Skip DIY (or pause and get help) if you suspect ongoing leaks, moldy underlayment, or large sections affected; those cases need remediation beyond laminate repair. Downsides to know: replacing planks may require multiple pieces to match color/texture, and temperature swings in garages can make “perfect” seam appearance harder in practice.
If the core is swollen, blending a chip or seam with filler is unlikely to stop failure—only removing the compromised planks resolves the root cause.
A “looks dry” garage can still have moisture-driven failures, so dry-before-repair decisions matter more than the visible defect size.
| Criteria | Repair kit / re-seat attempt | Plank replacement |
|---|---|---|
| Moisture source already fixed? | Required but not validated by filler | Handled first; then structural fix |
| Core swelling present? | No (or it will fail) | Yes (remove compromised core) |
| Subfloor flatness issues? | Usually not corrected | Can be addressed during rebuild |
| Time to complete | Short | Longer (removal + reinstall) |
| Materials needed | Repair filler/wax kit | Replacement planks (+ tools/trim) |
| Typical failure risk | High if moisture returns | Lower when moisture and flatness are corrected |
| Visual match challenge | Usually easier for small areas | May be harder if stock is unavailable |
| Garage temperature swings | Can worsen marginal joint repairs | Better controlled when expansion gaps stay correct |
| Best long-term outcome | Acceptable only for surface-only defects | Most reliable for structural failures |
| Verdict fit | When dry + cosmetic only | When swollen, lifted, or persistently failing |
| Verdict | Choose only if the board core is stable and dry | Choose after moisture correction and any core-compromising damage |
Garage Laminate Symptoms vs Most Durable Fix (2026)
| # | Symptom you see | Most likely root | Patch with filler? | Repair-kit blend durability |
|---|---|---|---|---|
| 1 | Small chips/scratches only | Normal wear | Yes | ★★★★★ |
| 2 | Small seam gap, joints still seated | Installation tolerance / minor movement | Sometimes (re-seat first) | ★★★☆☆ |
| 3 | Raised seam, no visible swelling | Possible subfloor flatness issue | No (fix seating/flatness) | ★★☆☆☆ |
| 4 | Dark stain line + slightly raised planks | Moisture penetration | No | ★☆☆☆☆ |
| 5 | Buckling / wavy boards | Swelling from water/humidity | No | ☆☆☆☆☆ |
| 6 | Standing-water exposure area | Long moisture duration | No | ☆☆☆☆☆ |
| 7 | Gaps return after “quick fix” | Ongoing moisture or wrong expansion control | No | ★☆☆☆☆ |
Scan/save checklist (quick decision guide)
| What you see | Most likely cause | Best move |
|---|---|---|
| Chips/scratches only | Normal wear | Repair kit + blend |
| Small seam gap, boards feel solid | Minor movement/installation tolerance | Re-seat (if floating) and verify expansion gap |
| Raised seams or buckling | Moisture or subfloor/flatness issues | Stop moisture → dry → replace affected planks |
| Dark stains/soft feel | Water penetration | Replace affected area (don’t rely on filler) |
| Repeated gaps after “fixing” | Lack of expansion space or ongoing moisture | Investigate garage moisture source + recheck install parameters |
Frequently Asked Questions
How do I fix bubbling or lifting laminate flooring in a garage?
Bubbling in garage laminate is usually caused by moisture from humidity, wet mopping, or minor leaks that get trapped under the planks. Start by identifying and fixing the moisture source, then remove the affected boards and check the subfloor for swelling or mold. Replace any water-damaged laminate sections and use a proper underlayment designed for garage concrete to prevent repeat lifting. If only a small section is lifted, you may be able to carefully re-seat planks and use the correct laminate repair kit, but ongoing moisture will continue to ruin the floor.
What’s the best way to repair scratched or dented laminate floors in a garage?
For light scratches and scuffs, use a laminate floor repair kit with matching putty or color-matched markers to blend the damaged area. For deeper dents from moving tools, chairs, or dropped objects, remove the affected plank if the tongue-and-groove is compromised and replace it with a new piece for a seamless repair. Avoid sanding aggressively, since it can damage the protective wear layer. In a garage, consider adding floor mats or protective pads in high-traffic and heavy-tool zones to reduce future damage.
Why does my laminate floor keep separating in a garage, and how can I stop it?
Laminate can separate when it expands and contracts due to temperature swings and humidity—common in garages without consistent climate control. Check the garage conditions, ensure proper acclimation of new laminate during installation, and verify that there is adequate expansion gap around the perimeter. If boards are already gapped, you may need to remove a section and reinstall properly to re-lock the click joints. For recurring separation, using an underlayment meant for concrete and sealing moisture at the slab level can help stabilize performance.
Which adhesive or filler should I use when repairing broken laminate planks?
Use a laminate-specific repair system—either a click-joint compatible adhesive (only if the manufacturer recommends it) or a color-matched wood/plastic filler designed for laminate surfaces. Avoid generic construction glue, which can interfere with the floating nature of laminate floors and prevent proper movement. For chips and cracks in the wear layer, apply filler sparingly, let it cure fully, then buff or wipe to match surrounding color. Always follow the brand’s instructions and test the product in a hidden spot first for the best laminate repair results.
How do I replace a damaged laminate plank in a garage without pulling up the whole floor?
If the damaged area is accessible, remove the baseboards or trim carefully and lift the planks around the damaged section to release the click joints. Remove the broken laminate plank, inspect the subfloor for moisture or debris, and install the replacement with the correct expansion gap. Use matching underlayment and ensure the new plank locks tightly with neighboring boards to prevent future separation. If the plank is in a difficult location, you may need to remove more rows, but doing it strategically helps minimize disruption while restoring a clean, professional-looking repair.
📅 Last Updated: October 22, 2026 | Topic: How to repair laminate floors in a garage? | Content verified for accuracy and freshness.
References
- Laminate flooring
- Mold | US EPA
- https://www.epa.gov/mold/mold-prevention-tips-you-can-use
- https://www.cdc.gov/mold/default.htm
- Floor
- Water damage
- Expansion joint
- https://scholar.google.com/scholar?q=laminate+flooring+repair+replacement+damaged+planks Google Scholar
- https://scholar.google.com/scholar?q=garage+laminate+flooring+moisture+water+damage+prevention Google Scholar
- https://scholar.google.com/scholar?q=laminate+flooring+swelling+cupping+warping+repair+steps Google Scholar

[…] inspect and repair the subfloor, then install new laminate using the correct underlayment and expansion gaps—so the floor can “float” without buckling or joint […]