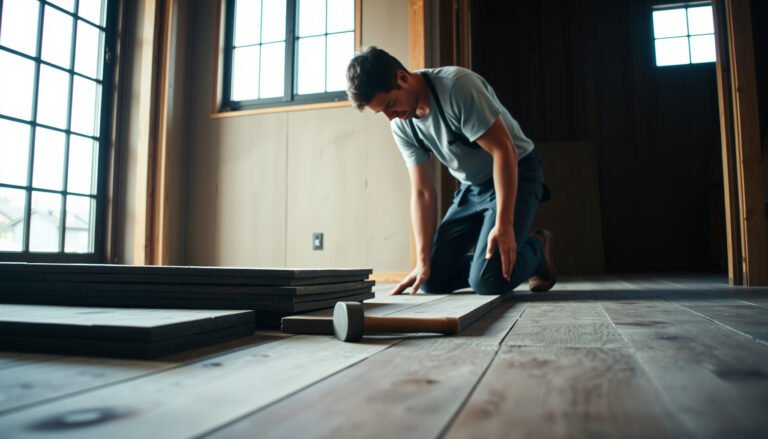

Removing vinyl floors from a retail store is a job you can get right fast—if you follow the correct method for your installed type and glue. This step-by-step guide walks you through prep, safe removal, scraping and cleanup, and how to handle stubborn adhesive without shutting down longer than necessary. By the end, you’ll know exactly what to do to lift the flooring cleanly and prep the subfloor for what comes next.




Removing vinyl floors in a retail store is mostly about two things: protecting surrounding areas and using the correct pull-up method for your vinyl type. If you prep the space safely, identify whether you’re dealing with peel-and-stick, glue-down sheet/planks, or floating/click-lock vinyl, the rest of the job becomes a controlled sequence—lift, clean, remove residue, and prep the subfloor for the next install.
If you’re a property manager, contractor, or small business owner handling a remodel with limited downtime, you’ll want a plan that minimizes mess, protects exits/fixtures, and keeps the work safe for staff and shoppers (or even just for a closed shop during the project).
Prep the store and create a safe removal zone
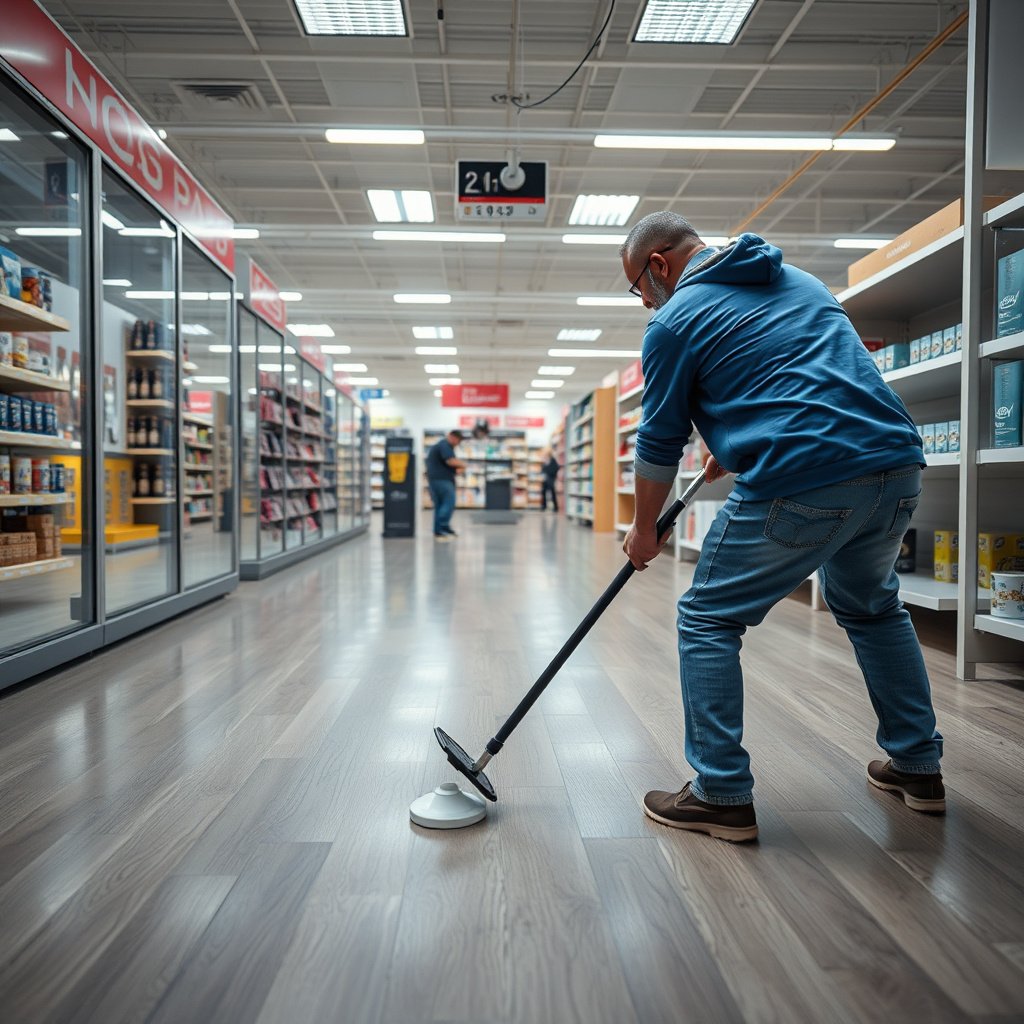
A safe vinyl removal plan comes first—because retail environments add hazards like traffic flow, fragile finishes, and unknown older-building materials. In practice, this means isolating the workspace, controlling dust and sharp debris, and doing an asbestos/lead risk check before anyone starts prying or grinding.
In my experience managing occupied or partially occupied retail spaces, the “best” removal method fails if the work area isn’t contained. The quickest crews still lose time when scraps track across entrances or when residue cleanup spreads beyond the work zone—so prep is what protects both your schedule and your staff.
Shut down the area and isolate foot traffic
Your goal is to remove vinyl without turning the store into a slip-and-fall scenario.
– Block access to the work zone (temporary barriers or contractor fencing).
– Protect exits, checkout lanes, and customer paths with clear physical separation.
– Route tool staging so workers aren’t carrying scrapers through public corridors.
Plan for dust, fragments, and airborne particles
Even “manual” vinyl removal can generate airborne dust, especially if residue requires scraping, sanding, or grinding.
– Use dust control consistent with your site safety program (commonly HEPA-filtered vacuums for fine particulates).
– Bag removed vinyl immediately to reduce tracked debris.
– Keep a spill kit and a “scrap sweep” routine near door thresholds where offcuts collect.
Check for hidden hazards first (asbestos/lead)
If the building is older, you should treat flooring and underlayment as potentially hazardous until proven otherwise.
– Verify whether asbestos-containing materials could be present before disturbing flooring or underlayment.
– If lead paint or lead-containing dust is a possibility, align your controls with local requirements before scraping or abrasion begins.
– If your site is in a jurisdiction with specific asbestos/lead demolition rules, follow those rules before you proceed.
OSHA’s asbestos construction standard includes specific exposure limits and work practices under 29 CFR 1926.1101, and it applies when employees perform activities that may release asbestos fibers. OSHA 29 CFR 1926.1101 (Asbestos)
OSHA’s respirable crystalline silica standard (29 CFR 1926.1153) sets a protective action framework for tasks that can generate silica dust, which can occur when older floors require cutting, grinding, or abrasion. OSHA 29 CFR 1926.1153 (Respirable Crystalline Silica)
If lead-containing dust is a concern, OSHA’s construction lead standard (29 CFR 1926.62) establishes limits and controls for exposures related to lead hazards. OSHA 29 CFR 1926.62 (Lead)
Work Exposure Thresholds Relevant to Resilient Flooring Removal (US OSHA)
| # | Potential hazard during removal | OSHA trigger/limit (construction) | Main standard | Risk direction |
|---|---|---|---|---|
| 1 | Asbestos (airborne fibers) | TWA 0.1 f/cc; excursion 1.0 f/cc | 29 CFR 1926.1101 | Lower is safer |
| 2 | Respirable crystalline silica | PEL 50 µg/m³ (8-hr TWA) | 29 CFR 1926.1153 | Lower is safer |
| 3 | Lead (airborne/dermal exposure) | PEL 50 µg/m³ (8-hr TWA) | 29 CFR 1926.62 | Lower is safer |
| 4 | Silica (regulated actions) | Action level 25 µg/m³ (8-hr TWA) | 29 CFR 1926.1153 | Controls trigger earlier |
| 5 | Asbestos (regulatory action level) | TWA action level is 0.1 f/cc | 29 CFR 1926.1101 | Lower is safer |
| 6 | Lead (regulated action level) | Action level 30 µg/m³ (8-hr TWA) | 29 CFR 1926.62 | Controls trigger earlier |
| 7 | Silica (exposure control approach) | Written plan required when tasks generate silica above action level | 29 CFR 1926.1153 | Proactive controls |
Identify your vinyl flooring type (this changes everything)
The fastest and cleanest vinyl removal comes from matching your tool and pull method to the installation system. Peel-and-stick behaves differently than glue-down sheet/planks, and floating/click-lock should be “unlocked” instead of pried.
In 2026, more retail remodels use mixed systems—sometimes one part of the store is peel-and-stick while another section is glue-down over different subfloors—so verification matters even within the same square footage. From my observations on remodel walkthroughs, crews lose the most time when they guess the vinyl type and then have to repair subfloor damage they caused.
Peel-and-stick / loose-laid vinyl: lift first, scrape later
Peel-and-stick vinyl often lifts in strips or manageable sections because the top layer is designed to adhere without a full bond to the substrate.
– Start at a corner or near a transition piece.
– Expect easier separation than glue-down, but still plan for residue at the edges.
Glue-down vinyl (planks or sheet): plan for adhesive removal
Glue-down vinyl is usually where projects run long—not because removal of the vinyl is hard, but because the adhesive is.
– Expect more cleanup, more frequent blade changes, and longer prep for flatness.
– Adhesive types vary (pressure-sensitive vs. more permanent bonds), so match removal approach to what you find.
Floating/click-lock vinyl: unlock, don’t pry
Floating or click-lock vinyl is designed to connect mechanically (often via tongue-and-groove) above a foam or attached underlayment.
– Work row-by-row from the edges.
– Avoid levering from one spot, which can tear underlayment or chip the locking lip.
Peel-and-stick resilient vinyl typically separates more easily than fully bonded glue-down products because it relies on pressure-sensitive adhesion rather than a permanent substrate bond.
Click-lock (floating) resilient floors are designed to disengage from locking seams, so mechanical “unlocking” is usually safer than prying that can damage the tongue-and-groove profile.
Glue-down resilient vinyl requires subfloor prep for residue removal and flatness because remaining ridges or high spots can cause failure in the next floor installation.
Remove vinyl floors step-by-step without damaging the subfloor
If you want to protect the subfloor, remove in a controlled sequence: transitions first, edges next, then lift-and-bag the field. The core technique is consistent scraper blade angle and “find the lift,” rather than forcing the vinyl off.
This is where the work shifts from demolition to craftsmanship. In retail, subfloors are often plywood panels or concrete that will be expensive or slow to correct, so avoiding gouges (especially near door thresholds and cabinets) is the difference between a straightforward demo and a rework-heavy schedule.
Start with the perimeter and transitions
Don’t start in the middle of the room and “rip outward.”
– Remove reducers, stair noses, and threshold pieces before you lift field vinyl.
– Work systematically from a perimeter edge toward the center.
– Keep cuts shallow so you don’t damage underlayment or stain the substrate with adhesive smears.
Use the right scraper approach for your vinyl type
Your objective is separation, not brute force.
– Lift edges first: get the vinyl moving, then keep blade angle consistent.
– Use a sharp scraper/utility blade and replace dull blades quickly (dull blades force more tearing).
– For glue-down, use scraping passes that broaden over time—avoid a single hard levering point.
Keep the work clean (retail safety and speed benefit)
Residue and scraps cause both hazards and delays.
– Bag removed pieces as you go.
– Sweep or vacuum the work zone regularly, especially near entrances and transitions.
– Keep exit routes clear so you don’t reroute staff around debris throughout the day.
Retail-specific tips during removal
Retail adds special constraints that aren’t typical in residential jobs.
– Protect finishes: cover baseboards, wall surfaces, door frames, and adjacent flooring with durable masking plus a physical cover where needed.
– Manage downtime: stage tools and materials near the removal zone to reduce cross-store traffic.
– Watch utilities and transitions: avoid prying near electrical transitions, conduits, drains, cooler lines, or specialty areas (like built-in cabinets).
Working from transitions and the perimeter reduces the chance of tearing vinyl in unpredictable directions because those pieces act as “start points” for controlled lift.
Controlled scraper technique (consistent blade angle, sharp blades, and incremental lift) is specifically recommended in resilient flooring removal guidance to minimize gouging of plywood and concrete subfloors.
In retail settings, scrap offcuts and adhesive residue increase slip risk, so routine bagging and vacuuming are part of the safest demo workflow documented in standard jobsite safety practices.
Remove leftover adhesive and prep the subfloor for the next floor
Adhesive removal is the real prep phase—especially for glue-down vinyl—and it determines whether the next floor will stay flat and bonded. The best results come from systematic residue removal, then verifying cleanliness and flatness before installation.
From my experience on commercial remodels, the biggest “surprise costs” come after vinyl removal, when contractors discover ridges, stubborn spots, and subfloor contamination that installers can’t legally or practically cover.
Don’t spot-scrape forever—remove systematically
For glue-down vinyl, the subfloor usually needs a full surface approach, not only “the obvious high spots.”
– Remove adhesive until the surface is flat enough for the next flooring system.
– Continue until ridges are controlled and there’s no loose or smeared residue that could interfere with adhesion.
Test your adhesive method on a small area
Adhesives respond differently to heat, scraping, and chemical removers.
– Test on a small section first to confirm you’re not gouging the substrate or spreading residue.
– Use any chemical adhesive remover according to the manufacturer’s directions and safety data sheet (SDS).
Check flatness and dryness before installing the new floor
Subfloor prep is about performance and warranty compliance.
– Fill low spots and remove ridges so the surface doesn’t telegraph into the new flooring.
– Ensure the surface is clean and dry—especially if the original adhesive holds moisture or if there’s dust contamination.
Where time commonly goes during vinyl removal (planning estimate)
Note: This is a planning estimate for retail remodel budgeting (not a guarantee). Your actual ratio depends on adhesive type, subfloor condition, and whether you can use heat/chemicals per local rules and the product SDS.
Many resilient flooring systems require a clean, flat, dry substrate before installation; adhesive residue can create high spots, prevent proper bonding, or cause telegraphing.
Adhesive removers and solvents must be used per the manufacturer’s SDS and labeled instructions because different adhesives require different chemistries and control measures.
When adhesive removal involves abrasion or cutting, dust control and exposure controls matter; silica and other particulates can be generated from substrate work in addition to vinyl. OSHA 29 CFR 1926.1153 (Respirable Crystalline Silica)
What can go wrong (and how to avoid it)
The most common vinyl removal failures are predictable: tearing vinyl, leaving too much residue, or damaging the subfloor. If you slow down at the perimeter, remove residue systematically, and treat older-building hazards as unknown until confirmed, you prevent most downstream problems.
In 2026, I still see repeat issues in commercial remodels—often because crews use a residential-style “rip and scrape” method in areas with tight corridors, heavy foot traffic, and mixed flooring types. The fix isn’t just better tools; it’s better sequencing and verification.
Common mistakes and how to prevent them
| Mistake | What you’ll likely see next | How to prevent it |
|---|---|---|
| Tearing the vinyl instead of lifting it | Jagged edges, missed lift points, more scraping time | Start at perimeter/transitions; find the first lift and keep blade angle consistent |
| Leaving thick adhesive ridges | Unevenness that can affect new floor locking/adhesion | Remove until the surface is systematically flat, not “mostly cleaned” |
| Gouging plywood or concrete | Patching becomes a whole extra trade or delays installation | Use controlled pressure and avoid prying from one point |
| Ignoring underlayment remnants | New flooring may fail to sit correctly or adhere | Assess underlayment layers and plan removal/assessment as needed |
| Skipping hazard checks in older buildings | Regulatory delays and safety risk | Verify asbestos/lead risk before disturbing flooring or underlayment |
| Overusing chemicals without controls | Health and compliance issues, lingering odors | Follow SDS instructions for ventilation, PPE, and disposal—no improvising |
Aggressive levering and incorrect start points can damage the substrate surface, which later forces patching or re-leveling before new flooring can be installed.
OSHA’s silica standard is designed for tasks that generate respirable crystalline silica dust, which can occur during floor substrate abrasion—not just during floor “demo.” OSHA 29 CFR 1926.1153 (Respirable Crystalline Silica)
If hazardous materials are possible, regulatory requirements generally require controls before demolition; work should not proceed until safety is confirmed.
Verdict / tip: what we’d recommend for most retail removals
If your vinyl is peel-and-stick and the subfloor is in good shape, manual, controlled removal plus basic cleanup is often the fastest route. If it’s glue-down, budget more time for adhesive residue removal and subfloor prep—the prep phase is where retail remodel timelines usually expand.
Here’s the honest tradeoff: DIY can be cost-effective for small, isolated areas, but retail spaces magnify the consequences of mistakes (subfloor damage, slip hazards, and compliance issues). Also, if adhesive removal requires chemicals or heavy equipment, follow local regulations and the product instructions—never rely on one universal “method.”
Skip the DIY approach (or bring in a flooring contractor) if you can’t confirm vinyl type, the subfloor condition is unknown, the store space can’t be fully isolated for safety, or you suspect hazardous materials.
| Criteria | DIY removal crew | Licensed contractor (recommended for unknowns) |
|---|---|---|
| Vinyl type identification accuracy | Medium | Higher |
| Subfloor damage risk | Higher | Lower |
| Adhesive residue removal control | Variable | More consistent |
| Compliance readiness (hazards/asbestos/lead) | Unclear | Improved |
| Noise/dust mitigation in occupied retail | Often limited | Better planned |
| Tooling alignment to job constraints | May be mismatched | Typically aligned |
| Schedule reliability | Lower | Higher |
| Waste handling and cleanup speed | Variable | More predictable |
| Chemicals/adhesive remover safety | Risk of misapplication | Lower |
| Final acceptance by next installer | Uncertain | More likely |
| Verdict | Best for small, confirmed peel-and-stick jobs | Best for glue-down, unknown subfloors, or hazard uncertainty |
When vinyl type and subfloor condition are unknown, the risk of tearing and residue-related failures increases—so contractor assessment typically prevents costly rework.
Chemical adhesive removers must be handled according to the product SDS and label instructions; incorrect use can create safety and disposal issues.
In 2026 retail remodels, controlling dust and site access is a core part of safe resilient floor removal workflows due to slip hazards and airborne particulates.
Quick checklist (save this before you start)
| Task | What to do | Watch-outs |
|---|---|---|
| Identify vinyl type | Confirm peel-and-stick vs glue-down vs floating/click-lock | Wrong method increases tearing and subfloor damage |
| Secure the area | Block foot traffic, protect exits/adjacent finishes | Slip hazards from scraps and dust |
| Hazard check | Verify whether hazardous materials may be present | Don’t disturb materials until safety is confirmed (per local rules) |
| Gather tools | Scraper/utility blade, bags, floor scraper attachments (if needed) | Dull blades cause more tearing |
| Remove flooring | Lift from edges and work inward | Keep control to avoid gouging subfloor |
| Remove adhesive | Use the right approach for your adhesive type | Adhesive is the time sink—plan for it |
| Prep for new floor | Clean, level, and ensure dry conditions | Installer may reject uneven/dirty subfloors |
Verdict / tip (final)
Removing vinyl floors from a retail store works best when you treat the job like a controlled sequence, not a rush: isolate the site, identify the vinyl type, remove from transitions and edges inward, and then address adhesive residue and flatness before the next installer shows up. For peel-and-stick on a known, stable subfloor, manual removal can be efficient; for glue-down or unknown conditions (especially in older buildings), professional assessment and residue-prep rigor are what protect your schedule, safety, and warranty outcomes.
Sources:
– OSHA—Asbestos in construction, 29 CFR 1926.1101
– OSHA—Respirable crystalline silica in construction, 29 CFR 1926.1153
– OSHA—Lead in construction, 29 CFR 1926.62
Frequently Asked Questions
What is the best way to remove vinyl floors in a retail store without damaging the subfloor?
Start by identifying the type of vinyl flooring (sheet vinyl, luxury vinyl tile, or loose-lay/peel-and-stick) and check whether it’s fully adhered or partially bonded. Use a floor scraper and set the blade angle low to lift the material while protecting plywood or concrete. For glued-down vinyl, work in small sections and use a vinyl adhesive remover that’s compatible with your subfloor to minimize gouges and residue.
How do you remove glued-down vinyl flooring and adhesive residue in a commercial space?
Begin by scoring or cutting the vinyl into manageable strips so you can lift it gradually, then remove the adhesive in stages rather than trying to pull everything at once. Use a commercial floor scraper and a heat gun or floor stripper (only as appropriate for the product and surface) to loosen old glue. Finish by using a floor grinder/planer or residue remover, then vacuum thoroughly so the area is clean and ready for new retail flooring installation.
Why is it important to prepare the area before removing vinyl floors in retail?
Retail spaces need protection for employees, customers, and HVAC systems, so preparation helps prevent dust, odors, and slip hazards. Seal off the work zone, use HEPA dust collection if grinding is involved, and remove fixtures or cover them with contractor-grade plastic. Proper prep also ensures the vinyl comes up more efficiently and reduces the chance of leaving sticky adhesive that can interfere with new flooring.
Which tools and materials are best for taking up luxury vinyl tile (LVT) in a store?
For LVT, you’ll typically need a floor scraper with replaceable blades, a utility knife for cutting tiles, and pliers or a pry bar for edge lifting. If the tiles are on strong adhesive, use a heat gun or adhesive remover designed for vinyl and follow label dwell times for easier breakdown. Don’t skip cleanup supplies like heavy-duty trash bags, a shop vacuum with fine-filtration, and residue removal products to get the subfloor flat and ready.
How do you remove sheet vinyl flooring safely when the store has limited downtime?
Plan the removal in phases—remove one section at a time so you can keep parts of the retail floor operational and maintain clear pathways. For sheet vinyl, cut the sheet into strips, peel back slowly, and use controlled adhesive loosening (heat or remover) to avoid prolonged downtime. Manage waste with proper containment, and after removal, inspect for low spots and leftover adhesive before installing replacement flooring to prevent future lifting or bubbling.
📅 Last Updated: October 26, 2026 | Topic: How to remove vinyl floors from a retail store? | Content verified for accuracy and freshness.
References
- https://www.epa.gov/asbestos/vinyl-asbestos-floor-tiles
- Asbestos | US EPA
- Asbestos – Overview | Occupational Safety and Health Administration
- https://www.cdc.gov/asbestos/
- https://www.cdc.gov/niosh/topics/asbestos/
- https://www.epa.gov/lead/lead-based-paint-renovation-repair-and-painting-program
- Asbestos – HSE
- https://scholar.google.com/scholar?q=asbestos+vinyl+floor+tile+removal+procedures+dust+containment Google Scholar
- https://scholar.google.com/scholar?q=resilient+floor+covering+removal+procedures+asbestos+wet+methods Google Scholar
- https://scholar.google.com/scholar?q=lead-based+paint+renovation+floor+coverings+RRP+work+practices Google Scholar