Replacing vinyl floors in a retail store is a straightforward job when you follow the right sequence for prep, removal, subfloor repair, and new plank or sheet installation. This step-by-step walkthrough shows exactly how to get a clean, durable finish that can handle constant foot traffic and frequent cleaning. If you want the quickest path to a professional-looking result with minimal downtime, this guide tells you what to do first—and what to avoid.




To replace vinyl floors in a retail store, plan the job around a foot-traffic shutdown, then remove the old flooring, prep the subfloor flat and clean, and install the new vinyl using the manufacturer’s method (including the right cure/traffic time). This guide walks you through the practical steps and the most common failures that show up after reopening.
If you’re updating a shop, grocery aisle, or showroom area where customers need to be kept off the floor, this is for you. It’s especially relevant if you’re dealing with old sheet vinyl, glued-down vinyl, or damaged Luxury Vinyl Plank/Tile (LVP/LVT) and you want a structured approach without surprises.
Replacing resilient flooring in occupied retail space is usually a scheduling and prep problem as much as a flooring problem. This step-by-step approach is written for store managers, facilities teams, and flooring contractors who need predictable sequencing, cleaner seams/edges at transitions, and fewer “callback” issues once the store is back open in 2025–2026.
Plan the replacement to minimize store downtime
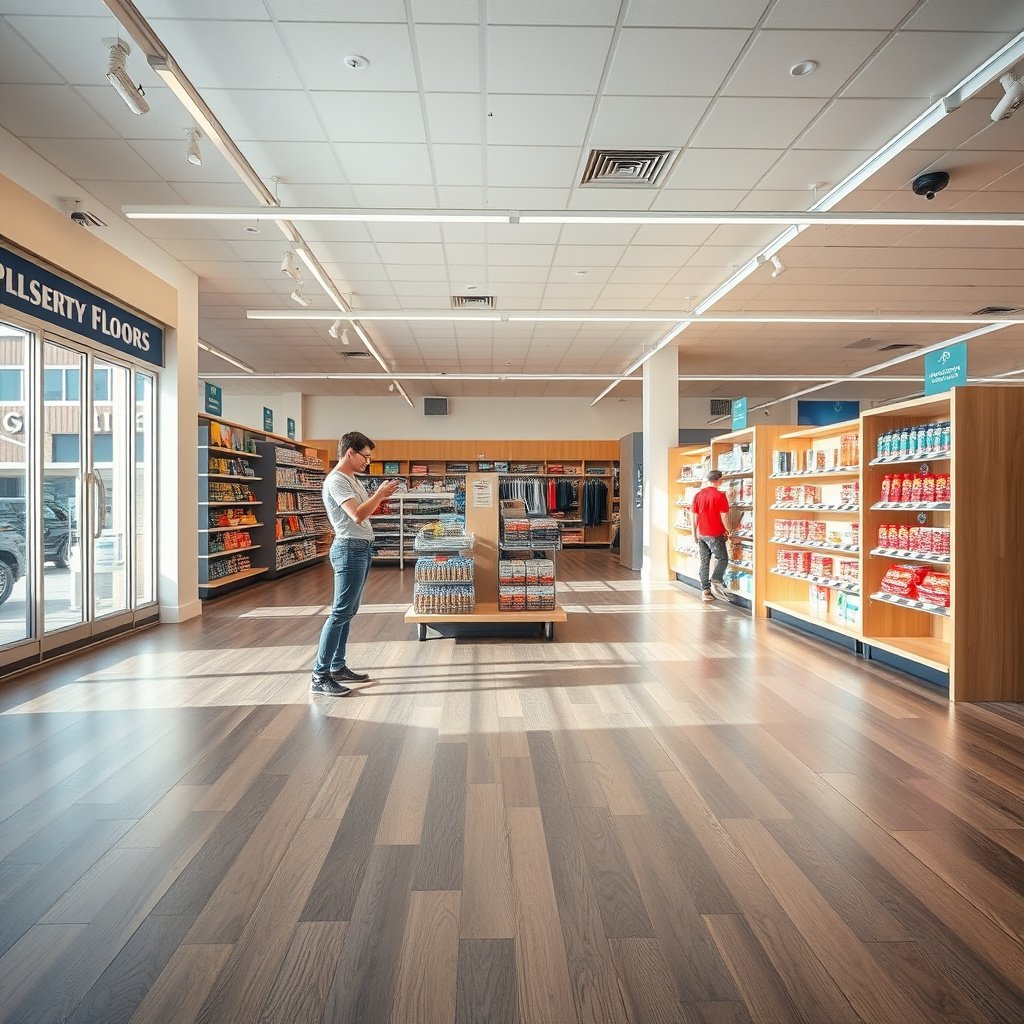
Plan your sequencing first; the fastest installs still fail if you run out of time for prep or reopen before the floor system can bond. The most reliable retail strategy is to define the work zone, match the installation method to the vinyl type, and build a reopening window around the manufacturer’s cure/traffic requirements.
“ASTM F710” is the standard practice used to prepare concrete floors to receive resilient flooring, which is why flatness and surface condition are treated as foundational steps rather than optional cleanup.
In resilient flooring workflows, the reopening (or traffic) timeline is controlled by the adhesive/underlayment system and manufacturer instructions—not by convenience—because bond strength develops over time.
– Choose the right vinyl type and installation method (sheet, glue-down LVP/LVT, or floating/loose-lay) so your prep and adhesive/underlayment steps match the product instructions.
– Sheet vinyl: typically requires a plan for seams, rolling/pressing, and heat welding (if your system uses it) plus careful edge trimming for doorways.
– Glue-down LVP/LVT: depends heavily on adhesive type, trowel/notch size, and the adhesive’s working/open time.
– Floating/loose-lay: is less adhesive-dependent but still needs a flat, stable substrate to prevent click noise and edge lift.
– Schedule around business hours, parking/loading access, and any noise limits; use floor protection to keep surrounding areas safe during demo.
– Define “off-limits” zones with clear signage and temporary barriers so staff don’t unknowingly track debris into your prep area.
– Protect ramps, thresholds, and adjacent floor finishes with proper coverings and edges so you don’t create new trip hazards.
– Gather the essentials up front: PPE, removal tools, patching/feather finish materials (per product/subfloor needs), cleaning supplies, and transition/trim pieces.
– For retail, don’t underestimate containment: dust control, vacuum filtration, and trash handling often determine whether prep stays clean enough for bonding.
Remove old vinyl and transition materials
If you want clean seams and stable edges, remove transitions and base-related trim first—then demo in a way that minimizes subfloor damage. The goal is controlled removal to avoid gouges and loose debris that can telegraph through resilient flooring.
RFCI’s resilient flooring work practices emphasize removal methods that protect the substrate surface so the new resilient system can bond or lock correctly.
Adhesive failure and edge separation commonly trace back to incomplete removal of incompatible residues or to subfloor damage that was created during demo.
– Remove transition strips, baseboards, and any loose trims first so the new floor can meet walls and doorways cleanly.
– If you’re reusing trim, plan for consistent reveal heights; mismatched trim thickness can force uneven transitions that stress seams.
– Demo the existing vinyl carefully: cut small sections where needed, lift/remove with the least damage to the subfloor, and avoid gouging that can telegraph through the new surface.
– Cut along seams where possible, then lift/peel to reduce “pulling” on the substrate.
– If the old material is sheet vinyl, remove in sections so the sheet doesn’t tear and leave adhesive films behind in unpredictable patterns.
– If there’s old adhesive, remove what’s required by the installation guidelines (often “to a suitable sound/flat surface,” but the exact requirement depends on what the manufacturer allows for that system).
– In retail, adhesive residue is a frequent source of bond problems because new adhesives don’t bond to contaminated or chemically incompatible residue.
– Follow the vinyl manufacturer’s stated residue standard and preparation chemistry for your specific system; “clean” is not enough if the guide requires a particular level of removal or a specific patching compound.
Prep the subfloor for new vinyl flooring
Prep is where success is decided: the subfloor must be flat, clean, dry, and within the temperature/condition requirements for your specific resilient system. Vinyl—especially LVP/LVT and sheet vinyl—can reveal small high spots and flatness issues quickly, so inspection and corrections are non-negotiable.
According to RFCI’s Recommended Work Practices for the Installation of Resilient Flooring, resilient floor performance depends on achieving an acceptably flat subfloor using straightedge/flatness checks prior to installation.
According to ASTM F1869, the calcium chloride method reports moisture vapor emission rate in “lb/1,000 sq ft/24 hr,” which helps determine whether concrete is dry enough for resilient flooring adhesive systems.
According to ASTM F2170, in-situ probes measure relative humidity in concrete as a percent (%RH), providing a different moisture profile than surface-only testing.
– Make the subfloor flat, clean, and dry: resilient/vinyl flooring highlights unevenness, so address dips/high spots and vacuum thoroughly before installation.
– Use a straightedge and mark corrections; high spots often show up as edge lift and premature wear, while dips can cause joint separation.
– Vacuum with the correct filtration and avoid wet cleanup that leaves residual moisture or contaminates pores.
– Check moisture requirements before you install (especially over concrete). Use the moisture testing method required by your floor system’s instructions, and fix issues before laying new vinyl.
– ASTM F1869 provides moisture vapor emission rate in lb/1,000 sq ft/24 hr, while ASTM F2170 measures relative humidity in %RH through in-situ probes—your vinyl system may require one method over the other.
– If moisture is out of spec, remediation must happen before installation; “install and hope” is how you get bubbling, adhesive failure, odors, and visible breakdown later.
– Confirm temperature and jobsite conditions meet the flooring guideline (acclimation and minimum/maximum room temps can matter for layout, seams, and adhesion).
– Temperature affects adhesive viscosity and vinyl dimensional behavior (expansion/contraction), which is why acclimation is included in most manufacturer instructions.
Moisture Testing Standards Used for Resilient Flooring (ASTM)
| # | ASTM Method | What It Measures | Primary Unit/Output | Notes for Vinyl Systems |
|---|---|---|---|---|
| 1 | F1869 | Moisture vapor emission rate | lb/1,000 sq ft/24 hr | ★ ★ ★ ★ ★ |
| 2 | F2170 | In-situ relative humidity | %RH | ★ ★ ★ ★ ★ |
| 3 | F710 | Concrete preparation practices | No moisture output | ★ ★ ★ ★ ☆ |
| 4 | F3191 | Installation quality for resilient floors | System-based acceptance | ★ ★ ★ ★ ☆ |
| 5 | F1861 | Resilient flooring underlayment adhesion checks | Bond assessment | ★ ★ ★ ☆ ☆ |
| 6 | E1907 | Moisture measurement on floors (general) | Moisture profiling | ★ ★ ★ ☆ ☆ |
| 7 | ASTM D4263 | Plastic sheet test for moisture (general) | Qualitative evidence | ★ ★ ☆ ☆ ☆ |
Install replacement vinyl floors in retail sections
Install method drives the failure mode; glue-down issues look different from floating/LVP edge lift. The right approach in retail is to acclimate and dry-lay for layout control, then install exactly per vinyl type—especially adhesive application, seam/roll/weld steps (sheet), and the reopen timing.
Manufacturer installation instructions for vinyl systems typically require that adhesive working/open time and bond development occur before traffic, which is why reopening too early often leads to seam or edge issues.
Loose-lay/floating vinyl systems rely on correct perimeter gaps and stable substrate conditions so movement doesn’t translate into edge lifting or joint separation.
– Acclimate and lay out before you start cutting: dry-fit rows/sections to reduce awkward seams near doorways and high-visibility edges.
– In retail, entrances, cash lanes, and queue lines are where customers notice seams first—use layout to keep patterns and seams visually balanced.
– Mark reference lines for planks/tiles so your cut edges don’t create thin “slivers” at transitions.
– Install in a way that matches your vinyl type:
– Glue-down systems: spread adhesive only as specified (right trowel/notch, working time, and open/flash times per manufacturer).
– Don’t “stretch” adhesive beyond its working time; if the adhesive skins over, bond strength drops.
– Keep a consistent rhythm: apply adhesive, place material, and roll/press per instructions.
– Loose-lay/floating systems: follow expansion/gap rules and lock/fit method exactly so movement doesn’t create edge lifting.
– Avoid forcing locks—misalignment can create micro-gaps that widen under retail traffic.
– Maintain specified gaps at fixed verticals (columns, wall returns) and cover them with transitions/trim where allowed.
– Sheet vinyl: account for seam placement, rolling/pressing requirements, and heat/welding instructions if your system uses it.
– Sheet vinyl seams are often the most visible stress points; heat welding details (tooling, dwell time, and temperature) must match your sheet system.
– Keep customers out until the floor reaches the required bond strength/curing time—this “reopen timing” is one of the biggest determinants of long-term performance.
– For your specific vinyl system, use the manufacturer’s required cure/traffic time (for example, after adhesive installation and rolling/pressing). .
– In retail, coordinate with opening procedures: initial traffic is often heavier than “normal” because staff are reorganizing carts, boxes, and displays right after reopening.
Quick comparison: which installation method fits retail needs best?
Use this to decide how strict your closure window needs to be.
| Installation method | Pros for retail | Cons / watch-outs | Where it commonly fits |
|---|---|---|---|
| Glue-down LVP/LVT | Great stability under high traffic when installed correctly; strong point-click under heavy loads. | Requires strict adhesive prep, trowel control, and cure/traffic timing to prevent edge/seam failure. | Aisles, cash wrap zones, showroom paths. |
| Floating/loose-lay LVP | Often faster installation and easier partial replacement; no adhesive cure window. | Demands excellent flatness and correct perimeter gaps; movement can stress edges if substrate is uneven. | Modern remodels where closure time must be short. |
| Sheet vinyl | Seam strategy can be simpler for large areas; resilient surface continuity. | Seam placement, rolling/pressing, and welding steps must be controlled to avoid visible stress lines. | Long runs like grocery aisles and service corridors. |
What can go wrong (and how to avoid it)
Most vinyl callbacks in retail don’t come from the “main install” step—they come from skipping one critical prep requirement or reopening before the system is ready. Here are the most common failure patterns and how to prevent them.
Resilient flooring systems are sensitive to substrate flatness because visible and audible defects (telegraphing, clicking, early wear) often originate from high/low spots that weren’t corrected.
Moisture and incompatible residue can undermine adhesive bond or create vapor pressure, which is why ASTM moisture testing methods and manufacturer preparation standards are repeatedly referenced in resilient installation guidance.
– Subfloor not flat enough: leads to joint/sheet separation, clicking noise, or premature wear—fix with proper patching/leveling before installation.
– If you hear hollow sounds or see localized lifting, stop and investigate whether it’s a high spot, debris pocket, or adhesive void (for glue-down).
– Moisture problems ignored: can cause adhesive failure, bubbling, or moldy odors; moisture testing and remediation should happen before you install.
– Use the test method required by your system: ASTM F1869 (MVER in lb/1,000 sq ft/24 hr) or ASTM F2170 (%RH).
– From my experience coordinating retail remodels, the “silent failure” is often odor or adhesive release that shows up weeks later when indoor humidity cycles.
– Wrong removal/adhesive prep: leftover residue, incompatible patching compounds, or skipping cleaning can prevent a proper bond.
– Scrape and clean to the surface standard the manufacturer requires; residue that looks “thin” can still be chemically incompatible.
– Traffic too soon: scuffs, seam separation, or lifted edges often come from reopening before the manufacturer-required cure/traffic window.
– For glue-down, this is especially sensitive to adhesive working time and bond development. Use and include a safety buffer if your store will reopen with heavy cart traffic.
Verdict and tip for store owners
If your subfloor is sound, you can control foot traffic, and you’re able to follow the vinyl manufacturer’s installation and cure-time instructions closely, you can often replace retail vinyl flooring with a solid plan and careful prep.
That said, this can be a bad fit if:
– the store can’t realistically close the affected area for the required time,
– you suspect major moisture issues under the existing floor,
– you need a warranty that depends on specific contractor/installation conditions, or
– the existing base is badly damaged (e.g., failing underlayment or deep concrete issues).
Tip: treat prep and reopen timing as the “real” work. Installation is straightforward once the surface conditions and instructions are correct.
RFCI emphasizes preparation and installation work practices for resilient floors, reflecting that long-term performance depends on substrate condition and installation sequence more than on surface appearance alone.
When adhesive systems are involved, manufacturer-defined working time and cure/traffic time directly control bond development, so closure planning is part of the installation—not scheduling overhead.
Scan-ready checklist (plus FAQs)
Use this checklist to keep the crew aligned from demo through reopening.
| Step | Quick check before you move on |
|---|---|
| Demo | Transitions/trim removed; subfloor not gouged |
| Adhesive/residue | Removed or prepared to the surface standard required by your system |
| Subfloor prep | Flat/clean; edges and patches feathered |
| Moisture/conditions | Moisture testing done (method per flooring instructions); temps acceptable; acclimation followed |
| Layout | Cut plan reduces visible seams and avoids tight door thresholds |
| Install method | Matches your vinyl type (glue-down vs loose-lay vs sheet) |
| Curing/traffic | Reopen only after the manufacturer’s required cure/traffic time |
| Final | Roll/press steps completed (if specified); transitions installed; cleanup done |
Frequently Asked Questions
What is the best way to remove old vinyl flooring in a retail store without damaging the subfloor?
Start by determining whether the vinyl is loose-lay, glue-down, or mechanically fastened, since removal method depends on the installation type. For glue-down vinyl, use heat and floor scraper tools to avoid gouging the subfloor, and then remove residual adhesive with an approved adhesive remover or mechanical grinding. In a retail environment, work in phased sections to keep traffic moving and use dust control measures like HEPA vacuums to protect customers and product displays. Always inspect the subfloor for damage and verify it is clean, flat, and dry before you install new vinyl flooring.
How do you replace vinyl floors in a retail space while keeping the store operational?
Replace the flooring in small zones so you can keep at least part of the store open and move customers through controlled pathways. Schedule work during off-hours, then use floor protection sheets and temporary barriers to prevent debris from spreading into sales areas. Coordinate with the HVAC schedule and maintain proper ventilation for adhesive curing, especially if you’re installing luxury vinyl plank (LVP) or sheet vinyl with glue. Plan your materials staging to reduce downtime, and ensure transition strips are installed carefully at doorways and checkout areas to avoid trip hazards.
Why do vinyl floor replacement projects fail, and how can you prevent lifting, bubbles, or gaps?
Most issues come from poor subfloor preparation, incorrect acclimation, or using the wrong adhesive system. Before installing replacement vinyl floors, confirm the subfloor is smooth, level, and free of dust, moisture, and adhesive residue; even small high spots can cause telegraphing or separation. Acclimate the vinyl to the retail store’s temperature and humidity conditions for the time recommended by the manufacturer to reduce expansion and contraction problems. If bubbles or lifting appear, address the root cause—moisture testing, roller application (for glue-down), and proper seam/edge finishing—rather than trying to patch over them.
How do you choose between glue-down and click-lock vinyl flooring for a high-traffic store?
For high-traffic retail areas, choose products with strong wear layers and a construction designed for commercial use. Glue-down vinyl can offer a more stable feel and can help reduce movement under heavy foot traffic, but it requires meticulous adhesive application and subfloor prep. Click-lock vinyl (floating) is faster to install and can reduce downtime, yet it still demands a very smooth, flat base to prevent joint gaps or noise. Your best choice depends on the condition of the existing subfloor, how quickly you need the store back open, and whether the area is exposed to temperature swings or frequent cleaning chemicals.
Which tools and materials do you need to replace vinyl floors professionally in a retail location?
You’ll typically need a floor scraper, utility knife, straightedge/leveling tools, and a notched trowel or roller depending on whether you’re installing sheet vinyl or glue-down LVP. Essential supplies include underlayment (if required by the vinyl type), seam tape and recommended adhesives, transition strips, and proper floor protection for customers and staff. For dust control, use a HEPA vacuum and consider moisture testing kits to confirm the subfloor conditions before replacement. Having cleanup tools, measuring equipment, and PPE (gloves, eye protection) ready helps ensure a smooth vinyl floor replacement process with clean edges and durable results.
📅 Last Updated: October 26, 2026 | Topic: How to replace vinyl floors in a retail store? | Content verified for accuracy and freshness.
References
- Vinyl flooring
- Asbestos | US EPA
- https://www.epa.gov/asbestos/asbestos-renovation-demolition-and-repairing
- Asbestos – Overview | Occupational Safety and Health Administration
- 1910.1001 – Asbestos. | Occupational Safety and Health Administration
- https://www.cdc.gov/niosh/topics/asbestos/
- RFCI – Resilient Flooring Covering Institute
- https://scholar.google.com/scholar?q=replace+vinyl+flooring+commercial+retail+store+installation Google Scholar
- https://scholar.google.com/scholar?q=resilient+floor+covering+removal+work+practices Google Scholar
- https://scholar.google.com/scholar?q=vinyl+flooring+subfloor+preparation+leveling+adhesives+installation+guidelines Google Scholar