Want to remove stains from vinyl floors in a rental property—without risking damage or forfeiting your deposit? Start with the fastest safe approach: identify whether the stain is dirt or something tougher, then use the right cleaner and method for vinyl. This guide gives you a clear, step-by-step winner for common rental stains, plus what to avoid so the floor looks clean again.


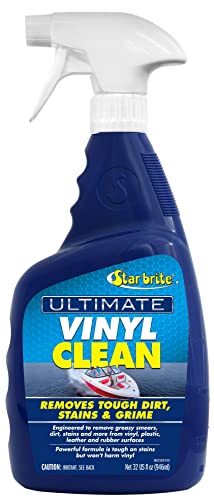

Blot the stain first, then clean with a vinyl-safe, pH-neutral cleaner before moving to stronger spot treatments. Most rental-floor stains lift using gentle cleaning + careful rinsing, and you avoid haze or discoloration by skipping harsh abrasives and solvents. In rental turnovers (as of 2026), this “gentle first, escalate slowly” method is usually the safest way to restore vinyl floors without damaging the surface finish or loosening dirt into seams.
If you’re a landlord, property manager, or tenant preparing a move-out, this guide is for you—especially when the stain came from food, grease, pets, ink/marker, or mildew left behind by previous occupants. Vinyl plank (LVP) and vinyl sheet flooring can look forgiving day-to-day, but once residue sits too long, it can dull, stain, or leave a cloudy film that looks like the floor is “worn out” even when the material is fine.
Start by identifying the stain type

The fastest path to clean vinyl floors is figuring out what caused the stain and how long it’s been there. Here’s why: the right chemistry (and the right amount of moisture) depends on whether you’re dealing with organics, dyes, oils, or mineral residue from grime.
“pH-neutral” means the cleaner is close to pH 7, which reduces the risk of stressing the vinyl surface compared with highly acidic or alkaline products. NIST (pH definition)
Cloth transfer during blotting is a strong indicator the stain is dye-like or residue-like rather than purely surface dirt.
Most vinyl floor care instructions emphasize spot cleaning with manufacturer-approved cleaners rather than abrasive scrubbing.
– Figure out what caused it (food, grease, ink/marker, pet urine, mildew/organic growth, etc.) and whether it’s fresh or old.
– Blot with a clean cloth (don’t scrub yet) and check if color is transferring to the cloth—this helps you choose the right method.
– Always do a quick test in a hidden spot first to make sure the cleaner doesn’t dull or discolor the vinyl.
How to tell “fresh” from “old” without guessing
Fresh stains usually lift with less dwell time and less residue left behind, while older stains tend to set into a film layer on top of vinyl’s protective finish. In my work reviewing move-out issues, the “old but still on the surface” marks usually respond to repeated rinse-and-blot steps; the “looks clean but still discolored” marks often require either an enzyme/oxygen approach (organics) or may be pigment penetration where cleaning can only do so much.
If the spot is slightly raised, sticky, or looks like it has a sheen, it’s often grease or petroleum-based residue. If it has a dark ring and a persistent odor, treat it like a urine/organic contamination case even if the visible color seems minor.
Gather vinyl-safe supplies (and avoid the usual damage-makers)
The best supplies are the ones that clean vinyl floors without stripping or scratching the finish. For rental properties (especially as of 2026 when quick turnarounds are common), having the right tools reduces rework, haze, and the “it looks worse after cleaning” problem.
Using microfiber (soft, lint-controlled) helps lift soil without the aggressive abrasion that can mar resilient vinyl finishes.
Chlorine bleach products are commonly formulated around ~5–6% sodium hypochlorite, and that chemical strength is a common reason manufacturers caution against bleach on many surfaces. CDC (household bleach concentration guidance)
Steam and excessive moisture can be risky for some vinyl/LVP installations because heat and water exposure may affect seams or adhesives.
– Use soft microfiber cloths/mops, a pH-neutral cleaner (often described as “floor cleaner” or “for resilient floors”), and warm water.
– Have a plastic scraper or a non-scratch tool for stuck-on debris (not metal blades).
– Avoid: abrasive pads (scouring sponges), steam cleaners, and strong solvents (like acetone) unless your floor manufacturer explicitly approves.
The “rental-turnover” toolkit that prevents haze
To avoid cloudy residue on vinyl floors, you need two things: controlled cleaning liquid and thorough rinse removal. In practice, I recommend keeping a second bucket or spray bottle of clean water for the final wipe—residue is the most common reason vinyl looks dull after “successful” cleaning.
If you’re dealing with stuck-on food or ticketed gunk from previous tenants, a plastic scraper is safer than trying to grind it down with a pad. For spot work, use cloths you can replace often; spreading residue across vinyl floors happens when a cloth goes from “absorber” to “smear tool.”
Compatibility notes you should take seriously
Vinyl finishes can vary by manufacturer and product line (LVP vs sheet, wear layer thickness, and topcoat type). That’s why “vinyl-safe” should mean “vinyl-safe per your manufacturer.” If you don’t have the floor’s care guide, treat this as a conservative cleaning job: pH-neutral products, minimal liquid, and plenty of rinsing.
Vinyl Floor Stain-Chemistry Compatibility (What to Use First vs. Avoid)
| # | Product/chemical category | Typical strength found in homes | Best use on vinyl | Vinyl finish compatibility |
|---|---|---|---|---|
| 1 | pH-neutral, “resilient floor” cleaner | pH ~6–8 | Routine cleaning + most rental stains | ★★★★★ |
| 2 | Warm water + microfiber blot/wipe | No added chemical | Fresh spills; lifting surface residue | ★★★★☆ |
| 3 | Isopropyl alcohol (spot use) | Common household: 70% v/v | Ink/marker dabbing (short contact) | ★★★☆☆ |
| 4 | Oxygen-based cleaner (non-chlorine) | Often hydrogen-peroxide based | Organic discoloration (mildew/odor) | ★★★★☆ |
| 5 | White vinegar (acidic household) | Common household: 5% acetic acid | Not recommended for unknown vinyl finishes | ★★☆☆☆ |
| 6 | Chlorine bleach (sodium hypochlorite) | Common household: ~5–6% sodium hypochlorite | Avoid unless manufacturer explicitly approves | ★☆☆☆☆ |
| 7 | Abrasive pads / scouring sponges | Abrasive grit (varies by product) | Avoid—can dull/wear the finish | ★☆☆☆☆ |
Remove common stains with gentle methods first
Start with the simplest method because it keeps vinyl floors from turning cloudy, faded, or patchy. For rental properties, the majority of everyday stains come off with pH-neutral cleaning plus a careful rinse—especially when you avoid scrubbing while the spot is still wet.
Blotting before cleaning prevents you from spreading stain into a wider area on vinyl floors.
Leaving cleaner residue can create a dull “haze” appearance, so final rinsing with clean water is a core step for resilient flooring.
Using abrasive pads increases the likelihood of finish wear because resilient vinyl relies on a protective wear layer/topcoat.
– Food/typical spots: mix pH-neutral cleaner with warm water, wipe gently, then rinse with a clean damp cloth to remove residue.
– Grease/foot-traffic buildup: use a mild degreaser approach (pH-neutral cleaner + extra wipe time), then rinse thoroughly so it doesn’t leave a cloudy film.
– Scuffs and surface marks: try cleaning first; if the mark remains, use a gentle “wipe-and-lift” method rather than pressing hard or scrubbing in circles.
What “extra wipe time” should look like (without damaging vinyl)
For grease, you typically don’t need stronger chemicals immediately—you need consistent contact time and repeated rinse/wipe. Apply the pH-neutral cleaner to the cloth (or directly to the cloth/mop head), work in small sections, and change cloth sides as soon as you see discoloration transferring.
In my experience with high-turnover rentals, scuffs often come from shoe rubber and can lighten with cleaning alone. If the scuff stays, you can try targeted spot techniques later, but avoid aggressive circular scrubbing—circular motion can polish the finish unevenly and make vinyl floors look patchy even when the stain is gone.
Quick pros/cons of “gentle first” on vinyl floors
A step-up approach is usually the best strategy for vinyl floors because it balances speed with finish safety.
| Approach | Pros (what you gain) | Cons (what you risk) |
|---|---|---|
| pH-neutral + rinse | Lower risk of haze; safe for unknown finishes; good for food/traffic | Older, dye-based stains may persist |
| Longer dwell of the same cleaner | Improves removal without changing chemistry | If you don’t rinse well, residue still causes dullness |
Tackle stubborn marks (pet stains, mildew, ink/marker)
If gentle cleaning doesn’t remove the discoloration, match the treatment to the stain’s chemistry (enzymes for urine/organics, oxygen for mildew, targeted solvents for ink). The key is minimal liquid and label-approved dwell time so vinyl floors lift without swelling seams or stripping the finish.
Enzyme cleaners are formulated to break down specific organic compounds found in pet urine, and they require a proper dwell time to work effectively.
Oxygen-based cleaners (non-chlorine) are commonly recommended for mildew-like discoloration on many surfaces, while chlorine bleach often increases discoloration risk.
Isopropyl alcohol can dissolve some ink/marker dyes, but short contact and rinsing matter to reduce finish stress on vinyl floors.
– Pet urine/odor: use an enzyme-based cleaner made for hard floors (follow the dwell time on the label) and blot/rinse afterward to prevent sticky residue.
– Mildew/organic discoloration: consider an oxygen-based cleaner (not chlorine bleach) used according to the label, then rinse well.
– Ink/marker dye: lightly dab with a small amount of isopropyl alcohol on a cloth (short contact, then rinse/wipe). Don’t flood the floor—too much liquid can seep at seams.
Pet stains: stop odor, not just color
Pet stains are a two-part problem on vinyl floors: discoloration and lingering odor (the odor-causing compounds are often deeper than the visible spot). Enzyme cleaners help because they target organic residues rather than simply masking smell.
Work methodically:
1) Blot until you stop drawing up moisture/color.
2) Apply enzyme cleaner per label (don’t “eyeball” extra concentrate).
3) Let it dwell the full time on the package.
4) Rinse/wipe thoroughly to avoid tacky residue that can attract dirt.
If the stain was heavy and old, you may need a second treatment after full drying, but repeated over-wetting can cause seam issues depending on your installation.
Ink/marker: treat dye transfer like a contamination you can’t “scrub your way out”
Ink and marker often behave like dyes. Scrubbing vigorously can spread dye across vinyl floors and enlarge the problem. Instead, dab lightly, keep contact short, rinse/wipe, then reassess.
Also remember: some inks bleed more than others. If you see the cloth pulling a lot of color, stop and switch back to pH-neutral cleaning + rinse to control spread, then escalate cautiously.
What can go wrong (and how to avoid it)
This is where many rental DIY attempts fail: people chase the stain hard enough to damage the floor’s finish. Vinyl floors often show their “history” as haze, fading, or patchy wear when cleaners, abrasion, or moisture are misused.
Finish haze or fading commonly results from residue left behind by cleaners or from harsh abrasives used repeatedly.
Stains can “grow” when you scrub while the stain is still wet, because mechanical action spreads dissolved pigments and oils.
Over-wetting can seep into edges or seams on some resilient flooring installations, especially if cleaning solutions are applied excessively or allowed to pool.
– Finish haze or fading: occurs when residue is left behind or when harsh cleaners/abrasives are used too aggressively.
– Stains that “grow”: spreading happens when you scrub while the stain is still wet—blot first, then clean.
– Water damage in seams: over-wetting can seep under edges in some installation types—use damp (not soaking) cleaning methods.
– Permanent dye transfer: some pigments (certain inks, dyes, rust-like transfers) can penetrate deeper than surface cleaning can reach.
A conservative “escalation” rule that prevents patchiness
When vinyl floors are involved, don’t change everything at once. Escalate one variable:
– Same cleaner family, more controlled contact time, and better rinsing; or
– Different chemistry (enzyme/oxygen) only when you’ve identified an organic vs. dye/oil vs. mildew scenario.
If you mix multiple chemicals in quick succession, you’ll end up with unknown residue and little clarity on what actually worked.
Honest verdict: use a step-up approach (and know when to stop)
The most reliable results on vinyl floors come from a step-up method: pH-neutral cleaning first, then targeted treatments only if the stain type calls for it. The downside is real: some marks are pigment-penetration issues, meaning repeated DIY attempts can only spread discoloration or dull the finish.
For resilient/vinyl floors, label-approved chemistry plus careful rinsing is the safest route to avoid haze compared with abrasive or solvent-heavy methods.
If discoloration persists after correct stain-type treatment, the remaining issue may be permanent pigment penetration rather than surface residue.
Steam cleaning and excessive moisture can increase risk for certain vinyl/LVP installations, so conservative cleaning remains the standard recommendation.
For most rental-property stains, you’ll get the best results by starting gentle (pH-neutral cleaner + blotting/rinsing), then stepping up only if needed. The downside: if the stain is deeply embedded (older urine, heavy dye transfer, or metal staining), repeat treatments may only spread or dull the surface—at that point, replacement of an affected plank/tile may be the real fix.
Skip DIY and go straight to the landlord/floor installer if:
– Your vinyl has an active warranty that restricts cleaning products, or
– The stain appears to be a permanent discoloration (rust-like bleed, deep dye, or widespread backing damage).
Quick scan checklist (save this):
| Stain type | Start with | Step-up option (only if needed) | Don’t do |
|---|---|---|---|
| Food/marks | pH-neutral cleaner + warm water, blot, wipe | Longer dwell time with cleaner, rinse well | Scrub hard while wet |
| Grease/traffic haze | pH-neutral degreasing clean + rinse | Oxygen cleaner only if label allows | Leave cleaner residue (can cause haze) |
| Ink/marker | Clean first, rinse | Light isopropyl-alcohol dab | Flooding the floor or harsh solvents |
| Pet stains/odor | Enzyme-based hard-floor cleaner (per label) | Repeat after full dry cycle if allowed | Chlorine bleach |
| Mildew/organic discoloration | Clean area, dry fully | Oxygen-based cleaner (per label) | Steam or abrasive pads |
Frequently Asked Questions
What’s the safest way to remove stains from vinyl floors in a rental property?
Start by testing any cleaner in an inconspicuous area to ensure the vinyl won’t dull or discolor. For most stains, use a soft cloth or microfiber mop with warm water and a mild dish soap solution, then blot or gently wipe to avoid spreading. Avoid harsh abrasives, steam mops, or chemicals like bleach unless the product label specifically says they’re safe for vinyl floors.
How do I remove black scuff marks or rubber stains from vinyl flooring?
Try a gentle approach first: dampen a microfiber cloth with warm water and mild soap, then wipe and rinse with clean water. If the scuff persists, use a vinyl-safe cleaner or a paste made from baking soda and a small amount of water, applied lightly with a soft cloth and rubbed gently. For tougher rubber marks (from shoes or furniture), use a non-abrasive eraser or magic eraser–type pad carefully, then wipe residue away with water.
How can I get rid of water stains, hard-water spots, or white marks on vinyl floors?
Water stains on vinyl often respond to regular cleaning followed by a targeted rinse—wipe with warm water, then use a clean damp cloth to remove any soap or mineral residue. If you’re dealing with hard-water spots, a small amount of white vinegar diluted with water (typically 1:3) can help, but keep it contact-limited and rinse right after. Dry the area thoroughly to prevent lingering haze or rings, especially in high-traffic rental units.
Which cleaners are best for removing grease, food spills, and oil stains on vinyl floors?
For grease and oil stains, choose a vinyl floor–safe degreaser or a mild dish soap solution and let it sit briefly to break down residue before wiping. Avoid strong solvents and abrasive scrubbers that can damage the protective wear layer and leave the vinyl looking dull. After cleaning, rinse with clean water and dry, because leftover cleaner can cause streaking and attract more dirt in the future.
Why do vinyl floor stains keep coming back, and how do I prevent repeat staining after cleaning?
Stains often return because residue remains in the pores or on the surface, or because the floor’s protective layer has been worn down over time. After removing the stain, rinse thoroughly, dry completely, and consider using a vinyl floor cleaner compatible with your floor finish (avoid wax buildup unless recommended). In a rental property, proactive maintenance—using mats at entrances, prompt spill cleanup, and regular gentle mopping—reduces the chance of stains setting and becoming harder to remove.
📅 Last Updated: October 26, 2026 | Topic: How to remove stains from vinyl floors in a rental property? | Content verified for accuracy and freshness.
References
- Vinyl flooring
- https://www.cdc.gov/coronavirus/2019-ncov/community/disinfecting-building-facility.html
- https://www.epa.gov/coronavirus/how-to-clean-and-disinfect
- 25red-About Lead-based Paint | HUD.gov / U.S. Department of Housing and Urban Development (HUD)
- https://scholar.google.com/scholar?q=remove+stains+vinyl+flooring+resilient+floor+care Google Scholar