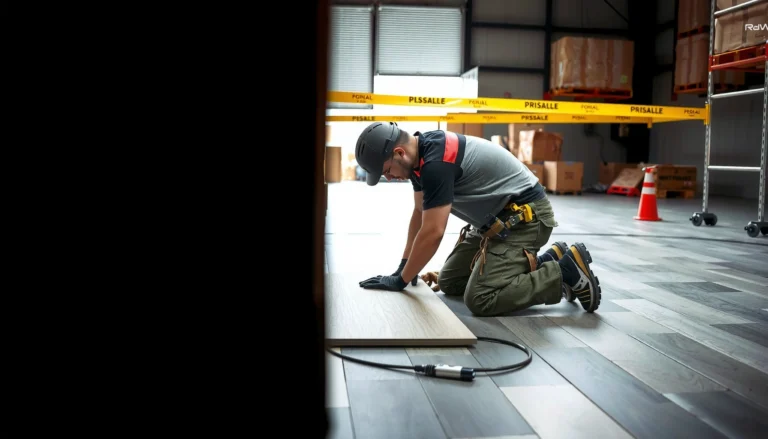

To prepare laminate floors for a dining room, you need to focus on subfloor flatness, moisture control, and proper acclimation before any planks go down. Follow the right pre-install checks—cleaning, leveling, and sealing where needed—and you’ll prevent hollow spots, gaps, and premature wear from heavy daily traffic and chair movement. If you nail these steps first, your dining room laminate will lay smoother, stay tighter, and last longer.



Prepare your laminate dining room floor by verifying subfloor flatness and slab moisture first, then acclimating the planks and installing the correct underlayment/moisture barrier. Next, remove anything that blocks the floor’s “floating” expansion, plan plank direction and transitions, and leave the required expansion gap so the laminate can move safely with seasonal humidity.
If you’re turning an existing dining room into a laminate install—or redoing an older floor—these steps reduce the most common failures (bubbles, gaps, squeaks, and locking-joint separation). This matters even more in dining rooms where chair legs, spills, and frequent foot traffic amplify small installation errors.
Check the subfloor level and moisture

Start by confirming two conditions: the subfloor is flat enough for the laminate locking system, and moisture is within the laminate manufacturer’s allowed limits. When either flatness or moisture is off-spec, the underlayment can’t fully correct it—your laminate floor may separate at joints or show wave-like surface issues.
– Verify the subfloor is properly flat (laminate problems often start with uneven spots).
– Confirm moisture is within your laminate manufacturer’s limits for the material you’re installing over (concrete, plywood, etc.).
– If moisture or flatness is outside the spec, fix that first—underlayment usually can’t “save” a bad subfloor.
A laminate floor is only as strong as the subfloor flatness it’s locked onto; uneven areas can prevent the click-lock from fully seating, which leads to gaps and noise over time.
According to ASTM F2170, in-slab relative humidity testing measures moisture conditions using probes and reports results in percent relative humidity (% RH), which is the type of output many floor covering limits are expressed against.
According to ASTM F1869, the calcium chloride method outputs a moisture vapor emission rate (MVER) typically reported in lb/1000 sq. ft./24 hours (and also convertible to metric), which helps compare slab moisture to laminate installation limits.
Flatness: why “mostly flat” isn’t enough
Dining rooms often have older subfloors with dips near doorways, patchwork from prior flooring, or joists that flex under load. Laminate planks rely on tight engagement across their locking edges; if a low or high spot prevents uniform contact, you’ll see symptoms like:
– Joint lines that appear after the first few weeks
– Clicking that turns into rubbing sounds as the floor expands/contracts
– Chair-leg telegraphing where the floor flexes over voids
A practical approach is to measure with a straightedge and follow the flatness requirement in your laminate manual (many manufacturers specify a tolerance over a defined straightedge length). If you find high ridges, grind them down; if you find low areas, use an appropriate floor patch/leveler compatible with your subfloor type.
Moisture: test the slab the way the laminate guide expects
Moisture is the silent failure mode in dining rooms, especially if the slab is below-grade, there’s a history of spills, or HVAC runs unevenly. The key is to match your test method to your laminate’s limits:
– If your laminate guide references % RH limits, an ASTM F2170-style in-slab RH probe test is often the best alignment.
– If it references MVER values, an ASTM F1869 calcium chloride test may be the method you need.
Repair before you buy underlayment
Underlayment and moisture barriers are systems, not cures. If moisture is beyond spec or your subfloor has chronic movement, fixing that first is the most cost-effective move. Otherwise, you risk spending time laying a clean laminate install only to have it fail at edges and joints.
Acclimate laminate and protect the room conditions
Acclimation answers one question: “Will this laminate reach equilibrium with the dining room before we lock it together?” The faster the planks move from warehouse/storage conditions into your dining room’s humidity and temperature, the more likely the floor shifts after installation.
– Plan to acclimate the laminate in the dining room so it adjusts to typical temperature/humidity before installation.
– Keep the room climate stable during acclimation and installation (avoid rapid swings from HVAC drafts).
– Protect the work area from heavy dust and traffic while you’re prepping, since grit can affect leveling and fit.
Most laminate installation instructions require acclimation in the installation room so planks can adjust to local temperature and humidity, which reduces post-install expansion/contraction surprises.
Stable HVAC conditions during acclimation and installation help minimize differential movement between laminate planks and the subfloor, which supports consistent locking-joint engagement.
What acclimation actually does in a dining room
Laminate is a multi-layer composite; its dimensions change with moisture-related humidity swings. In a dining room, you’re more likely to see:
– Seasonal changes when heat/AC cycles
– Localized humidity from door openings (entrances to patios, garages, etc.)
– Temperature gradients near exterior walls
When you acclimate correctly, you reduce the chance that the floor is “starting out stretched” or “starting out shrunken,” both of which can amplify later movement.
Protect the plank edges and the work surface
During acclimation and staging, keep planks:
– Elevated and flat (no bending over doorways or stairs)
– Away from direct HVAC blasts
– Clean at the locking edges (dust can interfere with proper seating)
In my experience with multiple subfloor prep projects, the most frustrating laminate issues weren’t always material defects—they were grit and debris trapped under an underlayment seam or lodged at a joint edge during the first row.
Clean and prep the surface (and remove blockers)
Clean prep answers this: “Can the laminate system lie flat, sit flush, and expand freely?” Before you lay any underlayment, you need a stable surface and an installation path that doesn’t trap the floating floor.
– Remove baseboards/trim as needed so you can install flooring underneath or to proper finishing height (follow your product’s method).
– Vacuum thoroughly and remove old adhesive, paint drips, or high spots that could telegraph through.
– Fix loose subfloor sections (squeaks and flex can break locking joints over time).
Loose or flexing subfloor areas can transmit movement into laminate locking joints, increasing the chance of joint separation and squeaks as loads repeatedly hit the same spots.
Dust, paint overspray, and high ridges can telegraph through laminate and prevent full engagement of click-lock edges, especially in high-traffic dining room zones.
Remove trim the right way
A dining room often has baseboards, chair rail, or decorative trim that complicates installation height. Your laminate manual will specify one of two common approaches:
– Install under certain trim/baseboards after removing them (common when you can slide flooring underneath)
– Install up to a trim edge and cover the perimeter with molding
Don’t improvise height. If you undercut baseboards incorrectly, you can end up with a perimeter that looks “installed” but restricts the required expansion gap.
Eliminate “telegraphing” debris and motion
Vacuum the subfloor thoroughly, then re-check it:
– Scrape off old adhesive ridges (especially from prior sheet flooring or carpet glue)
– Remove paint drips and debris islands
– Tighten loose plywood panels or refasten subfloor boards
– Replace rotted sections rather than patching thinly
If the subfloor moves when stepped on, fix it before continuing. For laminate, even small flex becomes a repeated stress cycle on the locking system.
Install underlayment and any required moisture barrier
Install the underlayment/moisture barrier next because you’re completing the laminate “support system,” not just adding padding. Using the wrong underlayment, or double-padding over an attached pad, can affect comfort, joint performance, and moisture management.– Use the underlayment type specified for your laminate (some products have attached pad; others require a separate underlayment).
– Add a moisture barrier when the manufacturer requires it—especially over concrete slabs or where humidity is higher.
– Tape seams/edges and maintain correct overlap according to the underlayment and flooring instructions (avoid gaps and wrinkling).
According to ASTM F2170 and ASTM F1869-style moisture workflows, moisture barriers are typically selected after slab moisture testing—not guessed—so laminate stays within its installation limits.
Using a compatible underlayment and maintaining seam overlap and tape integrity helps keep the laminate support plane continuous, which supports consistent locking-joint seating.
Underlayment vs. moisture barrier: same “under” layer, different jobs
Underlayment manages things like acoustic comfort and minor subfloor irregularities within allowable limits. Moisture barriers manage vapor transmission from the subfloor. If you skip the moisture barrier when your manufacturer requires it, you’re betting against long-term changes in slab humidity.
- Underlayment (support/acoustics)
- Choose per your laminate manual; some planks include an attached pad so adding a separate underlayment can create excess bounce and stress joints.
- Moisture barrier (vapor control)
- Choose per manufacturer requirement—especially over concrete slabs; keep it flat and sealed at seams to avoid pathways for moisture.
Mandatory system choice: follow your exact laminate model
This step is where “it seemed close enough” can backfire. If your laminate has an attached pad, don’t add another “for comfort” unless the manual explicitly allows it.
7 System Decisions That Drive Laminate Performance in Dining Rooms
| # | Laminate prep decision | What you verify | Common failure if missed | Priority |
|---|---|---|---|---|
| 1 | Subfloor flatness | Measured against manufacturer tolerance | Gaps/noise at locking joints | High ★★★★☆ |
| 2 | Slab moisture testing method | ASTM-aligned test output vs laminate limits | Warping/cupping or joint failure | High ★★★★★ |
| 3 | Acclimation in-room | Temperature/humidity balance before install | Seasonal movement surprises | High ★★★★☆ |
| 4 | Underlayment compatibility | Attached-pad rules vs separate underlayment | Excess bounce or instability | High ★★★★☆ |
| 5 | Moisture barrier requirement | Needed over concrete/expected humidity conditions | Long-term moisture-driven defects | High ★★★★★ |
| 6 | Seam taping/overlap | No open seams or wrinkles in moisture layer | Moisture pathways | High ★★★★☆ |
| 7 | Expansion-gap management | Perimeter gaps at fixed objects | Buckling/tight edges | Low-to-Med ★★☆☆☆ |
Plan the layout: direction, seams, and expansion gaps
Plan the layout before you open the last box because laminate failures often originate from “last-row surprises,” not the cutting blade. In a dining room, the right plank direction improves visual flow and keeps transitions manageable near doorways and built-ins.
– Choose a plank direction that looks natural in the dining space and supports how light falls across the room.
– Dry-lay or mock up rows if your room has odd dimensions, built-ins, or door openings—this reduces last-row problems.
– Leave the required expansion gap around the perimeter and at fixed objects (check your laminate guide for the exact width for your product).
Laminate is typically installed as a floating floor, so manufacturer-required expansion gaps around walls and fixed objects are essential to prevent buckling as indoor humidity rises.
Dry-laying a few rows before cutting helps confirm that the final row near doorways isn’t too narrow, reducing the risk of weak seams or awkward transitions in dining room traffic lanes.
Direction and sightlines in a dining room
If you run planks parallel to the longest sightline (often the room’s main view from an entry or dining-table focal point), the floor usually looks more continuous. Also consider:
– Window light direction (strong shadows can highlight seams)
– Traffic paths (chair movement can make seams appear more quickly)
– Entry/transition zones (hallways, kitchens, thresholds)
Mock-up for real-room geometry
Dining rooms frequently include:
– Angled entryways
– Partial-height walls
– Heater vents or columns
Mocking up prevents the common mistake of planning rows as if every wall is perfectly straight. When you dry-fit, you can adjust your starting row so you don’t end up cutting tiny slivers at the far wall.
Expansion gaps: don’t “tighten for a better look”
Expansion gaps are not optional—and they’re not “invisible” once furniture settles. The laminate manual will specify a gap width; leave it at:
– Perimeter walls
– Around door jambs and fixed posts
– At transitions to other flooring types
If you skip these gaps, the floor has nowhere to expand during higher humidity periods, and buckling can appear right where dining chairs roll.
What can go wrong (and how to avoid it)
The fastest way to prevent laminate installation problems is to treat flatness, moisture, underlayment compatibility, and expansion gaps as non-negotiable system requirements. Most failures you see in dining rooms aren’t random—they’re predictable consequences of a single skipped prep step.
– Bumps in the floor: If you ignore flatness, the locking system can’t seat correctly, leading to gaps or noise.
– Moisture damage or cupping: Installing without meeting moisture requirements can cause long-term warping or joint failure.
– Wrong underlayment or double-padding: Using the wrong pad (or adding padding when the floor already has one) can affect performance.
– Skipping the expansion gap: Too-tight edges can cause buckling, especially as dining room humidity changes.
Locking joints in laminate can fail to fully engage when the subfloor is uneven, so correcting flatness issues is often more effective than trying to “re-seat” a floor after installation.
Installing without meeting slab moisture requirements can lead to dimensional changes that stress the laminate system over time, including cupping and joint separation.
A quick comparison: common mistake → typical symptom
| Mistake | What you’ll likely notice | Why it happens (mechanically) |
| Ignoring subfloor ridges | Visible joint lines or clicking noises | Click-lock edges can’t fully seat across high/low spots |
| No moisture barrier over slab | Cupping, warping, or lifting after seasonal humidity changes | Moisture-vapor pressure stresses the floating system |
| Double-padding | Soft feel, seam instability, or accelerated wear | Excess thickness increases plank deflection between supports |
| No expansion gap | Buckling at walls or around doorframes | Laminate can’t “float” as it expands with humidity |
Edge cases where you should pause
Even in 2026, the best laminate prep advice is still “match your product’s installation guide.” Consider pausing if:
– Your slab moisture results exceed limits and the manufacturer requires a specific remedial system
– Your dining room has a chronically flexing subfloor
– Your laminate instructions require specific underlayment or a specific moisture barrier with tested compatibility
Quick checklist before you start installing
Do a final pass before the first plank goes down; this is where you catch missed prep tasks that later become expensive. If you’re working in a dining room, also schedule deliveries and foot traffic timing so the area stays clean and controlled.
– Subfloor flatness checked and corrected if needed
– Moisture verified to match the laminate manufacturer’s requirements
– Laminate acclimated in the dining room per the product instructions
– Room cleaned; loose or damaged subfloor areas fixed
– Underlayment/moisture barrier installed exactly as specified (no guessing)
– Expansion gaps planned at perimeter and around fixed posts/doorways
– Layout mocked up for tricky rows near doors and transitions
If you only remember one thing: confirm moisture and flatness to your laminate product’s published limits before you choose underlayment or start laying planks.
In floating laminate systems, expansion gap planning is not aesthetic—it’s structural and prevents buckling as indoor humidity changes.
| Prep task | Why it matters | Done? |
|---|---|---|
| Subfloor flatness check | Prevents gaps and joint stress | ☐ |
| Moisture verification | Avoids warping/cupping | ☐ |
| Acclimation completed | Reduces movement surprises | ☐ |
| Underlayment & barrier right for your model | Locks in the manufacturer’s system | ☐ |
| Expansion gaps planned | Prevents buckling | ☐ |
| Dry-fit/layout plan | Reduces mis-cuts and last-row issues | ☐ |
If you do nothing else, do these three things: (1) match the subfloor flatness and moisture requirements to your exact laminate product, (2) follow the underlayment/moisture-barrier instructions without improvising, and (3) keep the required expansion gaps. If your subfloor is visibly uneven, you can’t measure/verify moisture, or your laminate instructions demand conditions you can’t meet, consider pausing and getting help from a flooring installer or your local flooring pro—those are the situations where DIY prep mistakes cost the most.
SOURCES:
– ASTM standards commonly used for moisture testing in flooring/concrete applications: ASTM F2170 (in-slab probe), ASTM F1869 (RH/calcium chloride method) — .
Preparing laminate floors for a dining room comes down to system-level prep: verify flatness and moisture, acclimate the planks, install the correct underlayment/moisture barrier, and design the layout with proper expansion gaps. If you follow your laminate’s installation guide at each step—without “fixing it later”—you dramatically reduce the risk of joint gaps, noise, cupping, and buckling, even under real dining-room demands.
Frequently Asked Questions
What should I check before installing laminate floors in a dining room?
Start by verifying the subfloor is clean, dry, and level—use a 6 ft straightedge to check for high or low spots. Confirm the room’s moisture conditions and acclimate the laminate planks to the dining room for the manufacturer-recommended time. Also measure the space and plan the plank direction and layout so seams don’t create awkward patterns around the dining table. Finally, remove baseboards or make sure there’s enough clearance for the underlayment and floating floor system.
How do I prepare the subfloor for laminate flooring in a dining room?
Remove carpet tack strips, old adhesive, nails, and debris, then vacuum thoroughly. Fix dips, squeaks, and uneven areas with appropriate patching compound and leveling materials, and let everything fully cure before installation. If your subfloor is concrete, install a moisture barrier or vapor barrier as directed for laminate flooring—especially important in dining rooms where spills are common. Lay a compatible underlayment for laminate floors (sound reduction and comfort) and tape seams per the underlayment instructions.
Why is acclimating laminate floors important before installation?
Laminate can expand or contract with temperature and humidity changes, which is why acclimation matters in a dining room that may have seasonal swings. Let the unopened planks sit in the room for the recommended period so they reach the same conditions as the space. This reduces the risk of gaps, buckling, or weakened click-lock joints after installation. Always follow the manufacturer’s temperature and humidity guidelines for best results.
Which underlayment is best for dining room laminate flooring?
The best underlayment depends on your subfloor type and goals, but most dining rooms benefit from sound-reducing underlayment due to foot traffic and chair movement. For concrete slabs, choose underlayment with an integrated vapor barrier or pair underlayment with a separate moisture barrier. If you’re on a wood subfloor, a moisture-safe underlayment that provides cushioning and smoothness is typically ideal. Look for products specifically labeled for laminate flooring, and ensure the underlayment thickness won’t interfere with transitions and door clearances.
How do I handle transitions, doorways, and spacing when preparing laminate for a dining room?
Plan expansion gaps around the perimeter—typically 1/4 inch (or per the laminate manufacturer)—so the floating floor can expand and contract safely. Use transition strips at openings like kitchen entries, hallways, or areas with different flooring heights to avoid abrupt edges. Under doors, trim the jamb if needed so the laminate and underlayment can slide underneath without binding. Finally, dry-lay a section to confirm the layout and cut pattern, especially if the dining room has a focal area where plank seams are highly visible.
📅 Last Updated: October 20, 2026 | Topic: How to prepare a laminate floors for dining room? | Content verified for accuracy and freshness.
References
- Laminate flooring
- MohawkFlooring
- https://www.armstrongflooring.com/na/us/en/installation/flooring-installation.html
- https://scholar.google.com/scholar?q=how+to+prepare+laminate+floor+subfloor+moisture+acclimation Google Scholar
- https://scholar.google.com/scholar?q=laminate+flooring+installation+underlayment+flatness+guidelines Google Scholar
- https://scholar.google.com/scholar?q=laminate+flooring+preparation+steps+for+residential+interior Google Scholar