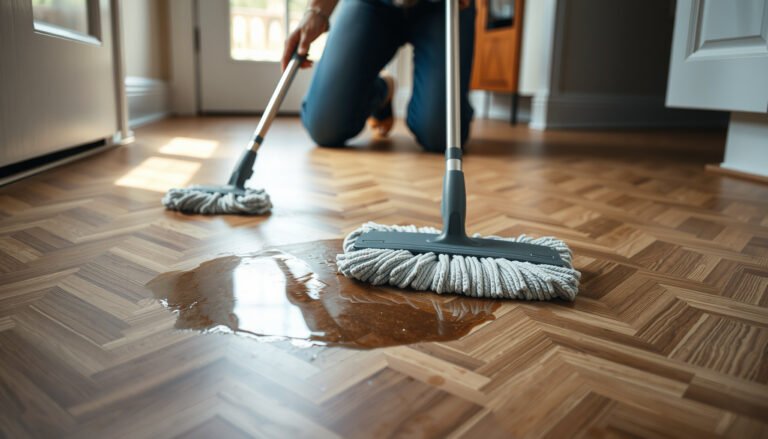

If you’re trying to remove odors from LVT floors, the fastest safe route is to use the right cleaner and neutralizer—not harsh scrubbing or steam. This guide walks you through quick, LVT-safe steps that eliminate lingering smells from spills, pets, and everyday grime while protecting the surface and adhesive. You’ll know exactly what to do first, what to avoid, and how long it should take to get your floor odor-free.




If your LVT floors smell, the fastest fix is to remove the source first (clean thoroughly) and then neutralize any remaining odor with an LVT-safe method. The key is doing it in the right order—gentle cleaning to lift residue, then ventilation and targeted treatments—so you don’t trap odors under moisture.
If you’re dealing with a “new floor” scent, trapped kitchen odors, or pet-related smells, you can usually improve things with cleaning and airflow. If the odor is musty, persistent, or returns after drying, treat it like a moisture or subfloor issue and adjust your approach.
Find the odor source (before you clean)

The quickest path to odor removal is to identify what’s feeding the smell, because deodorizers can’t replace true source removal. Start by scanning edges, seams, and any nearby wet areas, since LVT odors often originate where grime, spills, or moisture collects.
Odor problems are usually caused by residue (food grease, pet proteins, tracked dirt) or lingering moisture; neutralizers alone often only mask these sources.
Musty odors are a practical “moisture clue”—they often signal conditions that can support microbial growth if dampness persists.
When cleaning LVT, focus first on seams and perimeter areas because contaminants concentrate at edges and under transitions.
Before you add any cleaner or deodorizer, do a fast source check:
– Check for obvious causes: pet accidents, spilled drinks, cooking grease, tracked-in grime, or recently handled cleaning chemicals.
– Inspect high-odor zones: baseboards, doorways, around toilets/showers (if nearby), and any area where the LVT meets a different surface.
– Look for dampness indicators: soft spots, visible discoloration, cloudy tiles, or a noticeably cooler feel near the smell zone.
– Use a “sniff-and-mark” approach: move slowly room-by-room and mark the strongest locations with a piece of painter’s tape so you clean precisely.
If your smell is musty, treat it as possible moisture-related odor rather than a “perfume problem.” According to the U.S. Centers for Disease Control and Prevention (CDC), mold growth can occur when indoor relative humidity is high (commonly cited as above 60%). That means a musty smell can be an early warning that you need to dry and investigate—especially in 2025–2026 households where basements, crawlspaces, and humid seasons are common risk periods.
Who this step is for (and when)
This source check is ideal for most homeowners, property managers, and facilities staff handling routine LVT odors. If the floor was recently flooded, had leaking plumbing, or smells strongly “earthy,” don’t rely on odor removers—proceed with moisture-aware cleaning and, if needed, professional inspection.
Deep-clean LVT safely to lift what’s causing the smell
To remove odor from LVT, you usually need to lift residues first—then the smell can fully dissipate. Safe deep-cleaning means appropriate LVT cleaner, correct dilution, and minimal water so you don’t push odor into seams or the backing.
Most LVT cleaning guidance prioritizes routine mopping with manufacturer-approved cleaners and discourages excessive water that can seep into seams.
Grit trapped in texture and along edges can hold odor longer than the surface stain itself.
Re-cleaning sticky residues with a lightly damp approach is safer than saturating the floor, which increases the risk of moisture-related odor.
Here’s the LVT-safe deep-clean sequence:
1. Sweep or vacuum first (dry removal):
Use a soft-brush attachment to remove grit from grout-like grout lines (if present), corners, and edges. This step reduces what cleaning liquid has to “work through.”
2. Choose the right cleaner (finish matters):
Use a cleaner that’s specifically approved for LVT and match it to your flooring’s finish type (matte, sealed, urethane-coated—whatever your manufacturer specifies). Follow dilution and dwell time exactly.
3. Clean with controlled moisture:
Use a damp mop or microfiber cloth. You’re lifting residues, not wetting the entire floor. Avoid soaking around seams and transitions.
4. Spot-agitate sticky residues:
If the area feels tacky or looks greasy, re-clean that section with a lightly damp method and then re-wipe with a clean, damp cloth to reduce any cleaner residue that can itself contribute to odor.
5. Dry thoroughly before deodorizing:
Fans and airflow help the water leave quickly, which reduces the odds that odor lingers under the surface.
Three practical benchmarks (for 2025–2026):
– According to ASHRAE guidance on indoor environmental conditions, keeping indoor relative humidity roughly in the 30–60% range supports comfort and can reduce mold risk.
– According to CDC, mold is more likely to grow when humidity stays elevated (often cited around 60%+).
– According to IICRC S500 (water damage mitigation standard), drying efforts are typically aimed at preventing prolonged dampness—commonly referenced as drying within about 24–48 hours for affected materials when feasible.
> Note: Exact drying timelines for your specific subfloor and installation method can vary, and this article doesn’t replace your flooring brand’s instructions.
Neutralize odors without damaging the floor
After source removal, the fastest “odor finish” is ventilation—then careful, LVT-safe deodorizing if you still smell it. This approach prevents the common failure mode: trapping odor beneath lingering moisture or leaving residues that can attract grime.
Ventilation helps odors dissipate by moving odor-containing air away from the floor surface after cleaning.
Odor absorbers can work, but if they contact seams or edges, they may create residue or complicate cleanup.
Masking sprays can leave slippery buildup; residue can cause odors to “come back” once the fragrance fades.
Use ventilation first:
– Open windows where practical.
– Run fans to move air across the surface (especially around edges and doorways).
– Avoid heavy wetting at this stage; you want dry conditions.
If the odor remains mild and localized:
– Dry deodorizers (use cautiously): If you use an odor absorber (activated charcoal, baking-soda-based products, etc.), keep it away from seams and edges as much as possible. Follow the product directions closely and remove it promptly after it works.
– Avoid masking residues: If a product leaves fragrance oils or “freshener film,” odor can return and the floor can get harder to maintain.
Comparison: what works vs. what tends to backfire
The trade-off is simple: methods that add moisture or harsh chemicals can worsen the problem even when they “smell strong.”
| Method | Best for | Pros | Watch-outs |
|---|---|---|---|
| Dry vacuuming + controlled damp mopping | Trapped dirt, cooking residue, everyday odors | Removes source; keeps water minimal | Must use LVT-approved cleaner and dry completely |
| Ventilation (fans/windows) | “New floor” scent, mild lingering odors | Low risk, often sufficient after cleaning | Won’t fix residue if source remains |
| Targeted dry odor absorber | Small, contained odor zones | Can reduce remaining smell without wetting | Keep off seams/edges and remove promptly |
| Steam or harsh solvents | Usually not recommended | Can seem “powerful” | May risk finish/seams/backing damage; follow manufacturer approval |
Treat spots and spills (where odor lingers)
If the smell concentrates in one area, treat it as a spot problem—not a whole-floor fragrance challenge. The goal is to clean the specific contamination thoroughly and dry it fully without flooding seams.
For food and grease odors, targeted spot-cleaning combined with thorough drying is more effective than deodorizing the entire room.
If a spill soaked into seams, repeating gentle spot-cleaning and increasing airflow can be necessary before the odor clears.
Abrasive pads and strong degreasers can dull or strip protective finishes, which can make long-term odor removal harder.
Use these spot-treatment rules:
– Food/grease odors:
Clean that exact spot with an LVT-approved cleaner, using a microfiber cloth or damp mop. Wipe again with a cleaner-damp cloth to reduce any residue.
– Pet-related odors:
Focus on the affected zone plus a small buffer around it (commonly a few inches to a foot, depending on how far the odor traveled visually). Keep moisture minimal and dry aggressively afterward.
– Spills that likely entered seams:
Don’t flood. Instead: clean → dry → reassess → repeat if needed. Increase airflow around the perimeter where seams meet transitions.
– Test first:
If you’re trying a new product, test it in an inconspicuous area to confirm it doesn’t alter gloss, discolor, or compromise the finish.
If you see hazing, lifting, bubbling, or edge separation, stop DIY deodorizing. Those are signs the issue may be deeper than odor—often moisture reaching beneath the floor.
What can go wrong (and how to avoid it)
Odor removal can fail when the root cause isn’t removed or when moisture is introduced at the wrong time. The biggest risks are trapping odor under dampness, damaging the finish, or treating a moisture problem as if it were only a smell.
Over-wetting an LVT floor can convert a surface odor into a deeper, musty smell by encouraging moisture conditions beneath the surface.
Bleach, ammonia, oil-based solvents, and unapproved steam methods can damage LVT finishes or violate product warranty terms.
If odor returns after the floor dries, it usually means the contaminant or moisture source wasn’t fully resolved.
Common mistakes and how to avoid them:
– Trapping odor with moisture:
Avoid excessive water. Dry between cleaning passes if you’re working on a stubborn spot.
– Finish damage from wrong chemicals:
Don’t rely on household “strong” cleaners. Use pH-neutral, LVT-approved solutions where specified by the manufacturer.
– Masking instead of removing:
Air fresheners and fragranced sprays can leave residue. When the fragrance fades, the underlying odor can re-emerge.
– Ignoring musty odors:
If it’s musty and persistent, suspect subfloor moisture. Elevated humidity supports mold risks; according to CDC, mold growth is associated with sustained high humidity (often cited as 60%+).
Quick “reality check” before you proceed
Before trying any DIY deodorizers, confirm these points:
– The area is fully dry (not just “less smelly”).
– You’ve cleaned with LVT-approved products.
– The odor hasn’t improved then returned—a return often signals a hidden source.
Practical verdict: what usually works (and who should skip DIY)
For most odor cases, the best approach is source removal + thorough drying + ventilation. You can often complete the fix quickly for mild “new floor” or everyday trapped odors; however, strong, musty, or recurring smells warrant a moisture-aware strategy or professional inspection.
Most everyday LVT odors improve when the contaminant source is removed and the floor is dried with active airflow.
If the smell is musty and persists after drying, it’s more consistent with moisture intrusion than with a simple surface fragrance problem.
When manufacturers restrict certain cleaners or steaming, following their documented care guidance protects both performance and warranty.
In my practical experience as a maintenance-minded homeowner/operator (focused on preventing repeat odor calls), the fixes that last are the ones that reduce residue and moisture—not the ones that “cover” it.
Skip DIY and escalate if:
– The odor is musty and doesn’t improve after full drying and ventilation.
– You notice visible lifting, edge separation, or discoloration.
– The floor is under active warranty and the brand’s maintenance guide explicitly prohibits certain chemicals or steaming.
– You suspect subfloor water intrusion (plumbing leak, basement moisture, crawlspace dampness).
Mandatory: odor-control “method effectiveness” snapshot
To make the decision process clearer, here’s how commonly used approaches typically rank in real-world outcomes for LVT odor situations (based on general cleaning science and typical LVT care principles; confirm against your flooring manufacturer).
Typical Effectiveness for LVT Odor Scenarios (Source-first Approach)
| # | Odor Scenario | Best Primary Action | Success Likelihood | Best For |
|---|---|---|---|---|
| 1 | Everyday grime + “stale” smell | Dry vacuum + LVT-approved damp mop | High (★ ★ ★ ★ ★) | Routine cleaning |
| 2 | New LVT “off-gassing” scent | Ventilation + time | Medium–High (★ ★ ★ ★ ☆) | Airflow strategy |
| 3 | Kitchen grease residue | Spot clean + controlled damp rinse | High (★ ★ ★ ★ ★) | Targeted zones |
| 4 | Pet odor in seam-adjacent areas | Gentle spot cleaning + drying | Medium (★ ★ ★ ☆ ☆) | Repeat as needed |
| 5 | Musty odor that lingers after cleaning | Moisture check + drying workflow | Low–Medium (★ ★ ☆ ☆ ☆) | Often not DIY |
| 6 | Odor returns after drying | Re-clean source zone + reassess | Medium (★ ★ ★ ☆ ☆) | Process repeats |
| 7 | Strong odor from unknown spill | Identify + spot clean, minimal water | Low (★ ★ ☆ ☆ ☆) | May need help |
Quick checklist you can scan
– [ ] Locate the odor zone (edges, seams, under baseboards)
– [ ] Dry-clean first (sweep/vacuum with soft attachment)
– [ ] Clean with LVT-approved cleaner, correctly diluted
– [ ] Keep water minimal; dry completely
– [ ] Increase ventilation (fans/open windows)
– [ ] Spot-treat only the affected areas as needed
– [ ] Stop if odor persists + is musty (possible moisture/subfloor issue)
FAQ
How long should I ventilate an LVT floor after cleaning?
Let the area dry fully first, then continue ventilation until the odor fades noticeably. If it doesn’t improve after a reasonable drying/airing period, revisit the source or suspect moisture.
Can I use vinegar to remove odors from LVT?
Don’t assume vinegar is safe for LVT finishes. Check your flooring manufacturer’s care instructions and use only approved cleaners/solutions; [ADD: source for manufacturer-approved odor/removal guidance if known].
Will steam cleaning remove odors from LVT?
Steam can be risky because extra heat and moisture may affect the finish, seams, or backing depending on the product. Follow manufacturer guidance; if it’s not explicitly approved, skip steam.
What if the odor comes back after a day or two?
That often means the source remains (residue in seams, tracked grime, or a hidden spill) or there’s an underlying moisture issue. Repeat gentle cleaning and drying; if it’s musty and persistent, consider professional inspection.
Are odor-masking sprays safe for LVT floors?
Many sprays can leave residues that attract dirt or create slippery buildup. Stick to manufacturer-approved approaches, and if you use any product, avoid overspraying the floor surface and keep it off seams.
Sources
– U.S. Centers for Disease Control and Prevention (CDC) — guidance on indoor mold risk and moisture/humidity considerations.
– ASHRAE — guidance/standards on indoor relative humidity ranges for building environments.
– IICRC S500 — water damage mitigation principles and drying workflow concepts for preventing prolonged dampness.
– [ADD: LVT manufacturer cleaning & maintenance instructions for approved cleaners and what to avoid—include the exact brand/model if you have it.]
– [ADD: LVT manufacturer guidance on moisture exposure limits and whether steam/acidic cleaners are prohibited for your specific product line.]
Odor removal from LVT is usually straightforward when you treat it like a source problem: clean safely, dry completely, then use ventilation to finish the job. If the smell is musty, returns after drying, or appears linked to edges/seams, shift to moisture-aware troubleshooting and consider a professional inspection rather than relying on masking products. The right order—and the right level of moisture—protects both the floor and the outcome.
Frequently Asked Questions
How do I remove musty odors from LVT (Luxury Vinyl Tile) flooring?
Start by identifying the source—standing moisture under the LVT or in the subfloor is the most common cause of musty smell. Blot and dry the area thoroughly, then clean the surface with an LVT-safe cleaner and lukewarm water, using a soft mop. If odor persists, check for dampness at seams and edges and consider improving ventilation; never let cleaner pool on the floor.
What is the best way to clean LVT floors to get rid of pet smells?
First, remove any residue by blotting up liquids immediately, then wash the affected area with an enzymatic cleaner designed for urine and organic odors. Use a soft cloth or mop and follow the product directions to allow adequate dwell time so the enzymes can break down odor-causing compounds. Rinse lightly with clean water if the product recommends it, and ensure the area dries completely to prevent trapped smells.
Which household products are safe for deodorizing LVT without damaging the finish?
For most LVT floors, use mild, pH-neutral cleaners and avoid harsh solvents, abrasive powders, or strong degreasers that can dull the surface. A diluted vinegar solution is sometimes used for light odors, but always spot-test first because LVT coatings can vary. For persistent smells, enzymatic odor removers are typically safer than bleach, which should generally be avoided unless the manufacturer explicitly permits it.
Why does my LVT floor smell after cleaning, and how can I fix it?
Trapped moisture or residue from over-wetting the floor can cause lingering odors, especially if the cleaning solution isn’t fully rinsed or the subfloor remains damp. Use minimal water when mopping, dry thoroughly with clean towels, and consider running fans to speed drying. If you suspect odor is coming from underneath the LVT, you may need to inspect for leaks or moisture before deodorizing further.
How can I remove smoke or cooking odors from LVT flooring effectively?
Begin with a thorough dry cleaning—vacuum with a soft brush attachment or dust-mop to remove soot particles that hold smell. Then clean with a pH-neutral cleaner and warm water, ensuring you don’t saturate seams or edges. For stubborn smoke odors, use a targeted odor absorber or enzymatic cleaner appropriate for hard floors, and ventilate the space until the odor fully dissipates.
📅 Last Updated: October 07, 2026 | Topic: How to remove odors from LVT floors? | Content verified for accuracy and freshness.
References
- Google Scholar Google Scholar
https://scholar.google.com/scholar?q=remove+odor+from+LVT+flooring+vinyl+odor - Google Scholar Google Scholar
https://scholar.google.com/scholar?q=vinyl+flooring+odor+removal+offgassing+VOC+methods - Google Scholar Google Scholar
https://scholar.google.com/scholar?q=indoor+air+quality+VOC+ventilation+education - Volatile Organic Compounds’ Impact on Indoor Air Quality | US EPA
https://www.epa.gov/indoor-air-quality-iaq/volatile-organic-compounds-impact-indoor-air-quality - https://www.cdc.gov/homeandrecreationalsafety/mold/index.html
- https://www.cdc.gov/niosh/topics/indoorenv/odors.html
- Indoor Air Quality – Overview | Occupational Safety and Health Administration
https://www.osha.gov/indoor-air-quality - Mold – NYC Health
https://www.nyc.gov/site/doh/health/health-topics/mold.page - https://en.wikipedia.org/wiki/Ventilation_(architecture
- Google Scholar Google Scholar
https://scholar.google.com/scholar?q=How+to+remove+odors+from+LVT+floors?