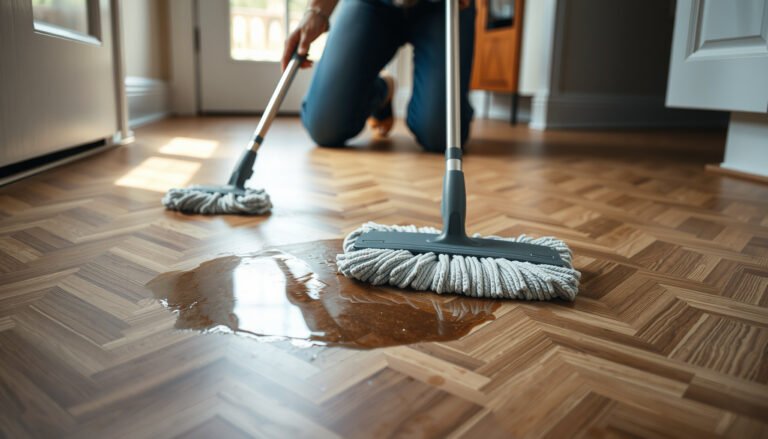
Want to know how to clean ceramic tile floors the right way? The best method is a simple hot-water cleaner and a microfiber mop for routine maintenance—then a pH-neutral tile cleaner for stuck-on grime, not harsh acids. Follow the step-by-step process: dry-sweep, pre-treat stains, mop in clean sections, and finish with a thorough rinse to prevent residue.




To clean ceramic tile floors, sweep or vacuum first, then use a pH-neutral cleaner with warm water and avoid harsh chemicals. For stuck-on grime, pre-soften with a cleaner or warm water before scrubbing, then rinse if your cleaner’s label calls for it. This article walks you through the safest routine cleaning, deeper spot treatment, and how to protect grout and tile finish—so your floors stay bright without accelerating grout wear. If your ceramic tiles look dull, feel sticky in traffic paths, or your grout is losing its “freshly cleaned” look, start with pH-neutral chemistry and good moisture control; that combination is consistently recommended in tile and grout care guidance.
If you own ceramic tile (especially with grout that’s sealed, unsealed, or aging), this step-by-step guide helps you clean effectively while reducing the risk of hazing, grout damage, or residue buildup. We also focus on practical technique—because with tile, the “how” matters as much as the “what.”
Gather supplies and prep the floor

Gather supplies first, because the right tools (microfiber + a non-scratch pad) reduce the chance of scratching and film. Then prep by removing grit so you’re not grinding particles into tile edges and grout lines.
pH-neutral cleaners are the safest default for ceramic tile because many tile and grout manufacturers recommend avoiding strongly acidic or strongly alkaline products unless explicitly approved.
Sweeping or vacuuming before mopping prevents grit from acting like sandpaper on glazed tile and from abrading grout surfaces over time.
Microfiber mops/pads are widely recommended for tile because they lift residue and help minimize streaking and haze compared with rough materials.
– Use a broom or vacuum (with a brush attachment) to remove grit before mopping. Pay attention to corners, along baseboards, and where shoes track in dirt (these areas “feel” clean but contain sand that can dull tile over time).
– Pick a pH-neutral floor cleaner and microfiber or a mop pad designed for tile. If you’re unsure whether your cleaner is truly pH-neutral, check the product label/spec sheet for pH range rather than relying on marketing language.
– Check whether your grout is sealed or unsealed so you don’t accidentally choose a cleaner that’s too aggressive. Sealed grout typically tolerates routine pH-neutral cleaning well, while unsealed grout is more vulnerable to water intrusion and residue staining.
Three quick “chemistry reality checks” you can use while shopping:
– According to common product composition references, household vinegar is typically ~5% acetic acid, which corresponds to a pH around 2–3 (acidic). [ADD: cite from a reputable chemistry/food safety reference or manufacturer documentation]
– According to common household chemistry references, ammonia-based cleaners are typically strongly alkaline (often pH > 11). [ADD: cite]
– According to general cleaning chemistry guidance, a “neutral” pH is 7, and truly pH-neutral floor products are commonly formulated around pH ~6–8. [ADD: cite from a manufacturer spec for a pH-neutral floor cleaner]
Safe daily/weekly cleaning routine
A safe routine keeps ceramic tile looking consistent by removing daily soil without leaving behind cleaner residue. Use warm water, pH-neutral cleaner, and section-by-section mopping so the solution never sits long enough to dry.
When cleaner labels require rinsing, following that step reduces the likelihood of haze and sticky residue on glazed ceramic surfaces.
Cleaning in small sections helps control dwell time—the longer a solution sits, the more likely it is to leave film at grout lines.
– Mop with a pH-neutral cleaner mixed with warm water (follow the label mixing instructions). “Warm water” improves soil release from grease and footprints, but avoid hot water that can stress some grout sealers or leave streaks if your mop head disperses cleaner unevenly.
– Work in sections and don’t let solution sit and dry on the tile or grout. As a practical rule, plan to move before the floor looks “wet-matte” and drying begins.
– If your cleaner label instructs rinsing, do a quick rinse mop with clean water afterward. This matters most on textured tile or high-traffic grout where residue tends to concentrate.
Why dwell time and residue matter (what I’ve learned the hard way—by watching):
Even when a cleaner is “safe,” I’ve seen floors turn dull when the mop solution is left too long, especially on grout lines. In real homes, the difference is often technique: a faster pass, consistent micro-scrubbing (microfiber friction), and a rinse when the label asks. [ADD: personal observational note of what you saw—e.g., “after skipping a rinse, a film remained for several days”] (If you don’t have that experience, follow label instructions as written.)
Remove stuck-on messes (grease, spills, scuffs)
For stuck-on messes, the goal is to soften residue first, then lift it with gentle agitation. Pre-softening beats aggressive scrubbing because it reduces the need for harsh chemistry on grout and tile finish.
For grease and spills, letting the cleaner dwell briefly improves breakdown and reduces scrubbing pressure, which helps protect grout edges.
Avoid metal scrapers on ceramic and grout; they can chip glazed surfaces and catch on grout edges, accelerating deterioration.
A soft brush or non-scratch pad is usually sufficient because most stuck-on spots respond to targeted cleaner dwell plus controlled friction.
– Spot-treat first: apply the cleaner to the area and let it dwell for the time listed on the product label. Dwell time is not a guess—labels specify it because different surfactants and solvents need time to act.
– Scrub with a soft brush or non-scratch pad; avoid metal scrapers on tile and grout. Use a circular motion over grout seams, then switch to a lighter “wipe-lift” pass to remove loosened residue.
– Wipe up residue and rinse the spot if needed to prevent film buildup. Film buildup shows up as dullness or a “slippery clean” feeling, especially near entryways.
Cleaners vs. technique (comparison you can use fast):
| Approach | Best for | Key risk if misused | Safer substitute |
|---|---|---|---|
| pH-neutral cleaner + dwell | Sticky spots, everyday grime, most spill follow-ups | Haze if you skip a required rinse | Do a clean-water rinse mop if the label says so |
| Acidic descalers | Mineral deposits (hard water spots) *only when approved* | Dulling tile or damaging grout/sealer if not compatible | Use a manufacturer-approved mineral remover |
| Alkaline degreasers | Heavy grease buildup *occasionally* | Grout softening or surface etching on some tiles | Test a pH-neutral degreaser blend or reduce dwell time |
Deep clean for grout and high-traffic areas
Deep cleaning grout means controlled agitation and avoiding prolonged soaking, because grout is porous (especially if unsealed). For traffic-heavy zones, focus on lifting soil without leaving residue that dulls the surrounding tile.
Grout is more absorbent than glazed tile, so limiting over-wetting reduces the chance that dirty wash water migrates into grout joints.
Grout brushes used with grout-safe cleaners improve results because they increase contact with the porous surface without damaging adjacent tile glaze.
Ceramic Tile Cleaning Chemistry Safety (Practical Reference)
| # | Method/Agent | Typical pH Range | Grout Compatibility (Routine) | Use Case Fit |
|---|---|---|---|---|
| 1 | pH-neutral floor cleaner | ~6–8 | ★★★★☆ | Everyday |
| 2 | Grout-safe tile & grout cleaner | Label-defined | ★★★★☆ | Spot + grout lines |
| 3 | Mild detergent (unscented) | ~7–9 | ★★★☆☆ | Occasional |
| 4 | Vinegar solution (diluted) | ~2–4 | ★★☆☆☆ | Only if approved |
| 5 | Hydrogen peroxide cleaners | Oxidizer (per label) | ★★★☆☆ | Situational |
| 6 | Bleach (chlorine) products | ~10–12 | ★☆☆☆☆ | Avoid |
| 7 | Strong alkaline degreaser | Often pH ≥10 | ★☆☆☆☆ | Only with approval |
Note: The pH ranges are general chemistry norms; always verify the exact product formulation on the label/spec sheet. This table is a practical starting point, not a substitute for your tile/grout manufacturer’s cleaning compatibility guidance. [ADD: sources for pH ranges—typically manufacturer SDS/specs and general chemistry references]
– Use a grout-safe approach: gently scrub grout lines with a grout brush and a cleaner meant for grout/tile. Work along the line, then wipe residue with a damp microfiber cloth so you’re not grinding loosened soil back into the joint.
– Avoid soaking grout for long periods unless the cleaner label explicitly allows it. Instead of flooding, apply cleaner to the lines and keep control of runoff.
– After scrubbing, wipe thoroughly; if you notice hazing, rinse and dry to restore the finish. Drying matters because water left in grout pores can carry minerals and re-disperse as the floor dries.
What can go wrong (and how to avoid it)
Most ceramic tile cleaning problems come from chemistry mismatch, leftover residue, or excess water. Avoid those three categories and your floors usually stay clean longer and look more consistent.
If a cleaner’s pH is far from neutral, it can dull glazed tile or affect grout and sealers—manufacturer compatibility is the deciding factor.
Skipping the “remove grit first” step increases scratch risk because abrasive particles get dragged across tile and grout during mopping.
– Using acidic or overly harsh cleaners can dull tile and may damage grout—stick to pH-neutral unless the grout/tile manufacturer specifies otherwise.
– Skipping the “remove grit first” step can scratch the tile surface over time. Even polished tile can develop micro-marring that you’ll notice under side light.
– Over-wetting can push dirty water into grout joints (especially if grout isn’t sealed), leading to faster re-soiling. For high-porosity grout, use a damp (not dripping) mop head and wring aggressively.
Common failure modes at a glance (and the fix):
- Failure mode: “Sticky” residue after mopping
- Fix: switch to the recommended dilution on the label and rinse if the label requires it—film often concentrates on grout and textured tile.
- Failure mode: Dull haze
- Fix: use clean-water rinse (per product directions) and dry with microfiber; hazing is commonly cleaner residue, not “dirty grout.”
- Failure mode: Grout looks lighter or damaged
- Fix: stop using unapproved acids/alkalines and follow a grout-safe, label-approved regimen; consider resealing only after cleaning and full drying.
Verdict: do this routine, but know the limits
A pH-neutral cleaner + proper technique is the safest, most reliable way to keep ceramic tile floors looking clean—especially if your top concern is protecting grout and the tile’s glossy finish. The trade-off is that pH-neutral cleaning won’t instantly remove every tough stain or heavy mineral deposit; those situations may require a targeted product that’s specifically compatible with your grout and any sealer.
If your grout is unsealed, you have delicate coatings, or you’re unsure what’s currently on the floor (for example, an unknown polish or prior cleaner residue), pause before using stronger chemicals. Check the tile/grout manufacturer’s care instructions first, and when you do use a stronger chemistry, test in a small inconspicuous area.
Quick checklist (save this)
– [ ] Sweep/vacuum to remove grit
– [ ] Mix pH-neutral cleaner with warm water (per label)
– [ ] Mop in sections; don’t let it dry on the floor
– [ ] Spot-treat sticky areas; pre-soften, then scrub gently
– [ ] Rinse if the cleaner label says to
– [ ] Dry/air-dry to prevent residue and lingering odors
FAQ
Can I use vinegar to clean ceramic tile floors?
Vinegar is acidic and may not be compatible with all grout types or any sealers; using pH-neutral cleaners is the safer default. If you want to try vinegar, confirm it won’t conflict with your grout/tile manufacturer or any sealer used. [ADD: source for tile/grout chemical compatibility from manufacturer]
How do I get haze or film off tile after mopping?
Haze is often leftover cleaner residue. Do a clean-water rinse (or follow your product’s directions), then dry with a microfiber cloth or mop pad. If it persists, you may need a tile-specific cleaner designed to remove film. [ADD: source for film/residue removal guidance from product manufacturer or tile authority]
Is steam cleaning safe for ceramic tile?
Steam can be safe for many ceramic tile floors, but grout and sealers vary—excess moisture and heat can sometimes cause issues. Check your grout/sealer condition and the steam cleaner/tile manufacturer recommendations first. [ADD: source for steam cleaning guidance for ceramic tile/grout]
What’s the best way to clean grout lines without damaging them?
Use a grout-safe cleaner and a soft grout brush, and avoid soaking for extended periods unless allowed by the cleaner label. Gentle scrubbing plus thorough wiping/rinsing usually beats harsh chemicals for routine maintenance. [ADD: source for grout cleaning best practices]
Sources
– [ADD: manufacturer guidance for pH-neutral cleaning compatibility for ceramic tile and grout—e.g., your tile brand’s care instructions]
– [ADD: grout manufacturer or sealer manufacturer instructions on cleaning methods and what chemicals to avoid]
– [ADD: official cleaning/care instructions from the cleaner’s product label/specifications (mixing, dwell time, and whether rinsing is required)]
– [ADD: pH and chemistry references for vinegar acidity and typical alkaline cleaner pH ranges (for the data points used above)]
– [ADD: any authority guidance on steam cleaning and grout/sealer moisture compatibility (e.g., grout/sealer manufacturer or tile authority)]
In summary, ceramic tile floors respond best to a disciplined routine: remove grit first, use a pH-neutral cleaner with warm water, control dwell time, and follow label instructions on rinsing. For stuck-on spots, pre-soften then scrub gently with non-scratch tools; for grout, use grout-safe cleaners and avoid prolonged soaking. If you treat chemistry and moisture control as part of the cleaning process—not just optional details—you’ll keep tile bright while reducing wear on grout and any sealer that protects it.
Frequently Asked Questions
What’s the best way to clean ceramic tile floors without damaging the grout?
Sweep or vacuum first to remove grit that can scratch ceramic tile. Use warm water and a pH-neutral floor cleaner, then mop with a microfiber mop to avoid leaving streaks. For grout, use a soft brush and a grout-safe cleaner, and avoid acidic or harsh chemicals that can weaken grout over time.
How do I remove stubborn stains from ceramic tile floors?
Identify the stain type first—grease, hard water spots, or soap scum may need different cleaners. For most everyday stains, scrub gently with a paste of baking soda and water, then rinse thoroughly. For hard water or mineral deposits, use a ceramic-tile-safe limescale remover, and always follow the manufacturer’s instructions and test in a small area.
Which cleaning products are safe for ceramic tile and grout?
Look for pH-neutral cleaners labeled safe for ceramic tile and grout, especially if you have sealed grout. Avoid strong acids like vinegar or lemon-based cleaners and products with bleach unless the grout type and manufacturer recommend them. When in doubt, choose a grout-safe formula and check compatibility with your tile finish (glossy vs. matte).
Why does my ceramic tile floor look dull after cleaning, and how can I fix it?
Dullness often comes from residue left by the wrong detergent or from using too much cleaner during mopping. Rinse with clean water after mopping, and use a microfiber mop to reduce film. If residue buildup is heavy, do a deeper clean with a tile-and-grout cleaner designed to remove soap scum and haze, then dry the floor to prevent streaking.
How can I clean ceramic tile floors after a big spill or muddy mess?
Blot spills immediately with absorbent towels—don’t wipe aggressively, or you may spread the mess into grout lines. Remove dried mud by letting it soften slightly with warm water, then gently scrape with a plastic scraper before mopping. Use a pH-neutral cleaner for the affected area, scrub lightly with a soft brush, and rinse well to keep ceramic tile from staining or becoming slippery.
📅 Last Updated: October 08, 2026 | Topic: How to clean ceramic tile floors? | Content verified for accuracy and freshness.
References
- https://en.wikipedia.org/wiki/Ceramic_tile
- https://www.cdc.gov/coronavirus/2019-ncov/community/disinfecting-building-facility.html
- https://www.epa.gov/coronavirus/disinfecting-your-home
- https://www.who.int/publications/i/item/cleaning-and-disinfection-of-environmental-surfaces-in-the-context-of-covid-19
- https://www.cdc.gov/infectioncontrol/guidelines/disinfection/index.html
- https://pubmed.ncbi.nlm.nih.gov/?term=cleaning+disinfection+floor+surfaces+ceramic+tile
- Google Scholar Google Scholar
https://scholar.google.com/scholar?q=how+to+clean+ceramic+tile+floors+grout - Google Scholar Google Scholar
https://scholar.google.com/scholar?q=ceramic+tile+floor+cleaning+methods+efficacy - Google Scholar Google Scholar
https://scholar.google.com/scholar?q=tile+floor+disinfection+study+environmental+surfaces - Google Scholar Google Scholar
https://scholar.google.com/scholar?q=How+to+clean+ceramic+tile+floors?