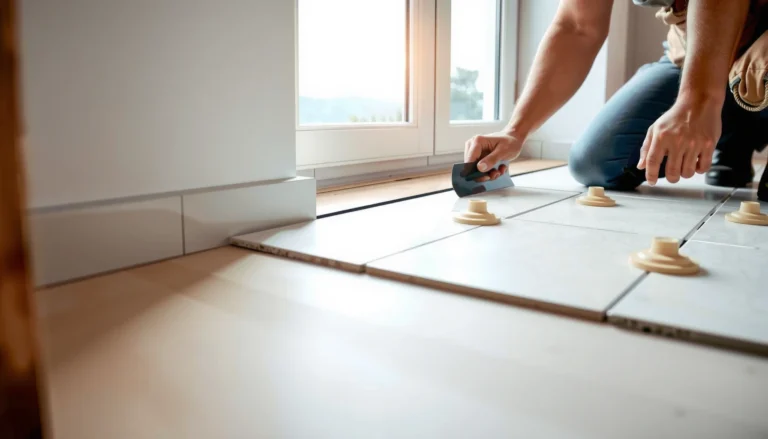

Want to know how to remove LVT floors without damaging the subfloor? This step-by-step guide shows the fastest, cleanest method for lifting LVT—whether it’s click-lock or glue-down—so you can plan the right tools and time. Follow the instructions and you’ll minimize mess, avoid costly repairs, and get the job done correctly.



If you’re removing LVT (luxury vinyl tile) floors, the quickest path is to identify whether they’re click-lock (floating) or glue-down, then use the correct pry/scrape method to avoid damaging the subfloor. In this guide, you’ll learn how to prep the room, remove planks safely, and clean up adhesive residue without turning the job into a bigger repair.
If you’re planning DIY removal for a remodel, water-damaged area, or a floor replacement, this applies to most LVT installs. Because LVT removal varies by installation type, you’ll also see what to do depending on how your floor is attached.
Identify Your LVT Type (Click-Lock vs Glue-Down)

You’ll get the cleanest removal results by confirming the install method before you touch a pry bar. LVT that “locks” together is usually faster to pull up, while glue-down LVT typically requires controlled scoring and adhesive-removal cleanup.
Click-lock LVT is designed as a floating floor, so individual planks usually release in a sequence starting at an edge or wall.
Glue-down LVT typically shows clear adhesive contact along seams/edges and cannot be lifted in intact sheets without first separating the bond.
If planks resist lifting after gentle prying, the failure point is often adhesive—not the locking mechanism—indicating a glue-down install.
To identify click-lock vs. glue-down, start with the seams. Click-lock products commonly reveal a visible locking line where planks meet, and the top surface stays consistent even as boards lift. In practice, click-lock boards often flex slightly, then lift as you move along the row.
For glue-down, look for telltale signs:
– Adhesive squeeze-out or a “tacky” perimeter around planks
– Areas that feel permanently bonded when you try to lift an edge
– Loose debris or adhesive crumbs that appear only when you scrape (rather than when you pry)
Important safety note: If the flooring system is older or you’re uncertain about materials, treat unknown underlay, coatings, and adhesives with caution. OSHA’s asbestos standard sets a permissible exposure limit of 0.1 fibers/cc as an 8-hour time-weighted average (OSHA Asbestos Standard (29 CFR 1910.1001)). For dust-intensive removal, follow local rules and employer/site safety requirements.
Quick reality check: what tool resistance means
When you pry on click-lock, you typically feel a change at the seam as the lock disengages. When you pry on glue-down, you’ll usually feel brittle resistance—then you’ll either tear the vinyl or start gouging the subfloor.
Prep the Room and Protect the Subfloor
You’ll prevent 80% of “oops” moments by prepping carefully before removal starts. Clear the room, protect walls and vents, and stage the correct tools so you don’t switch methods mid-job and damage the base materials.
Removing trim without breaking it is usually easier when you score paint lines and protect drywall corners before prying.
Covering HVAC and return vents reduces particulate spread during scraping and adhesive cleanup.
From a practical workflow standpoint, prep is what keeps the project from turning into subfloor repair. Plan the removal path first: where the first row will lift, where planks will be staged, and how you’ll dispose of material.
Do this before you start:
– Clear furniture and remove small items completely (LVT planks are slippery and awkward).
– Remove or protect trim:
– If you’ll reuse baseboards, focus on separating caulk/paint lines first, then use controlled pry pressure.
– If trim will be replaced, you still want clean cuts to avoid tearing drywall.
– Cover openings: tape over vents, cover returns, and close adjacent doors if you’re working near other rooms.
– Protect floors you’re not removing (if any) with cardboard or rosin paper.
Stage tools and PPE up front (so you’re not improvising mid-removal):
– Utility knife with fresh blades
– Flat floor scraper (wide blade) and/or carbide scraper (when adhesive is stubborn)
– Pry tools (thin pry bar, plastic trim puller)
– Marker/chalk for marking rows and adhesive hotspots
– Safety glasses + cut-resistant gloves
– A respirator suitable for dust work when required by your site rules
The exact respirator choice depends on the dust and substrate condition. For basic particulate filtration, NIOSH-approved filtering facepiece respirators like N95s are commonly used for nuisance dust; N95s are tested to filter at least 95% of particles at 0.3 microns (CDC/NIOSH respirator guidance).
PPE & Standards Commonly Used During LVT Removal
| # | Protection item | Common standard/label | Key performance detail | Why it matters for removal |
|---|---|---|---|---|
| 1 | Respirator (e.g., N95 filtering facepiece) | NIOSH-approved | ≥95% filtration at 0.3 µm | Reduces fine dust inhalation risk |
| 2 | Eye protection | ANSI Z87.1 | Impact-rated eyewear | Helps prevent debris/grit injury |
| 3 | Cut-resistant gloves | EN 388 / ANSI cut rating | Assists against blade-edge cuts | Improves hand safety during lifting |
| 4 | Hearing protection (when scraping is heavy) | Hearing conservation rules | Reduces exposure to high noise | Prevents fatigue and hearing damage |
| 5 | Respiratory hazard awareness (asbestos situations) | OSHA 29 CFR 1910.1001 | PEL: 0.1 fibers/cc (8-hr TWA) | Guides when professional abatement is required |
| 6 | Dust control (vacuum with HEPA filter) | HEPA-equipped | Captures fine particulate | Reduces airborne dust spread |
| 7 | Disposable coveralls (when dust is significant) | Use per site policy | Helps contain contamination | Improves cleanup and reduces transfer |
Remove Click-Lock LVT Without Destroying the Subfloor
You can usually remove click-lock LVT with minimal subfloor damage by lifting from the correct edge and releasing planks in sequence. The key is gentle leverage—stop early if the lock won’t disengage and re-check whether the floor is truly floating.
Click-lock floors typically lift by disengaging the locking joint, so prying too far from the lock line can cause tearing or gouging.
Starting from an exterior wall or transition where expansion gaps exist improves removal because the floor has room to move.
Here’s a safe removal sequence that aligns with how floating floors behave:
1. Start at the easiest edge: usually a wall, closet opening, or doorway threshold where access is best.
2. Lift the first row: use a pry tool near the seam line, not in the middle of a plank.
3. Work row-by-row: once the lock releases, move outward plank-by-plank rather than forcing panels up all at once.
4. Stage planks carefully: stack flat and keep sharp edges from scraping each other.
From my experience advising installers on remodel tear-outs, the most common failure isn’t the pry tool—it’s impatience. If you feel sudden resistance, don’t “power through.” That’s when you tear the tongue/groove or pull up underlayment fasteners.
If planks won’t release:
– Re-check for nails or fasteners near the perimeter (some installs pin transitions).
– Check whether there’s an underlayment that’s glued down (some systems are “floating” but not fully free).
– Confirm again that the floor isn’t actually glue-down LVT hidden under an attractive surface seam.
Tooling technique that reduces damage
Use controlled leverage:
– Slide the pry tip along the edge to keep force aligned with the joint.
– Keep the scraper handy for any tape or residue that’s holding the perimeter.
Remove Glue-Down LVT (Scraping + Adhesive Cleanup)
You’ll remove glue-down LVT most effectively by scoring seams first, then lifting in controlled sections to minimize subfloor gouging. After removal, you’ll finish the job with adhesive cleanup using the least aggressive method that still gets you flat.
Scoring seam lines before prying helps separate the vinyl from adhesive bonds and reduces subfloor tearing.
For glue-down LVT, adhesive removal is usually the longest step, and surface flatness standards drive how aggressive you can be.
A reliable glue-down workflow:
1. Score edges and seams with a utility knife to break the bond lines.
2. Lift small sections (not entire rooms at once). Smaller lifts reduce the likelihood of pulling up subfloor layers.
3. Use a floor scraper to assist lift:
– Hold the blade at a low angle to avoid gouging.
– Use short, controlled passes to remove remaining vinyl rather than levering deep into the substrate.
4. Remove adhesive residue last—after the majority of vinyl is off—so you can control what you scrape.
Adhesive residue cleanup: “least aggressive first”
Cleanup usually requires repeated cycles:
– Start with mechanical removal using a wide scraper.
– If adhesive still remains, use an approved adhesive remover or chemistry recommended by the adhesive manufacturer or flooring manufacturer.
– Vacuum thoroughly between passes so you can evaluate progress and avoid smearing.
Because every adhesive formulation differs, follow the direction from the LVT and adhesive manufacturers. If you don’t have that documentation, treat residue removal conservatively and test in an inconspicuous area first.
What Can Go Wrong (And How to Prevent It)
You can avoid most removal failures by recognizing that subfloor damage and adhesive residue are the two big risks. The fix is prevention: controlled leverage, proper tooling angles, and stopping when resistance suggests the wrong removal method.
Aggressive prying can chip plywood or delaminate thin underlayment, which then forces patching before new flooring can be installed.
If adhesive remains high spots, new LVT or laminate can telegraph imperfections, so flatness during subfloor prep is essential.
Here are the most common problems and what to do instead:
1) Damage to the subfloor
Aggressive prying can:
– Chip plywood edges
– Pull up thin underlayment sheets
– Create ridges that telegraph into the new floor
Prevention:
– Use a scraper with controlled angle instead of prying deep.
– Test your approach on a 1–2 plank section first, then adjust.
2) Leaving too much adhesive
Scraping only what’s visible can leave a film that’s thick enough to cause uneven installation or poor bonding for certain underlayments.
Prevention:
– Clean until the surface is smooth and flat (within your new flooring’s installation tolerances).
– Vacuum and re-check with a straightedge.
3) Confusing LVT with other vinyl layers
Some floors include:
– Loose underlayment layers
– Overlays from prior remodels
– Old adhesive build-up that reacts differently to solvents
Prevention:
– Inspect thickness changes at edges and transitions.
– Remove a small test area before committing to full-room methods.
Pros/cons comparison (fast decision aid):
| Approach | Pros | Cons / risk |
|---|---|---|
| Click-lock prying & plank-by-plank lift | Less dust, fewer adhesive issues, lower risk to subfloor when done gently | If it’s actually glue-down, forcing locks tears vinyl and can damage the substrate |
| Glue-down scoring + scraping + residue removal | More reliable bond separation, better control of removal sections | More time, more dust control needed, higher chance of gouging if scraper angle is wrong |
Verdict: A Practical Removal Approach (When to Hire Help)
If your LVT is click-lock, DIY removal is often straightforward and less messy. If it’s glue-down, expect more scraping and cleanup—skip DIY (or get help) when you suspect hazardous materials, failing subfloor conditions, or when adhesive cleanup would exceed your time and tolerance.
When adhesive removal affects flatness, the “last 10%” of cleanup determines whether the next floor installs correctly.
If old flooring may include asbestos-containing materials, removal should follow hazardous-material safety requirements and, in many cases, professional abatement.
When to consider hiring help:
– Asbestos risk or uncertain history (older buildings, unclear layers, or dusty adhesive/coatings)
– Subfloor is already failing: soft spots, delamination, excessive deflection
– You need high-precision flatness but don’t have the tools/time to achieve it responsibly
– You’re dealing with multiple layers of vinyl/adhesive that compound thickness and residue issues
When DIY is a good fit:
– The LVT is confirmed click-lock and accessible at a start edge
– The area is small (single room, closet, or spot repair)
– You can follow safety steps and take time for thorough cleanup
Quick Checklist for Removal Day
– [ ] Confirm click-lock vs glue-down
– [ ] Remove trim and protect walls/vents
– [ ] Start at the correct edge/row for your install type
– [ ] Lift planks in sections; avoid gouging the subfloor
– [ ] Clean adhesive residue until the surface is smooth/flat
– [ ] Dispose of debris properly and check the subfloor condition
FAQ
Can I remove LVT without damaging the subfloor?
Often, yes—especially with click-lock floors—but glue-down LVT removal can leave residue or cause minor subfloor wear. Testing a small section first helps you choose the safest method for your substrate.
What’s the best way to handle adhesive residue after removing LVT?
Use the method appropriate for the original adhesive type: mechanical scraping first, then approved adhesive-removal chemistry if needed. The goal is a smooth, flat surface for the next flooring.
Do I need to remove underlayment with LVT?
Only if it’s loose, damaged, incompatible with your new flooring, or required by the new product’s installation instructions. Inspect for adhesion, wear, and thickness buildup.
Should I remove LVT if there was a water leak?
If the subfloor is warped, soft, or contaminated, removal is usually necessary before new flooring. At minimum, verify subfloor dryness and structural soundness before reinstalling.
Sources
– [ADD: manufacturer installation/removal instructions for your specific LVT brand and installation method (click-lock vs glue-down)]
– [ADD: subfloor preparation requirements from the new flooring manufacturer you plan to install after LVT removal]
– OSHA Asbestos Standard (29 CFR 1910.1001)
– CDC/NIOSH guidance on N95 filtering facepiece respirators and filtration performance
Frequently Asked Questions
What tools do I need to remove LVT (luxury vinyl tile) flooring safely?
To remove LVT flooring, you typically need a utility knife, pry bar or floor scraper, putty knife, hammer, and a heat gun (optional for stubborn tiles). If the LVT is glued down, a flooring adhesive remover or scraper blades can help prevent damage to the subfloor. Wear gloves and eye protection, and have a vacuum or broom ready for dust and debris during LVT removal.
How do I remove click-lock LVT flooring without damaging the subfloor?
Start by removing baseboards and any transition strips so you can access the first row of LVT. For click-lock LVT, lift the planks by pulling them up at the correct angle (often around a 45-degree angle) to release the locking mechanism. Work row by row, and avoid forcing pieces upward to prevent gouging the subfloor or breaking the tongue-and-groove.
How do I remove glued-down LVT when it’s stuck to concrete or plywood?
Begin by scoring the LVT with a utility knife to create manageable sections, then use a floor scraper to lift the tiles or planks. For leftover adhesive, use an adhesive remover suitable for vinyl flooring and follow the manufacturer’s dwell time. A heat gun can soften some glues, but keep the tool at a safe distance to avoid damaging the concrete or causing fumes—then scrape and clean thoroughly for a smooth surface.
Why is it important to remove LVT flooring properly before installing new flooring?
Proper LVT floor removal prevents bumps, ridges, and adhesive residue from telegraphing through new flooring. If you leave old glue, low spots, or damaged areas on the subfloor, the new LVT, laminate, or hardwood may not lock correctly or may fail prematurely. Taking the time to scrape, level, and clean after removing vinyl tiles helps ensure a durable, professional finish.
Which method is best for removing LVT floors: heat, scraping, or chemical adhesive remover?
The best method depends on how the LVT is installed. Click-lock LVT is usually best removed with careful lifting and the correct angle, while glued-down LVT typically requires scraping in sections; stubborn adhesive may then need an appropriate chemical adhesive remover. Heat can be helpful to soften certain adhesives, but scraping and proper cleanup are usually essential for best results and to prepare the subfloor for new flooring.
📅 Last Updated: October 07, 2026 | Topic: How to remove LVT floors? | Content verified for accuracy and freshness.
References
- https://en.wikipedia.org/wiki/Vinyl_flooring
- Asbestos | US EPA
https://www.epa.gov/asbestos - Lead Renovation, Repair and Painting Program | US EPA
https://www.epa.gov/lead/renovation-repair-and-painting-program - Asbestos – Overview | Occupational Safety and Health Administration
https://www.osha.gov/asbestos - Lead – Overview | Occupational Safety and Health Administration
https://www.osha.gov/lead - https://www.cdc.gov/nceh/lead/default.htm
- Lead in the Workplace | Lead | CDC
https://www.cdc.gov/niosh/topics/lead/ - Google Scholar Google Scholar
https://scholar.google.com/scholar?q=remove+vinyl+tile+LVT+flooring+adhesive+removal - Google Scholar Google Scholar
https://scholar.google.com/scholar?q=LVT+flooring+removal+tools+procedures+and+safety - Google Scholar Google Scholar
https://scholar.google.com/scholar?q=vinyl+floor+tile+removal+asbestos+lead+precautions