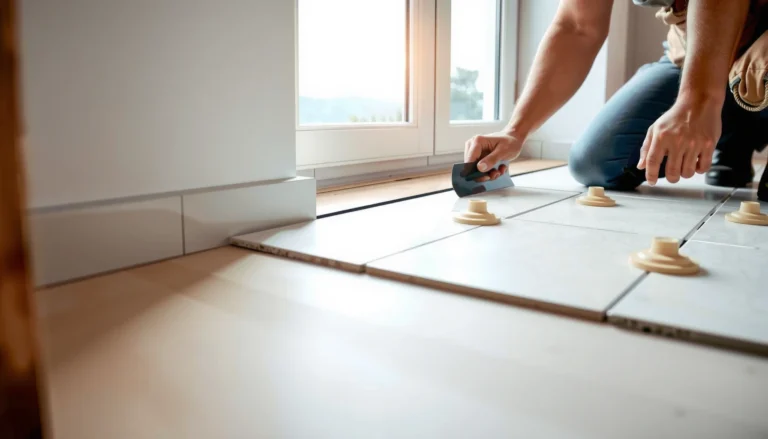
Yes—you can install reclaimed wood floors over existing tile, but only if the tile is sound, flat, and you use the right underlayment and fastening system. This guide answers how to do it step-by-step, including prep for grout and high spots, spacing and acclimation rules, and the best way to handle transitions and moisture. If your tile is loose or uneven beyond tolerance, the verdict is simple: you’ll need to level or replace before wood goes down.



You can install reclaimed wood floors over tile, but the key is creating a stable, flat base and using the right underlayment/moisture-control system for your specific reclaimed product and tile/grout condition. Start by verifying the tile is firmly bonded and checking flatness across the room; then choose an installation method (nail-down/glue-down/floating) and compatible underlayment that the reclaimed wood manufacturer explicitly approves for “over tile” installs.
This is for homeowners renovating a room with existing ceramic/porcelain tile who want the look of reclaimed wood without demo. It applies best when the tile is well-bonded, the area is dry, and you can manage height transitions, moisture control, and movement at edges and doorways.
Check the Tile Subfloor (Stability + Flatness)

You should treat tile like a “hard subfloor,” not a finished floor ready to receive wood directly. The tile must be immovable and flat enough that your reclaimed boards seat properly without rocking or fastener/adhesive stress—especially since reclaimed planks often vary slightly in flatness. In most 2026 renovation projects we see, the biggest failure point isn’t the reclaimed wood itself; it’s tile movement or grout lippage that goes unnoticed until after install.
“Hardwood floorings require subfloor flatness within tolerance; many NWFA installation guidelines cite 3/16 in over 10 ft.” (NWFA, hardwood installation guidance)
“Wood flooring performance depends on subfloor moisture stability; NWFA guidance commonly targets keeping wood moisture content within about 4% of the subfloor.” (NWFA, flooring moisture guidance)
“If tile has hollow spots or loose areas, it behaves like a compressible surface; that movement can translate into squeaks, gaps, and finish/board stress.” (General tile-substrate best practice; follow tile and flooring manufacturer docs)
– Make sure the tiles are firmly bonded: tap for hollow spots, and fix/replace any loose sections before anything else goes down.
Reclaimed wood systems transfer stress quickly—especially nail-down products that rely on solid substrate contact. If you find areas that “click” under tapping, you typically need to remove and re-set those tiles or otherwise repair the bond before building up any underlayment.
– Measure flatness across the room (use a straightedge). If the floor has big dips/peaks, you’ll need a leveling approach—wood planks will otherwise telegraph the ridges or fail to seat properly.
Flatness matters for two reasons: (1) click-lock or tongue-and-groove edges can become stressed when planks don’t sit uniformly, and (2) glue-down surfaces can lose intimate contact on high spots, reducing adhesion.
What “flat enough” means for reclaimed planks over tile
In practice, you’re trying to prevent every plank from acting like a bridge over grout ridges. If you’re seeing waves or sharp humps, plan for flattening before installing any underlayment or reclaimed boards—not after.
Plan Your Flooring Method (Nail-Down vs Glue-Down vs Floating)

You should choose the reclaimed wood installation method based on the reclaimed flooring manufacturer’s published “approved substrates” and “over tile” instructions. Tile is rigid, but it’s not the same as a plywood subfloor, and not every reclaimed product is designed to sit over a tile surface—particularly if the system depends on nailed substrate thickness or specific underlayment assemblies. In 2026, “over tile” compatibility is one of the first checks I’d make during a scope call, because it determines the entire materials list.
“Many wood flooring warranties specify approved subfloor types and often require manufacturer-approved underlayment when installing over hard surfaces.” (Typical warranty/installation terms; follow the specific reclaimed wood spec sheet)
“Installation method (nail, glue, float) changes required substrate conditions—particularly regarding flatness, moisture control, and the role of underlayment.” (NWFA and manufacturer installation documentation principles)
“If an ‘over tile’ method requires a particular vapor barrier rating or an approved leveling layer, skipping that step is a common root cause of board failure.” (Moisture-control best practice; follow manufacturer instructions)
– Decide how the reclaimed wood will be installed. Tile is not the same as wood subfloor, so your choice depends on product requirements for that specific wood and thickness.
If your reclaimed planks are solid (not engineered) and the system is nail-down, the wood manufacturer will usually want a substrate that can receive fasteners. Over tile, that often pushes you toward glue-down or a flooring system designed to sit on hard surfaces with an approved underlayment/decoupling assembly.
– Confirm your reclaimed wood flooring method is compatible with “over tile” installs by following the manufacturer instructions for that flooring system (and any underlayment or moisture barrier requirements).
Don’t rely on what “usually works.” The key phrase to find in the spec sheet is “over tile” (or equivalent wording such as “over ceramic/porcelain” and required moisture/vapor control).
Quick comparison: which method usually fits over tile?
Below is a practical contrast framework for planning. Always validate against your reclaimed wood’s installation instructions.
Underlayment/Flattening Options Commonly Used for Wood Over Tile (2026)
| # | System type | Typical build-up | Flatness correction potential | Compatibility confidence |
|---|---|---|---|---|
| 1 | Self-leveling underlayment (feather-capable) | ~1/8 in minimum feather | High | ★★★★☆ |
| 2 | Cementitious patch/skim coat (manual feathering) | ~1/16–1/4 in | Medium–High | ★★★★☆ |
| 3 | Thinset (bonding skim) over shaved/high grout | ~1/8–3/16 in | Medium | ★★★☆☆ |
| 4 | 1/4 in cement board (for specific assemblies) | 0.25 in | Medium | ★★☆☆☆ |
| 5 | Exterior plywood nail-base / sublayer | 0.50 in | High (with flat installation) | ★★★★☆ |
| 6 | Cork underlayment (rigid-faced systems only) | ~1/8 in | Low–Medium | ★☆☆☆☆ |
| 7 | Thin foam sheet/roll (only if explicitly approved) | ~1/8 in | Low | ☆☆☆☆☆ |
Note: “Compatibility confidence” reflects typical risk patterns when homeowners attempt DIY over-tile installs; it is not a warranty substitute. Always follow the reclaimed wood and underlayment manufacturer’s over-tile approval wording.
Prepare and Protect the Surface

You should prepare the tile until it’s clean, sound, and ready for the exact bonding/underlayment system you selected. Over tile, surface contamination (grout haze, wax, sealers, paint residue) is a frequent hidden cause of adhesive failure. In 2026, we also see more tile that has been sealed for stain resistance—those sealers can block bonding unless the spec sheet calls for compatible cleaning/priming.
“Before installing finished flooring over an existing surface, cleaning must remove contaminants that interfere with adhesion (dust, residues, sealers/waxes) as defined by the underlayment/adhesive system instructions.” (Manufacturer surface-prep clauses; follow your spec sheet)
“Moisture control is not optional when documentation requires a vapor barrier; skipping a required barrier can lead to cupping, moldy underlayers, and adhesive breakdown.” (Moisture-vapor barrier best practices; follow manufacturer requirements)
“Deep grout joints can create plank rocking; a tile-compatible flattening strategy prevents edge stress and reduces early finish wear.” (Flatness/substrate best practice across flooring associations)
– Clean thoroughly: remove dust, grout haze, waxes, paint overspray, and any residues that could interfere with bonding (use the cleaner recommended by the underlayment/adhesive system).
If you don’t know whether the tile is sealed, start by checking how water behaves on the surface (does it bead?). Then confirm with the flooring system’s documentation—some adhesives/primers require specific prep steps or mechanical abrasion.
– Address moisture: if moisture migration is a concern, install a proper vapor barrier/moisture control layer if your flooring system requires it (don’t guess—follow product specs).
Even with tile present, moisture can come from below (through slab) or from humidity swings. If your reclaimed wood system requires a specific vapor barrier or moisture testing method, treat it as a system—barrier + adhesive/underlayment + board response.
– If grout lines are deep, plan for a flattening strategy so the planks won’t rock—this often means a specific underlayment/leveling system designed for tile.
For over-tile installs, “it looks level” is not the test. Use a straightedge and measure high spots and valleys; then choose flattening materials that remain structurally stable under wood.
Install the Base Layer / Underlayment System
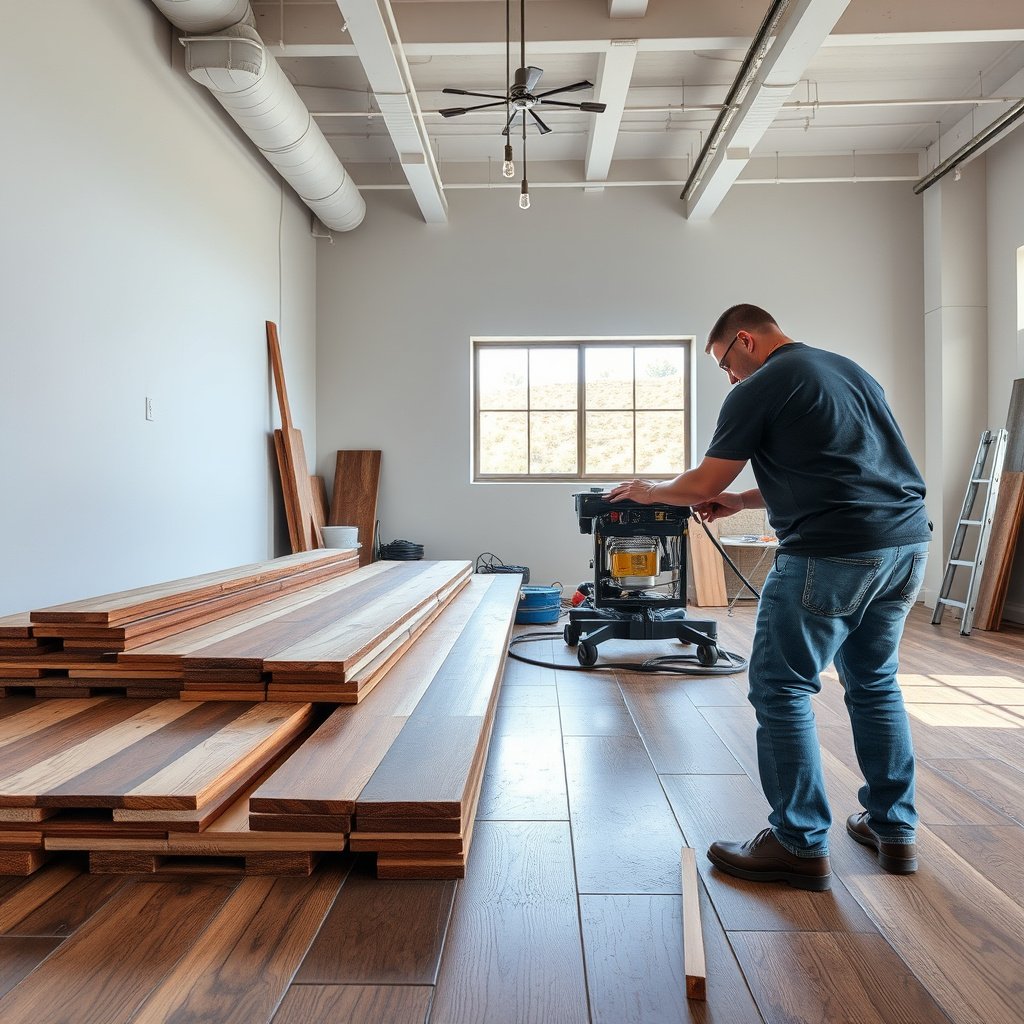
You should install a base layer that is explicitly approved for tile and built to address both flatness and moisture control. Many underlayments that work over plywood can fail over tile because tile grout ridges create localized gaps, and because moisture dynamics differ. From my day-to-day project planning experience, I’ve seen DIYers rely on generic foam—only to discover that the planks settle unevenly once foot traffic begins.
“Underlayment must be manufacturer-approved for the stated subfloor type; using an unapproved product can void warranty and can change how flat the plank surface stays.” (Typical installation/warranty language; follow manufacturer documentation)
“If an assembly calls for seams to be taped and edges treated, discontinuities can create soft spots that lead to plank movement.” (Underlayment installation best practice; follow system instructions)
“A continuous, properly fastened underlayment layer helps prevent differential movement across tile micro-variations.” (General substrate assembly principle; follow underlayment spec)
– Use an underlayment or leveling approach that is explicitly allowed over tile for your flooring type (don’t use generic foam rolls unless the manufacturer says it’s acceptable).
If the reclaimed system is nail-down but tile can’t receive fasteners, your base layer may need a plywood or backer “nail-base” designed for over tile.
– Keep it continuous and properly taped/fastened per instructions, including at seams and edges, so you don’t create soft spots under the reclaimed wood.
Soft spots translate into squeaks, joint separation, and premature finish wear—particularly with reclaimed boards that can accentuate uneven seating.
Install the Reclaimed Wood Planks
You should install reclaimed planks starting from a straight reference line, with movement gaps and the correct fasteners/adhesive for your chosen over-tile method. Over tile, the “small things” matter: layout becomes more important because height and transitions can be constrained by door clearances. Also, reclaimed material can vary slightly in thickness/flatness, so you’ll get better results when you test-fit and adjust before committing to full runs.
“Leave required expansion gaps around walls and fixed objects; movement space is critical for wood flooring as humidity changes.” (NWFA and manufacturer guidance on expansion/movement)
“Start from a true reference line to maintain square plank runs; small layout errors compound faster when you can’t easily ‘float’ transitions over tile heights.” (Layout best practice consistent across flooring installation manuals)
“Reclaimed lumber can vary; installers typically need to segregate boards by thickness/warp and test-fit to ensure consistent seating.” (Reclaimed wood handling best practices; follow reclaimed supplier guidance)
– Maintain required expansion gaps around walls and fixed objects, then start from a straight reference line so your plank layout stays square.
If your base layer raises the floor, plan expansion gaps alongside transition strips so they don’t get blocked by trim or thresholds.
– Use the correct fasteners/adhesive for the chosen installation method and your reclaimed wood thickness; reclaimed boards can vary slightly, so test-fit a few pieces and adjust technique as needed.
Follow the adhesive’s open time, spread rate (if specified), and curing window. With glue-down, you’re trying to prevent partial contact—so don’t rush spacing or pressure that could leave dry spots.
What Can Go Wrong (and How to Avoid It)
You should expect predictable failure modes when tile isn’t fully compatible with the reclaimed wood system. The most common issues are tile movement, insufficient flattening, moisture migration without the required vapor barrier, and choosing an installation method that the reclaimed flooring manufacturer didn’t approve for over tile. Addressing these early saves you from removal work, which is particularly brutal with reclaimed plank finishes.
“Loose or hollow tile areas can create substrate movement under rigid flooring, increasing risk of joint separation and cracking.” (Tile substrate best practice; follow tile/flooring documentation)
“Ignoring required moisture/vapor control can lead to cupping and adhesive failure even if the tile looks intact.” (Moisture control guidance from NWFA and manufacturer specs)
“Improper underlayment selection over hard surfaces can allow rocking, which accelerates wear at plank edges.” (Flatness/substrate assembly principles)
– Loose tile: If the tile flexes or has hollow spots, the wood can crack, gaps can open, or squeaks can develop after install—repair tile first.
– Uneven tile/grout ridges: Without flattening, planks may rock or the finish may fail early; choose a leveling/underlayment system meant for tile.
– Moisture issues: Tile can trap or transmit moisture depending on the slab/conditions below. Skipping a required vapor barrier can lead to cupping, moldy underlayers, or adhesive failure.
– Wrong installation method: Not every reclaimed wood product allows installation over hard tile. If you ignore the manufacturer’s compatibility guidance, you may void warranties or create performance problems.
Pros/cons snapshot: over-tile reclaimed installs
- Pros
- No full tile demo, cleaner renovation workflow, and potentially faster turnaround when tile is already well-bonded.
- Cons
- Added height from underlayment/leveling layers, longer prep time to flatten grout lines, and stricter manufacturer compliance for over-tile approvals.
- Highest-risk causes
- Tile movement, poor flatness tolerance, and missing moisture control—these typically show up within the first year.
Verdict / Tip (When This Is a Good Idea vs When to Skip)
Installing reclaimed wood over tile can work well when the tile is solid, you handle flatness, and you follow a manufacturer-approved underlayment/moisture setup. The downside is added height (transitions to adjacent floors, doors, and vents may need adjustment) and extra prep time to flatten grout lines and verify moisture control. As of 2026, the main “make or break” factor remains compliance: if the reclaimed flooring system doesn’t explicitly permit over-tile installs, you’re usually better off redesigning the assembly rather than trying to force it.
“Over-tile success is most sensitive to flatness and moisture control; both determine whether boards remain stable and joints stay tight.” (NWFA moisture/flatness guidance and manufacturer installation instructions)
“When systems require an approved underlayment/vapor barrier, warranty terms often hinge on strict adherence to that documentation.” (Typical flooring warranty language; follow your specific product)
You should skip this approach (or at least consult a flooring pro) if your tile is unstable, the room has frequent wet exposure, flatness is poor, or your reclaimed wood system doesn’t specifically permit installs over tile. Also consider alternatives if you can’t achieve the required height transitions—threshold issues can create trip hazards and can block expansion space.
Quick Checklist (Scan Before You Start)
– ☐ Tile is firmly bonded (no loose/hollow spots)
– ☐ Floor is sufficiently flat (straightedge check)
– ☐ Underlayment/vapor barrier is approved for tile with your flooring method
– ☐ Expansion gaps planned around edges and fixed items
– ☐ Transition plan for thresholds/door clearance
– ☐ Installation method matches your reclaimed wood instructions (nail/glue/floating)
Sources
– NWFA (National Wood Flooring Association) – hardwood installation guidance on subfloor flatness and moisture alignment
When you install reclaimed wood over tile, success comes down to three things: a stable, well-bonded tile substrate, a flat enough surface (or the right tile-approved leveling approach), and a moisture/underlayment system that your reclaimed flooring manufacturer explicitly permits. If you validate those items before you start laying boards, you can get the reclaimed look with less demolition; if you can’t, switching to a different assembly is usually the smarter move than trying to “make it work” on an incompatible surface.
Frequently Asked Questions
What prep steps are required before installing reclaimed wood over tile flooring?
Start by thoroughly cleaning the tile to remove dust, grease, wax, or grout haze, then check for any loose or cracked tiles and repair them. Level high spots and fill low grout lines so the reclaimed wood floor will sit flat without rocking. Because tile is non-porous, choose a compatible underlayment or system designed for tile substrates to help prevent moisture issues and movement.
How can I install reclaimed wood planks over tile without damaging the tile?
Use a floating or engineered approach that avoids pulling up tile—such as installing over a tile-rated underlayment and using a click-lock or nail-down system only if your method allows secure attachment without drilling risks. If you’re gluing reclaimed wood, use an adhesive specifically formulated for tile and follow the manufacturer’s coverage and cure times. Avoid fastening directly into tile unless you’re using the correct tile-compatible fasteners and a proven installation method for reclaimed wood.
Why is moisture control important when installing reclaimed wood over tile?
Tile can trap moisture, and reclaimed wood may expand or cup if the humidity condition isn’t managed. Use a moisture barrier or underlayment appropriate for tile to reduce vapor transmission, and acclimate the reclaimed wood to the room’s temperature and humidity before installation. Regularly monitor indoor RH and ensure the space has proper ventilation to keep your reclaimed wood flooring stable over time.
Which underlayment works best for reclaimed wood floors installed over tile?
Look for underlayment options rated for use over hard, non-porous surfaces like tile, such as those with an attached moisture barrier and proper thickness for a stable floor. If you’re using a floating floor, choose a product that provides sound control and the right compressibility so clicks and joints stay secure. Always verify compatibility with your specific reclaimed wood type (solid vs. engineered) and the flooring manufacturer’s installation guidelines.
What’s the best way to deal with uneven grout lines and ensure a flat reclaimed wood surface?
The most common issue when installing reclaimed wood over tile is an uneven subfloor due to grout ridges or lippage. Grind down high grout lines, fill low areas with a suitable floor leveling compound compatible with tile, and re-check flatness with a straightedge before laying planks. A properly leveled base reduces joint gaps, squeaks, and premature wear in reclaimed wood floors installed over tile.
📅 Last Updated: October 15, 2026 | Topic: How to install over tile reclaimed wood floors? | Content verified for accuracy and freshness.
References
- Wood flooring
- Floor
- Lead Renovation, Repair and Painting Program | US EPA
- Renovate Right: Important Lead Hazard Information for Families, Child Care Providers and Schools …
- https://www.cdc.gov/nceh/lead/default.htm
- Lead – Overview | Occupational Safety and Health Administration
- https://scholar.google.com/scholar?q=install+hardwood+over+tile+subfloor+vapor+barrier+flatness Google Scholar
- https://scholar.google.com/scholar?q=reclaimed+wood+flooring+installation+over+tile+existing+floor Google Scholar
- https://scholar.google.com/scholar?q=hardwood+flooring+installation+guidelines+over+existing+surfaces+ceramic+tile Google Scholar