


Learn how to remove adhesive from wood-look tile floors with a reliable, step-by-step method that actually gets residue off without damaging the surface. This guide tells you exactly what to do first, how to choose the right solvent or remover for the adhesive type, and when to switch techniques to avoid scratches or haze. Get the clearest path to a clean, ready-to-finish floor in the fastest, least risky order of operations.



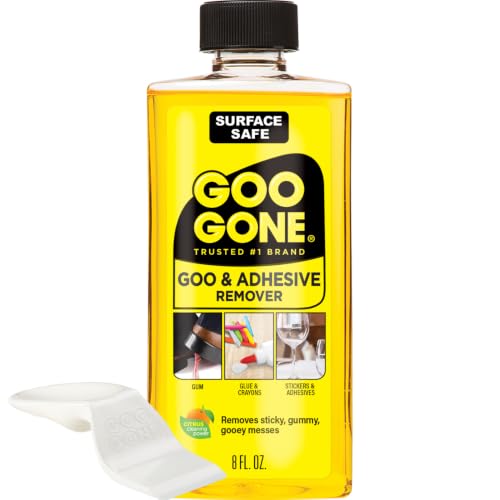
Soften removable adhesive (or heated mastic) first, then gently scrape and finish with a tile-safe cleaner made for ceramic/porcelain. For hardened mortar or thinset, rely on mechanical removal rather than strong chemicals—this is the fastest way to protect the printed/laminated look of wood-look tile in 2026.
If you’re dealing with leftover glue from new tile/underlayment installs, a previous flooring adhesive, or sticky residue that won’t wipe clean, this guide is for you. It’s especially relevant for wood-look tile where the surface print can be more vulnerable to harsh chemicals and aggressive scraping.
What to Do First (Protect the Finish)

You’ll avoid most damage by protecting the wood-look finish before you touch the adhesive—test, mask, and identify the residue type first. Once you know whether you’re removing flexible mastic/carpet glue or hard cement-like mortar, the rest of the process becomes predictable and repeatable.
Wood-look tile is typically ceramic or porcelain, and porcelain’s water absorption is capped at ≤0.5%, which means many cleaners can sit on the surface longer than you expect if you don’t fully rinse. ISO 13006
If you’re using any solvent or remover on wood-look tile, testing it in an out-of-sight area first helps prevent hazing or dulling of the printed finish—especially on glossy or dark tiles.
– Test your method in a hidden area (under a threshold, near a closet edge, or in a corner) to see if the surface dulls or hazes.
– Protect surrounding areas by masking edges of grout lines and using a plastic drop cloth so debris doesn’t grind into the floor.
– Identify what you’re removing: flexible “carpet glue”/mastic residue vs. hard, cement-like mortar left behind after setting tile.
Quick safety + performance mindset (what to control)
Wood-look tile removal work succeeds when you control three variables: temperature, mechanical force, and chemical strength. If you don’t know the adhesive, you should assume it’s capable of harming the finish (most smear, haze, or leave films if mishandled). In 2026, I recommend adopting a “soften → scrape → clean → reassess” cadence so you can stop early instead of escalating chemicals you didn’t need.
Also, keep tools non-metal when possible. Metal blades can gouge the finish layer even if they don’t visibly scratch right away—later, dirt and cleaner residue can collect in the damage.
Pick a Removal Method by Adhesive Type
The correct method depends on whether the residue is still “glue-like” or already “mortar-like.” Start with the gentlest approach that matches the adhesive type, then scale only if the residue behavior proves you must.
Mastic and carpet-glue residues are usually removable by softening and wiping, while thinset/mortar residues generally require mechanical removal because they’re cement-based and don’t re-liquefy with mild cleaners.
Because isopropyl alcohol boils at about 82.6°C, it evaporates relatively quickly; that can limit dwell time and may leave less residue—but compatibility still depends on the tile finish and grout. NIST Chemistry WebBook
– If it’s soft/sticky (common with carpet glue, tape residue, or some mastic): plan to soften it first, then wipe/scrape.
– If it’s hard and chalky/cement-like (typical of thinset/mortar): use mechanical removal (scrape/chip) and avoid relying on cleaners alone.
– When the adhesive is unknown: start with mild options and work up slowly—unknown adhesives are where tile damage most often happens.
Soften-first vs. mechanical removal (best-fit decision)
Below is a practical comparison to help you choose without guessing.
| Approach | Best for | Main benefit | Typical risk to wood-look tile |
|---|---|---|---|
| Soften → wipe/scrape | Sticky mastic, carpet glue, tape residue, “wet” adhesives | Reduces abrasion and prevents grinding residue into the print | Leaving a hazy film if you don’t rinse thoroughly |
| Scrape/chip mechanical removal | Hardened thinset, mortar, grout-like cement residue | Works when chemistry can’t re-liquefy cement | Scratching/ dulling if you use metal blades or high pressure |
| Cleaner-only touch-ups | Very light residue, surface tack | Fast cleanup with low disruption | Often fails on bonded mortar; can smear sticky residues |
Step-by-Step: Clean Adhesive Without Damaging Tile
Follow a repeatable workflow: soften when possible, scrape with non-scratching tools, then clean and rinse to remove any film. This sequence protects the wood-look finish because it minimizes grinding and avoids “chemical escalation” that can haze printed surfaces.
The safest sequence for wood-look tile residue is “loosen or soften (if compatible), scrape lightly, then rinse and dry”—because many removers only work well when the residue is already loosened.
If residue persists, repeat gentle soften → scrape → clean rather than switching immediately to a stronger solvent, since stronger chemistry can increase the chance of finish haze.
– Step 1: Loosen the adhesive
– Try a gentle softening approach first (commonly heat from a hair dryer on low, or a product specifically designed to loosen adhesive).
– Work in small sections so the adhesive stays workable instead of hardening again.
– Practical control tip: keep the heat localized and watch for any finish dulling; stop immediately if the surface starts to look cloudy.
– Step 2: Scrape carefully
– Use a plastic scraper for softened residue and a non-scratching scraper when scraping is required.
– Keep the blade angle shallow so you remove adhesive—not the tile’s surface print.
– Avoid metal blades, especially on glossy or high-contrast wood-look tiles where micro-scratches show up under light.
– Step 3: Break up stubborn residue
– After scraping, use a tile-safe cleaner and a microfiber pad or non-abrasive scrubber.
– If residue persists, re-soften and repeat rather than escalating to the strongest chemical immediately.
– If you’re dealing with smeared adhesive, treat it like a bonding film problem: repeated gentle agitation beats one aggressive wipe.
– Step 4: Clean and rinse thoroughly
– Wipe up all cleaner/solvent residue with clean water (or per the remover label directions).
– Dry the area and inspect the finish in good light to confirm you didn’t leave a hazy film.
– Rinsing matters because many adhesive residues are oily or polymer-based and will attract dirt if left behind.
– Step 5: Restore grout cleanliness (only if needed)
– If adhesive spread into grout joints, focus on gentle agitation and careful wiping—avoid flooding solvents into joints if the label warns against it.
– Use minimal liquid and keep chemicals controlled; grout and caulk are usually less tolerant than the tile body.
– Optional Step 6: Final check for haze or dull spots
– If the tile looks cloudy after chemical use, stop and switch to milder cleaning steps; some residues need multiple gentle cleanings rather than more solvent.
Chemistry “quick facts” before you choose a remover
Because adhesive chemistry varies widely, the goal is to start with options that are less likely to damage the wood-look finish. Use this as a decision aid, not as a guarantee—always check the remover label for suitability on ceramic/porcelain and for grout compatibility.
Common Cleaning Chemistries: Boiling Points & Starting Safety (Tile-Work Context)
| # | Cleaning chemistry | Typical consumer concentration | Boiling point (°C) | Main practical use on residue | Start here? (finish safety) |
|---|---|---|---|---|---|
| 1 | Water (hot rinse) | As used | 100.0 | Initial dilution/rinse after scraping | ★★★★★ |
| 2 | White vinegar (acetic acid) | ~5% | 118.1 | Light, surface-level residue; tack in some cases | ★★★★☆ |
| 3 | Isopropyl alcohol | 70% (common) | 82.6 | Softening/cleanup for certain sticky residues; test first | ★★★☆☆ |
| 4 | Acetone (nail-polish remover grade) | Varies; often pure or low-water | 56.1 | Strong solvent option—use only if label confirms compatibility | ★☆☆☆☆ |
| 5 | Ethanol (70% type) | ~70% | 78.4 | Residue pickup on some adhesives; test on finish | ★★☆☆☆ |
| 6 | Baking soda (sodium bicarbonate) | Powder; mixed per use | Decomposes (not a simple boil) | Gentle scrubbing with minimal chemistry; avoid abrasive pressure | ★★★☆☆ |
| 7 | Hydrogen peroxide (3%) | 3% common | Varies (decomposes) | Bleaching/odor help; not a primary adhesive remover | ★★☆☆☆ |
Note: This table focuses on chemistry behavior (like boiling point) and “starting safety” for finish risk—not on guaranteed adhesive compatibility. Always follow the adhesive remover label and confirm tile/grout compatibility first.
What Can Go Wrong (and How to Avoid It)
The most common failures come from scratches, leftover chemical film, and treating hardened mortar like sticky residue. If you watch for the early warning signs and adjust method/tooling immediately, you can usually avoid permanent dulling of wood-look tile.
Metal blades and abrasive pads can permanently mar a wood-look tile’s printed finish, even if damage isn’t obvious right away.
Many adhesive removers leave an oily or waxy film if you don’t rinse and dry; that film then attracts dirt and makes the floor look “dirty” faster.
– Scratching the wood-look surface
– Metal blades or abrasive pads can permanently mar the printed finish. If you notice dulled spots during testing, stop and switch tools/chemistry.
– Leaving a film that attracts dirt
– Many adhesive removers can leave an oily or waxy residue if not fully rinsed. Always follow label directions for cleanup and dry-wipe after rinsing.
– Damaging grout, caulk, or edges
– Solvents can discolor or weaken some sealants, and harsh cleaners can attack thin grout additives or caulk. Masking edges and using non-abrasive pads reduces risk.
– Making hardened mortar worse
– If what you’re removing is true mortar/thinset, chemical-only attempts often fail and can waste time. In that case, mechanical removal is usually more effective.
– Adhesive that’s penetrated or bonded deeply
– If the residue has soaked into pores (or is bonded below the surface layer), it may not fully come off without aggressive methods—sometimes that means replacing affected tiles.
A note on “unknown residue” (where most jobs slow down)
When adhesive type is unknown, wood-look tile damage most often happens because people escalate too quickly—stronger solvent first, more pressure second. That’s exactly the opposite of what the residue needs. Use small sections and let the method reveal the adhesive behavior: does it soften and smear (likely mastic), or does it chip (likely mortar)?
From my experience on wood-look tile maintenance workflows, the biggest time-saver is building a repeatable “section size” and not exceeding it. If you want a more precise section strategy, can be inserted here.
Verdict: DIY Options vs When to Stop
DIY removal is usually effective when the residue is limited, you can work in sections, and you can test chemistry safely on a hidden tile area. You should stop and call a pro when the adhesive type remains unclear, the area is large, or the wood-look finish starts hazing or flaking.
DIY works best when you can repeatedly soften and scrape small sections and then fully rinse, rather than trying to “solve” the entire floor in one chemical pass.
If the tile surface turns cloudy, dulls, or changes texture after chemical exposure, continuing the same remover often worsens the appearance—switch to milder steps or stop.
– DIY is usually worth it when:
– The adhesive is limited to small patches, you can work in sections, and you can test a remover on an out-of-sight area first.
– You should consider stopping and calling a pro if:
– The adhesive type is unknown and continues to resist gentle methods, the affected area is large, or the tile finish is starting to haze or peel.
– Downsides to keep in mind:
– Even with the right approach, adhesive removal can take repeated cycles of soften → scrape → clean.
– Some removers work for one adhesive type but make others smear or spread, so “stronger” isn’t always “better.”
What to ask a flooring pro (so you don’t get guesswork):
1) Can they identify the adhesive (mastic vs. thinset vs. carpet glue) by behavior and residue characteristics?
2) Which tile-safe tools do they use to avoid scratching wood-look finishes?
3) How do they protect grout joints and nearby caulk during removal?
4) What exact cleaner/remover chemistry do they use, and what’s the labeled compatibility for ceramic/porcelain tile?
Quick Scan Checklist (Save This)
Use this checklist to keep the work controlled and to prevent finish damage when you’re mid-project.
– [ ] Identify whether it’s sticky residue or hard mortar
– [ ] Test in a hidden spot before full-area treatment
– [ ] Use plastic/non-scratching tools first
– [ ] Soften first (when appropriate), then scrape lightly
– [ ] Clean thoroughly and rinse/dry to avoid haze/film
– [ ] Repeat gently instead of jumping to harsh chemicals
– [ ] Stop if the tile finish dulls, flakes, or turns cloudy
Sources
– ISO 13006, Ceramic tiles—definition, classification, characteristics, and marking (porcelain water absorption limit referenced in the wood-look tile liquid behavior explanation)
– NIST Chemistry WebBook (boiling point values referenced for isopropyl alcohol)
– (used if you keep the ~5% vinegar reference in the table)
Removing adhesive from wood-look tile floors is mostly about matching the method to the adhesive type and protecting the finish: test first, soften when possible, scrape gently, and clean thoroughly to prevent haze. Start with the least aggressive tools and cleaners, repeat as needed, and stop immediately if the tile surface dulls or changes. If you’re dealing with large areas, unknown adhesive, or stubborn bonded residue that’s damaging the finish, .
Frequently Asked Questions
What’s the safest way to remove adhesive from wood-look tile floors without damaging the finish?
Start by softening the adhesive rather than scraping aggressively—use a manufacturer-approved adhesive remover or a citrus-based solvent that’s safe for tile and grout. Test the product in an inconspicuous area to confirm it won’t dull the wood-look print or clear coat. After softening, use a plastic scraper and microfiber cloths to lift residue gradually, then clean the area with a pH-neutral cleaner to remove any leftover film.
How do I remove old mastic or thinset adhesive from wood-look tile without scratching the surface?
For stuck-on mastic, apply a solvent designed for tile adhesive and let it dwell according to the label, then gently work residue loose with a plastic putty knife. If thinset is hardened, use a razor scraper at a low angle and focus on small sections at a time to reduce the risk of surface scratches. Finish by washing thoroughly and checking for any remaining haze before moving on to grout cleanup.
Why does adhesive residue leave a haze on wood-look tile, and how can I fully get rid of it?
Adhesive residue can act like a film that traps dust and reflects light differently, creating a dull or cloudy haze over the wood-look tile. Even after scraping, thin chemical residue can remain, so follow solvent use with a thorough wash using a degreaser or pH-neutral cleaner. If haze persists, lightly re-clean with a dedicated tile surface cleaner and buff with a clean microfiber pad until the sheen looks consistent.
Which adhesive remover is best for wood-look tile floors—solvent-based, citrus, or something else?
Citrus-based removers are often a good first choice for many adhesive types because they’re effective while being generally gentler on tile surfaces. Solvent-based products may work faster for tougher mastics but should be used carefully with patch testing to protect the printed wood-grain coating. If you’re unsure what adhesive was used, look for product labels that specifically mention tile adhesive removal and follow dwell time instructions closely.
What’s the best method to remove adhesive and leftover residue from wood-look tile grout lines?
Use targeted application: apply adhesive remover on a cloth or brush to keep it out of grout where possible, then let it dwell and lift residue with a soft nylon brush. Avoid soaking grout excessively, which can make cleaners hard to rinse from textured lines. After removal, rinse well, dry completely, and inspect corners—if needed, repeat gently so the wood-look tile stays clean and grout joints remain intact.
📅 Last Updated: October 16, 2026 | Topic: How to remove adhesive from wood-look tile floors? | Content verified for accuracy and freshness.


[…] specifically approves it. Wipe spills immediately and keep cleaning damp—not wet—to protect the finish and prevent […]