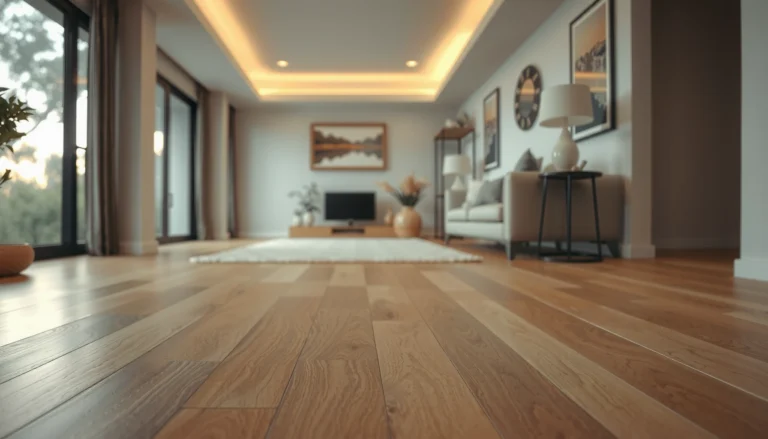
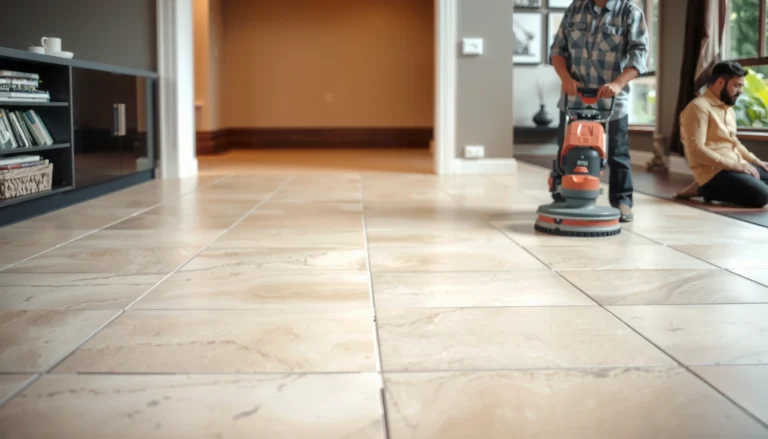
Struggling to remove adhesive from SPC floors? The safest, fastest method is to use the right floor-safe adhesive remover (or heat-assisted scraping where appropriate) while preventing gouges and finish damage. Follow the steps carefully and you’ll lift the bond cleanly without warping the core or leaving sticky residue.



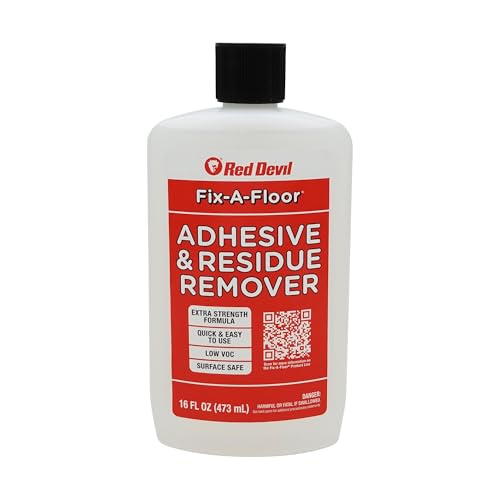
If you’re removing adhesive from SPC floors, the safest approach is solvent/adhesive remover first (to soften), then gentle scraping, and only then—if needed—careful, localized heat. This minimizes the risk of scratching the surface, leaving haze, or compromising the SPC wear layer. Work in small sections, follow your SPC manufacturer’s care/removal guidance, and finish with a thorough wipe so no tacky film remains.
If you’re dealing with leftover glue from an old installation—such as during replacement, repair, or re-laying boards—this matters because SPC (Stone Polymer Composite) relies on a wear layer for appearance and cleanability. The adhesive you’re removing might be tape residue, a pressure-sensitive adhesive (PSA), thin-set/mortar, or a full-spread glue-down product, and the “right” remover depends on which one you have. As of 2026, many SPC manufacturers still recommend “adhesive residue removal” only using compatible products and non-abrasive tools, so the safest plan is to identify the residue type before you start.
Identify the adhesive type before you remove it
You’ll get better results and fewer surface issues when you identify the adhesive residue type first, because different residues respond to different solvents and removal methods. If you guess wrong—especially with aggressive solvents or metal scraping—you can dull the wear layer or leave stubborn haze.
Here’s what to look for before you apply anything: texture, color, how it behaves under peeling, and whether it wipes away or requires chemical softening. In my experience advising remodel teams, the biggest time-saver is treating adhesive removal like “diagnosis,” not like “scrub harder,” because the wrong approach tends to multiply the mess (smearing residue deeper into seams and micro-texture).
“For resilient flooring, adhesive residue removal is highly dependent on the adhesive chemistry; manufacturers typically require compatible removers and non-abrasive tools.”
“If residue lifts by peeling, it’s often pressure-sensitive adhesive; if it’s chalky or mortar-like, it usually needs a different chemical/physical approach.”
“Test removers on an inconspicuous area first to confirm they won’t dull or discolor the SPC finish.”
Quick identification cues (what you can observe)
– Tape residue / PSA (pressure-sensitive adhesive): often feels slightly rubbery or gummy; may lift in strings or smears that re-tack with light pressure.
– Thin-set / mortar residue: tends to look chalky, dusty, or “cement-like.” It may require loosening rather than just dissolving.
– Full-spread glue-down adhesive: usually forms a tougher bond to the subfloor; scraping may be needed after softening.
– Film vs. chunks: a thin haze/film may respond to a cleaner or remover; thicker beads often need targeted softening and re-scraping.
Match your method to your residue
If you can’t confidently identify it, do a small hidden test patch:
1. Apply a flooring-appropriate adhesive remover (not a generic degreaser).
2. Let it dwell for the time on the label.
3. Try the gentlest scraping method you can (plastic/floor-safe scraper).
4. Wipe and re-check appearance under bright light.
Why this matters: solvent compatibility is the difference between “residue removed” and “wear layer compromised.”
Use the safest first approach: soften, then scrape
The best “default” method for SPC adhesive leftovers is to soften the glue with a flooring-compatible remover, then scrape gently with a floor-safe tool. This sequence reduces gouging risk while giving chemistry time to work.
“Adhesive removal procedures for flooring typically follow the same logic: dwell to soften, then wipe and scrape to lift residue.”
“Non-abrasive scrapers help prevent gouges that can collect dirt or create permanent marks in SPC.”
“A final damp wipe is important to remove dissolved residue so the surface doesn’t stay tacky.”
Step-by-step (safe, controlled, section-by-section)
1. Ventilate and protect yourself. Use gloves and eye protection. If you’re using solvent-based products, ensure cross-ventilation.
2. Work in small sections (for example, a few square feet at a time). Adhesive removers can dry out or spread if you cover too much area.
3. Apply adhesive remover as directed. Use only removers intended for resilient flooring residue. Follow the label dwell time exactly.
4. Wait for softening. You’re aiming for adhesive that lifts or smears easily—not adhesive that’s “still bonded.”
5. Scrape gently. Use a plastic scraper or a floor-safe razor scraper designed to reduce gouging. Keep the blade flatter than you think you need; avoid digging.
6. Wipe after scraping. Use a damp cloth (or mop head) to lift residue and prevent a sticky film. Replace cloths often—re-depositing residue is a common failure mode.
7. Repeat cycles only where needed. If a spot is stubborn, reapply remover rather than increasing force.
Three practical safety anchors (with real numbers)
When you choose solvent-based products, safety isn’t optional—adhesives and removers often contain volatile compounds.
– According to the U.S. Occupational Safety and Health Administration (OSHA), isopropyl alcohol has a permissible exposure limit (PEL) of 400 ppm (8-hour TWA) for workplace air. OSHA (Isopropyl alcohol PEL)
– According to OSHA, acetone has a permissible exposure limit (PEL) of 1000 ppm (ceiling). OSHA (Acetone PEL)
– According to chemical safety references, acetone’s flash point is about −20 °C, meaning it can ignite quickly once vapors accumulate. ADD: source for acetone flash point from an official chemical safety database (e.g., SDS)
(If you’re working in an occupied commercial space, check your facility’s safety procedures and the product SDS.)
Heat and mechanical methods (when solvents won’t cut it)
When softened-remover cycles don’t fully lift the adhesive, careful heat can help—but it must be controlled and localized to avoid altering the SPC wear layer. Use heat as the “second tool,” not the first.
“Heat can soften adhesives so scraping works at lower force; overheating can damage coatings and change the appearance of resilient flooring.”
“Repeated cycles (heat → scrape → wipe) are safer than forcing residue off with aggressive tools.”
“Keeping the tool flat and avoiding digging reduces the chance of permanent marks on the wear layer.”
How to apply heat safely (without cooking the floor)
– Use low, controlled heat (for example, a heat gun set low). Start farther away than you think you need and move continuously.
– Target the adhesive only, not the whole panel area. You’re softening residue beads and edges, not warming the entire room.
– Scrape while pliable. Wait too long and the adhesive can re-harden; scrape too soon and it won’t lift.
– Do multiple passes. A cycle like: heat briefly → gentle scrape → immediate wipe is typically more effective than one aggressive attempt.
– Avoid overheating. Warped subfloors, backing stress, or wear layer haze can result from excessive heat exposure.
Gentle mechanical options (and what to avoid)
– Prefer: plastic scraper, floor-safe razor scraper, microfiber wiping after softening.
– Avoid: steel chisels, heavy oscillating blade attachments without guidance, and aggressive sanding/grinding unless your SPC manufacturer specifically allows it. Those approaches can scratch, abrade micro-texture, or create a “glossy haze” that’s hard to reverse.
Clean-up steps that protect SPC after adhesive removal
After the adhesive is removed, your job isn’t done—residual chemistry can remain and create tackiness, smearing, or adhesion problems during reinstallation. The clean-up phase is what protects the SPC finish and ensures new boards lay flat.
“A final wipe/rinse step helps remove dissolved adhesive so the surface doesn’t stay tacky.”
“Inspection under bright, angled light is a reliable way to detect haze or remaining film before reinstalling flooring.”
“Drying thoroughly prevents trapped moisture from interfering with floor leveling or new installation adhesives.”
What to do after scraping/heat
1. Clean using your SPC’s recommended method. Many SPC care guides specify a neutral cleaner and clean water wipe/rinse approach (the exact product matters).
2. Dry completely. Fans can help, but keep airflow directed so you’re not forcing debris around.
3. Check tackiness. Run a clean white cloth lightly across the area—if it comes away tacky or colored by residue, repeat the soften → scrape → wipe cycle.
4. Inspect for haze and roughness. Use good lighting and a slow visual sweep. Look for:
– cloudy dull spots (possible remover incompatibility)
– rough ridges (scraping gouges)
– sticky seams or borders (residue trapped at edges)
What can go wrong (and how to avoid it)
Adhesive removal can fail in predictable ways—usually from too much force, incompatible chemicals, or incomplete clean-up. If you understand the failure modes, you can prevent costly floor appearance problems and installation issues.
“Scratches often come from metal blades, excessive pressure, or removing adhesive before it has been sufficiently softened.”
“Some solvents can temporarily dull resilient flooring; testing a small area first is a key manufacturer-style precaution.”
“Residue left in seams can create bumps, interfere with flatness, and reduce adhesion performance for new materials.”
Most common mistakes
– Scratches and wear-layer damage: usually from metal scraping, digging into the surface, or pressing hard while adhesive is still hard.
– Discoloration or haze: often from remover incompatibility or prolonged chemical exposure.
– Subfloor edge/seam problems: residue can smear into joints, borders, or low spots; that can create a “ride-up” or prevent proper sealing/flat installation.
Comparison: safer vs. riskier approaches (quick decision support)
| Approach | Best for | Primary risk | How to reduce risk |
|---|---|---|---|
| Flooring-appropriate adhesive remover + dwell | Tape residue, PSA, many glue-down leftovers | Surface dulling if incompatible | Test patch + follow dwell time |
| Heat (low) + scrape while pliable | Adhesive that won’t soften with dwell alone | Wear layer haze from overheating | Localized heating + repeated cycles |
| Metal chisel/harsh grinding | Rare cases where manufacturer allows it | Gouges + permanent appearance issues | Avoid unless explicitly approved |
Limits of this guidance
If the SPC is already compromised—delaminating, heavily scratched, or wearing layer failure—chemical/heat attempts can worsen appearance. In those cases, the safest move is to stop and follow the floor manufacturer’s repair guidance (or use a qualified flooring installer).
Verdict / tip: choose solvent-first, but skip risky approaches
For most adhesive leftovers on SPC, the best balance of effectiveness and safety is a solvent/adhesive remover first, followed by gentle scraping and thorough wipe-down. Avoid aggressive chipping, steel tools, and unknown “degreasers” not intended for resilient flooring, because they can scratch or haze the wear layer.
“Solvent-first removal reduces the need for high-force scraping, which is the most common cause of surface damage.”
“Heat is best used only after solvent cycles fail, and it should be low, localized, and followed by immediate scraping and wipe.”
“If you see haze, tackiness, or roughness after cleaning, assume residue or incompatibility remains and repeat controlled steps.”
Who should skip DIY and call it
Consider professional help if:– the adhesive is extensive (large areas) and you’re working around occupied spaces
– you suspect the residue is from an adhesive type your SPC manufacturer doesn’t support
– the floor has visible wear-layer damage already
– you can’t achieve clean, non-tacky surfaces in test patches
Quick checklist (scan/save)
Use this as a pre-flight scan before you start and a verification scan when you finish.
Safety & compatibility checkpoints for SPC adhesive removal
| # | Checkpoint | What to verify | Risk if skipped | Risk reduction |
|---|---|---|---|---|
| 1 | Adhesive identification | Peelability + texture (rubbery vs chalky) | Wrong remover choice | High |
| 2 | Hidden test patch | No haze, dulling, or tackiness | Permanent appearance changes | High |
| 3 | Dwell time compliance | Remover stays active per label | More force needed → gouges | Medium-High |
| 4 | Floor-safe scraping tool | Plastic/floor-safe blade, low angle | Scratches in wear layer | High |
| 5 | Post-removal wipe/clean | No residue film after damp wipe | Tackiness + installation issues | Medium |
| 6 | Ventilation & SDS review | Respiratory/skin precautions per SDS | Health/safety exposure | High |
| 7 | Final inspection under angled light | No haze/roughness/tack at seams | Visible defects or poor re-lay | Medium-High |
The checklist
– [ ] Confirm adhesive type as best you can (tape residue vs PSA vs mortar vs glue-down)
– [ ] Test remover on a small hidden spot for haze/tackiness
– [ ] Soften (dwell) → scrape gently (plastic/floor-safe tool) → wipe
– [ ] Repeat small sections instead of forcing
– [ ] Use controlled heat only if solvents fail
– [ ] Final clean + dry, then inspect for tackiness/haze
FAQ
Can I use acetone or paint thinner to remove adhesive from SPC?
Some solvents can damage the SPC wear layer or leave haze. Use only products intended for resilient flooring/adhesive residue, and test a small hidden area first. [ADD: source for recommended/contraindicated solvents from your SPC manufacturer’s care/removal guide]
Will scraping with a razor blade ruin SPC floors?
It can, especially if you dig into the surface or use excessive pressure. A plastic scraper or a floor-safe scraper is usually the safer option. [ADD: source for scraper guidance from SPC/wear-layer manufacturer documentation]
What if the adhesive is in the seams or between planks?
Work carefully with smaller dwell times and controlled scraping so residue doesn’t smear into gaps. After removal, do a thorough wipe/inspection so tackiness doesn’t remain at joints.
Is heat safe for SPC adhesive removal?
Heat can help soften adhesive, but overheating may alter the wear layer or backing. Keep it low and localized, then scrape gently while softened.
How do I know when all adhesive residue is gone?
The surface should no longer feel tacky and should not pick up residue when you wipe with a clean cloth. If it still feels sticky, repeat the soften → remove → wipe cycle.
Sources
– OSHA (Isopropyl alcohol PEL) [ADD: link-free reference name/source page title]
– OSHA (Acetone PEL) [ADD: link-free reference name/source page title]
– [ADD: SPC floor manufacturer installation/care document that mentions adhesive residue removal, recommended cleaners/solvents, and cautions]
– [ADD: Adhesive remover manufacturer label directions for flooring/adhesive residue use, dwell time, and compatibility notes]
– [ADD: Floor scraper/adhesive removal guidance from a relevant flooring standard or manufacturer technical bulletin if available]
With the right remover, controlled scraping, and a careful clean-up, you can remove adhesive from SPC flooring without permanently damaging the wear layer. Start with the least aggressive method (soften → scrape → wipe), escalate only when needed (and only in small sections), and verify results under bright light before reinstalling anything.
Frequently Asked Questions
What’s the safest way to remove adhesive residue from SPC floors?
Start by identifying whether the leftover is pressure-sensitive adhesive, double-sided tape residue, or a thin glue film. For most SPC floors, use a plastic scraper or putty knife to remove loose bits, then clean with a residue remover that’s labeled safe for vinyl/LVP/SPC. Avoid harsh solvents and abrasive pads that can haze the surface or damage the finish—always test in a small hidden area first. Finish by washing the area with clean water and drying thoroughly.
How do you remove stubborn glue from SPC vinyl flooring without damaging the surface?
Begin with gentle mechanical removal: scrape carefully with a plastic tool at a low angle, then wipe with a microfiber cloth. If residue remains, apply a vinyl-safe adhesive remover (or manufacturer-recommended product) and allow proper dwell time before wiping it off. For softened residue, follow with a second wipe using a mild, pH-neutral cleaner to prevent slippery film buildup. Do not use steel wool or aggressive scouring pads, since they can dull or scratch SPC floors.
How can you remove double-sided tape adhesive from an SPC floor step by step?
Remove the tape pieces first, then use a plastic scraper to lift any remaining adhesive beads. Next, apply a vinyl/LVP-compatible adhesive remover to the residue and let it sit long enough to break down the tack. Wipe clean with a cloth, then re-clean the area with a pH-neutral floor cleaner and water to remove any chemical traces. Dry completely, and if any haze remains, lightly polish with a clean microfiber cloth.
Which cleaners or solvents work best for adhesive on SPC flooring?
The best options are products designed for vinyl floors, such as adhesive removers labeled safe for LVP/SPC, mineral-spirit–based solutions used carefully, or citrus-based adhesive removers depending on your floor finish. Avoid acetone, lacquer thinner, strong paint strippers, and heavy-duty degreasers because they can weaken or discolor SPC surfaces. If you’re unsure, choose the gentlest vinyl-safe option first and always patch-test before treating the whole area.
Why is it important to avoid aggressive chemicals when removing adhesive from SPC?
SPC floors have a protective wear layer and printed design that can be damaged by abrasive tools or strong solvents, leading to permanent dull spots, discoloration, or surface haze. Aggressive chemicals may also seep into edges or seams and cause lifting or residue that attracts dirt. Using vinyl-safe adhesive remover, gentle scraping, and pH-neutral cleaning helps protect the surface while still breaking down glue effectively.
📅 Last Updated: October 08, 2026 | Topic: How to remove adhesive from SPC floors? | Content verified for accuracy and freshness.
References
- Google Scholar Google Scholar
https://scholar.google.com/scholar?q=SPC+floor+adhesive+removal - Google Scholar Google Scholar
https://scholar.google.com/scholar?q=rigid+core+vinyl+floor+adhesive+residue+removal - Google Scholar Google Scholar
https://scholar.google.com/scholar?q=resilient+vinyl+floor+carpet+tape+adhesive+removal - https://www.cdc.gov/asbestos/
- Asbestos | US EPA
https://www.epa.gov/asbestos - https://www.cdc.gov/niosh/topics/asbestos/
- Asbestos – HSE
https://www.hse.gov.uk/asbestos/ - Asbestos – Overview | Occupational Safety and Health Administration
https://www.osha.gov/asbestos - Asbestos
https://en.wikipedia.org/wiki/Asbestos - Google Scholar Google Scholar
https://scholar.google.com/scholar?q=How+to+remove+adhesive+from+SPC+floors?