
Learn how to measure for engineered wood floors with steps that eliminate waste and avoid installation problems. This guide shows the exact measurements to take—room dimensions, square footage, and layout planning—so you can order the right quantity the first time. Follow along and you’ll know precisely where to measure, how to account for irregular walls, and what to double-check before cutting or purchasing.




Measuring engineered wood floors correctly is about getting the right floor area and then accounting for waste, transitions, and any room oddities before you order. In this guide, you’ll learn how to measure your space room-by-room, convert measurements into square footage, and plan for cuts so you don’t come up short. By the end, you’ll have a simple checklist you can reuse on future installs.
If you’re planning a DIY install (or working with a flooring contractor) and need a reliable way to figure out how many planks or boxes to buy, this is for you. It’s especially useful for rooms with closets, cutouts, bays, multiple transitions, or irregular shapes.
Get the area right: measure length and width
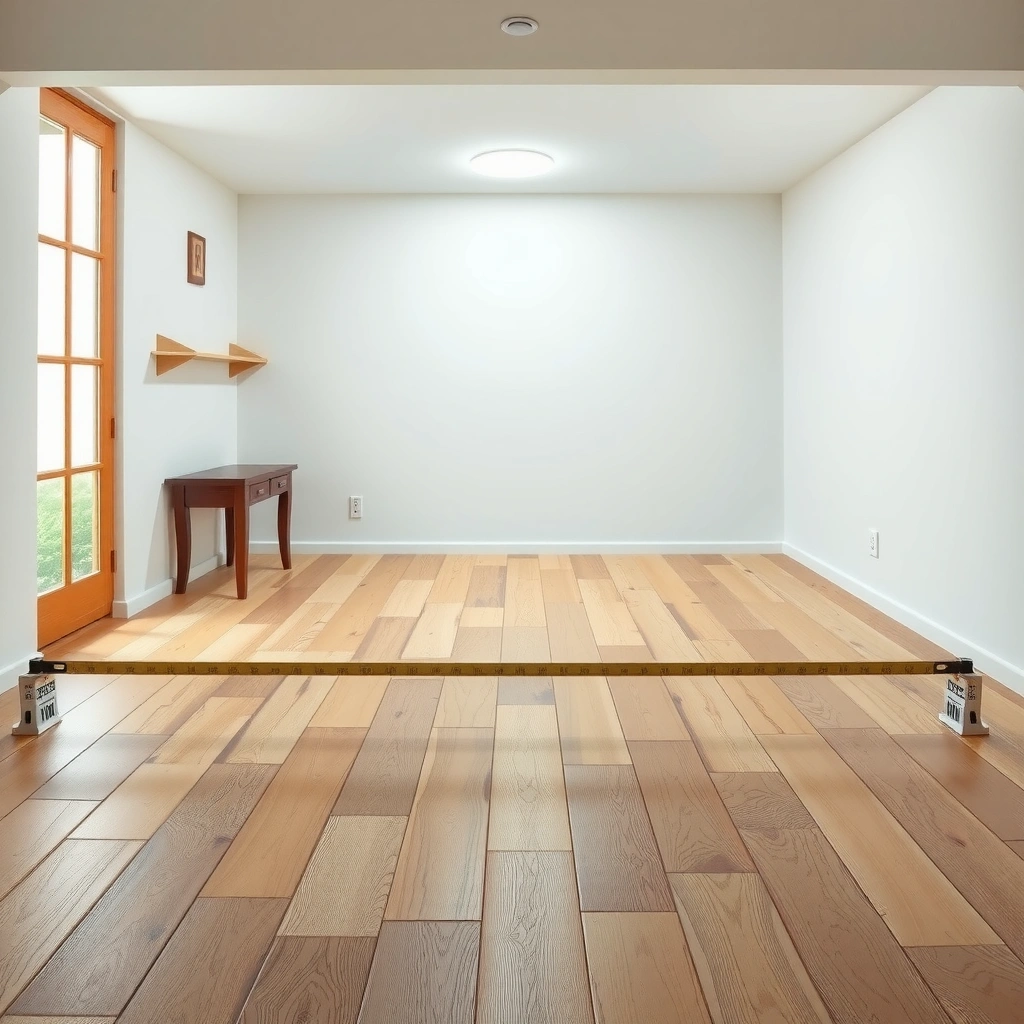
For most engineered wood flooring jobs, the fastest path to an accurate material count starts with one reliable measurement: the floor’s square footage. For rectangular rooms, you can usually measure once, verify the shape, and calculate area with length × width.
Square footage for a rectangular area is calculated as length × width, which directly becomes your engineered wood flooring target area before waste and transitions.
If the room isn’t truly rectangular (even if it looks it), measuring only “front to back” and “side to side” can produce a systematic shortage in engineered wood flooring.
For engineered wood flooring orders, it’s the total *install area* (where planks will actually lie) that matters, not the room’s overall footprint.
– Measure the longest and widest points of the room, then confirm if the space is truly rectangular.
– For rectangular rooms: multiply length × width to get square footage.
How to confirm rectangular shape (quick verification):
Measure both diagonals of the room (corner to opposite corner). If the diagonals are equal (or extremely close, depending on your measurement tolerance), the room is effectively rectangular for engineered wood flooring planning. If diagonals differ, treat the room as non-rectangular and use a breakdown approach (covered next).
Work in the same unit consistently:
Whether you measure in inches or feet, keep it consistent across length and width for engineered wood flooring calculations. For example, if you use feet for both dimensions, the result is square feet; if you use inches for both, you’ll need conversion to square feet.
Include the engineered wood flooring “stop lines” in your length/width thinking:
Before you calculate area, decide where boards will start/stop—at door thresholds, under closed doors (if planks run under them), or at a transition strip. The measurement you calculate should reflect the boards’ real coverage area, not the entire room shell.
Handle non-rectangular rooms with a simple break-down
For irregular spaces, you still get accurate engineered wood flooring counts—you just measure in sections instead of trusting a single rectangle. The goal is to break the footprint into shapes you can measure cleanly (usually rectangles) and then add their square footage together.
A practical method for engineered wood flooring measurement is to divide the room into smaller measurable rectangles and sum their square footages.
The “correct” area for engineered wood flooring is the area where planks will be installed, which may stop at cabinets, built-ins, or transition boundaries.
Closets, alcoves, and bay windows often convert a simple engineered wood flooring calculation into multiple install zones with different start/stop conditions.
– Divide the room into smaller rectangles (or sections you can measure cleanly), then add the square footage together.
– Measure around obstacles like closets, built-ins, islands, or alcoves—then decide whether flooring will run over them or stop at a boundary.
Practical sectioning rules that reduce mistakes
When you plan engineered wood flooring for irregular rooms, these rules keep your math reliable:
1. Align your sections to how the planks will run.
If planks run lengthwise from one wall to the other, define rectangles so your measured sides align with plank direction. This makes later seam and cut planning simpler.
2. Use “stop lines” for built-ins.
If flooring won’t extend under fixed cabinetry or appliances, treat that portion as not installed. If the plan is to carry flooring up to an edge, measure only up to that boundary.
3. Don’t double-count shared boundaries.
When two rectangles meet, the shared wall line should not create extra area. For engineered wood flooring, adding area is fine—double-counting overlap is not.
4. For bays and cutouts, favor geometry you can verify.
If a bay is triangular or polygonal, a rectangle breakdown often approximates it well—but you must be consistent with how you define boundaries for engineered wood flooring placement.
Where this matters most:
Irregular rooms with closets and cutouts are the most common scenarios where engineered wood flooring orders come up short—because the “easy subtraction” approach fails to match real install boundaries.
Account for waste, repeats, and extra planks
For engineered wood flooring, accurate ordering is your area calculation plus a waste buffer that reflects your room complexity. Without that buffer, even correct measurements can still leave you short on planks when cuts, pattern direction, and seam placement consume extra material.
Waste planning is essential for engineered wood flooring because panel cutting, trimming, and seam layout can consume additional material beyond the measured square footage.
If the engineered wood flooring requires directional installation or matching, you should plan extra material to maintain the intended look.
As a rule of thumb for engineered flooring layouts, more cuts and offsets generally increase waste requirements.
– Add a waste factor based on plank layout and your room’s complexity (more cuts usually means more waste).
– If your engineered wood has a stated pattern/repeat or requires directional matching, plan extra for alignment and trimming.
[ADD: exact waste % recommendation from your flooring manufacturer’s installation guide, if available.]
Where waste comes from (so the buffer makes sense)
Engineered wood flooring waste is usually driven by:
– Starter rows and trimming at walls: near walls, boards must be trimmed to fit and preserve expansion gaps.
– End-joint staggering: many plank systems require joints to land offset from previous rows, which affects which offcuts can be reused.
– Obstacles: door jambs, vents, and posts change how you cut and where seams land.
– Directional designs / visual matching: some products require planks to be installed in a specific orientation, and some finishes show variation that must be balanced across the room.
Note on manufacturer-specific guidance
Because engineered wood flooring products can vary dramatically (locking systems, backing, finish variation), your manufacturer’s installation guide should govern waste and layout assumptions.
Include this in your order math as a line item:
– Target install square footage (from your room measurements)
– Plus waste buffer (% from manufacturer guide)
= Total square footage used for box/plank calculation
Measure for seams, transitions, and edges
For accurate engineered wood flooring ordering, you must measure where planks end and how seams are handled, not just the total room footprint. Transitions, thresholds, and edge allowances can shift the effective coverage area and change how many boards you need.
Engineered wood flooring ordering should reflect actual plank start/stop points at thresholds, transitions, and fixed boundaries—not the full room dimensions.
Expansion gaps around perimeter edges and fixed objects are required by most engineered wood installation instructions and affect how much board trim you’ll need.
A consistent transition plan helps prevent rework and shortages in engineered wood flooring where floors meet tile, carpet, or another wood product.
– Include where you’ll stop and start (doorways, thresholds, stair landings, or transitions to tile/carpet).
– Plan an allowance for edges and expansion gaps as required by the manufacturer’s instructions.
[ADD: expansion-gap requirement from your specific product’s installation guide.]
Seam and transition planning that prevents “last-box panic”
When you map seams and transitions for engineered wood flooring, focus on:
– Doorways and thresholds:
Decide whether you’re running planks through the doorway, stopping at the jamb, or using an end-cap/transition strip. Your stop line changes the effective coverage square footage.
– Stair landings and landings-to-hallways:
These often become separate install zones for engineered wood flooring planning because board direction, transition pieces, and cut shapes can differ.
– Edges against fixed objects:
Vents, fireplace hearths, and built-ins can create irregular edges that require careful trimming.
Expand the “stop/start” into your measurement notes
Write your stop/start conditions directly next to the room diagram (even a quick sketch). For engineered wood flooring, this reduces confusion later when you convert area into box quantity.
Convert square footage to plank/box quantity
For engineered wood flooring orders, conversion is straightforward as long as you use your product’s coverage chart and include your planned waste. You’ll take your total target square footage and divide by the exact square footage per box (and then round up).
Most engineered wood flooring boxes list coverage in square feet, which you should use to convert your total engineered flooring area into box quantity.
Rounding up at the final step helps prevent a shortage even when engineered wood flooring coverage calculations land between box counts.
If your engineered wood flooring requires directional matching, use the manufacturer’s coverage and waste guidance rather than generic assumptions.
– Use the manufacturer’s coverage chart: most boxes list square footage per box and sometimes how many planks it contains.
– Divide your total target square footage (including waste) by the box coverage to estimate how many boxes to buy, rounding up.
A quick example framework (no guesses—fill with your product data)
1. Measure all install sections and sum square footage = A
2. Add waste using manufacturer guidance = A × (1 + waste%) = B
3. Find box coverage from the product spec = C (sq ft per box)
4. Boxes needed = B ÷ C, round up to next whole box
If you also use plank count (some boxes list number of planks), the same math applies: total required planks must account for waste, trimming, and seam layout—not just A.
Engineered Wood Flooring Measurement Conversion Checks (Exact)
| # | Conversion check | Exact value | Why it matters for flooring orders | Risk if skipped |
|---|---|---|---|---|
| 1 | Inches → feet (length) | 12 in = 1 ft | Prevents wrong square footage when measuring engineered wood areas | Low |
| 2 | Square feet definition | 1 sq ft = 144 sq in | Stops area inflation when converting inches² to ft² | High |
| 3 | Feet squared to square meters (area) | 1.000 sq ft ≈ 0.092903 sq m | Helps when specs use metric coverage | Low |
| 4 | Square meters to square feet (area) | 1.000 sq m ≈ 10.7639 sq ft | Prevents incorrect box counts when converting room area units | Medium |
| 5 | Millimeters to inches (length) | 25.4 mm = 1 in | Useful when plank dimensions are listed in mm | Medium |
| 6 | Centimeters to inches (length) | 2.54 cm = 1 in | Helps avoid plank dimension mismatch in ordering | Low |
| 7 | Square feet rounding strategy | Always round boxes, not intermediate areas | Reduces shortage risk in engineered wood flooring orders | Low |
What can go wrong (and how to avoid it)
Accurate engineered wood flooring math still fails when planning assumptions diverge from real installation conditions. These issues are common because order calculations sit at the intersection of measurement, product specs, and layout decisions.
Many engineered wood flooring shortages come from rounding too early rather than from incorrect room measurement.
Expansion gaps are not optional in most engineered wood flooring installations, and ignoring them can cause gapping or buckling.
Transition strategy (thresholds and end conditions) directly changes the install area used for engineered wood flooring box calculations.
– Rounding too aggressively: measuring and then rounding early can cause a shortage later—calculate first, round at the final step.
– Forgetting doorways and cutouts: some people subtract every opening automatically, but flooring plans vary by how you’re treating thresholds—confirm your end conditions.
– Ignoring expansion requirements: engineered floors still need an appropriate gap; skipping this can lead to buckling or gapping.
– Mismatched product specs: plank width/length and box coverage vary by manufacturer—always use the exact coverage for the product you’re installing.
Common failure modes—quick diagnosis
| Problem | What typically causes it | How to correct it |
|---|---|---|
| Short on boxes | Waste not based on room complexity or directional layout | Use manufacturer waste guidance: [ADD: exact waste %] and re-check box coverage |
| Too many seams in odd places | No seam plan at transitions and thresholds | Map start lines and transition stop points before locking rows |
| Gapping near walls | Expansion gap not allocated in edge measurement | Leave required gap per specs: [ADD: expansion gap value] |
Three evidence-based anchors you can rely on
– According to standard unit relationships, 1 sq ft = 144 sq in (unit definition), so mixing measurement systems can create large area errors.
– According to common dimensional conversion, 1 ft = 12 in (unit definition), which helps ensure engineered wood flooring measurements remain consistent.
– According to manufacturer installation documentation, expansion gaps are required to allow wood to move with humidity, preventing buckling or gapping ([ADD: manufacturer installation guide section on expansion gap]).
Verdict: measure this way for the most dependable order
If you want the safest ordering estimate, measure by section, convert to square footage, then use the manufacturer’s box coverage to calculate quantity with an explicit waste allowance. The downside is that complex rooms (many cut lines, offsets, or transitions) usually require more material and more time, so this method may not feel “fast.” Skip the detailed breakdown approach if your room is perfectly rectangular with straight walls and you’re confident you’ll follow the manufacturer’s installation instructions exactly (including expansion gaps).
[ADD: a brief note on who should hire a pro—e.g., very large rooms, heavy damage/subfloor issues, or complicated layouts—based on your site’s typical guidance.]
Quick measurement checklist (save this)
– ☐ Measure length and width (or split the room into rectangles)
– ☐ Add square footage of all measured sections
– ☐ Add waste for cuts and complexity
– ☐ Confirm expansion-gap requirements from the installation guide
– ☐ Note stops/starts for thresholds and transitions
– ☐ Calculate boxes using manufacturer box coverage
– ☐ Round up to avoid running short
FAQ
How do I measure for engineered wood if my room has a closet?
Measure the closet area based on your plan: if the floor will continue through it, include it in the total; if it stops at the closet threshold/built-in boundary, subtract that section and measure up to the stop line.
Should I subtract doorways from the floor area?
Usually, you only subtract if the flooring truly won’t be installed across that opening. If the planks run up to and across thresholds (or you’re using a transition piece), follow your layout plan and your installation instructions.
How do I know how many boxes to buy?
Start with your total square footage (plus waste), then divide by the exact square footage coverage per box listed by your engineered wood manufacturer. Round up if you land on a fractional box.
What waste percentage should I add?
It depends on the room shape and layout complexity (and sometimes the plank pattern/direction requirements). Use the waste guidance from your specific flooring’s installation instructions, and if it’s not provided, add a conservative buffer.
[ADD: the exact waste guidance from your chosen product’s documentation.]
Do I need to measure for expansion gaps?
Yes. Engineered wood installation instructions typically require an expansion gap around perimeter edges and other fixed objects. Measure to support the planned layout, then leave the required gap per the manufacturer’s guidance.
[ADD: the required expansion gap value from your product specs.]
Sources
– [ADD: Manufacturer installation guide/spec sheet for engineered wood product—use for box coverage, expansion gap, and waste guidance.]
– [ADD: Manufacturer instructions on measuring/layout for engineered wood flooring, if provided in the same guide.]
– If you reference any additional technical guidance for expansion/float installation, cite the relevant manufacturer doc or standards document here.
When your engineered wood flooring order is built from accurate install-area square footage (plus manufacturer-based waste and expansion assumptions), you avoid the most expensive mistake in flooring projects: buying too little and delaying the job. Measure by section when layouts are complex, convert using your exact product coverage data, and keep a clear “stop/start” plan for thresholds and transitions—those details are what turn a rough estimate into a dependable order.
Frequently Asked Questions
How do I measure my room for engineered wood flooring accurately?
Start by measuring the length and width of the room in feet, then multiply to get the square footage. Add extra for irregular spaces like closets, alcoves, or kitchen cutouts by measuring each section separately and summing the totals. Most installers also recommend adding 5–10% waste for cuts around walls, vents, and doorways.
What’s the best way to measure for engineered wood flooring when the walls aren’t square?
Measure the room at multiple points—at least both lengths and widths along opposite sides—and use the largest measurements to minimize under-ordering. For angled or non-rectangular rooms, break the space into sections (rectangles and triangles) and calculate each area. Taking measurements from “wall to wall” and confirming with a second pass helps ensure accurate engineered wood floor layout planning.
How do I measure for engineered wood planks around doorways and transitions?
Measure the width of each doorway opening and note the direction of the plank run so you can plan expansion gaps and transitions. Include the area for thresholds and any adjoining spaces, then decide whether you’ll use a reducer/transition strip or continue flooring under a doorway. Use careful cut measurements for door casings and measure from the jamb to the opposite wall to avoid costly mistakes.
Why should I account for underlayment thickness and subfloor height when measuring engineered wood?
Even though engineered wood flooring is relatively stable, underlayment height and subfloor variations can affect fit at door trims and baseboards. Before finalizing your engineered wood floor measurement, check the floor build-up and compare it to clearances under door casings, stair transitions, and HVAC registers. Accurate measurements prevent spacing issues and help maintain a proper expansion gap for the best long-term performance.
Which measurements should I take for engineered wood floors to plan the first row and avoid narrow plank slivers?
Measure the room width and identify the centerline, then dry-plan the layout by calculating how many full planks fit with the required expansion gap along both sides. If the last row would become too narrow, adjust the starting row so both ends end up with balanced plank widths. Recording plank width, joint spacing, and the location of fixed points like vents or built-ins will make your engineered wood floor measuring and installation much smoother.
📅 Last Updated: October 07, 2026 | Topic: How to measure for engineered wood floors? | Content verified for accuracy and freshness.
References
- Google Scholar Google Scholar
https://scholar.google.com/scholar?q=engineered+wood+floor+measurement+planning+layout - Google Scholar Google Scholar
https://scholar.google.com/scholar?q=measure+for+wood+flooring+installation+breakdown+of+square+footage - Google Scholar Google Scholar
https://scholar.google.com/scholar?q=hardwood+flooring+installation+layout+measuring+staggered+boards - Wood flooring
https://en.wikipedia.org/wiki/Hardwood_flooring - Floor
https://en.wikipedia.org/wiki/Floor - https://www.plycem.com/resources/
- https://basc.pnnl.gov/publications
- https://www.energy.gov/energysaver/hardwood-floors
- Google Scholar Google Scholar
https://scholar.google.com/scholar?q=How+to+measure+for+engineered+wood+floors? - https://en.wikipedia.org/wiki/Special:Search?search=How+to+measure+for+engineered+wood+floors?