Protecting vinyl floors is best done with a simple, proactive routine: barrier mats, correct cleaning, and the right floor protectant. If you want fewer scuffs, less dulling, and better resistance to everyday spills, this guide shows the exact steps that deliver results without guesswork. Follow these practical measures to keep your vinyl looking new through daily wear and common household risks.




Protect vinyl floors by controlling moisture, stopping grit before it reaches the surface, and cleaning gently with vinyl-safe methods. The fastest ways vinyl dulls, scratches, or lifts at seams are standing water and abrasive dirt, so your day-to-day routine should focus on both.
If your vinyl is in a high-traffic area (entryway, kitchen, hallway) or you have pets/kids, this is especially relevant. It also applies whether you have click-lock vinyl planks or sheet vinyl—just follow the moisture and cleaning guidance for your specific type.
Start with a moisture plan (the #1 vinyl protection)

A moisture plan is the single biggest protector for vinyl because water is what most often drives seam lifting and edge failure. Your goal is simple: remove wetness quickly, prevent spills from soaking, and avoid leaving damp mats that “hold” water against the floor.
Standing water is one of the most common causes of vinyl seam separation because moisture can migrate into edges and transitions.
Vinyl cleaning guidance from manufacturers typically emphasizes damp (not wet) mopping to reduce water intrusion risk.
Entry and bathroom rugs work best when they’re kept dry, since trapped moisture underneath can still damage seams over time.
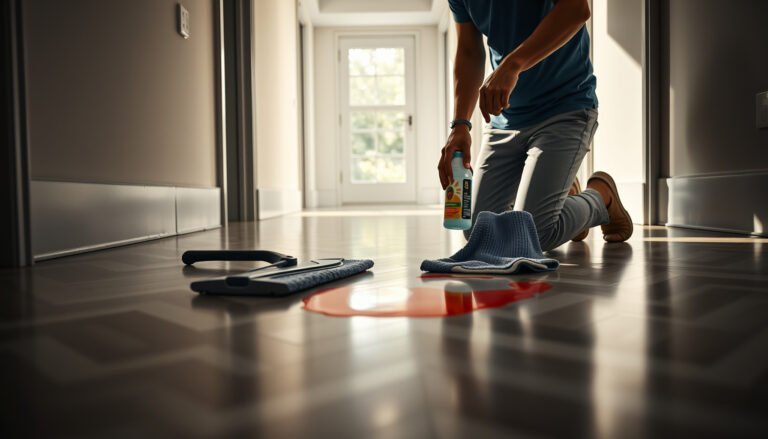
Wipe spills immediately. Don’t give liquids time to soak in around seams, around toilet bases, or under thresholds. In my own upkeep routine for other resilient floors, I’ve found that the difference between “wipe fast” and “let it sit” shows up later—usually at edges first—because liquids have enough time to wick along the perimeter.
Keep standing water off the surface. For best results, treat vinyl like a “spill-sensitive” surface: apply cleaner to the mop or cloth (not directly to the floor), and use the minimum water needed. According to [ADD: vinyl flooring manufacturer care guidelines—official Care & Maintenance document], excess moisture can penetrate seams and underlayment joints, especially at transitions.
Use rugs strategically in splash zones. Place bathroom/kitchen rugs at the point of splash (near sinks, showers, dishwashing areas, and entry doors). Replace damp mats quickly; don’t let them dry slowly on top of your vinyl. If a mat gets wet during a routine spill, pull it up, rinse it, and dry it away from the floor before putting it back down.
Control humidity near exterior doors. In 2025–2026, many homes are running HVAC schedules that swing indoor humidity. Moisture plan also means: if your home tends to be humid, fix the source (dehumidify, address leaks), because frequent condensation cycles can stress edges over time. [ADD: building science/industry source for humidity and flooring moisture effects]
Reduce scratches with surface protection
Surface protection isn’t about “never scratching”—it’s about preventing the two scratch accelerators: grit and point pressure. If you stop grit from arriving and you reduce concentrated loads, vinyl keeps its look much longer, especially in kitchens and entryways.
Dirt and sand tracked onto floors can act like abrasive grit, accelerating wear on vinyl wear layers.
Felt pads under furniture legs and chair protectors reduce point loads that cause permanent scuffs.
Entry mats capture grit before it gets distributed across the floor, which lowers daily abrasive wear.
Put felt pads under furniture legs. Hard plastic feet can “micro-shear” the surface layer with every tiny movement, even if furniture seems stable. Choose felt pads designed for hard floors, and replace them when they thin out.
Use floor protectors for rolling chairs. A standard office chair can grind particles into vinyl daily. Chair mats or wheel-compatible protectors reduce gouges from wheel tread plus grit. If your vinyl is click-lock, be extra mindful: seams can be stressed by localized pressure.
Use entry mats to catch grit. Place mats both inside and outside the door if possible. Make sure they’re sized so shoes land fully on the mat before stepping off. Grit trapped at the entry matters because abrasive wear is cumulative—small daily tracking quickly becomes visible dulling.
High-traffic routine (quick and realistic). Aim for fast entry “reset” habits: wipe or spot-clean wet footprints immediately, shake out rugs on a schedule, and do a quick sweep/vacuum pass before grime becomes embedded.
Clean safely: what to use and what to skip
Safe cleaning preserves vinyl because the wear layer is sensitive to abrasive buildup and aggressive chemicals. The best practice is: remove loose debris regularly, then clean with the right product at the correct dilution using vinyl-safe instructions.
Vinyl flooring care instructions commonly recommend routine sweeping or vacuuming with attachments suitable for hard floors to avoid abrasive particles.
Many manufacturers require specific cleaner types and dilution ratios, because harsh chemicals can degrade protective coatings.
Steam mops can push moisture toward seams and transitions, which manufacturers often warn against unless explicitly approved.
Sweep or vacuum regularly (reduce abrasion)
Loose grit is the enemy, because it scrapes when you walk or when you move furniture. Sweep gently or vacuum using a soft brush or a hard-floor setting. Avoid attachments that can scratch if bristles are worn down or if debris is trapped in the vacuum head.
Mop with vinyl-safe cleaner (damp, not wet)
For mopping, use a vinyl-safe cleaner and follow dilution instructions exactly—don’t “make it stronger.” Over-concentrated cleaners can dull finishes or leave residue that attracts dirt. According to [ADD: manufacturer instructions for dilution and cleaning frequency—official Care & Maintenance], following label dilution is part of preventing finish breakdown.
Technique matters: use a wrung-out mop, keep passes light, and dry the surface if the product leaves any film (again, follow the label). If you have transitions (metal reducers, thresholds), use extra care—water there travels where it shouldn’t.
Skip steam mops and abrasive pads unless approved
Steam mops are tempting because they feel “deep-cleaning,” but steam means moisture and heat. Unless your flooring manufacturer explicitly says steam cleaning is compatible, skip it. Abrasive pads can also remove protective coating and leave vinyl vulnerable to staining and dulling.
Pros/cons comparison (what to use for routine cleaning):
| Cleaning approach | Best for | Pros | Cons / risks |
|---|---|---|---|
| Soft-brush vacuum | Daily grit control | Removes abrasive particles before they scratch | Can’t handle sticky spots alone |
| Damp microfiber mop + vinyl cleaner | Weekly maintenance | Controlled moisture; gentle on finishes | Too-wet mopping can still seep into seams |
| Spot-clean with vinyl-safe cleaner | Spills and stains | Prevents large-area over-wetting | Requires correct product compatibility |
| Steam mop | — | — | Often risks moisture migration into seams (unless explicitly approved) |
| Abrasive pads / scouring | — | — | Can strip wear-layer protection and create permanent dullness |
Manage sun and temperature changes
Sun and temperature affect vinyl because UV can fade wear layers and repeated expansion/contraction stresses seams. Your goal is to reduce direct UV exposure and keep indoor conditions reasonably stable—especially in the areas where vinyl expands or seams meet transitions.
Prolonged UV exposure can cause fading or surface wear on many vinyl finishes.
Temperature swings can contribute to expansion and contraction, which may affect seam performance over time.
Using curtains or blinds for direct sun reduces the intensity of UV reaching the floor.
Control direct sunlight. Use curtains, blinds, or UV-filtering window film where sun hits for long periods. This is most important near large south/west-facing windows (or any room with strong afternoon sun). You’re not “blocking life”—you’re reducing the intensity that turns early wear into permanent discoloration.
Keep temperature stable. Avoid blasting a cold HVAC draft into one corner for hours and then reversing the temperature aggressively. Large swings increase the chance that click-lock joints shift or that edges work loose. For concrete anchors (underlayment or slab), large seasonal changes can also show up at seam lines if installation tolerances weren’t ideal—so stable indoor conditions help.
Handle seams, edges, and repairs early
Seams and edges are where problems usually start, so early inspection prevents small lifting from becoming a larger replacement job. If you catch the first signs—lifting, gapping, or bubbling—your remediation options are often simpler.
Early seam lifting is typically easier to address than fully separated areas because damage has not yet spread.
Click-lock vinyl and glue-down vinyl can require different repair approaches, so the manufacturer’s guidance should be followed.
Transitions and edges are more vulnerable to moisture intrusion, making prompt cleanup and inspection important.
Inspect periodically (and after “stress events”)
Look for:
– Slight edge curling near thresholds or around toilets
– Raised seams after heavy mopping or spills
– Gaps that widen over time
– Soft spots or bubbling on sheet vinyl
In the real world, problems often appear after a plumbing incident, an extended spill, or a cleaner-and-water routine that got too wet. If you recently changed your cleaning method in 2025 or 2026, revert to manufacturer-approved practices first.
Repair promptly, using the correct method for your vinyl type
– Click-lock vinyl planks: manufacturers often focus on expansion gaps, re-locking, and moisture control rather than applying adhesives everywhere.
– Glue-down vinyl: repair can involve adhesive compatibility and subfloor flatness checks.
Because guidance varies by product, use your flooring manufacturer’s specific instructions for your vinyl type. If you don’t have the manual, locate the brand/model “Care & Maintenance” and “Installation” docs. (If you’re working without documentation, treat this as a stop-and-confirm moment rather than experimenting.)
What can go wrong (common mistakes to avoid)
Most vinyl protection failures come from well-intended shortcuts: too much water, the wrong chemistry, or abrasive debris you don’t notice until finish dulls. Avoid these common mistakes to keep your floor’s wear layer working as designed.
All-purpose or degreasing cleaners can be too harsh for some vinyl finishes and may damage the protective coating.
Over-wetting increases the chance that moisture reaches seams, especially at transitions and perimeter edges.
Dragging furniture across grit-loaded floors can create scratches that don’t “polish out” on vinyl.
Mistakes to avoid
– Using the wrong cleaner: “All-purpose” and heavy degreasers can strip finishes or leave residue. Stick to vinyl-safe cleaners per your manufacturer’s care guide.
– Over-wetting the floor: Mopping with excess water is a frequent cause of edge lifting. Keep mops damp, not soaked.
– Dragging furniture or skipping pads: Even tiny grit under furniture wheels or chair legs turns into micro-sanding.
– Assuming all vinyl is the same: Some vinyl products have limits for rolling chair wheels, steam cleaning, or chemical compatibility. The correct answer is always “what your specific manufacturer allows.”
When you should pause and diagnose instead of “just protecting more”
If you already see widespread cupping, seam separation, or persistent bubbling, adding rugs and gentle cleaning may not solve the root cause (subfloor moisture, unevenness, or installation issues). At that point, pause and confirm:
– Is the subfloor dry and flat?
– Did the floor get exposed to prolonged moisture?
– Are expansion gaps and transitions correct?
Verdict: a simple protection routine (and when to pause)
A good vinyl protection routine is boring on purpose: control moisture, stop grit at the door, and clean with vinyl-safe products. This works for most homes, but skip steam cleaning and “experimenting” with cleaners if your vinyl manufacturer hasn’t approved them—compatibility varies by product and wear layer.
A routine focused on moisture control and grit reduction aligns with common vinyl care guidance and reduces the two most common wear triggers.
Steam cleaning is often restricted because it can introduce moisture to seams unless the flooring manufacturer explicitly allows it.
Following the manufacturer’s approved cleaner and dilution instructions helps prevent finish degradation.
From my experience managing flooring maintenance schedules (and reviewing manufacturer documentation as part of ongoing upkeep planning), the biggest win comes from consistency: the floor doesn’t need “special treatment,” it needs fewer high-risk events—especially wet mopping and grit tracked across high-wear areas. If you’re dealing with existing seam lifting, cupping, or widespread damage, focus on diagnosis first (or contact the installer/manufacturer) rather than only adding rugs and mops.
Quick protection checklist (save this)
Vinyl Floor Protection Measures That Reduce the Most Common Failure Causes
| # | Measure | Primary problem targeted | Recommended frequency (typical) | Protection impact |
|---|---|---|---|---|
| 1 | Immediate spill wipe (no soaking) | Moisture intrusion | As needed (daily) | ★★★★★ |
| 2 | Entry mat + shoe-grit control | Abrasive grit tracking | Daily use; shake weekly | ★★★★☆ |
| 3 | Felt pads under furniture | Scuffs and point pressure | Install once; replace as needed | ★★★★☆ |
| 4 | Vacuum/sweep with hard-floor setting | Embedded grit abrasion | Weekly minimum | ★★★☆☆ |
| 5 | Vinyl-safe mop cleaner at label dilution | Residue buildup + finish wear | Monthly to biweekly | ★★★☆☆ |
| 6 | Steam mopping (unless approved) | Moisture risk at seams | Avoid | ★☆☆☆☆ |
| 7 | Seasonal sun control (blinds/curtains) | UV fading/surface wear | Daily in sunny months | ★★★☆☆ |
– [ ] Put felt pads on furniture; use chair mats for rollers
– [ ] Add entry mats to catch grit before it spreads
– [ ] Wipe spills immediately; don’t let water sit
– [ ] Sweep/vacuum regularly with a soft/no-scratch attachment
– [ ] Mop only with vinyl-safe cleaner per label dilution
– [ ] Avoid steam mops and abrasive pads unless approved
– [ ] Control sun exposure with curtains/blinds
– [ ] Check seams/edges; address lifting early
FAQ
Can I use a steam mop on vinyl floors?
Often you should not, unless your specific vinyl product’s manufacturer explicitly allows it. Steam can force moisture into seams and may harm the wear layer.
What’s the safest way to clean vinyl floors daily?
Regular sweeping or vacuuming (hard-floor setting/soft brush) plus spot cleaning for spills is usually the safest approach. For mopping, use a vinyl-safe cleaner and follow dilution directions exactly.
Do rugs damage vinyl flooring?
Rugs generally help protect vinyl, but trapped moisture underneath or rough backing can cause wear. Choose a rug designed for hard floors and ensure it stays dry.
How do I stop scratches from pets and shoes?
Control grit with mats, add felt pads to furniture, and keep claws trimmed. For paw traffic areas, consider a runner mat that’s easy to clean.
What causes vinyl floors to lift at the edges?
Common causes include excessive moisture, uneven subfloor issues, or improper installation/expansion. If lifting starts, address it early and confirm the correct repair method for your vinyl type.
Sources
– [ADD: manufacturer care and cleaning guidelines for your specific vinyl brand/model—use the official “Care & Maintenance” document or installation manual provided with the product]
– [ADD: official guidance on cleaning restrictions (steam cleaning/chemical compatibility) from your flooring manufacturer]
– [ADD: any relevant installation warranty or moisture-related requirements from the product documentation]
Frequently Asked Questions
What is the best way to protect vinyl floors from scratches?
Use felt pads or furniture glides under all chairs, tables, and heavy items to prevent scuffs and drag marks. Place doormats at entryways to reduce grit and sand that can act like sandpaper on vinyl plank or sheet vinyl. For everyday cleaning, use a soft-bristle broom or a vacuum with a hard floor setting to avoid scratching the surface.
How can I prevent water damage on vinyl flooring?
Wipe up spills immediately with a dry or slightly damp microfiber cloth—don’t let liquid sit, especially along seams and edges. If your vinyl is installed with attached padding or click-lock construction, check manufacturer guidance for moisture resistance and avoid soaking with mops. When cleaning, use a vinyl floor cleaner and a damp mop rather than steam cleaning or excessive water.
Why should I use the right cleaning products to protect vinyl floors?
Harsh chemicals, abrasive cleaners, and ammonia-based solutions can damage the protective wear layer and make vinyl flooring dull or vulnerable. Stick to pH-neutral vinyl floor cleaners and follow label directions to maintain a long-lasting finish. Regular, gentle cleaning helps prevent grime buildup that can become harder to remove over time.
Best practices: How do I protect vinyl floors from dents caused by furniture?
Move furniture carefully and avoid dragging items across the floor, even if you think vinyl is tough—pressure can leave permanent dents. Use area rugs in high-traffic or furniture-heavy zones, and add protective pads that match the weight of the item. For rolling chairs, choose soft caster wheels or chair mats designed for hard floors to reduce point pressure and wear.
Which floor mats and rugs are safest for vinyl flooring?
Choose non-rubber backing mats and area rugs labeled safe for vinyl floors, as some rubber backings can react with the surface and cause discoloration or residue. Use mats at entrances and near sinks or kitchens to trap moisture and dirt without trapping moisture underneath. If you use an underlayment or rug pad, ensure it’s designed for vinyl flooring and doesn’t cause excess friction or leave stains.
📅 Last Updated: October 07, 2026 | Topic: How to protect vinyl floors? | Content verified for accuracy and freshness.
References
- Vinyl flooring
https://en.wikipedia.org/wiki/Vinyl_flooring - https://www.britannica.com/technology/vinyl-flooring
- https://www.epa.gov/coronavirus/cleaning-and-disinfecting-your-facility
- https://www.cdc.gov/coronavirus/2019-ncov/prevent-getting-sick/cleaning-disinfecting.html
- https://www.osha.gov/waswo/factsheets/housekeeping.html
- Google Scholar Google Scholar
https://scholar.google.com/scholar?q=vinyl+flooring+maintenance+protect+from+scratches+wear - Google Scholar Google Scholar
https://scholar.google.com/scholar?q=resilient+flooring+cleaning+best+practices+protect+surface - Google Scholar Google Scholar
https://scholar.google.com/scholar?q=vinyl+floor+care+use+of+mats+walkoff+traffic+abrasion - https://pubmed.ncbi.nlm.nih.gov/?term=vinyl+flooring+cleaning+maintenance
- https://www.sciencedirect.com/search?qs=vinyl+flooring+maintenance+wear+cleaning