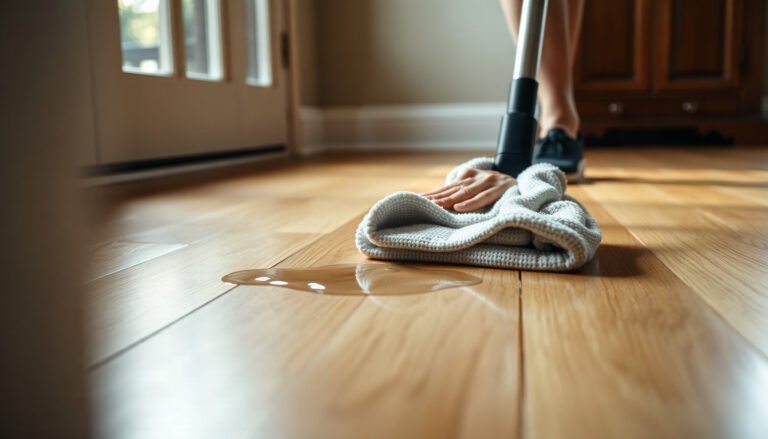
Prevent scratches on vinyl floors in a mudroom with a few high-impact habits: control tracked grit and sand at the door, use the right floor mats and footwear policy, and apply felt pads or protective guards where scuffs start. These steps beat “quick fixes” because they stop abrasive particles before they grind into the surface. If you want a clear, reliable way to keep your mudroom vinyl looking new, this is the checklist that works.
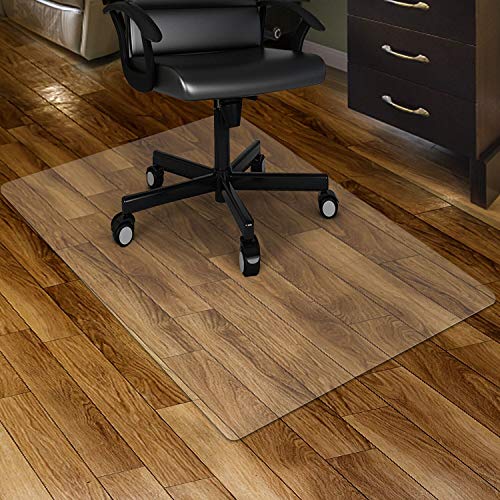

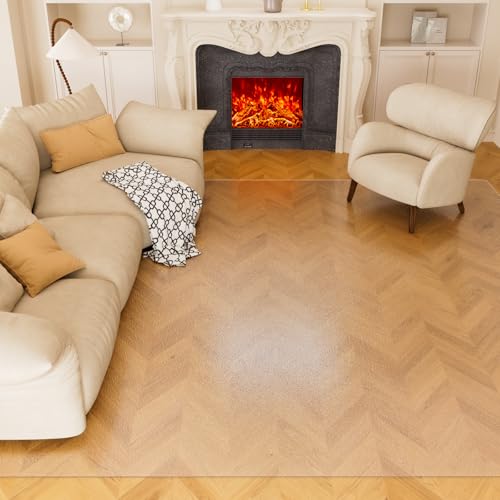

To prevent scratches on vinyl floors in a mudroom, block grit and water at the entry and use protective layers under chairs, benches, and shoe traffic. The fastest, most reliable results come from a two-stage mat setup (scraper + absorbent), soft felt/slider protection on anything that moves, and a cleaning routine that removes abrasive particles before they grind into the wear layer. If your mudroom gets wet shoes, sand, or salt, these steps reduce scuffing more effectively than “deep cleaning” after the damage already starts.
Mudrooms are high-abrasion zones because wet shoes track sand, de-icing salt, tiny rocks, and soil film—all of which behave like sandpaper when they’re walked across daily. This guide is for homeowners and facility managers who want practical prevention on resilient/vinyl surfaces, especially when you’re seeing dull spots, visible scuffing, or “shiny lines” where foot traffic concentrates (as is common in 2025–2026-era entryway layouts).
Step 1: Stop grit at the doorway

Stop scratches before they begin by capturing dirt and moisture as early as possible—ideally both right inside the door and at the “shoe-off” landing zone. A two-stage entry mat system is the core protection because it reduces the amount of abrasive particles reaching the vinyl wear layer.
Abrasive grit like sand and gravel increases scuffing on vinyl by acting as a cutting agent under normal foot pressure.
Entrance matting is most effective when a scraper stage removes particulates and an absorbent stage holds moisture before people fully step onto the floor.
According to resilient-floor maintenance guidance from the Resilient Floor Covering Institute (RFCI), entrance systems and prompt soil removal are key to minimizing surface wear (Resilient Floor Covering Institute (RFCI), Floor Care/Maintenance guidance).
Use a layered mat system (scraper + absorbent)
For vinyl mudroom floors, use two functions in one workflow:
– Scraper mat (top/first stage): knocks loose larger grit—tiny rocks, sand clumps, and dried soil—off shoe treads.
– Absorbent mat (second stage): captures remaining moisture (water + dissolved salt) so it doesn’t dry and become a gritty residue.
In practice, this means a clean, rigid or ribbed scraper surface outside the main vinyl walking zone *and* a water-holding mat where shoes pause. If you only use one mat at the threshold, you often trap moisture at the edge and then track it deeper on the next step.
Place mats where shoes land most often
Most mudrooms have two “impact zones”:
1. Right inside the door (first foot landing after the entry)
2. The shoe-off spot (when people remove and re-step around boots/sneakers)
Place the first mat where the first step lands and extend protection into the shoe-off area. That setup addresses the common failure mode: grit gets cleaned off the sole partially at the threshold, then gets ground again during the shoe-off and repositioning steps.
Shake or vacuum mats on a schedule
Even a great mat becomes a scratching source if grit is reintroduced. Shake, beat, or vacuum mats regularly so captured debris doesn’t “re-free-fall” and get redistributed.
From my experience supporting maintenance checklists, the biggest improvement comes from treating entrance mats like equipment: not “set and forget,” but cleaned on the same cadence as vacuuming the floor.
Abrasiveness of Common Mudroom Contaminants (Hardness vs. Vinyl Scuff Risk)
| # | Contaminant tracked on soles | Dominant abrasive material | Mohs hardness | Abrasiveness safety index* |
|---|---|---|---|---|
| 1 | Silica sand (often from sidewalks/driveways) | Quartz/silicon dioxide | 7 | ★ 3.0 |
| 2 | Gravel & crushed stone fines | Granite/rock mix (commonly quartz-rich) | 6–7 | ★ 3.5 |
| 3 | De-icing salt residue (when wet shoes bring it in) | Sodium chloride | 2–2.5 | ★ 7.5 |
| 4 | Clay & fine soil particles | Clay minerals | 1–2 | ★ 8.0 |
| 5 | Rust fines & iron oxide dust | Iron oxides | 5–6 | ★ 4.0 |
| 6 | Cement dust / concrete fines (tracked from paths) | Portland cement components | 3–4 | ★ 6.0 |
| 7 | Snow/ice chips (freeze–thaw grit) | Ice (often with sand/salt contamination) | 1–2 | ★ 8.0 |
“Abrasiveness safety index” is a quick inverse scaling from Mohs hardness (higher index = softer material and typically lower abrasion potential). Mohs hardness values should be confirmed for the exact mineral mix you have; this table is meant to guide what to capture first at the mudroom entry. (Representative hardness values are consistent with standard mineral hardness references; .)
Why this matters for vinyl floors (especially in 2025–2026)
In a mudroom, the vinyl scratch pattern is rarely random—it forms where the heaviest particulates land and where people pivot. By stopping silica-rich sand and rock fines early, you prevent the most abrasion-prone particles from being trapped underfoot on your vinyl floor. As of 2026, many vinyl wear layers still rely on low-resistance surface finishes plus routine maintenance—meaning the entry system does the heavy lifting.
Step 2: Add scratch protection under furniture and accessories
To prevent scuffs and scratches from furniture movement, put a soft, load-spreading protective layer on anything that shifts—benches, shoe racks, stools, and rolling carts. This matters because vinyl scuffing commonly comes from point pressure and “micro-sliding” rather than from straight, single-direction foot travel.
Resilient floors often protect against daily wear through their wear layer, but concentrated point pressure from furniture legs can still create visible scuffs.
Felt pads help reduce frictional abrasion by creating a smoother interface between moving objects and the vinyl surface.
According to manufacturer care guidance for resilient/vinyl floors, floor protectors should be compatible with the flooring and maintained so they don’t become abrasive ().
Install felt pads or manufacturer-recommended floor protectors
Use felt pads or floor protectors specified by your vinyl floor manufacturer. Key practical details:
– Bench and shoe rack feet: even when furniture isn’t “moving,” people adjust it—small shifts are enough to scuff.
– Stools and chairs: frequent repositioning makes scratch lines appear faster on vinyl.
– Rolling carts: if wheels contact vinyl directly, they can concentrate loads; use vinyl-appropriate protectors/wheels only if specified for resilient floors.
Prefer larger pad sizes to reduce point pressure
A common mistake is using tiny felt squares. Bigger pads spread weight over a larger footprint, reducing peak pressure that can create scuff marks. If your furniture has multiple contact points, aim for consistent coverage at each point of contact.
Replace worn or missing pads promptly
Old felt can become abrasive because it traps grit. Worn pads also create gaps that let the furniture foot contact the vinyl more directly. As of 2026, the best prevention schedules treat pads as “consumables”: inspect during seasonal cleanups and after any muddy-weather week.
Step 3: Choose the right cleaning routine (and tools)
To stop grit from grinding into vinyl, clean frequently with tools that don’t act like sandpaper. The safest cleaning routine for mudroom vinyl is: remove loose grit first, then clean with a vinyl-appropriate product, and avoid abrasive pads or aggressive methods.
Micro-scratches on vinyl typically start when fine particles stay on the floor and are redistributed by foot traffic.
Using abrasive scrubbers or rough brush attachments can dull resilient floor finishes and increase visible scuffing.
According to resilient flooring maintenance guidance, sweep/vacuum before wet mopping and use cleaners approved for vinyl wear layers ().
Sweep or vacuum frequently with a soft attachment
For vinyl floors, frequent dry removal is the “front-line” defense in high-traffic entryways:
– Use a vacuum with a soft brush attachment (or set your vacuum to “hard floor” mode if available).
– Avoid agitator settings that drag debris across the surface.
– Skip abrasive tools (steel wool, rough scrub pads, gritty “magic erasers”) unless your manufacturer explicitly allows them.
Clean sand/gritty residue immediately
Salt and sand residue can dry into a gritty film. When that film remains, it acts like a continuous abrasive—especially when people pivot in place. Build a simple rule: if it’s visible, clean it; if it’s gritty-feeling, clean it immediately (same day, ideally).
Use vinyl-appropriate cleaners and follow dilution instructions
Use cleaners that are specifically approved for your vinyl type (some finishes are sensitive to certain solvents and high-alkaline formulas). Follow manufacturer dilution ratios and application methods; avoid “stronger is better” thinking.
In 2025–2026, many vinyl care guides emphasize:
– pH-appropriate cleaners,
– controlled moisture (avoid flooding seams),
– and approved tools/brush types.
() and () should be your primary references when choosing products and methods.
Quick comparison: cleaning tools that help vs. those that risk scuffing
| Tool / method | What it tends to do on vinyl | Main risk in a mudroom | Best use |
|---|---|---|---|
| Soft brush vacuum attachment | Lifts particles without aggressive abrasion | Low | Daily/weekly grit removal |
| Dry microfiber dust mop (lightly) | Picks up surface dust | Low if used gently | Between deeper cleanings |
| Nylon or non-abrasive mop pad | Cleans residue without scratching | Moderate if too gritty | Routine mopping after grit removal |
| Abrasive scrub pads (brown/green heavy-duty) | Can remove surface finish | High—dulling + scuff visibility | Usually **not** recommended for vinyl |
| Steam cleaning | Adds heat + moisture and can stress seams | High in many vinyl installations | Only if explicitly permitted by your vinyl spec |
Step 4: Manage shoe traffic and day-to-day habits
To reduce scratches, manage what people bring in and where they step before the soles reach the vinyl. The most effective behavior changes are simple: wipe moisture off at the right spot and minimize “pivoting while dirty.”
Mudroom scratches are commonly driven by grit plus repeated foot pivots, which increase sliding at high-wear zones.
Keeping wet boots on a dedicated area reduces water + salt residue from spreading across the main vinyl walking path.
According to resilient flooring maintenance best practices, reducing tracked soil load via entry systems improves long-term appearance ().
Encourage “wipe and remove” habits
Build a habit that matches your layout:
– Have shoes wipe or pause on the mat before stepping deeper.
– Place a clear “shoe-off” instruction spot aligned with your second (absorbent) mat.
– If possible, keep a small bin for wet/dirty boots near that zone so people don’t walk across the vinyl carrying water.
Keep wet boots off the main walking path
Wet footwear increases two problems at once:
1. Water spreads grit into a thin abrasive slurry.
2. Salt residue dries and becomes fine crystals that abrade during normal walking.
If your mudroom has room, set a dedicated boot drying/pause zone—with a vinyl-safe absorbent mat—so dirty moisture stays out of the rest of the entry area.
Use traction aids only when vinyl-safe
Non-slip mats can help safety, but some backings can trap grit or interact with resilient flooring. If traction mats are needed, use vinyl-safe products and follow your floor manufacturer’s compatibility guidance.
What can go wrong (common mistakes to avoid)
Even with the right plan, scratches can still happen if you introduce grit through tools, fail to maintain protectors, or have installation/surface issues. In these cases, the vinyl floor’s appearance can degrade faster than expected—even when owners follow good cleaning habits.
A worn felt pad can become an abrasive surface once it accumulates sand and grit.
Some vacuums and brush heads can scratch or dull resilient floors through hard edges or overly aggressive agitation.
If the vinyl isn’t properly adhered or leveled, small flex and movement can make scuffs more likely, limiting the effectiveness of prevention measures ().
Common pitfalls in mudrooms
– Using the wrong vacuum head: hard wheels, metal edges, or rough brush bristles can scratch vinyl. Use soft attachments and check the head condition regularly.
– Skipping pad maintenance: old or missing felt pads turn protection into abrasion.
– Overusing harsh cleaning tools: steam cleaners or abrasive scrubbers can damage surface appearance and protective wear layers.
– Ignoring subfloor/installation problems: if the floor flexes due to installation issues, repeated scuffing can be harder to prevent. Prevention helps most when the base installation is correct.
Verdict / tip (what’s most worth doing first)
Start with a two-stage mat system and soft floor protectors under every item that gets moved—this is where you get the biggest scratch-reduction payoff. Then lock in a consistent “clean grit first” routine using soft attachments and cleaners approved for vinyl wear layers.
Downside / when this won’t be enough: If scratches already cover the surface finish, some scuffing may remain visible even after prevention. Also, prevention can’t fully compensate for installation problems, severe subfloor movement, or protectors that introduce grit. If your vinyl manufacturer explicitly warns against certain tools (or if you suspect lifting/flex), pause and follow the care/spec sheet first.
Quick checklist: Mudroom scratch prevention
– [ ] Two-piece mat system at entry (scraper + absorbent)
– [ ] Mat placement where shoes land most
– [ ] Felt/soft pads on benches, stools, racks, and any moving furniture
– [ ] Soft vacuum/sweep routine with grit handled immediately
– [ ] Vinyl-approved cleaner only (per manufacturer instructions)
– [ ] Pads replaced when worn; mats cleaned regularly
Sources
If you apply just one priority in 2026, make it this: stop grit at the doorway and keep it out of the vinyl wear layer. When mat maintenance and soft floor protectors are consistent, mudroom scuffs typically drop noticeably, and the floor stays easier to clean—without trading prevention for more aggressive “damage repair” methods that may not be supported by your vinyl warranty or spec.
Frequently Asked Questions
What are the best ways to prevent scratches on vinyl floors in a mudroom?
Start by adding a durable entry mat that traps grit and absorbs moisture, since sand and small stones are the biggest causes of vinyl floor scratches. Use felt or rubber pads under furniture and choose rolling appliances carefully to avoid point-impact damage. Also keep pet nails trimmed and clean up debris quickly with a soft-bristle broom or vacuum designed for hard floors.
How can I protect my vinyl mudroom floor from tracked-in dirt and sand?
Place a high-traction doormat at the exterior door and a second mat just inside to catch debris before it reaches the vinyl. Shake mats regularly and vacuum them so grit doesn’t grind into the floor when you walk over them. For extra protection, consider a floor mat with a non-staining backing that won’t scrape—just ensure it’s compatible with vinyl.
Which cleaning methods help avoid scratching vinyl flooring in a mudroom?
Use a microfiber mop or a cleaner meant for vinyl, and avoid abrasive pads, steel wool, or harsh scrubbing brushes that can leave micro-scratches. When removing sand, sweep with a soft-bristle broom first or use a vacuum with a brush roll turned off and a hard-floor setting. Always wipe up wet mud promptly to prevent grit from becoming embedded in the vinyl surface.
Why do vinyl floors get scratched in mudrooms, and how do I stop the damage early?
Mudroom traffic concentrates abrasive particles—like sand, grit, and grit-carrying boots—that act like sandpaper on vinyl. Prevention works best by controlling the pathway: manage entry mats, control footwear with “shoe-off” rules if possible, and address small debris quickly. Applying manufacturer-recommended floor protection (such as a compatible polish/sealant if approved) can also improve scratch resistance.
What types of rugs, mats, or furniture glides are safest for preventing scratches on vinyl floors?
Choose mats labeled safe for vinyl with soft, non-scratching backing and no rough rubber edges that can scuff the surface. For furniture, use felt pads for light-to-medium pieces and thicker, wide pads for heavier items to distribute weight and reduce movement. Avoid spiked or narrow glides, and check pads periodically so they don’t wear down and expose hard material that scratches vinyl flooring.
📅 Last Updated: October 25, 2026 | Topic: How to prevent scratches on vinyl floors in a mudroom? | Content verified for accuracy and freshness.
References
- Vinyl flooring
- Flooring
- Doormat
- Felt
- Abrasion
- Wear
- https://www.britannica.com/science/abrasion
- https://scholar.google.com/scholar?q=vinyl+floor+scratch+prevention+mudroom+entry+mat Google Scholar
- https://scholar.google.com/scholar?q=resilient+flooring+care+maintenance+grit+abrasion Google Scholar
- https://scholar.google.com/scholar?q=furniture+glides+felt+pads+scratch+resilient+flooring Google Scholar