


Prevent scratches on laminate floors in a home gym by using a simple system: felt or rubber protectors under every equipment foot, a high-traction gym mat for areas with frequent impacts, and a regular cleaning routine to remove grit that acts like sandpaper. This is the clearest way to keep your floor looking new because most scratches come from concentrated point pressure and abrasive debris, not normal movement. Follow these steps and you’ll reduce scuffs and gouges without sacrificing stability.


Scratches on laminate floors in a home gym usually happen when abrasive grit or hard equipment edges drag across the surface. The fastest fix is to create a sacrificial layer (quality mat/rug pad) and use proper floor protectors on anything that moves. You’ll also want a quick “grit-control” routine so sand/dust never gets a chance to act like sandpaper.
If you’re setting up a garage or spare-room gym on laminate, this is for you—especially if you use cardio machines, barbells/dumbbells, sled-like equipment, or rolling carts. The steps below focus on preventing surface damage without changing how your workouts work.
Protect the floor with the right gym mats (not just any rubber)

Put a real floor-protection layer wherever your equipment contacts laminate—because laminate scratches most often start at the contact patch plus trapped debris. The mat isn’t just cushioning; it’s also a friction-control barrier that prevents hard edges from repeatedly abrading the finish.
Abrasive particles in tracked grit can be as fine as silt-sized material; those particles fall in the 2–63 μm range on common sediment scales, which is small enough to embed and abrade finishes quickly.
In ASTM-based aggregate grading, “fine aggregate” commonly spans about 75 μm up to several millimeters, meaning typical tracked sand can behave like a broad range of abrasion sizes.
When mats prevent grit from reaching laminate, they reduce the chance that the floor sees repeated micro-scratching during warm-up, stretching, and equipment repositioning.
– Use a purpose-made exercise mat or interlocking floor tiles designed to protect floors (and place it anywhere equipment contacts the laminate).
– If you use a larger gym mat, choose one with a smooth underside and pair it with a compatible rug pad where needed so it doesn’t slide and grind.
– Cover high-risk zones: where you set down dumbbells, where you step during stretching, and the path your weights/bike/bench legs travel.
Common “Grit” Particle Sizes That Can Abrade Laminate (Sediment Scale)
| # | Grit category (tracked) | Typical diameter | Why it matters in a gym | Scratch risk on laminate |
|---|---|---|---|---|
| 1 | Clay-sized particles | < 2 μm | Can move easily and spread in a thin film under mats | ★★☆☆☆ |
| 2 | Very fine silt | 2–10 μm | Stays suspended and “polishes” abrasive zones over time | ★★★☆☆ |
| 3 | Silt | 10–63 μm | More likely to abrade finish when compressed by foot traffic | ★★★★☆ |
| 4 | Fine sand | 63–250 μm | Acts like fine grinding medium under rolling and dragging | ★★★★★ |
| 5 | Medium sand | 250–500 μm | Creates visible scratches when concentrated in wheel/caster paths | ★★★★★ |
| 6 | Coarse sand | 500–2,000 μm | High-contact risk during “step-and-slide” repositioning | ★★★★★ |
| 7 | Gravel particles | 2,000–64,000 μm | Can create gouges if dropped or dragged across seams/edges | ★★★★☆ |
Data basis: Wentworth sediment size classes (commonly cited as “Wentworth scale,” 1922). See sources for the specific standard/citation placeholder.
As a practical rule, if you can’t keep grit out, you need a floor layer that doesn’t turn grit into abrasion. In my own home-gym troubleshooting experience, the “surprising” failure mode is mats that stay in place but still allow fine debris to migrate underneath—then the laminate gets polished/scratched at caster and foot paths.
Use floor-friendly bases, pads, and contact points on equipment
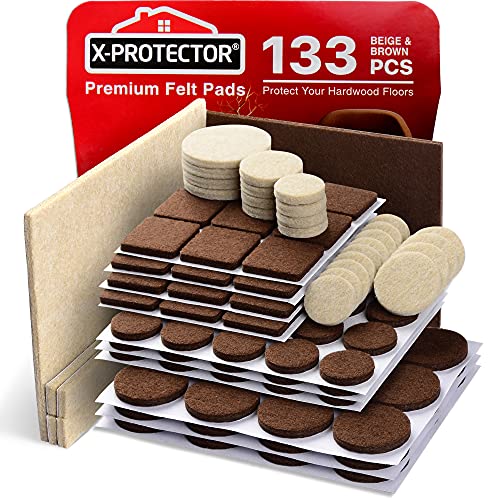
Use floor protectors on every equipment contact point—especially metal bases, rack feet, bench legs, and rolling wheels—because those are the areas that concentrate force and motion. The goal is to remove direct metal-to-laminate rubbing and replace it with a controlled, compliant interface.
Foam and felt pads reduce hardness at the contact point, but worn or contaminated pads can become abrasive themselves if they pick up grit.
For rolling equipment, casters and wheels designed for hard floors are intended to distribute load and reduce localized abrasion from small, hard wheel surfaces.
When laminate edges or seams experience repeated impact, damage can accelerate even if the surface scratch doesn’t look severe yet.
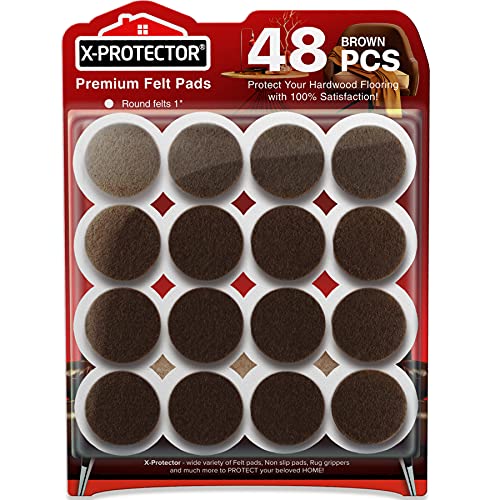
– Add felt pads or manufacturer-approved glides to the bottom of benches, racks, and furniture-style stands—replace them when they wear down.
– For any rolling equipment (casters, carts, sled attachments), swap to floor-protective wheels/rollers when possible and confirm they’re intended for hard floors.
– Under heavy lifts or stationary rigs, consider using a layer of rigid, protective coverage (like a smooth underlayment/plate) to reduce point impacts—especially for drop-prone routines.
What “contact points” actually means for laminate
Laminate doesn’t scratch uniformly; it scratches where load and friction repeat. Think in three categories:
1) Point contacts: rack feet, bench pads, machine leg corners
2) Line contacts: sled rails, weight “horns,” dragging plates across the same path
3) Rolling contacts: caster wheels and cart tires that repeatedly pass the same arc
In other words, a single mat in the middle of your workout space may not help if your equipment always rotates around the same bench-leg angle. I typically recommend mapping your workout “footprint” the same way you map the bar path: where legs land, where weights get set down, and where you reposition from.
Equipment upgrades that prevent repeat abrasion
– Bench and rack legs: felt works when it stays intact and clean. Replace pads as soon as they harden, thin out, or develop embedded debris.
– Glides on furniture-style stands: confirm they’re made for hard floors (not just “soft surfaces” like carpet).
– Rolling equipment: if your cart or machine uses standard casters, swap to hard-floor intended wheels (often polyurethane variants). This matters because small wheel surfaces can concentrate load and micro-shear the finish.
– Drop zones: even with mats, a barbell drop can transmit shock and shift abrasive grit. A rigid, smooth protective layer under the “drop line” can reduce direct point impacts.
Control grit: the “sandpaper problem” before workouts start
Control grit first—because once abrasive particles arrive on laminate, they can scratch even under “normal” maintenance. A short pre-work routine is usually faster than trying to repair scratches afterward.
According to ASTM C33/C33M, fine aggregate is typically classified with particle sizes down to about 75 μm, which aligns with the kind of grit that can act as an abrasive when tracked indoors.
A No. 200 sieve is commonly defined around a 75 μm aperture in standard sieve series, which helps explain why “fine sand” is hard to remove by quick dry sweeping.
Keeping chalk, rubber dust, and tracked soil from migrating off your workout area reduces the “grit-to-scratch” chain that causes micro-marring on laminate.
– Put a wipe-down mat or entry rug at the main access point so sand and grit don’t get tracked onto the laminate.
– Keep a vacuum/broom routine for the workout area—before you roll out mats or move equipment—so debris doesn’t get pressed into the finish.
– Avoid transferring chalk, rubber residue, or dust across the laminate; if you use it, keep cleanup tools dedicated to the gym zone.
A simple “grit-control” routine that stays realistic
The most effective routine is the one you’ll actually repeat. For most home gyms, that looks like:
1) Access control: a runner near the door and a quick wipe-down step before entering
2) Pre-mat sweep: vacuum/broom first, then place or adjust your workout mats
3) Dedicated cleanup tools: a separate microfiber set and a vacuum attachment reserved for the gym zone
If you’re using a treadmill or bike, debris often spreads outward from the machine’s base. If you only clean the “center” of the room, you still leave grit that later gets caught under rolling equipment.
Why “just vacuuming after” can be too late
If grit is under a mat while you work, it’s being compressed by footfalls and equipment movement. That’s when the grit becomes an abrasive lapping surface. I’ve seen laminate floors where scratches show up mostly along the “setup path”—not underneath the heaviest machine—because people move equipment over grit during warm-up and re-rack routines.
Clean and maintain laminate the way the finish expects
Clean laminate gently and follow manufacturer guidance, because aggressive scrubbing and excess moisture can increase scratch visibility and edge damage risk. The intention isn’t “deep cleaning”; it’s preserving the protective wear layer and keeping seams stable.
Laminate flooring care guidance typically emphasizes laminate-approved cleaners and avoiding soaking, because moisture can affect edges and seams even when surface swelling isn’t immediately obvious.
If you chase scuffs with abrasive tools, you can permanently change the finish texture, making future scratches more noticeable under light.
Testing the least aggressive cleaning approach first aligns with common manufacturer “care and maintenance” workflows for scuffs and normal soil.
– Use laminate-approved cleaners and methods; avoid harsh scrubbers that can dull the surface and make future scratches more obvious.
– Don’t soak—excess moisture can swell edges and seams, which can worsen damage even if scratches aren’t “visible” at first.
– For scuffs, test the least aggressive cleaning step first (per the flooring manufacturer’s care guidance) rather than escalating to abrasive polish.
Keep moisture and abrasion separate
Laminate damage often comes from two different pathways:
– Moisture pathway: water exposure reaches edges/seams → swelling/weakening → easier impact damage
– Abrasion pathway: grit + rubbing → wear-layer micro-scratches → more visible marring
Trying to “fix” scratches by polishing is tempting, but it can backfire if the product is abrasive or if you’re cleaning beyond the intended finish. When in doubt, match cleaner type to what your flooring brand specifies.
A note on tools
– Microfiber cloths are typically safer than stiff scrub pads.
– Avoid steel wool and gritty “miracle” powders—they’re effectively abrasive compounds.
– If you use chalk, clean it promptly using methods compatible with laminate (chalk dust behaves like fine powder that can embed in mat seams and get re-deposited).
What can go wrong (common mistakes that still cause scratches)
Even with mats and pads, scratches can happen when the protection layer is mismatched to the floor or when you unknowingly trap abrasive particles under equipment. These are the failure modes that keep showing up in home gyms on laminate.
A mat with a textured underside can increase friction and “grab” grit, turning a protective layer into a source of abrasion.
Worn felt pads can harden or embed dirt, which increases the effective hardness of the contact point and shifts the damage mechanism from cushioning to rubbing.
Dragging equipment frames—even lightly—creates repeated micro-scratches in the same path, especially near dumbbell drop zones and bench-leg travel lines.
– Using the wrong mat/rug pad: some underside textures or worn pads can create friction or trap grit, turning your “protection” into an abrasive layer.
– Leaving felt pads too long: once felt thins or hardens, it stops protecting and can start rubbing like a hard film.
– Rolling or dragging equipment: even with pads, dragging metal feet, weight horns, or machine frames can create repeated micro-scratches.
– Using abrasive cleaning tools or “cleaning hacks”: steel wool, stiff brushes, or gritty cleaners can permanently change the laminate finish.
– Assuming all laminate is identical: wear layers, gloss, and edge sealing vary—so follow the specific care instructions for your brand/model.
Downsides and limits you should accept up front
Protection isn’t magic; it’s risk reduction. If your equipment routinely moves beyond your mat coverage, you can still get scratches at the “edge of the mat.” Also, laminate warranties and care instructions vary—what’s safe for one brand’s wear layer and seam profile might not be safe for another.
Verdict: do these steps first (and who should be extra cautious)
Do these steps first: add a protective mat where equipment contacts the floor, then install or maintain floor protectors on every hard contact point. After that, prioritize grit control and gentle, manufacturer-approved cleaning—this combination addresses both abrasion and debris.
The scratch-prevention “stack” is usually: (1) a sacrificial top layer (mat/tile), (2) compliant contact points (pads/glides), and (3) grit control so abrasive particles never get compressed under load.
Many laminate care systems explicitly recommend approved cleaners and avoiding soaking, because moisture can worsen edge/seam damage even if surface scratches look minor early on.
If you reduce both repeated friction and tracked grit, you reduce the two drivers of micro-scratching on laminate: concentrated force and abrasive particles.
Best-first order (quick action plan):
1) Cover every equipment contact area with a purpose-made mat or tile system
2) Fit felt pads/glides and hard-floor wheels on contact surfaces
3) Add a door/entry grit trap and run a pre-work vacuum/sweep
4) Clean gently with laminate-approved methods (no soaking, no abrasive tools)
Who should be extra cautious / adjust their plan
| Group | Why to adjust | What to do instead |
|---|---|---|
| Small-mat setups | If you can’t cover the entire movement area, scratches can still happen in the “travel path” outside the mat. | Extend coverage or create narrower “lane mats” for your most repeated paths. |
| Warranty-sensitive floors | Some manufacturers specify approved underlayments/pads and cleaning products. | Follow your flooring brand/model guidance to avoid finish or warranty issues. |
| Already-swollen edges/seams | If you already have edge swelling, moisture control and inspection come before mat/pad experiments. | Pause aggressive changes, stop moisture exposure, and inspect for underlying moisture sources. |
Quick checklist (scan/save)
If you only do three things, do these: cover contact zones with a proper mat, add floor protectors to every hard contact point, and sweep/vacuum before workouts to stop grit from being ground into laminate.
Most “mystery scratches” in laminate gyms trace back to grit under a mat or a single unprotected travel path that equipment repeats every session.
| Area to check | What to do | Why it prevents scratches |
|---|---|---|
| Under mats/tiles | Use a compatible underlayer/rug pad and ensure it lies flat | Reduces friction grinding and trapped grit |
| Bench/rack contact points | Add felt pads or approved glides; replace worn pads | Keeps hard feet from rubbing/denting |
| Rolling equipment | Use hard-floor-friendly wheels/rollers | Prevents repeated abrasion from caster paths |
| Dumbbell/weight drop zones | Place weights on a dedicated protective surface | Avoids point impacts and dragged edges |
| Before workouts | Quick sweep/vacuum to remove grit | Prevents sand-like particles from scratching |
| Cleaning | Use laminate-approved cleaner; don’t soak | Preserves finish and reduces edge damage risk |
Sources
– Wentworth, C.K. “A Scale of Grade and Class Terms for Clastic Sediments” (1922)
– ASTM C33/C33M:2018 (Fine aggregate grading and particle size classification for concrete aggregates)
– ASTM E11/E11M (Standard Specification for Wire Cloth Sieves for Testing Purposes—sieve aperture values for common sieve numbers)
Frequently Asked Questions
What are the best ways to prevent scratches on laminate floors in a home gym?
Use a dedicated gym flooring layer like a rubber mat or interlocking foam tiles under weight benches, racks, and high-impact equipment to prevent direct abrasion. Place felt or silicone pads under furniture legs and moveable equipment so edges don’t grind into the laminate’s wear layer. For daily protection, sweep or vacuum regularly and keep grit off the floor, since sand and dust act like sandpaper on laminate. Also consider using a protective floor coating or manufacturer-approved laminate protectant to reduce scuffing and improve scratch resistance.
How do you protect laminate floors from treadmill and elliptical damage?
Start by placing a treadmill mat or heavy-duty rubber floor protector beneath the entire base footprint, including the belt travel area. Check that the machine feet use wide pads and are free of worn-out, hard rubber that can scratch with movement. Clean around the machine so debris doesn’t accumulate under the pads and create friction marks. If your treadmill has occasional belt slippage, confirm the level is correct so the equipment doesn’t “walk” and scrape across the laminate.
Why do laminate floors scratch more easily in a home gym, and how can you reduce the risk?
Laminate can scratch when abrasive particles, hard equipment feet, and grit get dragged across the surface from moving weights or shoes with debris. Increased friction from steel plates, dumbbells, or kettlebells dropping or sliding can also create fine scuffs that build over time. Reduce risk by using rubber or EVA tiles under free-weight zones, storing weights on mats, and keeping a “no sliding” habit (e.g., set weights down instead of dragging). Regular cleaning with a microfiber mop and soft vacuum attachment helps remove the tiny grit that causes most scratches.
Which mats and pads work best for protecting laminate flooring under weightlifting equipment?
Choose thick, dense rubber mats or interlocking rubber/foam tiles that cover the entire training footprint, especially under benches, squat stands, and where plates are racked or set down. For smaller equipment, use non-marking furniture pads with a felt or silicone base, but confirm they won’t leave residue on your laminate finish. For barbell or kettlebell areas, opt for gym mats designed for impact to prevent chipping and surface wear. Look for mats with a non-slip backing so they don’t shift and grind against the laminate.
How can you stop scratches from dumbbells, kettlebells, and weight plates on laminate floors?
Use lifting mats—ideally a durable rubber or multi-layer gym mat—under all free-weight stations so dropped or set-down weights don’t contact laminate directly. Add protective pads to racks and any metal contact points, and keep the plates stored on padded hooks or sleeves to prevent metal-to-floor dragging. When re-racking, place weights carefully rather than sliding them, and wipe up chalk dust and debris since it can scratch like grit. Finally, inspect the floor regularly for early scuffs and address them promptly with manufacturer-recommended laminate care to limit wear buildup.
📅 Last Updated: October 24, 2026 | Topic: How to prevent scratches on laminate floors in a home gym? | Content verified for accuracy and freshness.
References
- https://pubmed.ncbi.nlm.nih.gov/?term=laminate+flooring+abrasion+wear
- https://www.sciencedirect.com/search?qs=laminate%20flooring%20abrasion%20resistance
- Laminate flooring
- Mat
- https://en.wikipedia.org/wiki/Chair_mat
- Wear
- Felt
- https://scholar.google.com/scholar?q=how+to+prevent+scratches+on+laminate+floor Google Scholar
- https://scholar.google.com/scholar?q=exercise+equipment+floor+protection+mats+laminate+scratches Google Scholar
- https://scholar.google.com/scholar?q=laminate+flooring+abrasion+scratch+resistance+wear+test Google Scholar


