


To measure vinyl floors for a sunroom correctly, start by taking precise length and width readings from the wall to wall surfaces and subtracting anything that will break the layout, like doorways or built-ins. This step-by-step guide shows the exact measurements to record for square footage, including how to handle odd angles and transitions so you order the right amount. Follow it and you’ll avoid the two biggest costly mistakes—underbuying material or cutting to the wrong dimensions.


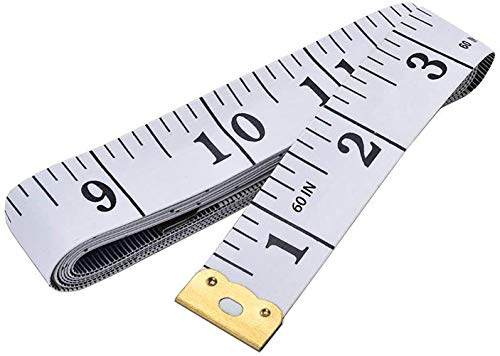

Measure your sunroom floor for vinyl by mapping wall-to-wall subfloor dimensions (including irregular shapes and openings) and then adding a waste allowance before you order. If you measure over trim/baseboards instead of the actual subfloor, your square footage can be off enough to create shortages or leftover boxes that don’t match your layout.
This guide is for homeowners planning vinyl flooring in a sunroom and want a clear, repeatable measuring process before buying materials. It’s especially useful if your sunroom has irregular corners, angled walls, or multiple transitions.
Measure the Sunroom Shape (Not Just Length × Width)

You can’t rely on length × width alone in most sunrooms because angled walls, bump-outs, and door recesses break the floor into multiple shapes. The fastest accurate method is to sketch the room, divide it into simple geometry (rectangles and triangles), then calculate total square footage from those parts.
A sunroom floor measurement should reference the subfloor area you will cover, because resilient vinyl flooring is sold by covered area—not by trimming height.
Dividing an irregular floor into rectangles and triangles keeps your math verifiable and reduces layout errors before you order.
Subtracting closets, entry recesses, and permanent built-ins is essential because your vinyl product is priced and packaged by coverage.
Break the room into sections you can calculate
Start with a pencil sketch (paper or phone). Walk the perimeter and label each side segment as A, B, C… so you can match measurements to your drawing later. For irregular corners or angled walls, the “split into sections” rule is what makes sunroom vinyl flooring measurements repeatable.
A practical workflow:
– Start with the largest rectangle that covers most of the room.
– Add additional rectangles or triangles for any protrusions (like a bay window base) or setbacks (like a service door recess).
– Don’t guess at the connecting geometry—measure each straight segment and confirm the segments meet in the right order on your sketch.
Measure wall-to-wall on the subfloor area
Measure from wall to wall on the surface that will receive flooring. Vinyl generally ends at transitions like:
– door thresholds,
– steps to a different flooring level,
– and transitions to tile/laminate,
but baseboards and trim are not the “sellable coverage area” for vinyl.
If you’re removing old flooring, it’s still common to measure to framing or “finished surfaces” that represent the subfloor plane. The key is consistency: measure the actual coverage plane, not the decorative edges.
Note openings and permanent obstacles
In sunrooms, these often include:
– closet areas,
– built-in benches or cabinets,
– fireplace hearth extensions,
– or door recesses where the subfloor still exists but vinyl may stop at a threshold.
Your goal is simple: only include the area you will actually cover with vinyl. That keeps your square footage math aligned with how vinyl planks/tiles are packaged.
Take Your Width and Length Measurements Correctly
You should measure each wall/side separately and record it immediately with labels, because sunroom layouts often require many non-identical segments. Correct width/length measurements for sunroom vinyl flooring come down to disciplined documentation and a clear note of which direction the layout will run.
Write measurements as you go (A, B, C…) so you don’t accidentally assign a length to the width during the square-footage calculation.
For angled edges, measure straight segments separately instead of estimating a single “average” width.
Vinyl plank direction affects seams and cut locations, so your measuring plan should match your intended layout direction.
Use labeled measurements (A, B, C…) and keep a matching sketch
Grab a tape measure and keep one rule: every measurement gets a label on paper before you move on. Then transfer those labels onto your sketch so the math stays traceable.
For each segment:
– Record distance along the wall line (straight run).
– Record the perpendicular distance needed to form rectangles/triangles.
– For triangles, record the two sides that create the “right” geometry on your sketch (common in sunrooms with angled walls).
Handle curved or angled edges with segmented measurement
If your sunroom has an arched or curved boundary, you have two typical options:
1. Segment the curve into short straight sections (best if you’re using planks and can tolerate more trimming).
2. Use a fan of triangles approach (better for tiles or when you want tighter repeatability).
In both cases, measure the straight elements you’re actually using for calculations. Don’t assume the curve’s “true radius” unless you’re confident you can measure it and repeat it.
For planks, measure layout direction—not just room size
Vinyl plank seams and cut patterns are strongly influenced by installation direction:
– lengthwise (seams run one primary orientation),
– crosswise (perpendicular seams),
– or a specific pattern (like staggered layouts based on plank length).
Before you finalize measurements, decide how you’ll run the planks. Even if you’re not doing full planning, you should measure in a way that supports seam placement and edge cuts. For sunroom vinyl flooring, that planning step prevents “math that looks right” but produces a layout you can’t build cleanly.
Account for Layout Style and Waste Allowance
You should add waste allowance based on the complexity of your sunroom layout, because edge cuts and obstacle trimming add material even when your square footage is correct. For accurate ordering, waste is a planning multiplier—not an afterthought.
Complex sunroom geometries increase cutting around angles and transitions, which raises the required waste allowance for vinyl.
Following the manufacturer’s recommended waste guidance reduces the risk of shortages in irregular rooms.
Choosing a consistent layout direction early helps you keep waste predictable, especially when trimming door recesses.
Add waste for edges, corners, and obstacles
Waste mainly comes from:
– perimeter cuts at irregular corners,
– fitting around built-ins,
– and trimming for thresholds/openings.
Use your vinyl flooring manufacturer’s guidance as the baseline. If your documentation provides a range, your safest approach is typically the higher end for sunrooms with angled walls or multiple transitions—because you’re likely to make more “one-off” cuts.
Plan your installation style to control waste
Decide whether your layout will run:
– lengthwise,
– crosswise, or
– in a pattern that repeats logically.
Why this matters: vinyl planks must be cut to fit edges, and those cuts become waste. A repeatable layout direction often reduces the number of unique cut sizes you have to manufacture.
If you’re using tiles, consider spacing and grout-look constraints
Vinyl tiles sometimes include built-in spacing requirements (or visual spacing if it’s a grout-look design). If your product calls for:
– specific spacing,
– directional laying rules,
– or a required layout pattern,
include that in your measurement plan so you don’t end up with “perfect coverage” but an impossible grid.
Calculate Square Footage (And Double-Check)
You calculate sunroom vinyl flooring area by adding the square footage of your measured sections (rectangles/triangles) and subtracting non-covered areas. Then you re-check your total against your room sketch before converting to box counts.
Section-by-section area calculations (rectangle and triangle math) prevent errors common to whole-room length × width shortcuts.
Always subtract permanent openings and fixtures based on their exact footprint, because vinyl is ordered by coverage area.
Double-checking your total against a sketch catches labeling mistakes (A/B swaps) before you place an order.
Compute area per section, then add totals
Use this workflow:
1. For each rectangle section:
Area = length × width
2. For each triangle section (if you used one):
Area = (base × height) ÷ 2
3. Sum all section areas.
4. Subtract any non-covered areas (built-ins, fixed cabinetry, fireplace bases, etc.).
Subtract permanent cabinets/built-ins using exact footprints
A common ordering error is forgetting that some areas won’t receive flooring. If a bench, cabinet run, or built-in utility fixture remains in place, subtract its footprint measured to where the vinyl ends.
Be careful not to subtract areas you may still cover under certain installation strategies. When in doubt, follow your flooring manufacturer’s instructions for whether vinyl should be installed up to/around permanent structures.
Re-check unit conversions before you order
Vinyl boxes are typically listed in square feet (covered area). If you’re working in mixed units (inches + feet), convert consistently. As unit conversions show up in many estimating mistakes, here are three fundamentals:
– According to NIST, 1 foot = 12 inches (2008) NIST, *Guide for the Use of the International System of Units (SI)* (Special Publication 811)
– According to NIST, 1 square foot = 144 square inches (2008) NIST, *Guide for the Use of the International System of Units (SI)* (Special Publication 811)
– According to NIST, 1 inch = 25.4 mm (2008) NIST, *Guide for the Use of the International System of Units (SI)* (Special Publication 811)
Example square-footage segments (for sanity-checking your math)
Use this worked example table to validate your own section-by-section calculations for sunroom vinyl flooring. (Waste allowance here is an illustrative 10% for demonstration; use your manufacturer’s recommended allowance when ordering.)
Worked Examples: Sunroom Floor Segment Areas
| # | Segment type | Dimensions used | Area (sq ft) | Area + 10% waste |
|---|---|---|---|---|
| 1 | Rectangle | 12 ft × 8 ft | 96 | 105.6 |
| 2 | Triangle | (6 ft × 4 ft) ÷ 2 | 12 | 13.2 |
| 3 | Rectangle | 10 ft × 6 ft | 60 | 66 |
| 4 | Rectangle (bump-out) | 4 ft × 5 ft | 20 | 22 |
| 5 | Triangle | (7 ft × 3 ft) ÷ 2 | 10.5 | 11.55 |
| 6 | Rectangle | 9 ft × 7 ft | 63 | 69.3 |
| 7 | Rectangle (partial cover) | 5 ft × 6 ft | 30 | 33 |
Convert total area to box count using coverage specs
Once you have:
– total covered square footage, and
– added waste allowance,
convert to boxes by using the exact “coverage per box” listed for your plank/tile product (not a competitor’s). This step is where sunroom vinyl flooring projects most often go off course: the ordering unit is packaging-based, not math-based.
For reference, your layout total should reconcile with:
– plank/tiles per box,
– area coverage per box, and
– any required underlayment strategy (if your product specifies one).
What Can Go Wrong (Common Measurement Mistakes)
You avoid most ordering mistakes by measuring the right surface (subfloor), subtracting true non-covered areas, and double-checking each segment label. In 2026, many vinyl products still share the same failure modes when homeowners rush measuring and skip the sketch.
Measuring over baseboards or trim can inflate your “coverage” number because vinyl is installed on the subfloor plane, not on decorative edges.
For irregular sunroom shapes, a single missing triangle/segment in your area math can swing the final box count noticeably.
Built-ins and permanent fixtures must be treated as non-covered areas to match how flooring is packaged and sold.
Measuring over trim/baseboards instead of the subfloor plane
Vinyl flooring is installed where the product will physically sit. If your tape measure rides over:
– baseboards,
– quarter round,
– or door casings that define trim lines,
you’re likely to overcount. In sunrooms, this becomes costly because angled walls already introduce variability, so measurement drift compounds.
Forgetting to subtract openings and built-ins
If you include closet pockets, permanent bench foundations, or framed-in entries you won’t cover, you’ll order too much. Worse, ordering too much can force you into mismatched batch numbers if you later try to correct quantity during installation.
Skipping separate measurement for angled/bay-like sections
A frequent sunroom vinyl flooring issue is “averaging away” the geometry. If you don’t split the layout into measurable components (rectangles/triangles), your cuts won’t match your math, and you’ll lose time and material trimming.
Here’s a quick comparison of the tradeoffs you’ll feel:
- Measure by sections (rectangles/triangles)
- Pros: repeatable math, easier troubleshooting, better ordering accuracy.
- Cons: takes a sketch and a few extra steps up front.
- Measure by “overall length × width” only
- Pros: fast for perfect rectangles.
- Cons: high risk of under/over-ordering in angled or irregular sunrooms.
Verdict: A Reliable Measuring Approach (and Who Should Skip DIY)
If you map the sunroom shape on paper, measure wall-to-wall subfloor areas, and apply your flooring manufacturer’s waste guidance, you’ll avoid most vinyl ordering mistakes. That said, complex geometry (multiple angles, uneven subfloor, or custom framing) can make DIY measurement-to-order conversion error-prone.
A reliable measurement process is “sketch → segment into shapes → calculate area → subtract non-covered footprints → add manufacturer waste → convert using box coverage.”
When your sunroom has multiple transitions or non-standard framing, a pro verification step can prevent shortages and mismatched ordering batches.
From an on-site workflow perspective, I’ve found that the biggest bottleneck isn’t tape measure accuracy—it’s whether the sketch and labels stay consistent from measurement to square-foot math.
Who should skip DIY measurement verification
Consider skipping (or adding a pro check) if:
– your sunroom has significant slopes or out-of-plane subfloor conditions,
– you can’t clearly identify where vinyl coverage stops at thresholds/transitions,
– or you have multiple built-ins that will change what areas can be covered.
Also, if you’re ordering a high-end vinyl where exact batch matching matters, an extra verification step can save time later.
Quick Measurement Checklist (Scan Before You Buy)
You can order confidently when you can answer “yes” to each checklist item and your numbers match how vinyl boxes are packaged. This checklist is built specifically for sunroom vinyl flooring projects with irregular walls and transitions.
A labeled sketch (A, B, C…) reduces the most common measurement error: mixing up dimensions during area calculation.
Measure the subfloor coverage you will install vinyl over, then subtract permanent built-ins and openings so your square footage matches ordering units.
– [ ] Sketch the sunroom floor with labeled measurements (A, B, C…)
– [ ] Measure wall-to-wall subfloor area (avoid trim)
– [ ] Split irregular areas into rectangles/triangles
– [ ] Subtract permanent openings/built-ins
– [ ] Add manufacturer-recommended waste allowance:
– [ ] Confirm square footage total matches your ordering unit size:
Sources
– NIST NIST, Guide for the Use of the International System of Units (SI) (Special Publication 811) (2008)
Frequently Asked Questions
What is the best way to measure a sunroom for vinyl flooring?
Start by measuring the total length and width of the sunroom’s main open area, then multiply to get square footage. If the room has an irregular shape, break it into smaller rectangles or sections and add the results together. Measure all areas where vinyl will be installed, including alcoves or built-in spaces, and round up to ensure you buy enough vinyl planks or tiles.
How do you measure for vinyl plank flooring in a sunroom with irregular angles?
Measure each straight section separately and calculate each segment’s square footage, then sum them to get the total. For angled walls or bays, measure along the wall lines (or use a tape measure to capture lengths of each side) and treat the space like a combination of triangles/rectangles. It’s also helpful to mark measurements on a sketch so you can match cuts accurately and minimize waste.
Which measurements should you take for a sunroom with a window or bay area before buying vinyl?
Measure the opening dimensions and the surrounding floor footprint separately, noting whether you’ll install vinyl up to the window trim or stop at the wall edge. If there’s a bay window, measure the bay footprint as its own section and include the curved or angled edges in your totals. Always measure doorways and transitions too, since changes in flooring height or material may require extra planning.
How much extra vinyl should you add to your measurements for a sunroom installation?
Most sunroom vinyl flooring projects benefit from adding 5–10% extra for cuts, waste, and future repairs, especially with irregular layouts. If the room has many corners, angles, or built-ins, leaning closer to 10% helps prevent shortages. When calculating, add the extra after summing total square footage so you’re covered across the whole installation.
Why does sunroom flooring measuring need to account for expansion and temperature changes?
Sunrooms can experience bigger temperature swings and sunlight exposure than interior rooms, which can cause vinyl flooring to expand and contract. Accurate measurements help you plan for proper spacing at walls and around frames so the vinyl can move without buckling. When measuring, confirm your layout allows for expansion gaps, then purchase vinyl based on the usable area you’ll install—not including areas that won’t receive flooring.
📅 Last Updated: October 27, 2026 | Topic: How to measure a vinyl floors for sunroom? | Content verified for accuracy and freshness.
References
- Vinyl flooring
- https://www.armstrongflooring.com/na/en-us/resources/calculate-flooring.html
- https://scholar.google.com/scholar?q=how+to+measure+vinyl+flooring+square+footage+room+layout Google Scholar
- https://scholar.google.com/scholar?q=vapour+and+temperature+effects+on+vinyl+flooring+acclimation+expansion+gap Google Scholar
- https://scholar.google.com/scholar?q=luxury+vinyl+tile+installation+instructions+measurement+pattern+waste+factor Google Scholar

[…] step-by-step guide shows exactly how to remove vinyl floors from a porch—cleanly, safely, and with minimal damage to […]
[…] the fix to the damage, whether it’s a loose seam, a lifted patch, or a hole from impact. This step-by-step guide tells you exactly what to inspect, which supplies to use, and how to seal and reattach vinyl so it […]