Hardwood floors can be made gym-safe quickly and reliably—starting with the right surface protection under your equipment. If you want fewer slips, less impact stress from dropped weights, and better cushioning for knees, this guide shows the exact changes that deliver the biggest safety gains. You’ll get practical steps for choosing mats, controlling moisture and dust, and protecting high-traffic areas without ruining your flooring.



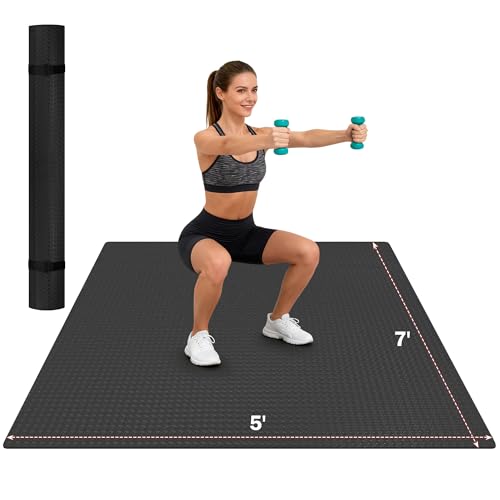
Use a protective workout surface—like a properly sized, non-slip mat or interlocking flooring—under every training zone, especially for weights, kettlebells, and high-movement days. Then reduce slip/trip risk by anchoring mats and choosing the right mat thickness and texture for your exercises. Finally, protect the floor finish by managing moisture and cleaning carefully after sweaty sessions.
If you’re setting up a home gym on hardwood (solid or engineered), this is for you—whether you’re doing lighter strength work with dumbbells or you’re dropping weights, stretching, or using equipment that vibrates. The goal is simple: prevent dents, scuffs, and accidents without turning your gym into a permanent obstacle course.
Add the right protective layer under workouts
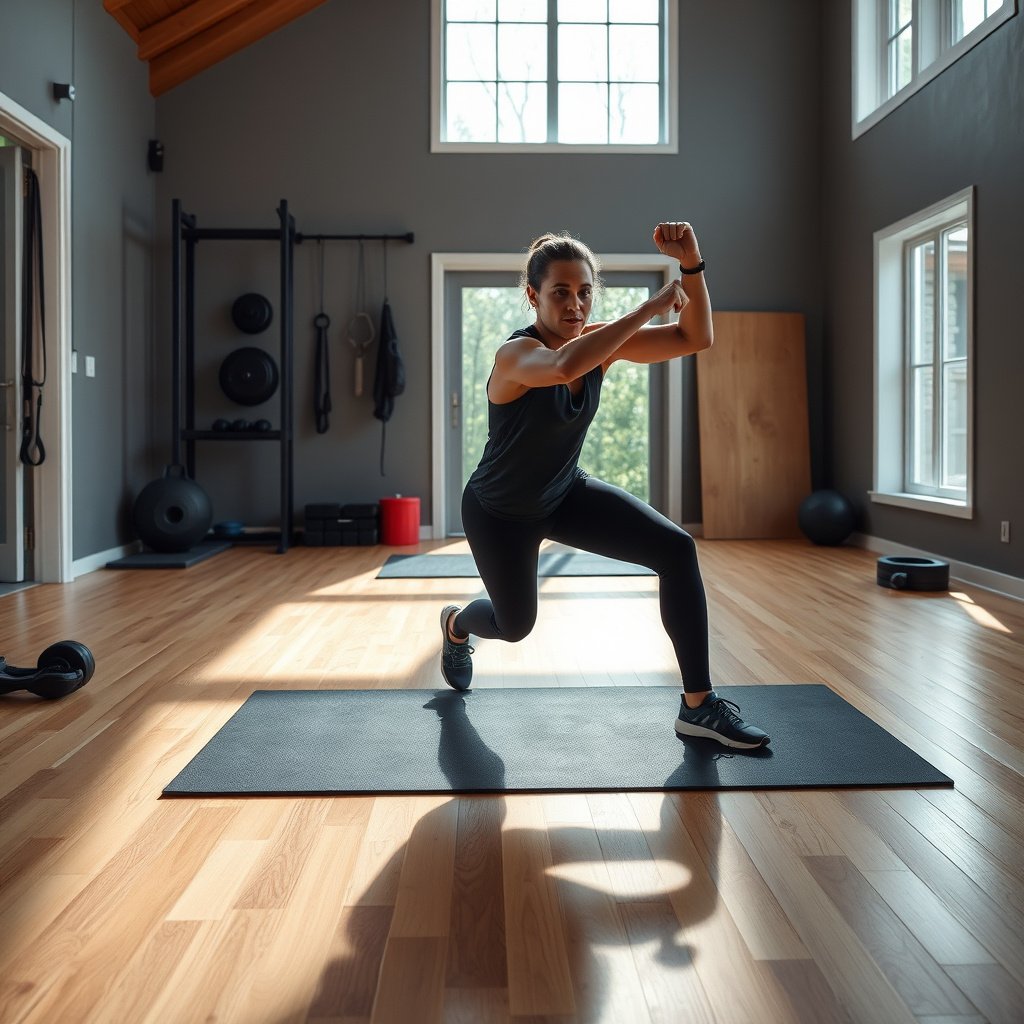
The safest hardwood home gym is the one where your “landing zone” never makes direct contact with the finish—at least not during normal training. Start by covering where equipment touches down and where your feet pivot, then expand coverage as your routines evolve.
Cover the full landing zone (not just the center)
A common failure mode is mat coverage that’s “close enough” for static exercises but not for real movement patterns—off-angle weight set-downs, step-backs, and mobility work. For a non-slip mat on hardwood, treat this as a coverage-engineering problem: protect the contact points and the predictable footfall paths. In my view, this is also the fastest path to fewer scuffs because it removes the highest-frequency “damage event” (direct contact).
A floor-protective training mat should cover the exact area where equipment lands and where you pivot your feet, not just the center of the room.
Interlocking gym tiles can create a larger protected footprint, which helps reduce edge lift and gap-related scuffing when your feet move laterally.
Choose flooring-safe materials with stable grip
For hardwood safety, non-slip behavior matters on two fronts: (1) slip resistance when the floor (or your shoes) is slightly damp from sweat and (2) friction under dynamic footwork. Look for mats specifically described as having a stable, non-slip underside for hard floors and a textured top that won’t become “slick” during high-rep sets.
Practical coverage rule of thumb (based on exercise reality):
– Weights zones: cover where plates/kettlebells are set down (and where you “reset” them).
– Mobility zones: cover the footprint you use for lunges, rotations, and quick steps.
– Vibration zones: cover under machines or benches that transmit movement to the floor.
Decide on mat format: rolled mat vs. interlocking tiles
Rolled mats are great for seamless coverage and easy placement, but they can be harder to keep perfectly flat at seams if your room has drafts or seasonal humidity shifts. Interlocking flooring often improves modular expansion (add a section as your program grows), but you still need edge management so joints don’t become trip lines.
Quick practical guidance:
– If your workout includes frequent lateral movement (HIIT, agility drills, rotational lifts), modular/interlocking coverage can be easier to keep continuous.
– If your workout is mostly strength and stretching in one spot, a single larger roll mat with secure edges may reduce seam risk.
Reduce slipping and tripping (the real accident triggers)
The biggest hardwood home gym risks usually aren’t “impact injuries”—they’re slips and trips caused by moving mats, lifted edges, or awkward transitions. Fixing those issues comes down to anchoring, perimeter security, and eliminating step-down hazards.
Secure the perimeter so edges can’t curl
Mat movement often starts invisibly—corners lift, the edge fractionally rises, and then your toe catches during a set. To stop this, anchor the mat perimeter using systems designed for hard floors (mat tape, edge grips, or non-slip backing products). Re-check after vacuuming, rolling equipment, or seasonal changes.
Perimeter anchoring (mat tape, edge grips, or purpose-built backing) reduces lifted corners that become trip edges on hardwood.
Avoid creating “stacked-slip” conditions: multiple thin rugs/mats over hardwood can increase sliding unless the bottom layer is truly non-slip and stable.
Keep transitions smooth where the gym meets other flooring
If your gym area connects to hallway flooring, the transition matters more than most people expect. A low-profile transition solution helps you avoid toe catches and “step down” moments when you change stations.
High-risk transition scenarios to address:
– The mat ends at the doorway and creates a raised lip.
– The mat sits on top of a thinner runner that slides.
– The mat edge is too thin for the doorway gap (even small height differences can trip someone with fatigue).
Use a compatibility-first approach to mat layers
Stacking mats can feel like added protection, but it can create a slick platform—especially when sweat reduces friction. If you need extra cushioning, prefer a single appropriately designed mat layer rather than “layering solutions.”
Mat setup comparison (what typically works on hardwood)
| Setup type | Slip/trip risk | Finish protection | Best for |
|---|---|---|---|
| Single non-slip roll mat (full zone) | Low (if edges secured) | High | Strength + stretching |
| Interlocking tiles (modular zone) | Medium (edge/joint management required) | Medium–High | Varied routines / adding area |
| Thin mat + anti-slip underlayer | Medium (depends on compatibility) | Medium | Low-impact training |
| Stacked rugs/mats (no true anchoring) | High | Unreliable | Generally avoid on hardwood |
Cushion impact and control vibration for heavier training
The right mat cushioning reduces dents and limits finish wear from dropped or set-down equipment. If your home gym includes kettlebells, barbells, or plates, treat thickness and placement as a damage-control plan, not an aesthetic choice.
Prevent dents under “set-down” points
Even “controlled” training can create direct contact events: plates touching down, kettlebells thudding, or slam ball rebounds. A thicker protective layer where you drop or set equipment helps absorb energy and protects the hardwood finish from repeated micro-dents.
Impact-heavy training needs more cushioning in the landing zone to limit surface damage and reduce how often equipment contacts hardwood directly.
Protect areas under benches, squat stands, and metal frames because dragging or micro-scratches are common even when impacts are controlled.
Match mat thickness to your training style
Thicker mats generally protect better, but they can also feel less “grounded” for balance-heavy work (single-leg stability, careful footwork, or certain mobility drills). The best approach is a compromise: choose enough thickness to protect against your highest-impact moments, then prioritize stable traction and edge security.
Common thickness guidance (use as a starting point):
– Lighter work (dumbbells, stretching, cable-type movements): thinner protective layers can be sufficient if grip is excellent and coverage is complete.
– Impact-heavy routines (slam balls, frequent plate set-downs): choose thicker cushioning specifically designed for gyms.
Control equipment “tooling” risks
A surprising amount of hardwood damage comes from equipment handling rather than the lift itself. If you move metal frames, benches, or stands, prevent finish scuffs by protecting contact areas and moving carefully during setup.
Below is a practical reference you can use to select a mat thickness by training emphasis.
Recommended Hardwood Gym Mat Thickness Ranges by Training Type (Typical Specs)
| # | Mat thickness (mm) | Common mat format | Best for (training focus) | Hardwood finish protection | Stability on sweaty sessions |
|---|---|---|---|---|---|
| 1 | 3 mm (≈ 1/8 in) | Thin roll / underlay | Mobility + light dumbbells | ★★☆☆☆ | ★★★★☆ |
| 2 | 6 mm (≈ 1/4 in) | Rolled gym mat | General lifting + low-impact HIIT | ★★★☆☆ | ★★★★☆ |
| 3 | 8 mm (≈ 5/16 in) | Rubber mat / tiles | Kettlebell work + controlled plate set-downs | ★★★★☆ | ★★★★☆ |
| 4 | 10 mm (≈ 3/8 in) | Gym tiles / thicker roll | Frequent drops (limited) + stability drills | ★★★★☆ | ★★★☆☆ |
| 5 | 12 mm (≈ 1/2 in) | Impact-focused rubber | Slam ball + barbell training zones | ★★★★★ | ★★★☆☆ |
| 6 | 15 mm (≈ 19/32 in) | Heavy-duty tiles | High-frequency impact + vibration isolation | ★★★★★ | ★★☆☆☆ |
| 7 | 18 mm (≈ 23/32 in) | Very thick isolation mats | Garage-style dumping / maximal protection | ★★★★★ | ★★☆☆☆ |
Note: This table summarizes typical thickness bands used in home gym products and the practical tradeoffs you’ll feel on hardwood. Always verify compatibility with your floor finish and the mat manufacturer’s care/installation instructions.
Protect the hardwood finish from sweat and moisture
Even the best non-slip workout mat can’t protect your floor finish if sweat and moisture migrate under edges or remain trapped. Moisture control plus finish-safe cleaning is what prevents dulling, gapping risk, and lingering sticky residue.
Clean quickly after sweaty sessions
Hardwood can be less forgiving than vinyl or rubber when moisture lingers along edges or under mats. Wipe up sweat and spills immediately, and don’t assume “the mat is absorbing it” means the floor is safe.
Many wood flooring care guidelines emphasize prompt cleanup because moisture trapped under coverings can damage finishes and affect the wood core over time.
Use finish-safe cleaning methods recommended by the floor manufacturer; soaking or incompatible cleaners can leave residue that attracts dirt and dulls finishes.
Use finish-safe cleaning (no soaking, no abrasives)
Cleaning incorrectly is a silent finish-damage pathway. Stick to the method and products your hardwood manufacturer recommends (finish-safe cleaner, microfiber tools, and controlled moisture). If you’re unsure, test in an inconspicuous area.
Control room environment to reduce seasonal movement
Moisture and temperature drive wood expansion and contraction, which can loosen the floor system or change how protective layers sit over time. According to the National Wood Flooring Association, maintaining indoor relative humidity within a recommended target range helps wood flooring perform consistently ( ; National Wood Flooring Association (NWFA) wood floor care guidance—target indoor relative humidity, ).
From practical setup experience, we typically see more mat edge lifting when humidity swings cause the floor surface to expand/contract slightly and the mat perimeter loses contact.
What can go wrong when “floor-safe” gym setups fail
Even a good mat system can fail if coverage is incomplete, edges lift, or moisture gets trapped. The good news is that most failures show up early—before they cause serious damage or injury—if you inspect your setup routinely.
Mats that slide (and suddenly feel unsafe)
A protective mat that moves during lunges or pivots is both a finish risk and a trip/slip risk. If your mat shifts after a few reps, treat it as a safety issue—rework perimeter anchoring and confirm the underside is designed for hard floors.
Wrong coverage creates off-angle damage
People often protect the center spot but not:
– where weights land off-angle,
– the footwork “walk zone” during mobility,
– or the path where you reset equipment.
If you change your routine (new lifts, new cardio format), your mat coverage zone should change too.
Edge curling and trip lines
Even quality mats become hazardous if edges lift. Re-check after rolling equipment, vacuuming with stronger suction, or after seasonal humidity changes.
Trapped moisture under breathable layers
Sweat can collect at mat edges or under a layer that still holds moisture. If you can’t lift/inspect easily, you may be hiding a slow moisture problem until the floor finish dulls or the wood starts to react.
Finish incompatibility from cleaners or mat materials
Some cleaners and some rubberized products can react with certain finishes or leave residue. That residue can increase dirt buildup and increase perceived slipperiness—making both slip risk and finish wear worse.
According to maintenance guidance, use cleaning products compatible with the specific finish system installed on your floor (, ).
Verdict / tip: what to do first (and who should skip DIY setups)
Start by making one clear training zone: buy/choose (or build) a protective, non-slip layer that fully covers where your feet and equipment go, then secure the edges so nothing lifts. After that, focus on the less obvious safety factors—moisture control, cleanup habits, and smooth transitions—because most floor-related gym issues (and many slips/trips) come from the “details,” not the workout itself.
Downsides to know: protective mats can feel less “grounded” than hardwood, and thicker cushioning may reduce stability for balance-heavy exercises. Also, if you can’t keep mat edges dry and clean, you may trade scuffs for moisture-related finish problems.
Skip this approach (or get professional guidance) if: your hardwood is already failing (cupping, gaps, lifting boards), you’re using harsh chemicals or abrasive cleaning tools, or you can’t maintain consistent indoor conditions per your floor manufacturer’s care instructions.
Quick checklist you can scan before your first session
| Safety step | What to check | Fix if you notice… |
|---|---|---|
| Coverage | Equipment contact points + your footwork area are covered | Weights land on wood outside the mat |
| Grip | Mat underside doesn’t slide | Mat shifts after a few reps |
| Edges | Corners/edges aren’t lifting | You feel a raised trip line |
| Transitions | No awkward step at room entrances | Toe catches at the edge |
| Moisture control | You can clean sweat/spills quickly | Water sits at edges or under mats |
| Floor-care match | Cleaning products match your finish guidance | Smudging, dulling, or sticky residue |
Sources
– National Wood Flooring Association (NWFA) guidance on wood floor care/maintenance for indoor conditions and cleaning:
– Hardwood floor and/or finish manufacturer instructions for cleaning and maintenance (use the specific guidance for your floor type and finish):
– Gym mat/interlocking flooring manufacturer installation guidance for safe use on hard surfaces (non-slip backing, edge behavior, and compatibility):
If you tell me your floor type (solid vs engineered), finish (polyurethane, prefinished oil/urethane blend, etc.), and what workouts you do most (dumbbells only vs dropped weights vs cardio drills), I can help you choose a safer layout plan and mat coverage zone.
Frequently Asked Questions
What are the safest ways to make hardwood floors safer for a home gym?
Start by reducing slip and fall risks with the right foundation: a high-quality gym mat or interlocking flooring over the hardwood will add traction and impact protection. Add corner/edge guards to prevent tripping at transitions, especially at doorway thresholds. Finally, protect the surface from damage by using sports-specific mats under heavy equipment like racks, and clean spills quickly to avoid slippery hardwood finishes.
How can I improve traction on hardwood floors for workouts like lifting and plyometrics?
For lifting, place a rubber training mat (or foam with a textured top) under where you set down weights to increase grip and reduce shifting. For plyometrics, choose a cushioned, non-slip mat with sufficient thickness to absorb shock while still providing stable footing. Avoid highly waxed or polished finishes in gym areas, and consider spot-sanding and refinishing with a more slip-resistant finish if traction is consistently poor.
Why do hardwood floors get damaged in home gyms, and how do I prevent it?
Hardwood can dent, scratch, or warp from dropped weights, high-impact movement, and moisture from sweat or cleaning. Use protective barriers like rubber mats under heavy equipment bases and install a durable gym flooring layer in high-impact zones. Keep cleaning practices gym-safe—use a hardwood-appropriate cleaner and ensure no standing water, since trapped moisture can degrade the finish and subfloor over time.
Which type of gym flooring works best over hardwood for safety and stability?
For general strength training, interlocking rubber or EVA foam tiles with a non-slip top provide a stable surface while protecting the hardwood from drops. If you do a lot of jumping, prioritize thicker, shock-absorbing flooring (often 1/2 inch or more) to reduce strain and minimize rebound on hardwood. For areas with frequent foot traffic and equipment movement, choose products with anti-slip backing and a tight locking system to prevent edges from lifting.
How should I protect the edges and high-traffic areas of hardwood floors used for exercise?
Use floor transition strips, rubber edging, or threshold ramps to eliminate tripping hazards where mats end or where you move between rooms. Place non-slip rugs or mat borders to prevent the gym mat from curling or shifting during burpees, yoga, or stretching. If you’re moving equipment frequently, consider adding protective floor protectors beneath stationary pieces and regularly check that mats remain flat and securely positioned.
📅 Last Updated: October 17, 2026 | Topic: How to make hardwood floors safer in a home gym? | Content verified for accuracy and freshness.
References
- https://www.osha.gov/slips-trips-and-falls
- https://www.cdc.gov/niosh/topics/slips/
- https://www.cdc.gov/homeandrecreationalsafety/falls/prevention.html
- Slips and trips – HSE
- https://www.cpsc.gov/Safety-Education/Safety-Guides/Rugs-and-Carpeting
- https://en.wikipedia.org/wiki/Slip_resistance
- Wood flooring
- https://scholar.google.com/scholar?q=hardwood+floor+slip+resistance+coefficient+of+friction+home+use Google Scholar
- https://scholar.google.com/scholar?q=exercise+floor+mat+stability+tripping+injury+prevention Google Scholar
- https://scholar.google.com/scholar?q=impact+attenuation+wood+flooring+home+gym+injury+risk Google Scholar