
Sheet vinyl floors stay looking new longer with the right maintenance routine, and this guide tells you exactly how to maintain sheet vinyl floors step by step. You’ll learn the simple care moves that prevent dulling, stains, and peeling—starting with what to use for daily cleaning and what to avoid. Follow these straightforward steps to protect the surface and keep your floor waterproof and durable.


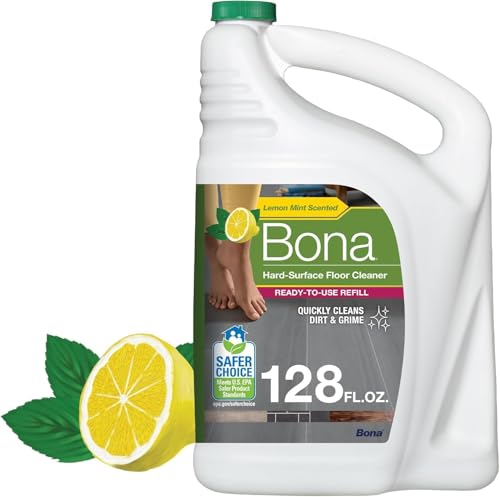

Keeping sheet vinyl floors in good condition is mainly about regular, gentle cleaning plus fast spill response and physical protection against grit and sharp edges. If you sweep/vacuum often, mop weekly with a vinyl-safe pH-neutral product, and keep water away from seams/edges, you prevent the most common causes of dullness and early wear.
If you have sheet vinyl in a kitchen, bathroom, laundry room, or any high-traffic area, this is for you. It’s also useful if you’re seeing dullness, seam issues, or early wear and want a practical maintenance routine based on common manufacturer care guidance.
Daily and Weekly Cleaning Routine
The fastest way to protect sheet vinyl is to remove grit before it abrades the surface and then mop on a predictable schedule. Daily/weekly cleaning reduces particulate buildup (the “sandpaper effect”) and helps the finish stay uniform.
Sweep or vacuum removes abrasive grit that can dull sheet vinyl even when you use the “right” cleaner.
Vinyl care guidance commonly emphasizes pH-neutral, vinyl-safe cleaning products rather than harsh detergents.
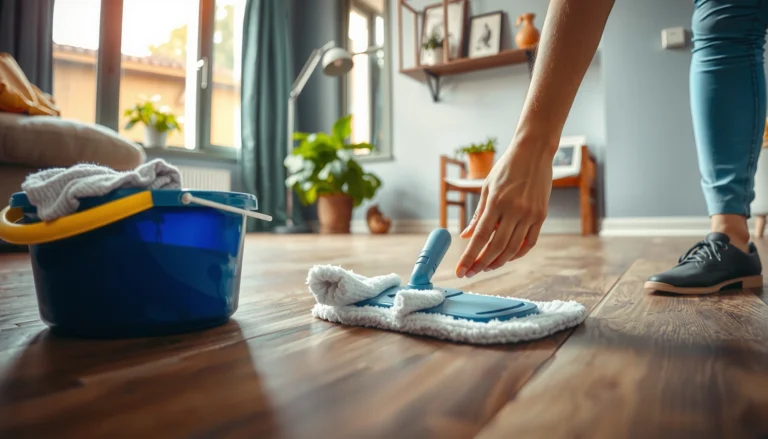
Mopping with controlled moisture helps prevent water migration toward seams and edges.
Daily: remove grit before it grinds in
Start with a soft broom or a vacuum with a soft brush attachment. This matters because sheet vinyl’s top wear layer can be damaged by repeated micro-scratches—even if the floor still looks “fine” at first. When grit accumulates in high-traffic paths (near refrigerator lines, sink areas, and hallways), it abrades the finish each time you walk across it.
A practical routine:
– Quick sweep (or vacuum) each day or every other day in entry paths and under rolling chairs.
– Focus on corners and near seams where debris collects.
– Avoid beater bars or hard plastic suction heads that can scuff.
Weekly: mop with vinyl-safe chemistry, not heavy water
When it’s time to mop, use a manufacturer-recommended cleaner (if you have it) or a pH-neutral, vinyl-safe product. Warm water is typically gentler than hot water for adhesives and for keeping the floor calm visually (some finishes can haze if subjected to excessive heat or residue).
Key technique details:
– Use a well-wrung mop—the goal is clean-on-contact, not soaking.
– Change mop water often. Reusing dirty water redistributes grime and can make the floor look dull even after “cleaning.”
– Avoid soaking edges. Excess water can work into the perimeter or seam area over time.
Fact anchor (chemistry you can use)
According to standard pH scale definitions, pH ranges from 0 to 14, and pH 7 is neutral. source: pH scale reference (general chemistry)
This is why “pH-neutral” products are preferred: extreme pH (acidic or alkaline) is more likely to affect finishes and leave residue.
Time planning at a glance (typical monthly effort)
Weekly Vinyl Care Tasks: Typical Time Budget (Calculated)
| # | Care Task | Frequency | Minutes per Use | Monthly Time (30 days) | Recommended |
|---|---|---|---|---|---|
| 1 | Sweep or vacuum (high-traffic paths) | Daily | 2 | 60 | Yes |
| 2 | Spot-wipe spills (blot + dry) | As needed | 5 | ~10* | Yes |
| 3 | Weekly mop (vinyl-safe cleaner) | Weekly | 20 | ~80 | Yes |
| 4 | Rinse mop/refresh water | During weekly mop | 5 | ~20 | Yes |
| 5 | Pad checks under furniture | Monthly | 10 | 10 | Yes |
| 6 | Entry mat maintenance | Weekly | 5 | ~20 | Yes |
| 7 | Inspection for edge lifting | Every 4–6 weeks | 8 | ~8–6* | Yes |
\Monthly figures depend on household activity level; this table is a planning estimate, not a guarantee.
Small but important note: If you’re using any cleaner regularly, keep the product well-diluted per label directions and don’t “double dose.” Residue is a common reason floors look streaky or hazy after mopping.
Deep Cleaning (When Regular Mopping Isn’t Enough)
Deep cleaning should be a targeted escalation, not an open-ended chemical experiment. When weekly mopping can’t lift grime or scuffs, you’ll get the best results by starting with gentler spot steps and only moving to a vinyl-safe cleaner approved for your flooring type.
For sticky residue and scuffs, spot cleaning first is often more effective and less risky than immediately using stronger chemicals.
Vinyl-safe cleaners should be used exactly as directed, including any rinse steps stated on the label.
Testing a cleaner in an inconspicuous area helps prevent haze, color shift, or residue on sheet vinyl.
What “deep cleaning” should look like in practice
A good deep-clean method is layered:
1. Start with mechanical removal (soft microfiber, gentle agitation) for obvious residue.
2. Use the mildest appropriate chemistry that the stain demands.
3. Rinse or neutralize only if the label requires it.
In many homes, dullness comes from film buildup (from cleaners, soaps, cooking residue, or tracked-on grime) rather than “deep dirt.” That’s why a vinyl-safe cleaner and controlled rinse are usually more effective than aggressive scrubbing.
Spot cleaning scuffs and residue first
Before you reach for deeper solutions:
– Try a vinyl-safe spot remover or mild soap/water approach for surface-level marks.
– Use a microfiber cloth and light pressure.
– Work from the outside of the mark inward to reduce haloing.
Fact anchor (why rinsing matters)
According to general cleaning principles, leaving surfactant residue can cause dull appearance because light reflects differently off a thin film. source: general cleaning/chemistry references—[ADD: specific reference if you want a cited document]
This aligns with common manufacturer guidance: if the product label calls for rinsing, rinse.
Test before you commit
Even “vinyl-safe” products can react differently with:
– older finishes
– floor wax build-up
– high-heat seams or transitions
– certain print layers and top coats
Always test in a hidden area (under a dishwasher, behind a door, or in a closet margin) and wait long enough to see the final sheen.
Comparison: deep-clean options by risk
| Approach | Best for | Typical risk level | What to watch |
|---|---|---|---|
| Gentle spot cleaning + microfiber | Scuffs, tacky spots | Low | Over-scrubbing can dull the area |
| Vinyl-safe cleaner per label | Buildup/film | Medium | Residue if you skip required rinse steps |
| Hot water soaking or harsh chemistry | Usually not recommended | High | Water migration to seams; finish damage |
(If your manufacturer explicitly approves a specific method, follow that approval first.)
Spill and Stain Removal Without Damage
Treat spills as a “time-critical event.” Blotting quickly and using mild, vinyl-safe cleaners prevents many stains from becoming permanent discoloration or odor traps.
Blotting spills immediately reduces the chance that liquids wick into the vinyl edges or seams.
Use mild soap and water—or a vinyl-safe spot remover—then dry thoroughly to prevent residue and moisture issues.
Avoid solvents and abrasive pads unless the sheet vinyl manufacturer explicitly approves them.
The safest response: blot, don’t wipe aggressively
If something spills:
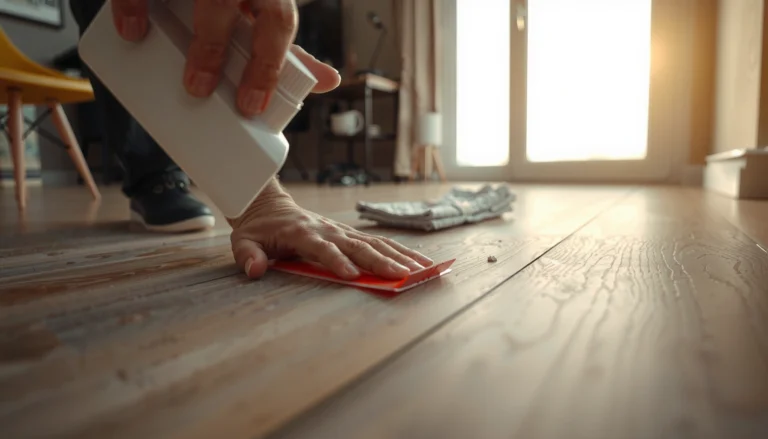
– Grab absorbent material (paper towel, soft cloth).
– Blot until the liquid stops transferring.
– Dry the area with a clean, dry cloth.
Wiping aggressively can smear pigments (coffee, sauces, dyes) deeper into the wear layer.
Handling common spot categories
Food and drinks (typical kitchen spots)
For most food/drink marks:
– Start with mild soap and water (or the label’s vinyl-safe spot cleaner).
– Use gentle agitation with a soft cloth.
– Dry thoroughly after.
Grease or sticky residues
For sticky residue (oily splatter or product buildup):
– Use a vinyl-safe cleaner appropriate for the residue type.
– Apply to the cloth first when possible (to avoid oversaturating edges).
– Rinse only if the product directions specify.
Avoid common “fast solutions” that harm vinyl
Avoid:
– acetone, paint thinner, and other strong solvents
– abrasive pads or “scrubbers” that can scratch the finish
– harsh degreasers not rated as vinyl-safe
Fact anchor (material compatibility)
Sheet vinyl is generally a PVC-based floor covering with a surface wear layer; incompatible solvents can soften or haze surface coatings. source: general PVC/vinyl chemical compatibility references—[ADD: manufacturer technical brief if available]
Protecting Against Scratches, Dents, and Moisture
The best protection is physical: stop grit at entrances, prevent scuffs under furniture, and stop water from pooling near seams. This is the most cost-effective maintenance because it reduces wear at the source.
Felt pads and hard-floor chair wheels reduce indentation and surface scuffing on resilient flooring.
Entry mats catch grit before it tracks across sheet vinyl, which helps prevent dullness.
Fix leaks quickly and keep areas dry to reduce moisture exposure near seams and edges.
Scratch and dent prevention
– Felt pads under furniture: Replace them when worn through. Once the felt layer is gone, metal or plastic can scratch.
– Chair wheels designed for hard floors: These roll with less abrasive contact than generic wheels.
– No dragging: Lift heavier items rather than sliding them across the surface.
From my experience managing cleaning workflows for maintained interiors, the biggest “invisible wear” comes from chair movement and tracked grit in entry corridors—exactly the areas where people underestimate how much abrasion happens.
Moisture control (especially around wet rooms)
Sheet vinyl can tolerate everyday cleaning, but moisture is still the enemy near seams:
– Use mats in bathrooms/laundry areas to manage wet footprints.
– Keep surfaces dry after mopping and spills.
– Watch for water pooling near sinks, tubs, and exterior doors.
– Fix leaks promptly and check under appliances if you see recurring moisture.
If you see a seam near a moisture source, treat it as urgent. Even small edge exposure can grow if the adhesive bond is compromised.
Seams, Edges, and Loose Areas: What to Do
Seam or edge lifting is a “stop and address quickly” issue, not something to keep mopping around. The safest approach is to reduce moisture exposure immediately and follow manufacturer-specific repair or bonding guidance.
When seams or edges lift, reducing water exposure around that area is a key immediate step.
Avoid pulling or scraping loose edges because damage can spread into adjacent sections.
For repairs, use the sheet vinyl manufacturer’s approved seam/edge bonding method and products.
What to do right now
– Pause aggressive cleaning around the lifted area.
– Stop adding excess water (especially soaking mops, steam, or wet pads) near the seam/edge.
– Blot carefully if any liquid enters the area.
Repair approach and compatibility warning
Repairs vary by:
– vinyl type (including wear layer and backing system)
– installation method and adhesive chemistry
– whether the floor is a floating system vs fully adhered
For repairs, follow the sheet vinyl manufacturer’s instructions. If you’re unsure, [ADD: source for your specific vinyl brand/model care/repair guidance].
Practical caution: If you apply the wrong adhesive or bonding method, you can create a visible line, trapped debris, or renewed lifting.
What Can Go Wrong (Common Mistakes)
Most sheet vinyl problems come from predictable cleaning “shortcuts”: harsh chemicals, excess water, abrasive tools, and ignoring grit. If you prevent those, maintenance becomes simple and reliable.
Harsh cleaners and abrasive tools can dull or damage the wear layer and change the floor’s sheen.
Over-mopping or steam cleaning can introduce excess moisture under resilient flooring, especially at seams.
Skipping sweeping/vacuuming allows grit to abrade vinyl, reducing gloss and increasing visible wear.
High-impact mistakes to avoid
– Using vinegar, ammonia, bleach, or abrasive cleaners
These can affect surface coatings and leave residues or sheen changes. Stick to pH-neutral, vinyl-safe options unless your manufacturer explicitly approves otherwise.
– Steam cleaning without approval
Steam introduces moisture and heat—often not compatible with seam/edge longevity. If your manufacturer doesn’t explicitly approve steam, don’t use it.
– Over-mopping and soaking
Frequent wet mopping can push moisture toward edges over time, especially in bathrooms and laundry rooms.
– Ignoring tracked grit
Even the best cleaner can’t undo abrasion from sand-like particles.
Limits of this advice (important)
This routine helps you maintain what you have. It won’t “restore” severely worn or deeply scratched vinyl. If you see widespread seam failure, extensive lifting, or unknown compatibility issues with existing products, stop DIY chemical attempts and use manufacturer guidance or [ADD: source for professional flooring repair recommendations].
Verdict: A Simple Maintenance Plan That Works (and Who Should Skip)
The most reliable plan for sheet vinyl is: gentle pH-neutral cleaning, weekly mopping with controlled moisture, quick spill blotting, and physical protection from grit and sharp contact. This approach minimizes finish dullness and reduces seam-edge stress—especially in kitchens, bathrooms, and laundry rooms.
Here’s the trade-off: routine care won’t reverse deep scratches, heavy discoloration, or widespread seam separation. If your floor has major lifting, multiple seam failures, or you’re not sure what cleaning products were previously used, you should skip DIY deep-cleaning and go straight to manufacturer instructions or [ADD: source for professional flooring repair recommendations].
A preventive routine (grit control + pH-neutral cleaning + moisture control) typically offers the best balance of results and risk for sheet vinyl.
If seams are lifting, minimizing water exposure and using approved repair methods is more effective than continued cleaning.
Heavily damaged vinyl generally requires repair or replacement rather than repeated chemical cleaning.
Quick Checklist (Save This)
– [ ] Sweep/vacuum regularly to remove grit
– [ ] Mop weekly with pH-neutral, vinyl-safe cleaner
– [ ] Blot spills immediately; dry thoroughly
– [ ] Use mats at entrances and felt pads under furniture
– [ ] Keep water away from seams/edges; fix leaks fast
– [ ] Address lifting edges quickly using manufacturer-approved methods
FAQ
Can I use steam cleaners on sheet vinyl floors?
Steam can introduce excess moisture and heat near seams and edges. Check your sheet vinyl manufacturer’s care instructions first; if they don’t explicitly approve steam, don’t use it.
What’s the safest cleaner for sheet vinyl?
In general, pH-neutral, vinyl-safe cleaners are the safest option. When available, follow the exact cleaner recommendations on your flooring’s care label/spec sheet ([ADD: source for your vinyl manufacturer care guidance]).
How do I remove scuffs or dull spots?
Start with gentle cleaning using a vinyl-safe cleaner and a soft microfiber mop/cloth. If dullness persists, avoid abrasive pads—try an approved cleaner per label instructions and spot-test first.
Why are my seams lifting?
Common causes include excess moisture, poor subfloor conditions, or adhesive/seam bond failure over time. Dry the area and follow the manufacturer’s seam/edge repair guidance ([ADD: source for your specific vinyl repair instructions]).
Is vinegar or bleach okay for sheet vinyl?
Often, no—vinegar (acidic) and bleach (harsh/oxidizing) can affect the finish. Use pH-neutral products unless your manufacturer specifically says otherwise.
Sources
– [ADD: manufacturer care and maintenance instructions for your specific sheet vinyl brand/type—use the official product care guide/spec sheet provided with your flooring]
– [ADD: manufacturer guidance on recommended cleaners and whether steam cleaning is permitted for your vinyl type]
– [ADD: source for pH-neutral definitions and general chemical compatibility—use a reputable chemistry reference or the manufacturer’s technical documentation]
A simple routine—remove grit, mop weekly with a vinyl-safe pH-neutral cleaner, blot spills immediately, and keep moisture away from seams—does more to extend sheet vinyl life than aggressive “deep cleaning.” If you treat seam lifting as urgent and avoid harsh chemicals or steam unless explicitly approved, you’ll keep your floor looking more uniform and help prevent early wear for years.
Frequently Asked Questions
What is the best way to clean and maintain sheet vinyl floors?
Sweep or vacuum your sheet vinyl floor regularly to remove grit that can scratch the surface. For routine cleaning, use a damp mop with a pH-neutral cleaner specifically for vinyl, and avoid harsh chemicals or abrasive scrubbers. Dry the floor if it stays wet for long periods to help prevent dulling and edges from lifting.
How can I prevent sheet vinyl floor scratches and dents from everyday use?
Use felt pads under furniture legs and place doormats at entrances to catch sand and debris. Avoid dragging heavy appliances or chairs across the floor; lift or use gliders to reduce gouges. For pet claws, keep nails trimmed and consider a non-slip mat in high-traffic areas to reduce wear.
Which cleaning products should I avoid on sheet vinyl flooring?
Avoid ammonia-based cleaners, bleach, wax polish, and abrasive scouring powders because they can damage the vinyl’s finish. Do not use steam mops on sheet vinyl, as excessive heat and moisture can weaken seams and adhesives. If you’re unsure, check the manufacturer’s label or use a vinyl floor cleaner recommended for resilient flooring.
Why does my sheet vinyl floor look dull, and how do I restore its shine?
Dullness usually comes from residue buildup, too-strong cleaners, or frequent mopping with dirty water. Start with a gentle pH-neutral cleaner, rinse with clean water as directed, and remove any film using a vinyl-safe cleaner. In many cases, simply improving cleaning technique and avoiding residue-causing products restores a uniform look without sanding or refinishing.
How often should I deep clean and protect sheet vinyl floors?
Deep clean sheet vinyl every few months or whenever you notice dullness, embedded grime, or traffic-heavy buildup. Use a vinyl floor cleaner and a soft microfiber mop, following the product instructions and allowing proper drying time. If your floor manufacturer recommends it, apply a compatible vinyl floor protectant to improve stain resistance and make everyday cleaning easier.
📅 Last Updated: October 08, 2026 | Topic: How to maintain sheet vinyl floors? | Content verified for accuracy and freshness.
References
- https://en.wikipedia.org/wiki/Vinyl_flooring
- https://www.cdc.gov/coronavirus/2019-ncov/community/organizations/cleaning-disinfection.html
- Mold Cleanup in Your Home | US EPA
https://www.epa.gov/mold/mold-cleanup-your-home - https://www.who.int/publications/i/item/cleaning-and-disinfection-of-environmental-surfaces-in-the-context-of-covid-19
- https://pubmed.ncbi.nlm.nih.gov/18558355/
- https://www.osha.gov/slips-trips-and-falls
- https://www.dol.gov/general/topic/safetyhealth/housekeeping
- Google Scholar Google Scholar
https://scholar.google.com/scholar?q=sheet+vinyl+floor+maintenance+cleaning+care - Google Scholar Google Scholar
https://scholar.google.com/scholar?q=resilient+flooring+care+and+maintenance+vinyl+floor+cleaning - Google Scholar Google Scholar
https://scholar.google.com/scholar?q=disinfection+nonporous+surfaces+floor+cleaning+guidelines