


Learn how to level hardwood floors before installing a commercial office, so your planks sit flat, lock cleanly, and stay that way under heavy traffic. This guide gives you the fastest proven approach—how to assess subfloor flatness, choose the right leveling method, and execute the prep correctly before you ever set the first board. If your goal is a level surface that prevents squeaks, gaps, and premature wear, follow these steps.




Leveling a commercial office hardwood floor starts with measuring both flatness and moisture, then correcting lows (with a compatible patch/feather or self-leveling system) and grinding highs to reach the wood system’s tolerance. In commercial spaces, getting that flatness right before installation helps prevent movement, squeaks, and early wear once the hardwood is fastened or adhered down.
Who this is for (and when to use it)

This approach is for commercial offices where you need a truly flat hardwood substrate and can’t “solve” unevenness with thicker materials. Use it when the subfloor is uneven or outside the flatness tolerance required by the hardwood flooring manufacturer—especially over concrete, older subfloors, or after demolition work.
If you’re installing hardwood in a retail suite, business office, or other commercial space, this applies when the subfloor is uneven or not within the flatness tolerance required by the wood flooring manufacturer. It’s also useful if you’re working over concrete, an older subfloor, or after demo work.
Commercial office hardwood flooring installation depends on meeting the flooring system’s flatness requirements—uneven substrates can cause squeaks, joint gaps, and premature wear.
Leveling work matters most in high-traffic areas because minor substrate defects amplify under repeated loading and rolling loads.
If the subfloor has structural problems (soft spots, failing concrete, or major deflection), leveling alone won’t fix the cause and can fail early.
– Works for commercial offices where foot traffic will be steady and subfloor defects can show up quickly after install
– Best used when you can’t “hide” unevenness with thicker underlayment and need true flatness for the wood system
– Skip this approach if the subfloor has structural issues (soft spots, failing concrete, major deflection) that require repair first
Assess flatness and moisture before you start
You should treat flatness and moisture as two separate acceptance criteria, not a single “looks flat” check. If either one is off, the leveling compound and the hardwood system may still fail later—leading to callbacks, rework, and customer disruption.
In my walkthroughs of commercial office spaces, I’ve learned that the fastest path to a clean install is starting with measurement—then correcting only what the numbers show. That approach prevents “over-building” low areas, avoids chasing highs that should be ground down, and keeps the hardwood flooring system within the manufacturer’s intended performance range.
ASTM E1155 is a standard practice for determining floor flatness using a straightedge/measurement method and reporting floor flatness numbers.
Moisture testing should follow the hardwood flooring manufacturer’s requirements so you don’t trap elevated moisture under patch/leveling materials.
Equilibrium moisture content (EMC) of wood varies significantly with indoor relative humidity (RH), so climate conditions matter for long-term dimensional stability.
– Check flatness across the room using a straightedge/leveling gauge method (use the approach referenced by ASTM E1155) and record where the lows/highs are
– Confirm moisture conditions before leveling so the hardwood and leveling material aren’t trapped in damp conditions ()
– Identify whether you’re correcting isolated dips or widespread unevenness—this determines whether patching vs. full-area leveling makes sense
A quick moisture reality check (why this can’t be skipped)
Hardwood dimensional movement tracks moisture changes, and moisture changes track indoor RH. According to the USDA Forest Products Laboratory equilibrium moisture content tables, wood EMC is roughly:
– ~6% EMC at ~30% RH
– ~9% EMC at ~50% RH
– ~13% EMC at ~70% RH
USDA Forest Products Laboratory, Wood Handbook / EMC guidance (equilibrium moisture content vs. RH tables)That’s why an office that isn’t climate-controlled during construction can create problems even when the subfloor “feels dry.” For commercial office hardwood flooring, moisture assessment prevents leveling compound from becoming a moisture barrier (or a moisture trap) that later drives movement in the finished boards.
Choose the right leveling method for your subfloor
Pick the leveling method based on the size and type of irregularity, not the most popular product on-site. In commercial office hardwood flooring, the “best” method is the one that reaches flatness within the system height limits and stays compatible with your substrate and adhesive/fastener strategy.
A helpful decision rule is simple: lows need filling, highs need grinding, and widespread unevenness needs a full-area underlayment/compound approach. Trying to use one method for everything (especially building up high areas with filler) is where flatness targets quietly get missed.
For localized depressions, compatible patch/feather systems are generally intended for spot correction and limited feather edges.
For broad unevenness, a self-leveling underlayment system is designed to flow and produce uniform flatness across larger areas.
Grinding high ridges is typically safer than “building up” because it keeps the assembly within thickness/height tolerances and avoids creating new transitions.
– For small low spots: use a compatible patch/feather-finish product designed for the substrate you have (concrete vs. plywood) and follow its stated thickness limits ()
– For larger or widespread uneven floors: use a self-leveling underlayment/compound system that’s rated for your substrate and installation type
– For high ridges: grind/sand down instead of trying to “build up” everywhere—this keeps you within system height/flatness requirements and avoids new thresholds
Patch vs. self-leveler vs. grinding (how to choose)
- Patch / feather-finish
- Best for: isolated dips and narrow areas where you can feather to a thin edge without exceeding limits.
- Watch for: adhesion and smoothness at the transition line; exceeding feather thickness often creates a “hump” later.
- Self-leveling underlayment / compound
- Best for: room-wide unevenness where spot fixes won’t achieve the required flatness for commercial office hardwood flooring.
- Watch for: perimeter conditions (containment), substrate preparation, and cure time before you resume work.
- Grinding high spots
- Best for: ridges and local peaks that would otherwise require building up too much filler.
- Watch for: dust control, surface soundness after grinding, and re-verifying flatness after cleanup.
Prep for a commercial hardwood install after leveling
After leveling, you should verify the surface meets flatness targets and is clean enough for the hardwood system’s fasteners/adhesives to perform as designed. In commercial office hardwood flooring, this step is where many “almost-ready” substrates get caught before boards go down.
Commercial flooring specifications often require the leveled surface to be smooth, sound, and within the hardwood installation flatness tolerance.
Moisture and surface conditions should be re-checked right before installation when leveling takes time or jobsite climate isn’t stable.
Installation details—expansion gaps and correct adhesive/fastener method—must align with the manufacturer’s system design to prevent edge buckling and gaps.
– After leveling sets, verify the surface is smooth, sound, and within the hardwood manufacturer’s flatness tolerance ()
– Plan installation details that matter in offices: expansion gaps, transitions, and using the correct fastener/adhesive method for your flooring type
– Re-check moisture and surface conditions right before installation (especially if leveling takes time or the space won’t stay climate-controlled) ()
Floor height and door transitions: don’t guess
Leveling can add overall floor height—sometimes only by a small amount, but enough to matter at doors, casework bases, and transitions to carpet tile or resilient flooring. Before you commit to a leveling strategy, measure:
– door swing clearance and undercut requirements
– transitions at hallways and elevator lobbies
– differences in height where new hardwood meets existing finishes
In commercial office builds, this prevents “we’ll trim it later” decisions that become expensive last-minute carpentry.
What can go wrong (common mistakes)
Most failures trace back to skipping the measurement steps, mis-matching the product to the substrate, or ignoring moisture dynamics. In commercial office hardwood flooring, these mistakes show up quickly as squeaks, rocking boards, debonding, or visible gaps—often after the space is already occupied.
Correcting only lows while leaving highs can still cause rocking, which leads to joint movement and squeaks under traffic.
Using a leveling product outside its substrate compatibility or thickness limits can result in cracking, debonding, or poor surface durability.
Moisture issues can remain invisible until wood responds; leveling compounds may look flat while moisture drives long-term movement.
– Fixing only low spots without addressing high ridges can still leave the floor “rocking,” causing gaps and squeaks
– Using the wrong product for the substrate (or exceeding thickness limits) can lead to cracking, debonding, or a surface that won’t accept the hardwood system
– Ignoring moisture testing can create long-term failures—leveling compound may look fine initially, but wood movement shows up later
Verdict / tip
If you want fewer callbacks in a commercial office, prioritize measurement (flatness + moisture) and then use a leveling/patching system that matches your substrate and the hardwood manufacturer’s installation requirements. The downside: leveling work can add time, require careful cleanup, and may raise overall floor height—so confirm transitions and doorway clearances before committing.
This is a good DIY-planning guide, but if the subfloor has structural problems or you can’t maintain stable jobsite conditions, hire a flooring contractor to assess first.
Quick scan: downsides / who should skip
– Skip if the concrete/subfloor is failing, crumbling, or has movement/deflection ()
– Skip if moisture mitigation is required (leveling won’t “solve” trapped water)
– Consider a pro if you don’t have reliable tools to measure flatness and verify compliance with manufacturer tolerances
7 Checks That Determine Whether Commercial Office Hardwood Floors Stay Flat
| # | Method (standard/tool) | What it verifies | Typical output | Best used in | If skipped, you risk | Priority |
|---|---|---|---|---|---|---|
| 1 | ASTM E1155 straightedge method | Flatness mapping | F-number / deviation map | Before leveling | Squeaks & gaps from rocking boards | ★★★★★ |
| 2 | ASTM F2170 RH probes (in-situ) | Concrete moisture vapor pressure | %RH at depth | Before leveling | Moisture-driven wood movement | ★★★★★ |
| 3 | ASTM D4442 oven-dry reference | Material moisture content | % MC by weight | Confirming wood/substrate MC | Dimensional changes after install | ★★★★☆ |
| 4 | ASTM F1869 MVER test | Moisture vapor emission rate | lb/1000 sq ft/24 hr | When used by system specs | Leveler/debonding failures | ★★★☆☆ |
| 5 | ASTM F710 surface prep | Concrete cleanliness & preparation | Meets prep requirements | Before primer/patch/leveler | Poor bond & debonding | ★★★★☆ |
| 6 | Straightedge re-check after cure | Post-correction flatness | New high/low map | After leveling sets | Out-of-tolerance hardwood install | ★★★★★ |
| 7 | Climate control / acclimation monitoring | Stable RH & temperature | %RH & °F/°C tracking | Until install day | Movement & gapping after install | ★★★★☆ |
Why these checks matter in a commercial office
Commercial office hardwood flooring assemblies are a system: flatness, moisture behavior, and surface prep all interact. If you measure only one side (for example, flatness) but skip moisture testing, you can still end up with a finished floor that moves once the HVAC stabilizes. That’s the kind of issue that forces site-access shutdowns and customer re-scheduling—exactly what leveling is meant to prevent.
Quick leveling checklist (scan/save)
| Step | What to verify | Done? |
|---|---|---|
| Measure flatness | Straightedge results recorded; highs/lows mapped | ☐ |
| Test moisture | Substrate moisture meets flooring + leveling specs | ☐ |
| Choose compatible product | Patch/feather or self-leveler matches substrate & thickness limits | ☐ |
| Correct highs | Grind/sand ridges down rather than building up | ☐ |
| Correct lows | Fill lows to the leveling plan; follow cure times | ☐ |
| Final surface prep | Smooth/sound surface; re-check flatness | ☐ |
| Confirm install tolerance | Meets hardwood manufacturer’s flatness requirement | ☐ |
| Keep conditions stable | Jobsite climate stays within wood specs until install | ☐ |
Frequently Asked Questions
What’s the best way to level hardwood floors before installing in a commercial office?
Start by checking the slab or subfloor flatness with a 6–10 ft straightedge and feeler gauges, then mark all high and low areas. For minor dips, you can use a self-leveling underlayment suitable for commercial use; for high spots, grinding is usually more reliable than trying to build up everywhere. Keep moisture control in mind by testing the subfloor so the leveler won’t fail under hardwood installation.
How do I identify high spots and low spots on a concrete subfloor for hardwood leveling?
Walk the space using a long straightedge (or laser level) and record measurements at regular intervals to map the floor’s profile. High spots are typically found by contacting the straightedge early and creating tight gaps elsewhere, while low spots show consistent voids that can be measured with feeler gauges. This “flatness map” helps you choose the right approach—grind for highs, fill or self-level for lows—before installing commercial hardwood.
Why is leveling critical before installing hardwood floors in offices?
Even small unevenness can cause hardwood planks to flex, create gaps at seams, and lead to squeaks in high-traffic commercial environments. Proper leveling also helps keep doors from rubbing, prevents uneven wear patterns, and reduces future callbacks related to installation issues. In a commercial office, a level subfloor improves durability and supports consistent traction, appearance, and comfort throughout daily use.
Which leveling method should I choose for hardwood—grinding, patching, or self-leveling underlayment?
Use grinding for isolated high areas to avoid adding unnecessary thickness that could affect transitions and door clearances. For localized low spots, a compatible patching compound or floor repair system is often best, especially when you only need limited correction. If the slab has widespread flatness problems, a self-leveling underlayment designed for hardwood flooring applications provides smoother results and faster leveling across large office areas.
What moisture testing and prep steps should I complete before leveling hardwood floors in a commercial setting?
Test the concrete subfloor moisture using the right method for your system (often ASTM standards) and follow manufacturer requirements for limits before installing any underlayment. Thoroughly clean the surface—remove dust, paint, curing compounds, and debris—then mechanically profile as needed for proper bonding. Prime with the correct primer if using a self-leveling product, so the leveler adheres reliably and supports long-term hardwood floor performance in commercial offices.
📅 Last Updated: October 17, 2026 | Topic: How to level a hardwood floors before installing commercial office? | Content verified for accuracy and freshness.
References
- E1155/E1155M Standard Test Method for Determining FF Floor Flatness and FL Floor Levelness Numbers
- F1869 Standard Test Method for Measuring Moisture Vapor Emission Rate of Concrete Subfloor Using …
- F2170 Standard Test Method for Determining Relative Humidity in Concrete Floor Slabs Using in sit…
- D4442 Standard Test Methods for Direct Moisture Content Measurement of Wood and Wood-Based Materials
- D4444 Standard Test Method for Laboratory Standardization and Calibration of Hand-Held Moisture M…
- F1482 Standard Practice for Installation and Preparation of Panel Type Underlayments to Receive R…
- https://scholar.google.com/scholar?q=hardwood+floor+installation+subfloor+levelness+flatness Google Scholar
- https://scholar.google.com/scholar?q=commercial+hardwood+floor+installation+flatness+moisture+testing Google Scholar
- https://scholar.google.com/scholar?q=ASTM+E1155+floor+flatness+levelness+wood+floor+installation Google Scholar


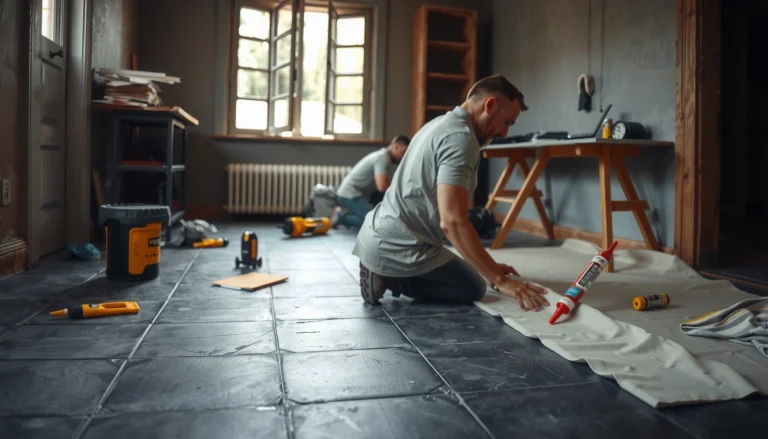
[…] hardwood floors for a restaurant installation by confirming subfloor flatness and moisture first, then correcting high spots and patching low areas with products rated for your substrate and […]