


Want to know how to level hardwood floors before installing restaurant flooring? For most restaurant remodels, the fastest, most reliable win is to prep the existing hardwood with a proper floor-leveling compound and careful grinding—keeping everything flat enough for the new wear-resistant surface to lock or adhere correctly. This approach answers the real question of whether you should chase low spots, fill dips, or resurface first, and how to get a level substrate without creating new squeaks or failures.




Level hardwood floors for a restaurant installation by confirming subfloor flatness and moisture first, then correcting high spots and patching low areas with products rated for your substrate and thickness range. Do a final flatness re-check before fastening—because in high-traffic kitchen-and-dining environments, “good enough” unevenness often becomes board movement, gapping, and callback-level failures.
This guide is for contractors or facility owners preparing an existing subfloor (wood, plywood, or concrete) before installing hardwood in a commercial restaurant space—especially where heavy foot traffic and moisture from kitchens make good subfloor prep non-negotiable.
Check flatness and moisture first (don’t guess)

Leveling starts with measurement, not assumptions: identify where the floor is high or low, and verify moisture conditions before you add any cementitious or self-leveling material. For restaurant floors, this step protects the hardwood, the underlayment (if used), and the adhesives/fasteners that depend on a stable, properly prepared base.
A common hardwood flatness target is **no more than 3/16 in (4.8 mm) over 10 ft** and **no more than 1/8 in (3.2 mm) over 6 ft**, so measurement needs to match that scale. NWFA, Hardwood Floor Installation Guidelines
Moisture verification matters because leveling products can trap moisture under the new floor system, increasing the risk of cupping, gapping, and bond/adhesive failure. NWFA, Hardwood Floor Installation Guidelines
If you test for moisture, use the test method required by the flooring/underlayment specifications (for example, ASTM F2170 for in-situ RH testing). ASTM F2170
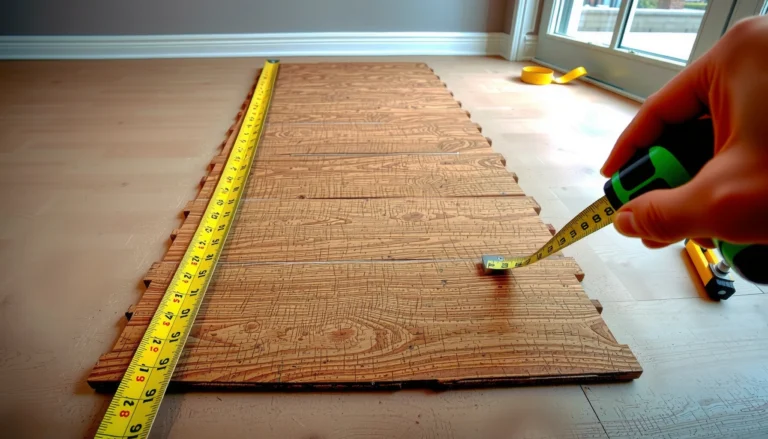
– Measure flatness with a long straightedge/level and record where the dips and humps are so you can choose the right leveling method.
In practice, you’re mapping a “bathymetry chart” for the floor: mark every deviation so you can determine whether you can fix it with sanding and a feather-finish patch, or whether you need a deeper self-leveling underlayment (SLU).
– Test moisture (and match the required moisture limits to your hardwood and underlayment specifications); leveling over excess moisture can cause failures later.
Restaurant environments often show moisture gradients—kitchen zones and dishwashers are usually the worst-case areas—so treat moisture testing as a zone-based task, not a one-time hallway check.
– Confirm what “acceptable” flatness tolerance means for your exact product—use the tolerance stated in the hardwood installer instructions or the leveling underlayment data sheet.
Even when industry guidance exists, the manufacturer’s tolerance (and the installation method—nail-down vs glue-down vs floating) is what governs whether your leveling approach is actually compliant.
Prep the subfloor so leveling compounds can actually bond
A leveling compound will only perform as designed if the substrate is sound, clean, and compatible with the specific leveling system. In restaurants, the “hidden enemy” is often residue—sealants, dust, drywall compounds, or curing compounds—that prevent adhesion and create delamination risk.
Surface contamination (paint overspray, loose patching, sealers, or dust) can prevent leveling materials from bonding, so prep needs to follow the leveling product’s adhesion requirements.
Structural movement (soft spots, failing fasteners, or squeaks) must be corrected before leveling because leveling can’t stabilize a moving base.
– Remove anything that prevents adhesion (paint overspray, drywall mud, loose patching, sealers—unless the leveling system explicitly allows them).
In my experience coordinating restaurant renewals, it’s surprisingly common to find old floor patch debris, glossy coatings from previous repairs, and sanding dust that looks “clean enough” but isn’t compatible with cementitious systems. If the leveling manufacturer calls for mechanical profiling or priming, follow that exact instruction.
– Thoroughly clean and mechanically profile the surface if required by the leveling product instructions (some systems require priming before you pour/skim).
Primers aren’t a “nice to have” in commercial settings; they’re part of the bond mechanism. If primer is required, your schedule should assume cure time and re-check the surface condition before pouring.
– Address structural issues first (soft spots, squeaks, failing fasteners, subfloor movement)—leveling compounds aren’t a fix for a moving base.
Start with fastener check/repair, subfloor tightening, and any necessary reinforcement. Once the substrate is stable, you level for flatness—not for structural repair.
Choose the right leveling method for hardwood installation
Choose the leveling method based on the scope of unevenness: localized dips usually need patching, while broad low areas typically require self-leveling underlayment. Trying to force one product type to cover the other is one of the fastest ways to create thickness inconsistency and bonding problems.
Localized shallow lows are usually handled with a cementitious patch/feather-finish system because it’s designed for controlled thin-to-thick transitions.
Broad or widespread low areas are better corrected with SLU because it self-flattens across larger sections, reducing the number of “step” transitions under hardwood.
– For small low spots: use a cementitious patch/feather-finish product rated for your substrate and thickness range.
Feather-finish systems typically help where you need a smooth transition rather than a “sheet” pour, but you still must respect max thickness per pass and cure requirements.
– For larger or widespread unevenness: use a self-leveling underlayment (SLU) that matches your floor system and conditions (including whether it can be used under hardwood).
Not every SLU is approved for every finished floor type, and approval can hinge on things like load class, bonding requirements, and whether the SLU is intended to be permanently covered by wood flooring systems.
– For minor high areas: sand/grind high spots and re-check flatness—over-using patch/SLU to “cover” highs can create new thickness and bonding problems.
If you cover highs instead of removing them, you increase overall buildup. That can create uneven fastening conditions and “telegraphing” (visible/feelable variations) once the hardwood is installed.
Quick compare: Patch vs SLU (decision logic)
A contractor-friendly way to decide is scope-first: how much area is low, and how deep is the deviation?
- Cementitious patch / feather-finish
- Use when: low spots are localized and you can blend transitions.
- Pros: less overall material thickness, easier to control small corrections.
- Cons: can be slow if unevenness is widespread.
- Self-leveling underlayment (SLU)
- Use when: broad low areas prevent achieving flatness with sanding/patch alone.
- Pros: produces a more uniform surface over large zones.
- Cons: greater sensitivity to surface prep/primer and requires strict product compatibility.
Leveling steps that work in real restaurant installs
Follow a repeatable workflow so your crew doesn’t lose control of mixing, cure, and final flatness checks. In commercial kitchens and dining areas, schedule and moisture management are as important as the leveling material itself.
Mix ratios and mixing time matter because leveling performance depends on achieving the designed water/cement chemistry.
If primer is required, skipping it is a common cause of debonding—especially on cleaned but porous or irregular substrates.
After cure, you still need a final flatness verification to catch ridges or texture that could interfere with hardwood fastening or create board telegraphing.
– Mark the high spots and low spots, then follow the leveling product’s mix directions exactly (water amount and mixing time matter).
In restaurant projects, this is where crews often try to “work around” supply issues or speed up hydration. Resist that. Document mix compliance so you can defend workmanship if there’s a dispute later.
– Apply primer (if required) and let it dry to the condition specified on the label; skipping primer is a common route to debonding.
Don’t guess primer dry state by appearance only—restaurants have variable airflow and humidity near kitchens. Use the label criteria so you’re not starting the pour on a surface that’s too wet or contaminated.
– After the patch/SLU cures, re-check flatness and remove ridges or texture that could prevent proper hardwood fastening or create telegraphing.
“Cured” doesn’t always mean “ready for finish.” If your product requires a grinding step (or if you discover ridges), plan that labor into your scope.
– Plan your workflow around downtime: restaurants often need phased work so kitchens can continue operating while subfloor prep happens in controlled sections.
This is a practical installation advantage: you can keep the dining room open while prepping subfloor zones in phases, but you must protect open areas from traffic and moisture during the transition.
Restaurant-typical risk note (2026 reality check): As of 2026, many facilities manage renovation schedules by limiting access to only part of the kitchen/day route. That makes zone-based moisture control and sequencing even more critical than in empty commercial spaces.
What can go wrong (and how to avoid it)
Most leveling failures in restaurants are avoidable when you treat leveling as a system with inputs and constraints—not as a quick “surface fix.” The goal is to stop moisture and movement from being trapped under the hardwood and to keep the final surface within the manufacturer’s flatness tolerance.
Skipping moisture verification can trap moisture under hardwood, increasing the risk of cupping, gapping, and adhesive failure even if the floor looks fine during installation.
If the substrate has dust, curing compounds, or unapproved coatings, leveling materials may not form the designed bond and can debond under traffic.
– Skipping moisture verification: leveling can trap moisture under hardwood, leading to cupping, gapping, or adhesive failure.
Kitchens create moisture pulses (washdowns, steam, cleaning chemicals), and those pulses can migrate into concrete or plywood systems if conditions are already elevated.
– Incorrect substrate readiness: dust, curing compounds, or unapproved coatings can stop the leveling material from bonding.
For commercial sites, vacuuming and mechanical profiling (when specified) are usually the difference between “works in the shop” and “holds up in service.”
– Overbuilding thickness: exceeding the product’s maximum depth range can cause shrinkage, cracking, or an uneven surface that ruins the hardwood fit.
This is particularly important when multiple passes are involved. Your plan must respect maximum thickness per pour/passing and allow full cure between steps.
– Not re-checking flatness after leveling: even a good pour can end up with ridges—your final flatness check should happen before installation.
I’ve seen crews rush this step to meet a grand opening date, then discover fastening problems or visible transitions that could have been avoided with a final pass.
– Restaurant-specific moisture risks: areas near sinks, dishwashers, or floor-wash zones may need additional moisture protection beyond “leveling” alone—follow your waterproofing/moisture-control requirements if your scope includes them.
Leveling makes the floor flat; it doesn’t inherently waterproof it. If your project scope includes moisture barriers or waterproofing, coordinate that scope early with your flooring system design.
Verdict / tip (what to do, and who should skip this DIY)
Leveling before installing restaurant hardwood is worth doing carefully because it directly affects how straight the boards lay and how well fasteners and adhesives perform under heavy traffic. If your subfloor has movement, repeated moisture problems, or you can’t confirm the required moisture/flatness tolerances from the hardwood and underlayment manufacturers, it’s smarter to pause and bring in a qualified flooring installer or flooring-repair specialist rather than “covering issues” with patch/SLU.
For hardwood, flatness and moisture targets aren’t optional—tolerances are typically specified in manufacturer installation instructions and supported by industry guidance from the NWFA. NWFA, Hardwood Floor Installation Guidelines
Leveling products can improve flatness, but they do not correct structural instability or moisture that exceeds the flooring system’s requirements.
Who should not DIY this:
– Facilities with known moisture excursions (kitchen washdown areas, plumbing leaks, recurring condensation).
– Projects where you can’t document moisture test results and flatness measurements.
– Jobs requiring significant subfloor correction (soft/sagging spots, extensive plywood tightening, or concrete remediation).
Downside to keep in mind: Even when leveling is done correctly, restaurants must still manage traffic protection, cure time, and sequencing. If the site schedule is too compressed to allow full cure and a final flatness re-check, outcomes can degrade fast.
Hardwood subfloor flatness checkpoints commonly referenced for installs
| # | Measurement span | Flatness target | Metric equivalent | Implication for leveling | Fit-for-service |
|---|---|---|---|---|---|
| 1 | 10 ft run | ≤ 3/16 in | ≤ 4.8 mm | Generally aligns with common hardwood guidance | ★★★★★ |
| 2 | 10 ft run | ≈ 1/8–3/16 in | ≈ 3.2–4.8 mm | Usually fixable with sanding + targeted patch | ★★★★☆ |
| 3 | 10 ft run | > 3/16 in | > 4.8 mm | Patch alone often fails to produce a stable surface | ★★☆☆☆ |
| 4 | 6 ft run | ≤ 1/8 in | ≤ 3.2 mm | Supports consistent board seating and fastening | ★★★★★ |
| 5 | 6 ft run | ≈ 1/16–1/8 in | ≈ 1.6–3.2 mm | Often manageable with localized correction | ★★★★☆ |
| 6 | 6 ft run | > 1/8 in | > 3.2 mm | Requires SLU or a broad correction strategy | ★★☆☆☆ |
| 7 | Plan verification | Re-check after cure | — | Prevents “ridgelines” and rebound unevenness | ★★★★★ |
Targets reflect commonly cited hardwood flatness guidance; always confirm the tolerance required by your specific hardwood and underlayment documentation. NWFA, Hardwood Floor Installation Guidelines
Quick leveling checklist (save or print)
Leveling goes smoothly when you can verify every constraint before installation day. This checklist is designed for commercial schedules where the wrong assumption (often moisture or bond readiness) becomes an expensive rework.
Flatness and moisture verification should be documented before you pour patch/SLU, so you can demonstrate compliance with hardwood and underlayment specifications.
A final flatness re-check after cure prevents installing over ridges that can interfere with fastening and contribute to telegraphing.
– [ ] Straightedge/flatness measurement completed and documented
– [ ] Moisture testing completed and within the limits required by the hardwood and underlayment
– [ ] Surface cleaned and profiled as required (including primer where specified)
– [ ] High spots sanded/grinded; low spots planned for patch vs SLU
– [ ] Patch/SLU mixed per manufacturer instructions (no estimate water ratios)
– [ ] Cured fully, then flatness re-checked
– [ ] Any ridges/edges corrected before hardwood installation
– [ ] Installation plan accounts for restaurant traffic/downtime and kitchen-related moisture exposure
Sources
– National Wood Flooring Association (NWFA), Hardwood Floor Installation Guidelines (moisture/acclimation and site preparation guidance)
– ASTM standards relevant to floor evaluation/testing: ASTM E1155 (measuring floor flatness) and ASTM F2170 or other applicable moisture test standards (confirm which method matches your flooring system and jurisdiction)
A well-leveled substrate is the difference between a restaurant hardwood floor that stays tight and serviceable and one that develops gapping, movement, and adhesive/fastener failures. If you document flatness and moisture, prep for bond, choose the right leveling method for the unevenness scope, and re-check flatness after cure, you can install confidently even in the demanding 2026 reality of kitchens, washdowns, and constant foot traffic.
Frequently Asked Questions
What’s the best way to check how level the subfloor is before installing hardwood floors in a restaurant?
Start by measuring the subfloor for flatness and levelness across the entire footprint using a 6–10 ft straightedge and a laser level. Mark high spots, low spots, and any transitions at doorways, kitchen entries, and other heavy-traffic areas. In restaurants, also check for moisture-related movement by inspecting for damp spots, visible concrete issues, or prior patching that could affect the hardwood installation. Document your findings so you can choose the right leveling approach before you install restaurant-grade hardwood floors.
How do I level hardwood floors when the subfloor has low areas or dips?
For low areas, use a self-leveling underlayment designed for hardwood installation, following the manufacturer’s recommended thickness range and mixing instructions. If the dips are localized, you may need to use a cementitious patch or floor leveling compound first, then skim or feather the surface for a smooth, even plane. After leveling, allow full cure time—rushing can cause soft spots, squeaking, or separation once the hardwood flooring is installed. Always re-check flatness with the straightedge after leveling to confirm the surface is ready for hardwood.
Why is leveling critical for hardwood floor installation in restaurants compared to other flooring types?
Hardwood floors magnify problems in the subfloor because they can telegraph unevenness as gaps, squeaks, or uneven boards. In a restaurant, heavy foot traffic, chair movement, and dropped items increase stress on every fastened or floating plank, making a level base essential for long-term performance. Proper leveling also helps prevent premature wear and reduces the risk of cupping or joint separation related to uneven load distribution. Spending time leveling before installing hardwood helps your floor stay stable, attractive, and durable in a high-use environment.
Which leveling products should I choose for concrete and wood subfloors under restaurant hardwood?
On concrete slabs, self-leveling underlayment or feather-finish patch compounds typically provide a smooth, flat surface for engineered hardwood floors. On wood subfloors, the focus is often on fixing deflection, tightening subflooring, and addressing squeaks before using a leveling compound where appropriate. Choose products rated for flooring underlayment compatibility, and verify they’re suitable for the moisture conditions in your restaurant. If you’re installing over slab areas near kitchens or plumbing lines, consider moisture testing requirements to ensure leveling materials perform correctly.
What’s the best process and schedule to level the floor so the restaurant can reopen quickly?
Plan a step-by-step workflow: measure flatness, prepare the surface (clean, grind high spots, prime if required), apply leveling compound, and cure fully before hardwood installation. Use downtime-efficient sequencing by starting in low-traffic areas first and targeting repairs early to reduce delays. Confirm cure times and moisture conditions before placing any hardwood floorboards, since trapped moisture or incomplete curing can lead to bonding failures or future flooring issues. For faster turnaround, coordinate deliveries of leveling products and hardwood and keep a strict flatness checklist so you don’t have to redo leveling after underlayment placement.
📅 Last Updated: October 17, 2026 | Topic: How to level a hardwood floors before installing restaurant? | Content verified for accuracy and freshness.
References
- Wood flooring
- https://en.wikipedia.org/wiki/Floor_screed
- Screed
- Concrete slab
- E1155 Standard Test Method for Determining FF Floor Flatness and FL Floor Levelness Numbers
- F1869 Standard Test Method for Measuring Moisture Vapor Emission Rate of Concrete Subfloor Using …
- https://scholar.google.com/scholar?q=hardwood+floor+installation+subfloor+flatness+tolerance Google Scholar
- https://scholar.google.com/scholar?q=ASTM+F1869+F2170+moisture+testing+wood+flooring+before+installation Google Scholar
- https://scholar.google.com/scholar?q=concrete+floor+leveling+self-leveling+compound+before+wood+floor+installation Google Scholar


[…] sealing them with a commercial-grade, chemically resistant polyurethane (and backing it with proper subfloor prep and full-edge flashing). If you want floors that can handle spills, wet mopping, and high-traffic […]