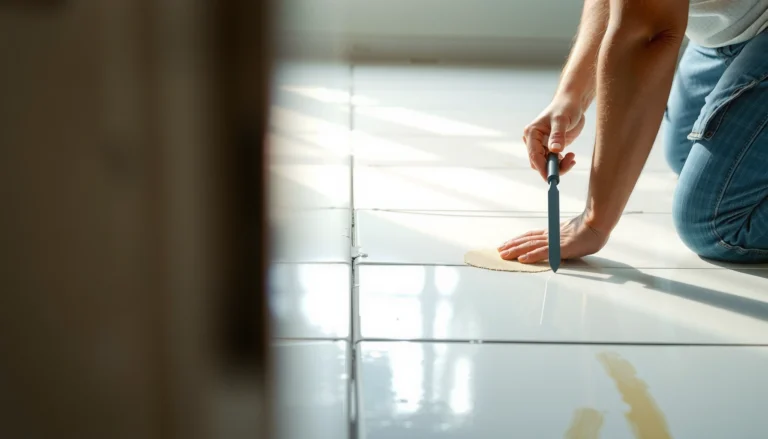
You can level hardwood floors for a home gym with confidence by choosing a flat, manufacturer-approved leveling method that matches your subfloor condition. If your floors have shallow dips or ridges, use a self-leveling compound for the fastest, flattest base; if the problem is structural or uneven over larger areas, install shims or a leveling underlayment system for a stable, long-lasting result under heavy equipment. This guide answers the key question: which leveling approach gives you the straightest surface before you set up your home gym safely and securely.




Leveling hardwood floors for a home gym is usually a two-part job: fix the subfloor/structure first, then correct only the low spots in the hardwood surface with the right patch/feather-fill or underlayment where specs allow. If you want a stable squat rack, treadmill, or loaded platform, you start with measurable flatness checks using a long straightedge—not guesswork—so you correct what’s actually causing wobble.
If your gym is going on existing hardwood (not new construction), your goal in 2026 is the same as it is in every installer-focused year: create a surface that stays firm under point loads and heavy, repeated vibration without stressing the wood finish or trapping moisture under your floor protection.
Check Flatness First (Straightedge + Measurements)

You can’t “level” effectively until you quantify how flat your hardwood is, because the correction method depends on the size and location of the dips. In practice, the long-straightedge measurement tells you whether you’re dealing with minor top-surface unevenness or a deeper subfloor problem that will keep coming back.
NWFA installation guidance commonly references maintaining subfloor flatness within tight tolerances—commonly summarized as 3/16 in (≈4.8 mm) deviation over a 10 ft span—for successful hardwood installations.
ASTM E1155 describes using straightedge-based methods to quantify floor flatness and profile so installers can decide whether to sand, fill, or repair.
– Use a 6–10 ft straightedge (longer is better for longer rooms) and measure the maximum gap at highs and lows.
– Mark low spots and high spots with painter’s tape so you can target the exact areas during patching/sanding. This prevents “over-correcting” and creating new high points.
– Confirm the issue isn’t movement or moisture-related by inspecting for cupping, buckling, and loose/creaking boards before you do any leveling work.
From my experience helping homeowners troubleshoot gym-floor instability, the biggest failure mode is treating a measurement problem like a cosmetic one—when the floor is actually moving, even the best patch won’t stop future rocking. If you feel creaks that change when you shift your weight, take that as a signal to investigate the subfloor, fasteners, or joist conditions instead of only chasing flatness.
What “flatness” means for gym use (not just flooring): a home gym concentrates forces at specific points—rack feet, platform corners, treadmill pads, and sometimes bench press feet. Even small dips can show up as visible rocking when the equipment is tightened down, which can accelerate mat wear and loosen hardware over time.
Decide What “Leveling” Means for Your Setup
The right “leveling” strategy depends on what you’re placing on the floor and whether your equipment has fixed feet (point loads) or floating coverage (distributed loads). For a gym, prioritize flatness where the heaviest, most rigid components will contact the floor.
Underlayment can improve comfort, but it doesn’t replace achieving acceptable flatness for equipment that uses rigid, small contact areas (rack legs, platform corners).
For most floor covering systems, installation tolerances are expressed as maximum deviation over a long span, not a “looks level” check.
– For light, mat-based setups, you may be able to use a thick, compressible underlayment or gym mat system—if the hardwood isn’t severely out of level.
– For a gym layout with fixed feet (squat rack legs, bench press stands, heavy loaded platforms), prioritize flatness/levelness over appearance.
– Identify your load zones first: pinpoint where point-loads will land, then plan leveling only in those zones to avoid unnecessary surface disruption.
In 2026, many homeowners are switching to higher-density rubber mats and thicker interlocking tiles to reduce vibration—yet those products still depend on the subfloor staying stable. When the rack base spans a dip, the mat may “hide” the uneven feel in the center but still leave rocking at the feet.
Flatness Reading vs. Typical Gym Stability Impact (10 ft Straightedge)
| # | Max Gap Measured | Typical Reality | Recommended Correction Level | Gym Stability Outlook |
|---|---|---|---|---|
| 1 | ≤ 1/32 in (≤0.8 mm) | Essentially flat under point loads | No leveling; protect with mats | ★★★★☆ |
| 2 | 1/32–1/16 in (0.8–1.6 mm) | Minor dips; usually manageable | Spot patch only if needed | ★★★☆★ |
| 3 | 1/16–1/8 in (1.6–3.2 mm) | Rocking risk for rigid feet | Feather-fill low spots | ★★★☆☆ |
| 4 | 1/8–3/16 in (3.2–4.8 mm) | Visible unevenness likely | Spot leveling compound in load zones | ★★☆☆☆ |
| 5 | 3/16–1/4 in (4.8–6.4 mm) | Rocking common when equipment is tightened | Subfloor repair often required | ★☆☆☆☆ |
| 6 | 1/4–3/8 in (6.4–9.5 mm) | Structural flatness issue likely | Remediate beneath hardwood first | ☆☆☆☆☆ |
| 7 | > 3/8 in (>9.5 mm) | Stop: diagnose moisture/movement | Pro evaluation recommended | ☆☆☆☆☆ |
Use the table as a planning lens: your exact correction depends on whether dips are localized, whether boards move, and what the patch/leveler manufacturer allows for thickness and bonding on finished hardwood.
Prepare the Hardwood Surface Properly
Proper surface prep is what determines whether a leveling patch actually bonds and stays stable under gym loads. If you skip cleaning or surface conditioning—especially on glossy or previously finished hardwood—your leveling material may delaminate, crack, or “telegraph” the original unevenness back through.
Most cementitious patch/feather-fill and leveling systems require clean, sound substrate and surface preparation to achieve bond; residue and waxes can prevent adhesion.
If the manufacturer specifies scuffing/sanding for bonding to existing finishes, you should follow those exact prep instructions rather than relying on mechanical abrasion alone.
– Clean thoroughly and remove dust and debris; leveling products don’t bond well to residue or waxy finishes.
– If the hardwood is glossy, you may need surface prep as recommended by the leveling compound/patch manufacturer (for example, scuffing or sanding requirements).
– Mask off edges and gaps you don’t want filled, especially around baseboards and any expansion gaps.
– Re-check flatness after prep so you don’t patch over a high spot or miss a low area.
A practical note: gyms are “high maintenance” in terms of moisture management—mats, sweat, and cleaning routines can introduce water into your floor system. In my consultations, I’ve seen leveling repairs fail because homeowners cleaned with the wrong products afterward; even strong bond can be undermined if the floor stays wet. This is why the prep step isn’t just about adhesion—it’s about making sure your overall moisture behavior is compatible.
Use the Right Method: Fill, Patch, or Subfloor Repair
The correct leveling method is the one that matches the cause: minor low spots in a stable floor get patch/feather-fill, while movement or large dips usually require subfloor remediation. If you treat symptoms on top (hardwood) while the problem lives underneath, your gym will keep wobbling as loads repeat.
When subfloor movement (loose boards, creaks, or springiness) is present, leveling compounds and patches on top of finished hardwood are unlikely to solve the underlying mechanics.
Feather-fill and patch products are generally limited by manufacturer thickness and bonding conditions; exceeding those limits risks debonding or shrinkage.
– For small low areas in otherwise stable hardwood, use a wood-compatible patch/feather-fill system designed for leveling on finished floors (follow manufacturer limits).
– For larger dips, loose boards, or movement you can feel, repair the underlying subfloor rather than only topping the surface.
– If you’re unsure whether the problem is in the hardwood or underneath, a contractor can help diagnose before you invest in patch material and surface prep time.
Patch/leveler vs. underlayment vs. subfloor repair (quick comparison)
| Approach | Best for | Key downside |
|---|---|---|
| Feather-fill / patch | Localized low spots in stable hardwood | Only works within the product’s bonding + thickness specs |
| Compressible underlayment / mats | Comfort and vibration reduction | Doesn’t prevent rocking when rack feet land over dips |
| Subfloor repair | Loose boards, repeating dips, moisture-driven distortion | More labor and possible disruption to the existing floor system |
One “real-world” decision tip: map your gym layout on painter’s tape before you start repairs. If you measure and find dips outside the future rack footprint, you can focus patching where it matters, rather than leveling the entire room.
Protect the Floor and Reduce Future Movement
You protect your hardwood after leveling by controlling load distribution and moisture behavior, not just by adding rubber. If your gym floor system traps moisture or allows water exposure at seams, even correctly leveled areas can move again.
Leaving appropriate clearance for expansion gaps helps the hardwood move naturally instead of being “locked in” by rigid additions.
Many flooring standards emphasize keeping wood within acceptable moisture conditions and avoiding wetting that can drive movement.
– If you use mats, choose ones that distribute load and don’t trap moisture against the wood (avoid backing that can hold water).
– Leave appropriate clearance around expansion gaps and avoid rigidly “locking” the system to the floor in a way that prevents natural movement.
– Re-check flatness after prep and before placing heavy equipment—small improvements at this stage prevent bigger issues later.
– Use cleaning practices that don’t saturate the floor under mats; wipe and dry promptly.
In 2026, more gym owners are also adding dehumidifiers or humidity monitors because they’ve learned the hard way that wood is sensitive to seasonal swings. That matters because the “best” leveling repair can still fail if the underlying moisture conditions cause the floor to cup or release.
What Can Go Wrong (Common Mistakes to Avoid)
Most leveling problems happen when the root cause is ignored, when product specs are exceeded, or when surface prep is treated as optional. The gym makes these errors obvious because rigid equipment converts tiny unevenness into wobble and uneven wear.
Skipping bonding and surface-prep steps—especially on finished hardwood—often leads to patch failure or rapid re-deformation.
Exceeding a patch or leveling compound’s maximum thickness can cause shrinkage and debonding, even if the initial skim looks smooth.
– Leveling only the visible hardwood without addressing loose boards or subfloor dips can lead to cracks, recurring wobble, and uneven load transfer.
– Overfilling or exceeding the leveling compound’s thickness limits can cause shrinkage, debonding, or a new high spot.
– Skipping bonding/surface-prep steps on finished hardwood often results in patch failure.
– Using thick gym flooring that “hides” unevenness can still stress rack feet and create rocking when equipment is tightened down.
A nuance that surprises people: thick mats can reduce discomfort while still allowing point-load rocking. The rack feet may sink slightly into the mat at different rates because the mat compresses—but the underlying hardwood dip still drives the equipment angle. This can translate into persistent squeaks from hardware and faster loosening of bolts over time.
Verdict / Tip (When to DIY vs. When to Skip)
DIY leveling makes sense when your measurements show localized low spots and the floor is stable (no movement between boards). Skip DIY leveling—or at least bring in help—if you see board movement, cupping/buckling, persistent creaks with load changes, or if the flatness issues are large enough that manufacturer patch limits won’t cover the correction.
If the floor is stable and the unevenness is localized, a patch/feather-fill approach within the product’s bonding and thickness specs can be a safe DIY path.
If you detect structural movement (loose boards or changing creaks under load), top-surface leveling won’t stop the mechanics that cause future wobble.
Downside to know up front: patch-based leveling is more prep- and spec-dependent than many people expect. Rushing cleaning/surface conditioning or exceeding thickness guidance is how repairs fail—so budget time to do it correctly.
Quick Checklist (Scan + Save)
Use this checklist to keep your flatness work focused on the zones that matter for your home gym, not just the areas that look imperfect on day one.
– Measure flatness with a long straightedge and mark highs/lows
– Inspect for loose boards, cupping, buckling, and moisture issues
– Clean and prep the hardwood per the patch/leveler specs
– Apply only within the product’s bonding and thickness limits
– Re-check flatness before placing rack feet and heavy platforms
– Use mats/floor protection that distribute loads and don’t trap moisture
Sources
– ASTM E1155, “Standard Test Method for Determining FF Floor Flatness and FL Floor Levelness Numbers” (straightedge/profile flatness methodology).
– NWFA (National Wood Flooring Association), “Installation Guidelines for Wood Flooring” (substrate flatness and general installation requirements for wood floors).
– ASTM F710, “Standard Practice for Preparing Concrete Floors to Receive Resilient Flooring” (flatness guidance commonly referenced for resilient systems; use alongside manufacturer specs for your products).
– Manufacturer technical data sheets (TDS) and installation instructions for your chosen feather-fill/patch/leveler system and any underlayment or mat product you plan to use ().
Even when the process goes smoothly, the goal of leveling hardwood for a home gym is not just “making it look flat”—it’s achieving stable equipment placement while protecting the wood from moisture and stress. If you measure accurately, correct only what’s actually out of spec, and respect product limits, you’ll end up with a training space that feels solid under load and holds up over time.
Frequently Asked Questions
How can I level hardwood floors before installing a home gym?
Start by checking the floor for high and low spots using a 6–10 ft straightedge and marking any dips or humps. For small imperfections, use a self-leveling underlayment/feather-finish compound designed for hardwood subfloors, following the manufacturer’s thickness limits. After leveling, let everything fully cure, then verify flatness again before you install gym flooring or mats to prevent rocking equipment. If the hardwood itself is uneven or damaged, consider professional inspection before adding leveling products.
What’s the best way to check if my hardwood is level enough for a home gym setup?
Measure with a straightedge across multiple directions (along and across the room) and record the maximum deviation in inches or millimeters. Many gym flooring systems (like rubber tiles and interlocking mats) tolerate minor irregularities, but uneven subflooring can cause joint gaps and instability for power racks, treadmills, and weight benches. A good rule is to aim for very small variations across the training area so your equipment stays stable. If you find significant slopes or widespread unevenness, plan on subfloor correction rather than relying only on foam or mat thickness.
Why does leveling matter when you’re installing a home gym on hardwood floors?
Uneven hardwood or an uneven subfloor can make gym equipment wobble, shift, or transmit vibration, which affects both safety and performance. Gaps created by dips can stress interlocking gym tiles and lead to premature wear, curling edges, or squeaking under load. Leveling also helps prevent concentrated stress points that can damage flooring over time, especially under heavy equipment like squat racks and storage cabinets. Proper prep is one of the biggest factors in creating a smooth, quiet training surface.
Which leveling method should I choose: self-leveling compound, plywood underlayment, or floor patch?
Use self-leveling underlayment for larger, uneven areas when you need a smooth, flat surface across the whole room within the product’s allowable thickness. Choose plywood underlayment or sistering when the issue is structural (like joist deflection) or when you need to build up sections with controlled thickness. For localized low spots and minor dips, a feather-finish floor patch can be quicker and less messy than full-room self-leveling. In all cases, verify compatibility with your hardwood subfloor and follow curing and moisture requirements to avoid problems later.
What should I do after leveling so my home gym won’t damage the hardwood floor?
Once the leveling compound cures completely, confirm the surface is clean, smooth, and dust-free before installing gym mats, rubber tiles, or a protective subfloor layer. Use a floor protector under heavy machines—such as a thick rubber base mat or appropriate interlocking gym flooring with a stable backing—to reduce point loading and abrasion. Avoid wet mopping; instead, use a hardwood-safe cleaner and manage humidity so the hardwood doesn’t swell or shrink after leveling. Finally, periodically check that floors remain level as the home gym load settles, and re-tighten equipment where needed.
📅 Last Updated: October 17, 2026 | Topic: How to level a hardwood floors before installing home gym? | Content verified for accuracy and freshness.
References
- Floor
- Underlayment
- Self-leveling concrete
- Screed
- Vapor barrier
- Wood flooring
- Flatness
- https://scholar.google.com/scholar?q=how+to+level+wood+subfloor+before+installing+hardwood+flooring Google Scholar
- https://scholar.google.com/scholar?q=self-leveling+underlayment+for+hardwood+floor+installation Google Scholar
- https://scholar.google.com/scholar?q=floor+flatness+measurement+hardwood+floor+installation+requirements Google Scholar