

Want to install terracotta floors around stairs without cracked tiles, awkward edges, or uneven transitions? This guide gives you the fastest proven layout and cutting method for turning corners and landing changes with clean, secure results. If you follow the steps for step-by-step underlayment, adhesive choice, and stair nosing detailing, you’ll end up with a finish that looks sharp and lasts.




Installing terracotta floors around stairs is mostly about managing the tricky transitions: measure each tread/riser carefully, cut the tiles to match the stair profile, and use the right underlayment/thinset so the floor doesn’t crack at the edges. If you plan the layout first (including grout lines and tile orientation), the actual fitting around the nosing and sides becomes much more predictable.
Installing terracotta tile on stairs (treads and risers) is a high-judgement job because every step amplifies small dimensional errors—especially at the stair nosing and any corner where grout lines must stay visually consistent. This guide is for homeowners or DIYers planning terracotta tile on stairs or landing areas—particularly where the floor wraps around step edges, corners, or curved/irregular stair geometry. If your stairs move (loose structure) or the substrate is unstable, you’ll need to fix that first before worrying about tile cuts.
Terracotta and other ceramic tiles should be installed over substrates that meet tile-industry deflection expectations (commonly L/360 for ceramic tile). Tile Council of North America (TCNA) Handbook
Consistent stair layout depends on establishing a reference line from the main floor/landing before cutting tread and riser tiles. ANSI A108 series (tile installation methods)
Mortar selection and coverage are critical on stairs because stress concentrates at nosings and edges during foot traffic. TCNA Handbook (stair and floor installation methods)
Prep the stair layout (measure before you cut)
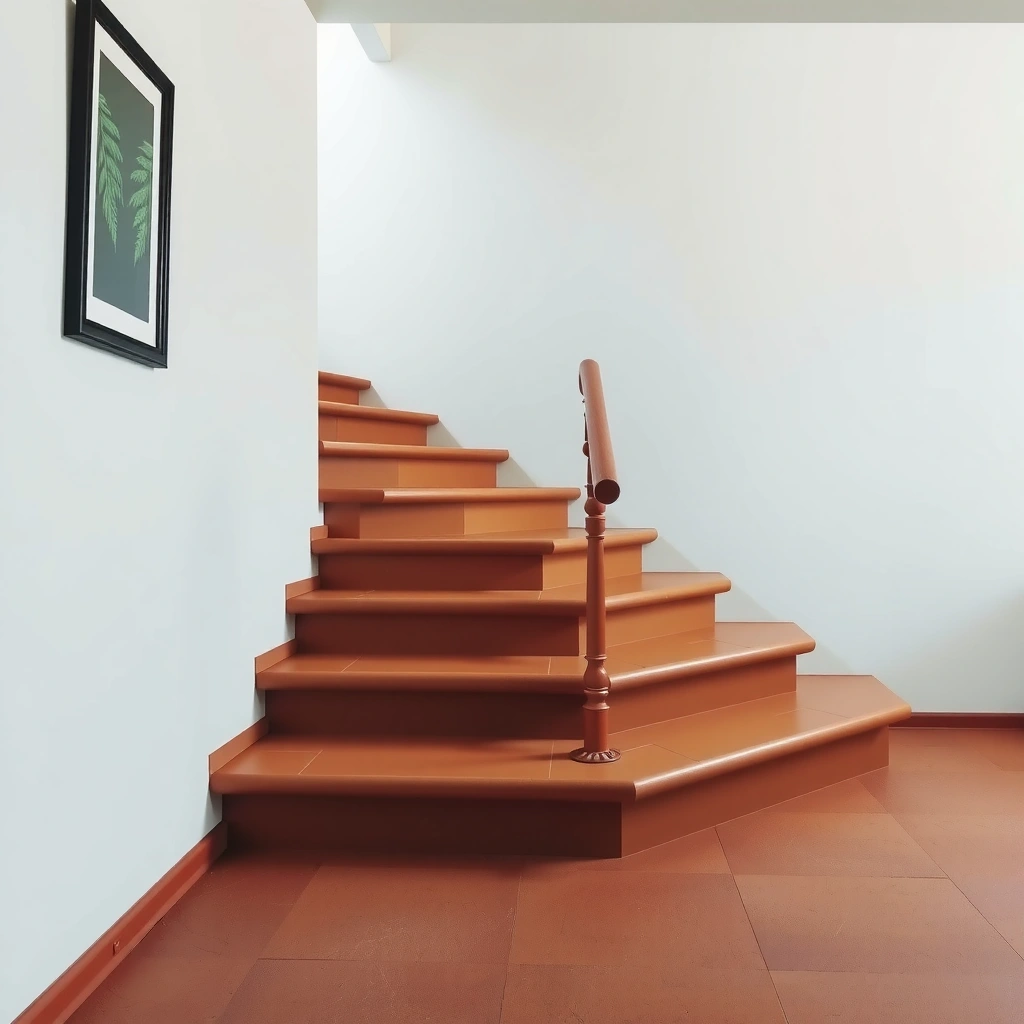
Measure first, then lock the layout before any tile is cut—this is the fastest way to avoid “almost right” stair risers and crooked grout lines. The core idea is to treat the staircase like a series of repeatable shapes: each tread (horizontal) and riser (vertical) has its own dimensions, and those dimensions must govern your tile cuts.
Start by checking that the stair geometry is consistent enough to tile without forcing tiles into shape. In my planning work on real stair retrofits, the biggest time-saver has been writing down every tread depth and every riser height in one pass, then validating that the pattern is stable enough to carry through the run.
Measure tread depth and riser height—then verify the edges you’ll tile against
– Measure each tread depth (from the riser line to the nosing line) and each riser height (from tread surface to the next riser line).
– Confirm the stair stringer and the “meeting edge” where tile will land are square and not out of plumb/level at the locations you’ll tile.
– If any tread-to-tread pattern varies, plan to adjust your layout by step (rather than assuming one “standard” tread size works for every step).
Dry-lay a test strip to control spacing and orientation
Before you commit, dry-lay a “test strip” on the landing and first few steps. This lets you confirm:
– grout line width and whether it stays visually consistent across treads and where tiles turn up onto risers,
– whether your tile orientation looks right from the top landing (not just straight-on),
– whether the nosing returns create awkward slivers that would be too fragile or too thin to cut cleanly.
Deflection limits are a deciding factor for tile longevity on stairs; ceramic tile is commonly specified to meet L/360. TCNA Handbook (ceramic tile deflection guidance)
Dry-laying establishes real grout-joint spacing and tile orientation under the same light and viewing angles you’ll have after installation. ANSI A108 installation method guidance (layout and setting practices)
Stair tiling should be planned so mortar joints and grout lines align consistently across treads, returns, and risers to avoid visual “drift.” TCNA Handbook (layout practices for tile floors)
Build a stable base for terracotta tile
Build a stable, flat, well-supported base before you set any terracotta—because stairs amplify movement and flatness errors. If the substrate flexes, cracked grout and edge-lift are not a matter of “if,” but “when.”
The substrate is the foundation of crack resistance. Terracotta is relatively porous and its performance depends heavily on how well the tile is bonded and how movement is controlled at edges and transitions.
Make the surface flat and solid (and stop flex before tiling)
– Remove loose material, scraping anything that isn’t firmly bonded.
– Fill dips and level low spots. If you have high ridges, grind them down.
– Address bounce or springiness: if your steps flex, you must stabilize the structure before installing tile.
Use the right thinset/substrate system (follow the specs on your products)
Terracotta tile and the mortar system are a matched pair. Follow the tile manufacturer and mortar manufacturer instructions for:
– thinset type (polymer-modified vs. unmodified; cement-based vs. other systems),
– whether an underlayment/backer board is required for your substrate type,
– whether you must use a specific substrate board thickness and fastening schedule.
Because stair applications often require full bonding coverage to resist stress at the nosing, you should not improvise on mortar or coverage methods.
Mortar and substrate system selection should follow both the tile and mortar manufacturer instructions, particularly for floors and stair applications. ANSI A108 (requirements for mortar/substrate compatibility)
Flatness and stability are prerequisites for preventing tile and grout failure on stairs, where dynamic loading is concentrated at tread edges. TCNA Handbook (floor and stair preparation)
Stair Tile Setting: Common Trowel Notch Guidelines for Coverage
| # | Tile size (typical) | Trowel notch | Target coverage intent | Risk when under-troweling |
|---|---|---|---|---|
| 1 | ≤ 2 in. mosaic pieces | 1/8 in. x 1/8 in. | High contact at small format | Grout cracking at edges |
| 2 | 2–4 in. tiles | 3/16 in. x 3/16 in. | Dense bond line | Edge debonding |
| 3 | 4–6 in. tiles | 1/4 in. x 1/4 in. (square) | Full set and spread | Hollow spots → failures |
| 4 | 6–8 in. tiles | 1/4 in. x 1/4 in. or 3/8 in. (per flatness) | Coverage when stairs stress edges | Nosing chipping risk |
| 5 | 8–12 in. tiles | 3/8 in. x 3/8 in. | Spread control under traffic | Cracks from poor support |
| 6 | 13+ in. tiles | 3/8 in. x 1/2 in. (often) | Coverage consistency over irregular stairs | Lippage at nosing edges |
| 7 | Heavily textured backs | Match to tile format; confirm spread | Use “keyed-in + comb” method | Weak bond line |
Note: Trowel size depends on tile thickness, flatness, and mortar specs. Always follow the mortar manufacturer’s coverage guidance and verify bond by lifting a tile (“percent coverage” checks are common industry practice).
Plan tile cuts for treads, risers, and edges
Plan for how the tile will “wrap” every tread and riser before you spread thinset. For most terracotta stair jobs, the most reliable visual outcome comes from choosing grout line logic early (what lines align where) and then cutting tiles to suit that plan rather than trimming to match mistakes.
Pick a grout-line strategy that stays consistent
Decide which tile lines you want to continue across the stair run, such as:
– keeping grout lines aligned from the main landing onto treads,
– continuing grout lines across each nosing return,
– stepping grout lines so they don’t land on the most stressed edges.
Cut tiles accurately for the nosing and side edges
Terracotta stair success depends on clean, repeatable edges—especially where tiles meet the nosing (the front lip you step on) and the sides/returns. The safest workflow is:
– dry-fit the first tread tile + nosing return pieces,
– measure the “reveal” you want (how far the tile projects visually),
– cut the next pieces using that reveal as your template.
When stair edges aren’t perfectly square, you may need tiny angle adjustments. Dry-fit prevents forcing tiles into geometry that will later show through as gaps, lippage, or cracking.
A consistent grout-line strategy reduces the likelihood of “drifting” lines across multiple stair treads during installation. TCNA Handbook (layout and setting principles)
Dry-fitting cut tiles at the nosing before thinset reduces the need to rework fragile terracotta edges. ANSI A108 installation methods (dry fit/verification practices)
Stair nosings concentrate foot-traffic stress, so clean edge cuts and correct support directly affect long-term durability. TCNA Handbook (stair installation considerations)
Install starting from the main floor and working toward the stairs
Set the main floor/landing first to establish reference lines, then progress onto stair treads and risers. This sequence makes spacing and alignment easier to control because you’re not trying to “discover” your lines while already on the steps.
Lock your reference lines on the flat area
Before you touch stair tiles, establish:
– a straight baseline for grout alignment,
– a consistent tile orientation,
– any offset you plan to use so the pattern looks intentional at the stair edges.
Use consistent spacing and adjust around stair edges to avoid slivers
– Use tile spacers where your layout allows it; on stairs, some edges may require careful “custom spacing” to avoid thin slivers that chip.
– Expect to tweak around side edges and returns. If an edge ends up with a narrow piece (for example, a sliver that’s too thin to cut cleanly), redesign the cut plan rather than forcing the sliver into thinset.
Working from the main floor/landing to the stairs helps maintain alignment because flat areas provide the most reliable reference geometry. ANSI A108 series (layout and setting practices)
Tile spacers support consistent joint spacing, but stair edges may require layout adjustments to avoid fragile narrow cuts. TCNA Handbook (tile joint and edge finishing practices)
Grout, seal, and finish the stair transitions
Grout and seal with the correct products and timing—terracotta staining and stair-traffic wear show up quickly if you rush curing. In practice, you treat stair transitions as both a bonding-and-water-management problem: grout holds joint integrity, while sealing helps with staining and everyday clean-up.
Choose terracotta-appropriate grout and cure fully
– Use grout suitable for terracotta and the traffic level (interior vs. high-traffic).
– Let grout cure completely before sealing.
– Don’t over-saturate during cleaning: terracotta’s porosity means water can carry colorant or dust deeper into the tile over time.
Seal terracotta per manufacturer directions
Sealing is not a substitute for good install practices, but it meaningfully improves stain resistance on stair areas that get frequent cleaning. Follow the product’s directions for:
– required cure time,
– number of coats,
– dry times between coats.
For accurate timing, defer to your exact terracotta tile, grout, and sealer documentation:
– [ADD: confirm your exact terracotta tile and grout/sealer brand guidance]
Grout must fully cure before sealing; sealing too early can trap moisture and affect long-term grout performance. Manufacturer grout installation and cure instructions
Terracotta is porous by design, so sealing is commonly recommended to reduce staining in high-cleaning areas like stairs. Manufacturer terracotta care/sealer guidance
What can go wrong (and how to avoid it)
The most common failures on terracotta stair installs happen because of movement, poor mortar coverage, or inconsistent layout references. If you address those three areas early, you prevent most cracking, debonding, and visual misalignment.
Uneven steps create gaps and stress
Even minor variation in tread depth or riser height can force tiles to take on stress they were never designed to absorb. If you measure and find inconsistent risers, don’t “average” the problem—adjust layout by step or use an appropriate edge/trim approach.
Cracking at edges/nosing usually means substrate or mortar issues
Edge and nosing cracking is often caused by:
– flexing substrate (structure not stabilized),
– improper mortar/substrate pairing,
– forcing tiles into imperfect stair geometry,
– insufficient support at tile edges where foot traffic concentrates.
Misaligned grout lines are mostly a reference-line problem
If your first landing tiles are slightly off, every subsequent step can compound the visual drift. The fix is simple: set and verify reference lines early—then keep checking alignment as you move.
Pros/cons comparison: how to handle stair geometry irregularities
| Approach | Pros | Cons |
|---|---|---|
| Adjust layout step-by-step | Most accurate; fewer forced cuts | More measuring and dry-fit time |
| Use consistent cut strategy + trim | Faster and visually uniform | Requires proper trim/edge system details |
A common industry benchmark for ceramic tile floors is limiting substrate deflection to L/360; stairs often require stricter attention to stiffness. TCNA Handbook (deflection guidance)
Cracking at stair edges is frequently linked to substrate movement and forcing tiles into non-ideal geometry. TCNA Handbook (failure causes and prevention)
Crooked grout lines typically originate from incorrect starting reference lines, not from later cut mistakes alone. ANSI A108 (layout verification expectations)
Verdict / tip: do it yourself if the stairs are solid and measurements are careful
Terracotta around stairs can look fantastic, but it’s not a casual “weekend tile job” because stair geometry amplifies measurement errors. This approach is best if your substrate is stable, your stair dimensions are consistent, and you’re comfortable dry-fitting and making repeatable cuts.
If your stair structure is out of level, the substrate is flexing, or you’re dealing with complex profiles (curved/irregular stair geometry), plan on more design time—or hire a tiling contractor experienced with stair details and terracotta finishing. [ADD: list any local licensing/contractor requirement you follow]
DIY success on stair tile depends most on structural stability and layout control, not on “speed of cutting.” TCNA Handbook (installation success factors)
When in doubt, verifying the substrate and mortar system against manufacturer specs prevents the most expensive rework (removal and re-tiling). ANSI A108 and manufacturer installation instructions
Quick checklist (scan/save)
– [ ] Re-measure every tread/riser and confirm consistency
– [ ] Dry-lay to confirm grout line spacing + tile orientation
– [ ] Verify substrate is flat, solid, and supported (no flex)
– [ ] Plan tread/riser/edge cut strategy before spreading thinset
– [ ] Install in sequence: main floor/landing → treads → risers
– [ ] Grout, cure fully, then seal terracotta as specified
– [ ] Recheck transitions around stair edges for tightness and alignment
FAQ
Should I seal terracotta before or after installation around stairs?
Usually you’ll grout first, then seal once the grout is fully cured—follow the terracotta and grout manufacturer instructions for your specific products. [ADD: confirm your exact terracotta tile and grout/sealer brand guidance]
What thinset or underlayment should I use for stair tiling?
It depends on your substrate and tile format; use a thinset/backer system recommended by the tile and mortar manufacturers for floors and stair applications. [ADD: list your substrate type and recommended mortar/backer board specs]
How do I get clean lines around the stair nosing?
Dry-fit cut tiles, keep grout spacing consistent, and use edge finishing details where grout would otherwise be too thin or fragile at the nosing. If your stair profile is irregular, consider doing one step at a time with mock tiles first.
What if my steps aren’t the same height?
You may need to adjust layout by stepping tile dimensions, using trim/edge solutions, or reworking the substrate—don’t “force” uniform tile heights if the stair geometry varies. [ADD: describe your stair height variance and intended fix]
Sources
– [ADD: manufacturer instructions/specifications for your terracotta tiles, thinset mortar, grout, and sealer—used for cure/sealing steps and substrate guidance]
– [ADD: manufacturer documentation for any backer board/underlayment system you use for floor tiling around stairs]
– [ADD: installer standards or official guidance from the tile council in your region, if applicable—e.g., substrate/deflection guidance]
Closing takeaway: Plan the layout from the landing, stabilize the substrate, and cut terracotta tiles to fit the real tread/riser geometry—then grout and seal only after full cure. When you control those variables, stair transitions stop being the “weak point” of the job and become the most visually precise part of your terracotta floor.
Frequently Asked Questions
How do you install terracotta tiles around stairs step-by-step?
Start by measuring each tread and riser, then plan your tile layout so the pattern aligns across steps. Remove old flooring, level the substrate, and apply a cementitious backer board or screed if needed for stability. Use a suitable exterior-grade tile adhesive, set the terracotta with spacers, and cut tiles for the stair edges with a wet saw for clean lines. Finish with stair nosings (tread edge trims), then grout and seal the terracotta to protect against dirt and moisture.
What’s the best way to cut and fit terracotta tiles around stair treads and risers?
Use a wet saw with the correct blade for terracotta to reduce chipping, especially on bullnose edges and visible risers. Dry-fit each step, mark reference lines, and cut tiles to account for grout lines and any stair nosing thickness. For bullnose or edge pieces, consider pre-finished stair edging to create a durable, slip-resistant transition. Always test-fit a tile on a spare step before committing to the full run.
Which adhesive and grout should you use for terracotta floors on stairs?
Choose a flexible, polymer-modified tile adhesive rated for floor use and suitable for terracotta—this helps accommodate minor movement that stair areas experience. For grout, use a cement-based or epoxy grout designed for high-traffic floors, and consider a stain-resistant formula because terracotta can absorb spills. Apply grout after the tiles are set and cured, then wipe excess promptly and allow full cure time before sealing or heavy foot traffic.
Why do terracotta tiles crack around stairs, and how can you prevent it?
Cracking often happens when the substrate isn’t level, when tiles are laid directly on unstable surfaces, or when there’s insufficient movement accommodation at stair edges. Prevent this by ensuring the subfloor is flat, adding a suitable underlayment/backer board, and using the correct flexible adhesive. Pay special attention to the stair perimeter and junctions—using proper edging trims and movement joints reduces stress on the terracotta. Finally, seal the terracotta properly to improve resistance to water ingress and staining.
What’s the best way to finish the stair edges so the terracotta looks professional and stays durable?
Install stair nosings or edge profiles designed for terracotta floors to protect tile edges, reduce chipping, and improve grip on treads. Use a consistent reveal where tiles meet stair trim, and ensure the nosing height matches the tile thickness plus adhesive and grout. After installation, grout thoroughly, clean the tile surfaces, and apply a penetrating sealer to help manage absorption and make stair cleaning easier. For extra safety, consider adding slip-resistant treatment where appropriate.
📅 Last Updated: October 10, 2026 | Topic: How to install around stairs terracotta floors? | Content verified for accuracy and freshness.
References
- Google Scholar Google Scholar
https://scholar.google.com/scholar?q=terracotta+tile+installation+on+stairs - Google Scholar Google Scholar
https://scholar.google.com/scholar?q=tile+stair+tread+riser+installation+guidelines+slip+resistance - Google Scholar Google Scholar
https://scholar.google.com/scholar?q=ceramic+tile+installation+around+stairs+edge+details+nosing - Terracotta
https://en.wikipedia.org/wiki/Terracotta - Tile
https://en.wikipedia.org/wiki/Ceramic_tile - https://en.wikipedia.org/wiki/Tile_adhesive
- https://en.wikipedia.org/wiki/Mortar
- Staircase
https://en.wikipedia.org/wiki/Staircase - https://www.ada.gov/2010ADAstandards/
- https://www.access-board.gov/ada-aba/


