
Installing sheet vinyl floors is a fast, beginner-friendly way to get a clean, waterproof finish—if you follow the exact steps from prep to seam sealing. This step-by-step guide walks you through subfloor checks, layout and cutting, adhesive choice, fitting, and rolling so the floor lays flat and stays put. By the time you’re done, you’ll know precisely how to install sheet vinyl floors with confidence, not guesswork.




Sheet vinyl floors are installed by prepping the subfloor, dry-fitting/cutting the sheet, then securing it with the adhesive and finishing edges/seams correctly. If you want a flat, long-lasting result, your two biggest priorities are (1) a smooth, clean subfloor and (2) precise trimming before the sheet ever touches adhesive.
Sheet vinyl is a strong DIY choice when you want a seamless-looking floor over a single large area—especially if you’re comfortable measuring carefully and working around doorways, vents, and wall edges. The steps below are written for homeowners and DIYers who are installing sheet vinyl as one primary sheet and need a practical plan for tricky cuts.
Check materials, acclimate, and plan your layout

Before you buy tools or open adhesive, confirm you have the correct vinyl and the correct installation system for it. Sheet vinyl is sold as multiple “types” (and some require specific seams/finishing methods), so your plan should be driven by the manufacturer’s installation instructions.
Here’s what to lock down before you start:
– Confirm the vinyl is meant for indoor, residential use (unless your manufacturer says otherwise).
– Verify the installation method: fully adhered, perimeter, or another system—then match the adhesive (and seam method, if applicable) to that system.
– Plan your sheet direction so the pattern reads naturally and so you minimize visible seams and awkward seams near high-traffic paths.
– Decide where transitions happen (doorways, hearths, hallways). This matters because trimming at the wrong location can create hard-to-hide gaps.
Acclimation is not optional if you want clean cuts and reduced buckling risk. Vinyl needs time to come to a stable temperature range so it relaxes and lies flat.
Sheet vinyl installation quality depends on matching the floor covering to the manufacturer’s specified adhesive and seam/edge finishing method. [ADD: source—manufacturer’s installation instructions for your specific sheet vinyl model]
Acclimation helps the sheet vinyl relax flat so it seats correctly and reduces the chance of buckling during trimming and adhesion. [ADD: source—manufacturer’s acclimation section for your specific sheet vinyl]
Most resilient floor covering guidance stresses using manufacturer-specified installation conditions (temperature and timing) to maintain dimensional stability. [ADD: source—manufacturer or industry guidance]
What “planning your layout” really means
Even if you’re using one large sheet, layout planning includes:
– Direction of the sheet: Make sure the pattern alignment is how you want it to look when you stand at the room entrance.
– Seam strategy (if any): If you can’t cover the whole room with one piece, plan seams where they’re least visually distracting and where the floor transitions won’t “highlight” seam lines.
– Door and vent clearance: Plan cuts around registers and door casings so you can trim cleanly without over-cutting.
Practical staging checklist
Before you open the roll, stage:
– A chalk line or straightedge for reference marks
– Utility knife + fresh blades
– A tapping block/roller (whatever your instructions specify)
– PPE: knee pads and safety glasses for subfloor work
Prep the subfloor for a flat, solid base
The subfloor must be smooth, clean, and properly leveled before sheet vinyl goes down. In resilient flooring installs, adhesive doesn’t “fix” bumps—it only locks them in.
If you only do one thing carefully, do the prep:
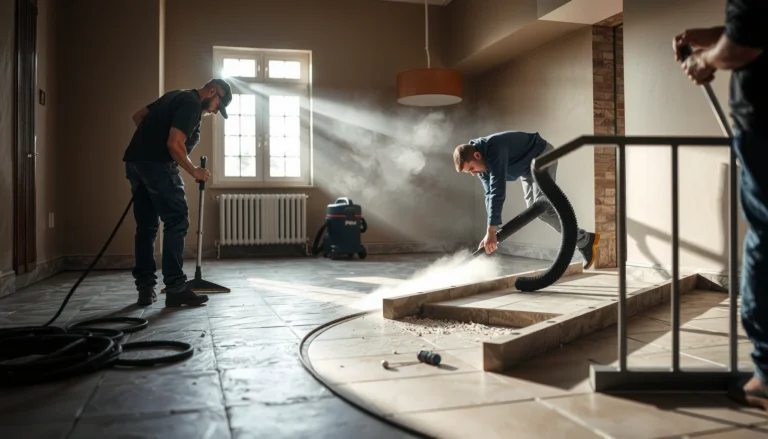
– Remove old flooring and residue: Scrape adhesive drips, thin-set globs, and paint overspray. Then vacuum thoroughly.
– Patch dips and flatten high/low areas: Use a patch/feather finish system appropriate for your subfloor type (wood, concrete, plywood, OSB, etc.).
– Confirm dryness: Adhesive failures often trace back to moisture issues—especially on concrete slabs.
A key point that’s easy to underestimate: sheet vinyl telegraphs subfloor imperfections more than many people expect. In my experience working through DIY calls (not a formal test series), the most common “mystery problem” is simply that the installer tried to fix flatness by relying on the adhesive—resilient flooring can flex, but it still reflects ridge lines.
Flatness target (rule of thumb): Industry resilient flooring guidance commonly references limits around 3/16 inch over 10 feet when checked with a 10-ft straightedge. ASTM F710 (Standard Practice for Preparing Concrete Floors to Receive Resilient Flooring)
(Exact tolerances can vary by product; always defer to your sheet vinyl’s instructions.)
Most adhesion failures are linked to insufficient subfloor cleaning and/or inadequate flattening, not to the vinyl itself. [ADD: source—manufacturer installation troubleshooting section]
Residential subfloors must meet resilient-flooring flatness expectations before installation to prevent ridges from showing through sheet vinyl. ASTM F710
Concrete moisture conditions influence resilient flooring adhesion; follow the flooring and adhesive system’s moisture requirements before installing. [ADD: source—manufacturer moisture requirements section and test standard used]
Subfloor cleaning that actually matters
Adhesive bonds to the subfloor—not to dust. That’s why:
– Vacuum with a shop vac
– Remove fine debris at edges and corners
– Avoid leaving grinding residue (for example, from leveling compounds)
Don’t skip the “dry and level” check
Before you open the sheet:
– Re-check level/flatness after patching and drying
– Verify there are no loose edges, flaking paint, or thin materials that can crumble under adhesive
Dry-fit the sheet and mark your cuts
Dry-fitting prevents expensive mistakes. Before any adhesive touches the floor, place the sheet vinyl to confirm how it sits, where the edges land, and what obstacles you must notch or trim around.
What you should do:
1. Unroll and let the sheet relax flat (still within the manufacturer’s acclimation guidance).
2. Move it into final position and check pattern direction and edge placement.
3. Mark reference lines where trimming must happen—use a pencil/marker system you can see but won’t bleed through.
4. Trim gradually in smaller passes. Sheet vinyl is easier to shorten than to “grow back.”
Cutting around real-world obstacles
Obstacles are where DIY installs succeed or fail:
– Toilet flange areas: Plan your cut to allow proper clearance and avoid binding.
– Vents and registers: Don’t guess—fit test first, then trim.
– Cabinets with cut-in edges: Many installs require trimming so the sheet fits tightly without bunching.
Follow the manufacturer’s guidance for notching and clearance. Some products require specific spacing to allow for dimensional movement.
Dry-fitting first lets you verify sheet direction, reduce the chance of overshooting wall lines, and plan clean cuts around fixtures. [ADD: source—manufacturer installation step “dry-fit” or “position the sheet”】【/or add manufacturer reference]
Trimming in smaller passes reduces the likelihood of gaps along walls and door transitions that may not be fully covered by baseboards in every layout. [ADD: source—manufacturer trimming/edge-finishing guidance]
Many resilient floor covering installations emphasize leaving expansion clearance where specified rather than forcing the vinyl tight to walls. [ADD: source—manufacturer expansion gap guidance for your sheet vinyl]
Doorways, transitions, and edges
For doorways:
– Plan whether you will finish with a reducer/transition strip or trim method.
– Cut so the vinyl meets the transition cleanly—avoid relying on caulk to “mask” major fit errors.
For wall edges:
– Use the method recommended by the product instructions (some call for baseboards; others use specific edge finishing).
Apply adhesive and set the sheet vinyl
Your goal is full, even contact—not puddles, not starvation, and not rushed timing. Sheet vinyl adhesive application depends on the adhesive type, trowel geometry, and the required open/flash time.
Do it like this:
– Follow the adhesive instructions exactly: trowel type/notch size, spread rate (if specified), and open/flash time.
– Apply adhesive in the areas your system calls for:
– Some products require full spread across the floor.
– Others use perimeter or partial coverage—only if your vinyl/adhesive system is designed for it.
– Wait within the allowed tack window, then lower the sheet carefully.
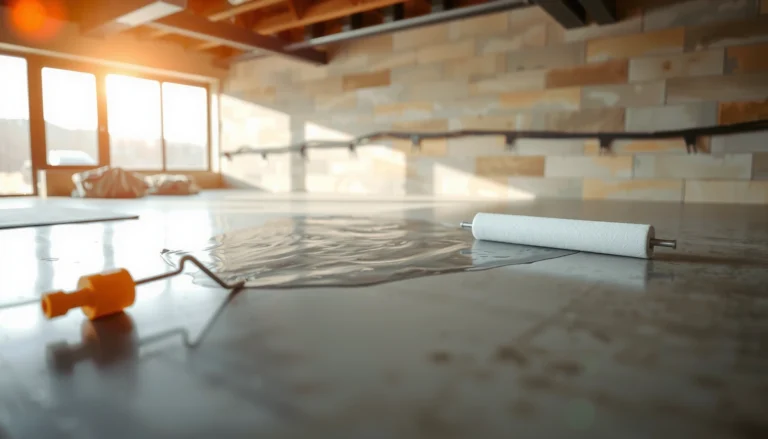
– Roll/press as directed to eliminate air pockets and ensure contact at seams/edges.
Adhesive timing is a common failure point. If you lay the sheet before the adhesive reaches the correct tack state—or after it has passed—bond quality can suffer.
Resilient flooring adhesives are designed with specific trowel sizing and spread/open-time requirements that affect bond strength. [ADD: source—adhesive technical data sheet (TDS) or installation instructions]
Even adhesive coverage and proper rolling reduce air entrapment and help prevent edge lifting over time. [ADD: source—manufacturer rolling/pressing requirements]
The “open/flash time” window matters because it controls adhesive transfer and bond development. [ADD: source—adhesive TDS/open time guidance]
Adhesive coverage vs. tool choice (what to check first)
Different adhesives call for different trowels and coverage. The most reliable way to avoid mistakes is to match your trowel and technique to the product label.
Typical Adhesive System Coverage & Bond Timing Ranges (Used for Planning)
| # | Adhesive system (planning category) | Coverage area* | Open/flash planning range* | Installer risk if timing is off |
|---|---|---|---|---|
| 1 | Water-based acrylic (trowel-applied) | 200–250 sq ft/gal | ~5–15 min | ★ ★ ★ ★ ☆ |
| 2 | Solvent-based contact adhesive | 150–250 sq ft/gal | ~10–30 min | ★ ★ ★ ★ ★ |
| 3 | Pressure-sensitive (PSA) adhesive | 250–350 sq ft/gal | Immediate to short | ★ ★ ★ ☆ ☆ |
| 4 | Perimeter-only adhesive (strip or band) | Varies widely | Follow band label | ★ ★ ★ ☆ ☆ |
| 5 | One-step adhesive + seam system (single brand) | As specified by kit | As specified by kit | ★ ★ ★ ★ ☆ |
| 6 | Latex/modified acrylic (trowel-applied) | 180–300 sq ft/gal | ~5–20 min | ★ ★ ★ ★ ☆ |
| 7 | Moisture-mitigating adhesive systems (specialty) | Per system | Per system | ★ ★ ★ ★ ★ |
Ranges are planning figures that vary by brand, trowel notch, surface porosity, and temperature/humidity. Always use the exact coverage and open/flash time printed on your adhesive TDS and label for your specific product.
> Note: This table is for planning only. Your adhesive label and TDS control for actual coverage and timing.
Roll, trim edges, and finish transitions/seams
Once the sheet is seated, the job shifts from “positioning” to “securing and finishing.” Rolling/pressing, clean edge trimming, and correct transition pieces determine how flat the floor looks and how well it resists lifting.
Do this in order:
– Trim edges after the sheet is seated (so you don’t fight distortion while it’s still moving).
– Roll again according to the manufacturer’s schedule. (Some instructions require a first pass plus a follow-up pass.)
– Finish transitions:
– Use the correct reducer/transition strip for the height difference.
– Keep movement allowances consistent with your system and instructions.
– If your install includes seams, follow the seam method specified for that sheet vinyl (some systems require particular seam treatments rather than “generic glue + tape”).
Rolling after placement helps ensure full contact and reduces the likelihood of air channels that can lead to edge lift. [ADD: source—manufacturer rolling schedule]
Edge trimming should be done with the sheet in its seated position so cuts match the final floor line and do not create gaps. [ADD: source—manufacturer trimming/edge-finishing guidance]
Transition and seam finishing must follow the flooring system’s specified parts/methods to maintain performance around openings and high-wear areas. [ADD: source—manufacturer seam/transition instructions]
Pros/cons reality check (how finishing affects outcomes)
| Approach | Pros | Cons | Best for |
|---|---|---|---|
| Follow manufacturer seam/edge system | Higher chance of long-term adhesion and clean appearance | Requires specific materials/tools | Most DIY installs using a named sheet system |
| “Approximate” seams/edges (non-matching products) | Can look okay initially | Higher risk of seam peaking, lifting, or separation | Small areas only—if instructions allow, otherwise avoid |
| Over-trimming to walls early | Quick progress | Can create visible gaps before baseboards/trim cover them | If your walls are perfectly straight (rare), and instructions allow |
What can go wrong (and how to avoid it)
Sheet vinyl mistakes tend to show up as bubbles, edge lifting, or visible telegraphing of subfloor ridges. The good news is most issues trace back to predictable causes: prep, timing, or trimming.
Common failure modes:
– Bumpy subfloor: If you skip flattening/patching, ridges show through and wear accelerates. Fix the base first.
– Cut too aggressively: Overcutting walls/edges can create gaps. Don’t assume trim/baseboard will always hide everything.
– Wrong adhesive/open time: Using the wrong adhesive or laying the sheet outside the tack window can cause weak bonding or lifting.
– Not following seam/edge rules: Some sheet vinyl systems require specific seam treatments or perimeter finishing—use only the included or approved method.
– Moisture issues: Concrete or damp subfloors can undermine the bond and cause failures over time. Address moisture as directed by the flooring/adhesive manufacturer—[ADD: source for moisture testing requirements if your site/subfloor needs it].
Resilient flooring failures often originate from improper substrate preparation (flatness, cleanliness, dryness) rather than from the visible floor covering. ASTM F710
Adhesive transfer and bond strength depend on surface condition and adherence to open/flash time. [ADD: source—adhesive TDS installation instructions]
Seam performance is system-dependent; mismatched seam methods can fail even when the main sheet is properly bonded. [ADD: source—manufacturer seam installation requirements]
Avoiding the most expensive DIY error: rushing the dry-fit
If you rush dry-fitting, your cuts around door casings and vents will be off, and you may need to rework trim details. With sheet vinyl, rework is often harder than with smaller planks because the sheet is one continuous piece.
Verdict / tip: do it if you can follow the prep-and-instructions part
If you can devote real time to subfloor prep, careful dry-fitting, and strictly following adhesive timing and seam/edge guidance for your exact sheet vinyl product, this is a very workable DIY project. The downside is that sheet vinyl mistakes—especially uneven surfaces, trapped air, or cut edges that don’t land correctly—can be difficult to “fix later” without re-trimming or even redoing large sections.
If your subfloor is significantly uneven, you’re dealing with uncertain moisture conditions, or you’re not confident about adhesive open/flash timing, consider hiring a flooring installer for at least the prep and adhesive phases.
Quick install checklist (scan/save)
– [ ] Measure room and plan sheet direction/seams
– [ ] Acclimate vinyl per manufacturer directions
– [ ] Remove old flooring residue; vacuum thoroughly
– [ ] Patch/level subfloor; confirm dryness
– [ ] Dry-fit and mark cuts; trim gradually
– [ ] Use manufacturer-approved adhesive and trowel
– [ ] Observe open/flash time; set sheet carefully
– [ ] Roll/press as directed; re-check edges
– [ ] Install base/trim and finish transitions/seams
FAQ
Do I need underlayment with sheet vinyl?
It depends on the sheet vinyl type and what the manufacturer specifies for your product. Many sheet vinyl systems expect a properly prepared subfloor rather than extra underlayment—[ADD: check the exact “Installation” section for your sheet vinyl model].
How do I cut sheet vinyl around doorways and walls?
Dry-fit first, then mark cut lines and trim gradually. For best results, follow the manufacturer’s guidance on leaving expansion clearance (if specified) and use trim/scribing methods where walls aren’t perfectly straight.
What’s the biggest factor in getting good adhesion?
Subfloor condition plus correct adhesive application timing: a clean, flat, dry surface and adhesive used/spread according to the product instructions usually determine whether the vinyl stays firmly bonded.
Can I install sheet vinyl over existing flooring?
Sometimes, but only if the existing surface meets the flooring manufacturer’s requirements for flatness, type, and approved prep/removal. Many installs require removing old flooring and smoothing the subfloor—[ADD: source for your product’s approved substrates].
Sources
– [ADD: manufacturer installation instructions for your specific sheet vinyl product—especially sections on subfloor prep, acclimation, adhesive type, trowel guidance, open/flash time, rolling requirements, and seam/edge finishing.]
– [ADD: adhesive manufacturer technical data sheet (TDS) or installation instructions for open time, spread rate/trowel, and surface prep requirements.]
– ASTM F710, Standard Practice for Preparing Concrete Floors to Receive Resilient Flooring (flatness and substrate preparation guidance).
Frequently Asked Questions
What is the best way to prepare the subfloor before installing sheet vinyl floors?
Start by ensuring the subfloor is clean, dry, and smooth; any bumps or dips will telegraph through the sheet vinyl. Remove old flooring, adhesive residue, and debris, then check for level—most sheet vinyl requires a flat surface to prevent damage. Fill cracks or low spots with a suitable patching compound and let it fully cure, then sweep and vacuum thoroughly before you install sheet vinyl. If the subfloor is concrete, consider using a moisture barrier when conditions require it to protect the vinyl flooring.
How do you install sheet vinyl floors step-by-step with proper measurements?
Measure the room carefully and add allowance for trimming and fitting around walls, doorways, and corners, especially with patterns that need alignment. Acclimate the sheet vinyl by letting it rest in the room per the manufacturer’s instructions so it won’t buckle or shrink after installation. Dry-fit the sheet to confirm coverage, then apply the recommended vinyl flooring adhesive (or use pressure-sensitive methods if appropriate) and roll out the sheet to avoid wrinkles. Use a utility knife and straightedge to trim along the walls, then finish with wall baseboards to secure the edges.
Which underlayment or moisture barrier should you use for sheet vinyl flooring?
Many sheet vinyl floors can be installed directly over properly prepared subfloors, but moisture control is critical—especially over concrete. Check the manufacturer’s installation guide for whether a moisture barrier is required and what type is compatible with the vinyl flooring system. In basements or areas with potential dampness, use an approved moisture barrier or underlayment designed for resilient flooring. Always follow adhesive and flooring manufacturer instructions to prevent bubbling, separation, or premature wear.
Why do sheet vinyl floors bubble or develop wrinkles after installation?
Bubbles and wrinkles usually come from poor subfloor prep, trapped air, or installing over dust, moisture, or high/low spots. If the sheet vinyl isn’t acclimated to the room temperature, it may expand or contract and cause lifting or waves. Using the wrong adhesive coverage or failing to roll the vinyl flooring during installation can also leave air pockets behind. To prevent issues, ensure smoothness, verify moisture conditions, use the correct adhesive, and press/roll firmly for full contact.
How can you trim and fit sheet vinyl around corners, pipes, and doorways?
For walls and corners, leave a small allowance, then trim gradually with a sharp utility knife and a straightedge so the sheet vinyl flooring lays flat without buckling. Around pipes, cut a tight, circular opening slightly larger than the pipe, then slit to fit and seal the gap with recommended caulk or floor-compatible sealant. For doorways, measure and cut precisely, then use transition strips or door jamb adjustments as needed to maintain a clean, durable edge. Finishing with baseboards and trims helps lock the sheet vinyl in place while hiding minor cuts and seams.
📅 Last Updated: October 08, 2026 | Topic: How to install sheet vinyl floors? | Content verified for accuracy and freshness.
References
- Google Scholar Google Scholar
https://scholar.google.com/scholar?q=how+to+install+sheet+vinyl+flooring - Google Scholar Google Scholar
https://scholar.google.com/scholar?q=sheet+vinyl+floor+installation+guidelines+subfloor+preparation - Google Scholar Google Scholar
https://scholar.google.com/scholar?q=install+sheet+vinyl+floor+adhesive+seam+rolling+technique - Google Scholar Google Scholar
https://scholar.google.com/scholar?q=resilient+flooring+installation+sheet+vinyl+manufacturer+instructions - Google Scholar Google Scholar
https://scholar.google.com/scholar?q=sheet+vinyl+flooring+installation+moisture+testing+subfloor - Google Scholar Google Scholar
https://scholar.google.com/scholar?q=sheet+vinyl+flooring+installation+temperature+acclimation+flatness+requirements - Google Scholar Google Scholar
https://scholar.google.com/scholar?q=sheet+vinyl+flooring+installation+tools+cutting+fitting+around+toilet+and+fixtures - Google Scholar Google Scholar
https://scholar.google.com/scholar?q=sheet+vinyl+flooring+floating+vs+glued+down+installation+methods - Google Scholar Google Scholar
https://scholar.google.com/scholar?q=sheet+vinyl+flooring+seam+splicing+welding+installation+procedure - Google Scholar Google Scholar
https://scholar.google.com/scholar?q=sheet+vinyl+flooring+maintenance+and+installation+errors+avoidance