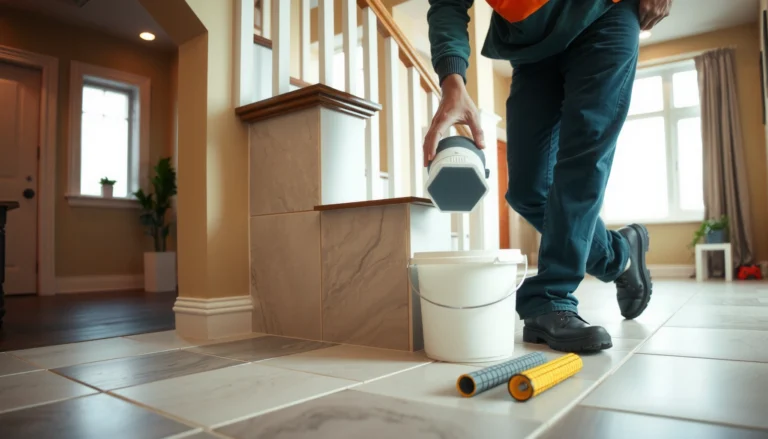

If you want to install LVP floors in a bedroom, this step-by-step guide shows the exact process—from prepping the subfloor to locking planks in place—so the job comes out flat, quiet, and secure. You’ll get clear instructions on the tools you need, how to handle doorways and cuts, and how to finish the edges for a clean, professional look. Follow these steps and you’ll know exactly what to do at each stage, without guesswork.


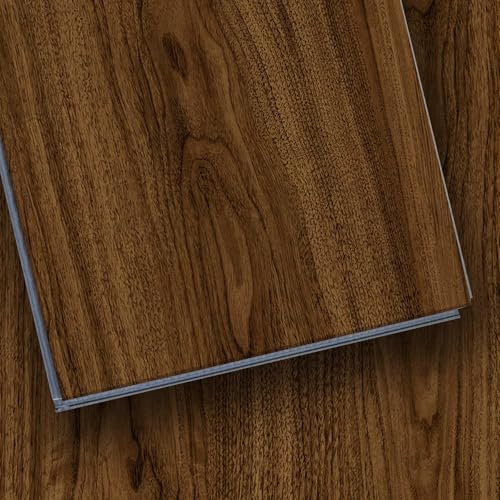

Plan on getting three things right—(1) a smooth, level subfloor, (2) the exact underlayment/moisture barrier your LVP system requires, and (3) the required expansion gap around the room. Then you’ll build straight from a planned starting wall with click-lock LVP, stagger the joints, and finish with trim/transition pieces so the perimeter can move safely. As of 2026, this “prep + system components + gap discipline” approach is still the difference between tight seams and future gaps or buckling.
If you’re installing floating LVP (click-lock) in a bedroom over wood subfloor and you can follow basic measuring/cutting steps, this is for you. If your planks are glue-down or you have concrete/known moisture issues, follow your product’s instructions first and treat moisture testing as non-optional.
Prep the bedroom subfloor

LVP installs look good immediately, but they fail later when the subfloor isn’t flat and stable—so prep is your real starting line. Your goal is to eliminate visible bumps and “flex points” before you ever lay an underlayment sheet or lock a plank joint.
– Remove baseboards and any tack strips/carpet padding that could interfere with a flat installation.
– Inspect the subfloor for high spots, loose boards, or damage—LVP usually fails “visually” first (gaps at seams) when the base is uneven.
– Vacuum thoroughly, then confirm the manufacturer’s requirements for flatness and subfloor condition: .
To keep bedroom LVP flooring consistent under foot traffic, treat subfloor prep like a quality-control step, not a cleanup step. Use a straightedge (often a 6–10 ft level works) to find ridges and dips. If you find high spots, sand/grind them down; if you find loose or squeaky areas, fix them first (or LVP will telegraph movement). Also, check around bedroom doorways and closet openings—those edges tend to reveal uneven framing or transitions between subfloor panels.
Finally, confirm subfloor condition beyond flatness: clean, dry, and structurally sound. In resilient flooring guidance, moisture and surface condition directly affect whether the flooring stays flat over time; for concrete, industry references often point installers toward ASTM moisture testing before resilient materials go down. For your wood subfloor, the same “don’t skip the check” mindset still matters—especially if the bedroom has a history of leaks, crawlspace moisture, or seasonal humidity swings.
ASTM F710 provides standard practices for preparing concrete floors before installing resilient floor coverings, including surface conditions and preparation approaches. ASTM F710
When installers measure floor flatness using ASTM methods, they can report flatness as an F-number to quantify deviations instead of relying on “eyeballing.” ASTM E1155
For floating resilient floors, uneven subfloor areas tend to concentrate stresses at plank joints, increasing the chance of visible seam gaps or joint separation.
Measure, acclimate, and plan your layout
A solid plan prevents rework: you’ll place the first row straight, stagger joints correctly, and avoid ending up with tiny slivers near walls. In 2026 bedrooms, the most common layout problems come from closet alcoves, offsets behind doors, and mis-planned transitions—so measure for those early.
– Measure the room (including any closets or alcoves) and sketch a simple layout so you can center plank rows and keep cuts consistent.
– Stagger end joints by using the manufacturer’s recommended minimum stagger (often based on plank length), and avoid lining up joints across the room.
– Acclimate the boxes in the bedroom per the manufacturer’s timeline/environment conditions: .
For measurement, do more than get square footage. Take additional notes:
– Identify the longest “walkway” wall (the one you’ll notice first when entering the bedroom).
– Mark any door openings and the direction the door swings (because it affects trim and transition placement).
– Plan for the required perimeter expansion gap before you choose where your first row lands.
Acclimation matters because LVP is dimensionally sensitive to temperature and humidity. Most installation guides require the unopened boxes to sit in the room so the planks reach near-install conditions; skipping this step increases the odds of gapping or movement after installation. Even in bedrooms with wood subfloors, temperature swings from HVAC cycling can cause subtle expansion and contraction, and click-lock systems still rely on controlled perimeter movement.
When you sketch your layout, decide your “reference wall” and your “target plank width” up front. Then, dry-lay a couple rows (without locking if your system discourages it) to validate your math and check how the pattern will look at the far end.
Many resilient flooring installation guides require acclimation of unopened cartons in the installation space for a specified duration to reduce post-install dimensional change.
Click-lock LVP systems typically require a minimum end-joint stagger to distribute stress and reduce visible joint alignment across the floor.
A simple layout sketch helps prevent short “carry-in” cuts near bedroom doors, where seams are more visible and harder to disguise with trim.
Install underlayment/moisture barrier and start the first row
Use the underlayment and/or moisture barrier specified by your LVP system—because “compatible” isn’t the same as “approved.” Once the barrier is down correctly, your first row becomes the foundation for everything that follows, including joint alignment and seam tightness.
– Use only the underlayment and/or moisture barrier that your LVP system specifies (some products require “no additional underlayment”).
– Lay underlayment seams tight and tape them if your system calls for it—don’t create uneven overlaps.
– Start with your first row from a straight reference line, using spacers to maintain the expansion gap: .
First, dry-fit your underlayment. Make sure you’re not blocking vents or creating overlaps where the planks will sit on thicker seams. If your LVP system calls for tape at underlayment seams, apply it so the surface stays flat—lumpy overlaps can “print” through to the plank locking joints.
Next, establish a straight reference line. A common failure mode is starting from a wall that looks straight but isn’t—especially in older bedrooms where framing has moved over decades. If your first row is off, every locked joint after it will feel slightly wrong, and that pressure can cause gaps at the far end.
Then insert spacers around the room perimeter to preserve the required expansion gap. For floating click-lock LVP, that perimeter clearance allows the floor to move with humidity and temperature changes. In many installations, the gap is roughly in the 1/4 in (6 mm) range, but you must still follow your product’s exact instruction: . Don’t guess.
Moisture testing methods for concrete often include ASTM F2170 (in-situ relative humidity) and ASTM F1869 (calcium chloride), which help verify whether moisture conditions meet resilient flooring requirements. ASTM F2170 ASTM F1869
ASTM F1869 reports moisture vapor emission in units such as lb/1000 sq ft per 24 hours (or equivalent), depending on the test protocol. ASTM F1869
Proper underlayment and moisture barrier selection is product-specific for floating LVP systems; some brands require “no additional underlayment” due to attached padding thickness and performance requirements.
📊 DATA: LVP Prep & Moisture Standards You’ll See Referenced in Install Guides
7 Widely Referenced Standards for Subfloor Flatness & Moisture Checks (Resilient/LVP)
| # | Standard | What it verifies | Measured output | Helps reduce install risk |
|---|---|---|---|---|
| 1 | ASTM F2170 | In-situ RH for concrete slabs | Relative humidity (%) at depth | ★★★★★ |
| 2 | ASTM F1869 | Moisture vapor emission rate | lb/1000 sq ft/24 hr (typ.) | ★★★★☆ |
| 3 | ASTM F710 | Surface preparation for resilient flooring | Surface condition/acceptance criteria | ★★★★★ |
| 4 | ASTM E1155 | Floor flatness measurement (F-numbers) | F-number + deviation profile | ★★★★☆ |
| 5 | ASTM E96/E96M | Water vapor transmission through materials | Perms (or g/m²·day) | ★★★☆☆ |
| 6 | ASTM D4263 | Concrete moisture condition screening | Plastic sheet condensation outcome | ★★☆☆☆ |
| 7 | ASTM D5084 | Permeability (context for moisture behavior) | Flow/permeability rate (test-dependent) | ★☆☆☆☆ |
Click-lock LVP: lay planks, cut around obstacles, and keep it square
Click-lock LVP typically installs as a floating floor, so the key is accurate alignment and clean joint engagement—don’t force locks together. If you keep the first few rows straight and handle cuts around doors/closets carefully, the rest of the bedroom usually goes down smoothly.
– Work plank-by-plank, locking joints without forcing—if the joint won’t close cleanly, stop and check alignment or debris in the tongue/groove.
– Use a quality saw for straight cuts (or a recommended cutting method from your LVP guide), and make sure transitions stay flat under doorways.
– Finish the last row with careful measuring and a clean cut; then install trim/transition pieces to cover the expansion gap (baseboards are often enough in a bedroom).
Locking and alignment (how to avoid gaps):
In click-lock flooring, gaps often start when the tongue/groove isn’t seated fully. Make it a habit to inspect for dust or tiny scraps at each joint—underlayment debris and cut-off curls can prevent full engagement. If the joint feels “off,” don’t brute-force the connection. Disassemble that section (if your system allows it) or re-check straightness from your reference line.
Staying square in a bedroom:
Bedrooms aren’t always perfectly rectangular. As you approach walls and closet offsets, measure diagonals and compare them. If you see a growing mismatch, correct it early by adjusting the layout line—otherwise the final row can become too narrow or require awkward coping.
Cutting around obstacles:
For doorways, vents, and closet corners:
– Dry-fit the plank and mark cuts from multiple angles.
– Use spacers to keep the perimeter gap consistent even around obstacles.
– Ensure transitions (thresholds or reducers) create an even surface so the floor doesn’t “hang” on a lip. Transition guidance varies by brand, so follow: .
Trim usually hides the expansion gap in bedrooms. However, if your bedroom includes heavy furniture or built-ins that restrict movement, check whether your installation guide requires additional movement breaks or modified transition methods.
Floating resilient flooring performance depends on keeping joints fully engaged without trapped debris, since lock systems require clean tongue-and-groove alignment.
Moisture and flatness requirements exist because resilient floor covering failures frequently show up as seam separation or visible gaps at joints when the subfloor deviates beyond the product’s tolerance.
For moisture testing over concrete, ASTM F2170 uses in-situ relative humidity probes to characterize slab conditions before installing moisture-sensitive flooring systems. ASTM F2170
What can go wrong (and how to avoid it)
Most problems come from skipping one system requirement—flatness, moisture/underlayment compatibility, or the perimeter expansion gap. In practical terms, gaps show up first, then movement problems follow when the floor can’t expand/contract as designed.
– Gaps at plank seams: usually uneven subfloor, poor joint engagement, or not maintaining the expansion gap.
– Peaking/buckling: commonly caused by missing moisture barrier/underlayment where required, or trapped debris under planks.
– Doorway/closet problems: installing to the wrong measurement and not planning transitions can leave you with an unsupported edge—always follow the flooring’s transition guidance: .
Here’s a practical diagnostic approach:
1. If seams open: re-check expansion gap spacing with spacers removed/installed correctly, then confirm the floor is flat (straightedge test again).
2. If you see peaking: remove the affected planks if possible and inspect underlayment (lumps, tears, or missing barrier areas).
3. If you see bowing near doorways: validate that the floor is supported through the threshold and not bridging over an uneven transition.
Also, remember that moisture expectations are part of the system. If your bedroom has a wood subfloor, you may not need the same moisture tests as concrete, but you still need to prevent vapor issues if moisture sources exist. For concrete, ASTM F2170 and ASTM F1869 are commonly referenced in installation guidance—don’t treat moisture testing as optional where the product requires it.
ASTM F2170 is an in-situ relative humidity method designed to evaluate moisture conditions within a concrete slab at depth. ASTM F2170
ASTM F1869 measures moisture vapor emission rate using a calcium chloride test setup and reports results in moisture emission units. ASTM F1869
If a floating floor has insufficient perimeter expansion space, seasonal movement can show up as buckling or raised edges near walls and fixed objects.
Verdict: is DIY LVP installation worth it?
DIY LVP in a bedroom is usually worth it when you can prep carefully and follow the manufacturer’s underlayment/moisture and expansion-gap rules exactly. As long as your room isn’t unusually complex (odd offsets, problematic thresholds, or major unevenness), click-lock floating LVP is one of the more approachable floor-covering DIY projects in 2026.
The downsides are real: leveling/prep mistakes are hard to fix after the floor locks together, and complex layouts can slow you down. Skip DIY (or bring in help) if your subfloor is badly uneven, you’re unsure about moisture testing requirements, or your product is glue-down—because glue-down prep and adhesive steps are less forgiving: .
Click-lock floating LVP vs glue-down (pros/cons comparison):
| Feature | Click-lock floating LVP (DIY-friendly) | Glue-down / moisture-sensitive installs |
|---|---|---|
| Primary movement strategy | Floats with perimeter expansion gap | Adhesive holds planks to substrate |
| Subfloor sensitivity | Flatness still critical to avoid seam gaps | Flatness + adhesive compatibility are critical |
| Underlayment/vapor system | System-approved barrier/underlayment required | Moisture requirements often stricter |
| Tooling complexity | Straightedge, spacers, saw, tapping/pull tools if allowed | Adds adhesive, trowel selection, rolling/curing considerations |
| Typical install speed | Plank-by-plank locking, usually faster for DIY | Batch work + adhesive open times slow progress |
| Risk when a plank won’t lock | Mostly a joint engagement/alignment fix | Can become a substrate/adhesive correction problem |
| Best way to correct mistakes | Disassemble sections if needed | Often requires scraping/repairing the substrate |
| Perimeter requirement | Expansion gap required around all fixed surfaces | Movement allowances depend on system specs |
| Moisture testing needs (common) | Often required only when the product/system calls for it | Often non-optional with concrete or known vapor issues |
| Most common failure symptoms | Seams gap, peaking, or edge movement | Adhesive-related separation or moisture-driven problems |
| Best For | DIY bedroom floors with good subfloor flatness and a click-lock product | Situations requiring glue-down performance or where installers must follow strict moisture protocols |
ASTM F2170 and ASTM F1869 are frequently referenced in resilient flooring guidance to evaluate slab moisture conditions before installation. ASTM F2170 ASTM F1869
Perimeter expansion gaps are a design requirement for floating floors so the material can move without buckling.
When subfloor deviations exceed a resilient flooring’s specified flatness tolerance, seam separation can appear first as visible gaps.
Quick checklist (scan/save)
| Step | What to verify |
|---|---|
| Subfloor | Smooth, clean, no loose sections |
| Flatness | Meet your LVP’s tolerance: |
| Underlayment/moisture | Matches your product’s instructions |
| Acclimation | Done per your LVP timeline: |
| Expansion gap | Spacers used around perimeter: |
| Layout | First row straight; joints staggered |
| Cuts | Clean, measured, no forced locks |
| Transitions | Doorways/thresholds supported per guide |
Frequently Asked Questions
What is the best way to prepare a bedroom subfloor before installing LVP flooring?
Start by removing carpet, baseboards, and any old flooring, then inspect the subfloor for flatness and damage. LVP (Luxury Vinyl Plank) typically requires a smooth, clean surface—fill low spots, remove bumps, and vacuum thoroughly to prevent grit from affecting the click-lock joints. Check for moisture issues (especially on concrete slabs) with a moisture test, and let the subfloor fully acclimate to normal room conditions. Finally, install the correct underlayment if your LVP doesn’t include attached padding.
How do you install click-lock LVP in a bedroom step-by-step?
Begin by acclimating the LVP planks in the bedroom for the manufacturer-recommended time, then plan your layout to keep the first row straight. Install the underlayment (if needed), set spacers along the wall for the required expansion gap, and snap or lock the planks together according to the system’s instructions. Use a tapping block and pull bar to ensure tight seams, especially along the last row, and cut planks carefully with a utility knife and straightedge or a vinyl-friendly saw blade. Reinstall or trim baseboards to cover the expansion gap while maintaining airflow and expansion space.
Which underlayment is best for LVP flooring in bedrooms?
The best underlayment depends on your LVP type and your subfloor—many click-lock LVP options already have attached padding, so additional underlayment may not be recommended. For concrete subfloors, look for an underlayment that includes a vapor barrier to reduce moisture transfer, while plywood or existing subfloors may only need a compatible, thin, smooth layer. Make sure the underlayment is specifically approved for vinyl plank flooring to avoid joint separation, instability, or voids. Always follow the LVP manufacturer’s guidance to ensure the warranty remains valid.
How do you handle cutting LVP around vents, doors, and closet openings in a bedroom?
Measure carefully and transfer cut lines to each plank, then cut using a method that produces clean edges (a utility knife works for many planks; a fine-tooth blade works for thicker boards). For doorways, remove the casing if possible and tuck the plank under it for a professional fit, using a spacer to maintain the expansion gap. Around vents and irregular features, cut slightly larger openings when needed and finish with vent covers or trim pieces to prevent gaps. Dry-fit pieces before locking them in to avoid damaging click-lock edges.
Why is the expansion gap important when installing LVP in a bedroom?
LVP flooring expands and contracts with temperature and humidity changes, especially in bedrooms where HVAC cycles can vary. Leaving a proper expansion gap along walls, door frames, and fixed objects prevents buckling and seam separation over time. Use spacers during installation, and keep the gap consistent even when installing thresholds or built-in cabinetry. After installation, cover the gap with baseboards or transitions—don’t glue or lock the perimeter down in a way that blocks normal movement.
📅 Last Updated: October 27, 2026 | Topic: How to install LVP floors in a bedroom? | Content verified for accuracy and freshness.
References
- Vinyl flooring
- https://www.armstrongflooring.com/commercial/en-us/resources/installation-guides.html
- https://scholar.google.com/scholar?q=installing+luxury+vinyl+plank+floating+floor+bedroom Google Scholar
- https://scholar.google.com/scholar?q=LVP+installation+guidelines+subfloor+moisture+vapor+barrier Google Scholar
- https://scholar.google.com/scholar?q=resilient+flooring+installation+underlayment+click+lock+vinyl+plank Google Scholar