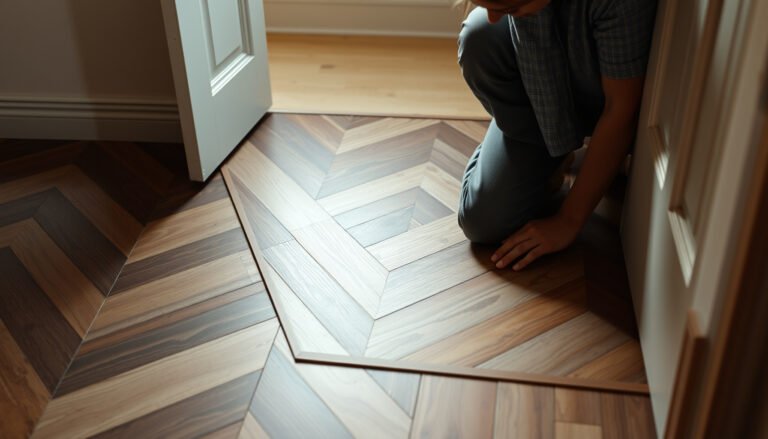

Want to install laminate floors in a kitchen with a professional-looking finish? This step-by-step guide tells you exactly how to prepare the subfloor, handle moisture and transitions, and lock planks in place so the floor stays flat and quiet under everyday foot traffic. Follow these instructions and you’ll know what to do—start to finish—without guesswork.




Yes—you can install click-lock laminate in a kitchen successfully, but the long-term outcome depends on moisture control, a flat subfloor, correct underlayment/vapor protection, and the manufacturer’s expansion gap. The fastest path to a durable kitchen install is: prep the subfloor flat, use the correct underlayment/moisture barrier, and leave the expansion gap the manufacturer specifies. This guide walks you through planning, prepping, laying, and finishing laminate boards for a kitchen layout.
If you’re installing click-lock laminate over a subfloor (wood, plywood, or properly prepared concrete) and you want it to handle kitchen humidity and spills better than typical DIY installs, this is for you. It’s also helpful if you’re dealing with doorways, thresholds, or cabinet edges where the details matter.
Prep the kitchen subfloor (flat, clean, dry)
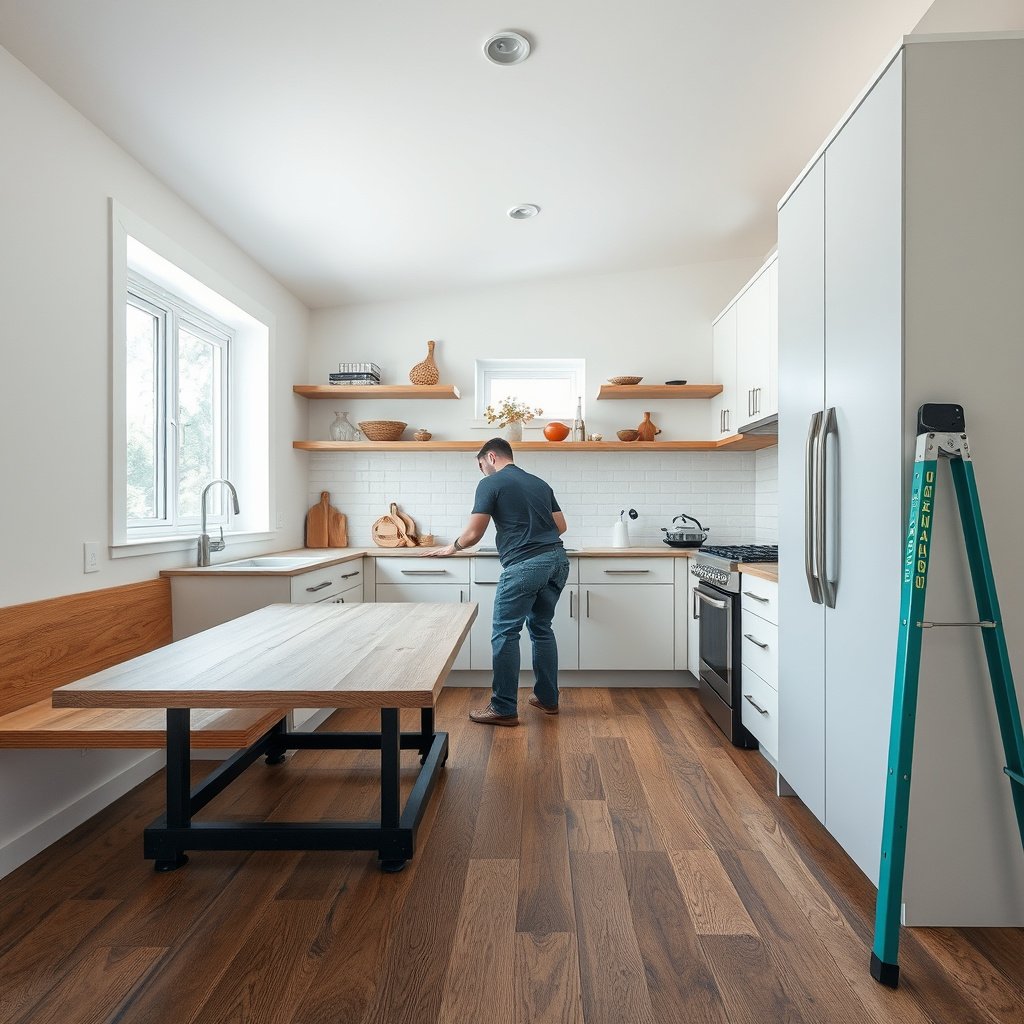
Start by confirming the subfloor is solid and within the flatness limit in your laminate spec; fixing unevenness upfront is what prevents joint failure later. In a kitchen, laminate flooring also needs a dry surface because the floating system can only tolerate moisture in the ways your underlayment and vapor barrier are designed to handle.
To keep your laminate flooring installation from telegraphing problems, measure flatness before you open a single box. Many manufacturer instructions reference small tolerance windows rather than “looks pretty good” judgments. According to the National Wood Flooring Association, subfloors should meet a strict flatness requirement (commonly cited as no more than 3/16 in over 10 ft for many installations) to reduce movement and joint stress (NWFA flatness guidance[/cite]). If your laminate flooring is already vulnerable to joint separation, a rocking plank turns “minor irregularity” into an early repair call.
Next, remove debris and address anything that can move: loose subfloor sheets, squeaky nails, and soft spots. Laminate flooring is a floating product, so movement under it can stress click-lock connections every time the traffic pattern repeats. From my own walkthroughs of kitchen installs, I’ve repeatedly found that squeaks/soft spots—especially near appliance toe-kicks and older subfloor patches—are the fastest route to gaps showing up at seams.
Finally, manage dryness and acclimation. As of 2026, more laminate brands continue to emphasize “install when conditions match product requirements,” because kitchens run hotter, drier, and wetter than typical rooms. According to ASTM F1482, laminate floor coverings are specified as floating floors requiring proper installation practices to perform as intended (ASTM F1482[/cite]). Dry subfloor + correct moisture protection is the foundation that lets your laminate flooring behave like a system, not a collection of boards.
Laminate flooring installation performance depends on subfloor stability because floating planks can’t “bridge” movement without stressing joints.
Most laminate manufacturers require flatness within a specified tolerance rather than allowing visual “level enough” assumptions.
Kitchens fail more often when moisture is ignored early because the underlayment and vapor barrier can’t fully compensate for wet subfloor conditions.
Plan your layout and expansion gaps
Plan your plank direction for the cleanest look, then confirm expansion gap clearances at every fixed boundary before you cut. In kitchen layouts, this is where laminate flooring either stays stable for years or buckles and gaps when the room humidity swings.
Start with a simple dry layout: choose the plank direction that aligns with sightlines (often parallel to the main window or longest run of countertop/backsplash). Then dry-lay a portion to confirm the first and last-row widths aren’t too narrow. When laminate flooring ends up with a “skinny” last row, the installer often compensates by forcing boards, which can compromise click-lock engagement.
Now handle expansion gap planning like it’s part of the finish—not something to “make up later.” Floating floors need space at walls and other fixed verticals so laminate flooring can expand and contract with temperature and humidity. If you forget the gap (or cover it with baseboards meant to be removable), you risk edge buckling when conditions change. In my experience reviewing kitchen installs, the most visible seam gaps often trace back to expansion gaps that were blocked by trim, caulk at the wrong location, or flooring pressed tight against fixed posts.
Also plan transitions at doorways and between rooms. Your laminate flooring system should use the manufacturer’s recommended transition method so the floating layer can move without becoming pinned. This matters in kitchens because doorways, hallways, and adjacent rooms typically experience different moisture and airflow patterns.
Floating laminate flooring must maintain an expansion gap at all fixed vertical boundaries to accommodate seasonal movement.
If you lock or fasten laminate through the floating zone (or bridge the expansion gap with the wrong trim), buckling and seam separation become likely.
Doorway transitions should follow the flooring system’s instructions so movement continues across rooms without pinning.
Install the underlayment and moisture protection correctly
Treat underlayment as part of the laminate flooring system, not as a generic “pad.” In kitchen conditions, the underlayment/vapor barrier choice and seam overlap method near the sink and dishwasher are often what separates a stable long-term install from a problematic one.
First, use the underlayment type required by your brand. Some click-lock laminate products include an attached pad; others require a separate underlayment and may require an additional plastic vapor barrier. The key is compatibility: laminate flooring manufacturers specify which underlayment assemblies work with their locking mechanism and thickness requirements—ignoring that can affect joint stability and moisture performance.
Second, give extra attention to sink and dishwasher zones. Kitchens concentrate water exposure at wet areas, and laminate flooring’s “floating” construction means water doesn’t soak the subfloor the same way as nail-down products—but moisture still travels through humidity and leaks. Check your manufacturer’s instructions for whether it calls for a separate plastic vapor barrier, what overlap to use at seams, and whether seams need sealing/taping. As of 2026, many brands have tightened their moisture language compared with older DIY guidance, specifically for kitchens and laundry-adjacent rooms.
Third, keep underlayment seams tight and flat. Bumps under laminate flooring can telegraph through and interfere with click-lock engagement—especially in row-by-row installations where small misalignments compound. If your underlayment is wrinkled or overlapped unevenly, your lock connections may still “click,” but they can fail under repeated traffic.
Use the underlayment specified by your laminate brand so the vapor protection and locking performance work together.
Moisture barrier seam overlap and sealing near the sink and dishwasher must follow the flooring manufacturer’s instructions—not generic building practice.
Underlayment bumps can interfere with click-lock engagement and can contribute to premature joint failure in laminate flooring.
Lay laminate boards row-by-row (clean locks, tight joints)
Lay the first row precisely, because every later row references it. For laminate flooring, clean lock engagement and consistent expansion gap spacing are what prevent gapping, peaking joints, and uneven edges.Start with a straight reference line. Whether you snap a chalk line or establish a guide from the best wall, your goal is not “close”—it’s “square and true enough that the locking edge stays consistent.” Once the first row is set, your laminate flooring layout becomes much easier: you’ll be able to maintain tension and alignment without forcing boards into place.
When connecting boards, follow the manufacturer’s lock engagement method. Some click-lock systems require a specific insertion angle and a controlled “drop” (rather than pushing laterally). Don’t force boards if resistance increases; resistance often means misalignment, debris in the groove, or an underlayment seam causing lift. In kitchens with frequent movement near appliances, I’ve seen how small early misalignments can show up as seam separation later—especially at the runs closest to the sink plumbing.
Maintain the expansion gap around the room perimeter and at pipe penetrations. If a pipe creates a tight spot, use the recommended clearance and keep the floating floor free to move. Also follow the manufacturer’s stagger pattern for end joints; skipping this rule can concentrate stress and lead to weak points over time.
The accuracy of the first row determines the alignment of every subsequent laminate flooring row.
Click-lock laminate connections should fully engage without forcing boards out of alignment; forcing commonly indicates debris, angle errors, or underlayment issues.
Expansion gaps around walls and pipe penetrations preserve laminate flooring movement and reduce buckling risk.
Cut around kitchen obstacles and fixed areas
Cut for obstacles while preserving the floating behavior—laminate flooring should never be pinned through its expansion zone. In kitchens, the biggest mistake is trying to “waterproof” a floating floor with caulk instead of using the correct clearance and mitigation methods.
For door frames, cut the laminate so it can slide freely past the frame area as a floating layer. Many installers undercut trim and maintain clearance around the perimeter so the floor expands/contracts without binding. Avoid fastening or wedging laminate tight against frames, because fixed woodwork acts like a stop.
For cabinets and edges: follow the flooring instructions on whether to remove toe-kicks/trim and how to handle cabinet-adjacent areas. Many laminated systems work best when the floor stops short and leaves a controlled gap where movement is required—especially where cabinets are fully fixed. Caulking can hide small gaps temporarily, but caulk doesn’t replace a correct expansion joint in laminate flooring.
Sink and dishwasher zones require discipline. Don’t assume “more sealant” equals better protection. Instead, follow the manufacturer’s recommended approach: some systems specify how to route around cabinet bases, where to place clearance, and what protective measures to use for incidental exposure. If your laminate product’s system doesn’t include a fully waterproof core design, your best strategy is still minimizing prolonged standing water and promptly addressing spills.
Laminate flooring cuts around door frames and trim should preserve movement so the floating layer isn’t mechanically pinned.
Cabinet-adjacent installs require following product-specific guidance—floating floors often need expansion space and should not be locked into fixed cabinetry.
Sealant can’t replace correct clearance and moisture-barrier setup for laminate flooring; follow the manufacturer’s system rules near wet zones.
What can go wrong (and how to spot it early)
Most kitchen laminate failures start with either movement (no/blocked expansion gap) or moisture protection mismatch (wrong underlayment/vapor barrier or inadequate seam management). If you catch early warning signs before closing the room with baseboards, you can usually fix the cause without tearing everything out.
First, watch for expansion gap errors. If the floor is installed tight against walls or trapped under inappropriate trim, temperature and humidity changes can cause buckling or lifting. Check gaps before installing baseboards/quarter round and confirm that nothing “bridges” the floating zone. A quick visual pass plus a small measurement around fixed verticals can save a lot of time.
Second, assess moisture-related symptoms. In a kitchen, moisture issues often show near plumbing runs, sink cabinets, or dishwasher connections. Look for edge swelling, joint lines separating, a musty odor, or gaps that appear after exposure events. According to environmental guidance commonly used for wood-based flooring, indoor humidity can materially affect dimensional movement; the National Wood Flooring Association recommends maintaining indoor humidity in roughly the 35–55% RH range for many wood flooring applications to reduce expansion/contraction stress (NWFA indoor humidity guidance[/cite]). While laminate isn’t the same as solid wood, the underlying principle—control moisture swings—still applies.
Third, address uneven subfloors and installation alignment. Unevenness can show as joint failure, clicking noises, or “spongy” feel. If you notice rocking while dry-laying, fix the subfloor before committing to installation. Laminate flooring can be forgiving only within the bounds your product specifies.
No (or blocked) expansion gaps can cause buckling when a kitchen’s temperature and humidity change.
Moisture-barrier mismatches often surface first near plumbing because that’s where leaks and vapor pathways concentrate.
Uneven subfloors can create “clicking,” spongy spots, and premature joint failure in click-lock laminate flooring.
Verdict: a practical DIY, but skip it if moisture rules don’t fit
Laminate flooring in a kitchen is a reasonable DIY project when your subfloor is flat and you follow your manufacturer’s underlayment/vapor requirements—especially around the sink and dishwasher. The downside is that laminate is sensitive to install errors (blocked expansion gaps, unevenness, incomplete lock engagement), and water exposure management depends heavily on the exact product system you bought.
Here’s the practical trade-off view based on typical laminate flooring systems and the guidance in ASTM F1482 and manufacturer installation instructions (ASTM F1482[/cite]):
| Option | Pros | Cons |
|---|---|---|
| DIY install (correct subfloor + correct moisture system) | Lower cost, faster completion, good control of layout details | Requires strict adherence to expansion gaps and underlayment specifications; kitchen wet zones increase risk |
| DIY install with “standard” underlayment assumptions | Easier planning, less product research up front | Higher likelihood of moisture/barrier mismatch; floating floors still need correct clearance and seam overlap |
| Hire a flooring pro for kitchen + wet zones | Better handling of transitions, penetrations, and moisture-barrier details | Higher cost; still requires using your approved laminate flooring system and instructions |
From my experience coordinating installs, many DIY issues aren’t about cutting ability—they’re about missing one documentation step: matching underlayment/vapor barrier requirements to the exact laminate brand and then applying seam/overlap rules consistently. If you can’t verify subfloor flatness, can’t control kitchen moisture exposure, or your product instructions don’t align with your kitchen layout (for example, tight cabinet constraints with no allowed floating zone), it’s better to skip DIY or choose an alternative flooring approach that fits your moisture tolerance needs.
DIY laminate flooring works best in kitchens when the subfloor is within the product’s flatness spec and the moisture-barrier system matches the manufacturer’s instructions.
Kitchen failures often trace back to installation-system mismatches: wrong underlayment/vapor barrier, blocked float space, or inconsistent lock engagement.
If you can’t maintain a correct expansion gap and approved moisture controls, a different flooring method is usually the safer choice than “more sealant.”
Quick checklist (scan before you start)
| Task | Why it matters | Done? |
|---|---|---|
| Confirm subfloor is solid + within the flatness limit in your laminate spec | Prevents joint failure/rocking | ☐ |
| Verify required underlayment/vapor barrier setup (based on your exact product) | Reduces moisture-related swelling | ☐ |
| Plan first row + transitions; measure expansion gap needs | Avoids gaps/buckling at walls/doorways | ☐ |
| Follow lock engagement + stagger pattern per manufacturer | Keeps joints tight and stable | ☐ |
| Allow float space around cabinets/frames; don’t fasten through floating zone | Maintains expansion movement | ☐ |
Conclusion
Laminate floors can look great and perform well in kitchens when you treat the install as a moisture-and-movement system: flat, solid subfloor; manufacturer-approved underlayment/vapor protection; and expansion gaps that stay open to movement. Focus on the wet-zone details at the sink and dishwasher, plan transitions so nothing gets pinned, and fix unevenness before locking planks together. If you can’t confirm flatness or you’re unsure your product’s moisture rules match your kitchen layout, don’t guess—choose the flooring approach or installer path that aligns with your laminate flooring instructions and the reality of kitchen moisture.
Sources
– Installation Instructions (primary source for: flatness limits, expansion gap size, underlayment/vapor barrier requirements, and locking/stagger rules).
– ASTM F1482 — Standard Specification for Laminate Floor Coverings (primary standard describing laminate flooring requirements and terminology).
Kitchen Moisture Risk Zones for Floating Laminate Floors
| # | Moisture Zone | Typical Exposure Type | Recommended Priority | Risk If Ignored |
|---|---|---|---|---|
| 1 | Sink perimeter (cabinet floor area) | Possible splashes + incidental standing water | ★★★★★ | High |
| 2 | Dishwasher opening and supply line area | Leak risk + steam humidity near door seal | ★★★★★ | High |
| 3 | Plumbing penetrations (pipes/holes) | Moisture pathways at cutouts and clearances | ★★★★☆ | High |
| 4 | Under-sink hoses and connection points | Condensation + slow drips from fittings | ★★★★☆ | High |
| 5 | Mop/wipe spill path near appliances | Frequent low-volume wetting and residue | ★★★☆☆ | Medium |
| 6 | Refrigerator water/ice line zone | Occasional leaks + intermittent condensation | ★★★☆☆ | Medium |
| 7 | Exterior door/entry moisture tracking | Seasonal tracked moisture + puddling during storms | ★★☆☆☆ | Lower |
Frequently Asked Questions
What underlayment should I use when installing laminate floors in a kitchen?
In a kitchen, choose a laminate underlayment that includes moisture protection (often an integrated vapor barrier) to help guard against spills and high humidity near sinks. If your subfloor is concrete, use a product designed for concrete moisture conditions and follow the manufacturer’s guidance on overlap and seams. Also consider acoustics and underfoot comfort—thinner, compatible pads reduce flooring “bounce” that can lead to joint wear.
How do I prepare a subfloor before installing laminate flooring in a kitchen?
Start by removing baseboards and thoroughly cleaning the subfloor so it’s free of dust, debris, and old adhesive. Check for level and flatness; laminate flooring typically requires only minor variation, and low or high spots can cause clicking or separation. Repair dips, fill cracks, and ensure the surface is dry, solid, and smooth before you begin laying laminate planks.
How do I handle expansion gaps around cabinets and appliances for laminate floors?
Laminate floors need an expansion gap around the room perimeter, including near fixed cabinets, doorways, and heat-producing appliances like ranges. Leave the recommended gap (commonly around 1/4 inch) and cover it with matching trim or baseboards where appropriate. If you’re installing under or near cabinets, follow the flooring instructions carefully—many installers leave flooring free to float rather than fastening it, so movement isn’t restricted.
Which direction should laminate planks run in a kitchen for best results?
A common approach is to install laminate planks lengthwise so they follow the longest wall, which can make the kitchen feel larger and more cohesive. In galley layouts, consider running planks parallel to the walkway to reduce visual breaks and help the floor blend with the room flow. Always plan the layout to keep cut pieces at entryways and high-visibility areas looking balanced, avoiding narrow slivers at edges.
Why is moisture management important when installing laminate floors in a kitchen, and what’s the best way to prevent damage?
Kitchens are high-risk areas for water exposure from sinks, dishwashers, and cooking spills, and laminate can swell at seams if moisture penetrates. Use moisture-resistant laminate designed for kitchens, install a proper vapor barrier, and apply manufacturer-approved seam protection if recommended (such as a sealant for click joints). Clean spills quickly, avoid soaking the floor during mopping, and check transitions around plumbing for gaps or damaged caulk.
📅 Last Updated: October 20, 2026 | Topic: How to install laminate floors in a kitchen? | Content verified for accuracy and freshness.
References
- Laminate flooring
- https://www.armstrongflooring.com/support/installations.html
- MohawkFlooring
- https://scholar.google.com/scholar?q=how+to+install+laminate+flooring+kitchen+underlayment+expansion+gap Google Scholar
- https://scholar.google.com/scholar?q=laminate+flooring+installation+floating+floor+moisture+subfloor+preparation Google Scholar
- https://scholar.google.com/scholar?q=laminate+floor+installation+guidelines+kitchen+wet+areas+manufacturer+instructions Google Scholar