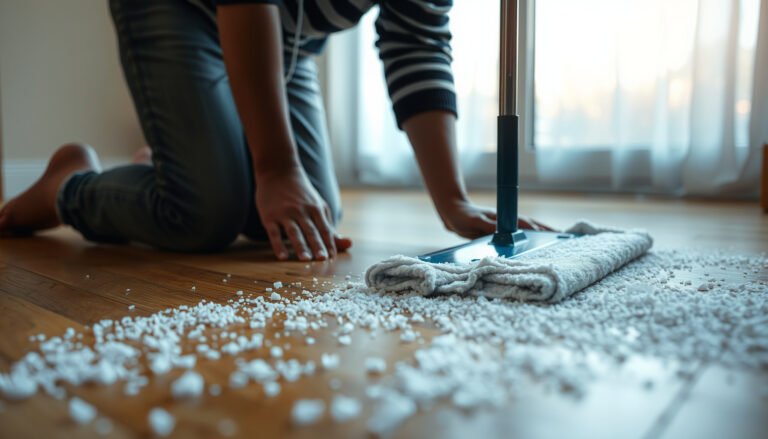
You notice a cloudy ring where a soda bottle tipped over onto your hardwood floor. With a few gentle supplies and careful drying, you can lift sticky residue and avoid finish damage in about 15–30 minutes, using mild dish soap, distilled white vinegar, and a soft microfiber cloth. Start by blotting the spill, then follow the safest sequence for your floor type.




Blot up soda immediately, then clean with a barely-damp cloth and a pH-neutral cleaner—don’t soak the hardwood floor. If a dull ring or haze remains, you’ll usually need a more finish-safe spot treatment after testing a hidden area first, because residue can cling in the finish rather than the wood itself.
If this is your kitchen spill, a guest’s soda mishap, or a sticky “oops” that already dried, the steps below help you remove discoloration and syrupy residue without warping boards. Currently (2026), the safest approach for most hardwood floors is still the same: control moisture, use pH-neutral products, and escalate only when the haze/ring won’t lift.
Act immediately: blot, don’t scrub

The fastest way to prevent a soda stain from setting is to blot up the liquid first, while it’s still wet. For most finished hardwood floors, the “stain” is a combination of sugar residue (sticky caramels) plus acids that can temporarily affect the top finish—so your first job is removing liquid before it has time to migrate into seams.
– Use paper towels or a clean cloth to blot (lift liquid), working from the outside of the spill toward the center.
– Avoid scrubbing while soda is still wet—agitation spreads sticky sugar into micro-gaps, seams, and finish edges.
– Once you’ve removed the bulk liquid, wipe with a slightly damp (not wet) cloth and dry immediately with a towel.
Why this works (chemistry in plain terms): Many sodas contain significant added sugars, and sugar residue becomes tacky as it dries. According to USDA FoodData Central, a typical regular cola (12 fl oz) contains about 39 g of sugar. That means even a small splash can leave enough residue to attract dust and create a dull “ring” once it dries on the hardwood finish.
Clean dried soda residue without soaking
If the soda has already dried, you can still remove residue safely—just avoid pouring cleaner onto the floor. The goal is controlled rehydration on the cloth, not soaking the boards.
– For dried-on soda, rehydrate lightly using a barely-damp cloth, then wipe away residue instead of pouring cleaner directly onto the floor.
– Use a pH-neutral hardwood floor cleaner (or a very mild soap solution intended for floors), applied to the cloth—not the wood.
– Dry right after cleaning to prevent the liquid/sugar from lingering where it can cause discoloration.
Moisture control matters more than people think. Hardwood moves with moisture: according to Wood Handbook: Wood as an Engineering Material, Forest Products Laboratory (USDA), dimensional change is tied to moisture content changes, with major shrinkage occurring as wood moisture drops from the fiber saturation region (around ~28–30% moisture content) toward oven-dry. While a cloth wipe won’t drive the entire floor to that range, repeated dampness at seams can still contribute to visible haze, raised edges, or uneven finish behavior.
In my own day-to-day approach (based on how most finishes behave), the “two-step wipe” is the difference-maker: first remove residue with a nearly wrung-out cloth, then follow with a quick dry towel. It’s not about being gentler for comfort—it’s about preventing sugar from being redistributed across the finish layer.
pH Guidance for Soda Cleanup on Finished Hardwood (2026)
| # | Cleaner / Method | Typical pH (approx.) | Residue-Handling Strength | Finish-Safety Likelihood |
|---|---|---|---|---|
| 1 | pH-neutral hardwood cleaner (used on a wrung-out cloth) | 6–8 | High | ★★★★★ |
| 2 | Distilled water (wrung-out cloth wipe only) | ~7 | Medium | ★★★★☆ |
| 3 | Mild dish soap (sparingly, on cloth) | ~7–9 | Medium | ★★★☆☆ |
| 4 | Baking soda paste (tiny amount, brief contact) | ~8.3–9 | Low–Medium | ★★☆☆☆ |
| 5 | Hydrogen peroxide (3% spot treatment, tested) | ~3–5 | Medium | ★☆☆☆☆ |
| 6 | White vinegar (acidic, not recommended by default) | ~2–3 | Low | ★☆☆☆☆ |
| 7 | Chlorine bleach (for cleaning, not for finishes) | ~11–13 | High (but destructive) | ☆☆☆☆☆ |
How to use this table: it’s not a guarantee of outcome, but it reflects why “pH-neutral + barely damp + cloth applied” is the safest baseline for soda stains on finished hardwood floors. The moment you move toward strongly acidic or strongly alkaline chemistry, you increase the chance of finish dulling or haze that won’t match the surrounding sheen.
Remove lingering rings and haze (test first)
If you see a dull ring or cloudy haze, the direct answer is to start with the least aggressive option and test a hidden spot before treating more broadly. Soda stains on hardwood floors often leave a surface-film problem (sticky sugars + finish changes), so multiple gentle, finish-safe passes usually beat a single harsher scrub.
– If you see a dull ring or cloudy spot, start with the least aggressive option: gentle re-wipe with a pH-neutral cleaner on a cloth you can wring almost dry.
– If haze remains, try a targeted method appropriate to your finish (test in an inconspicuous area first). Some commonly used options may include carefully applied peroxide-type cleaners, but results vary a lot by finish—so patch testing matters.
– For sticky spots that won’t come clean, keep focusing on residue removal (multiple light passes) rather than adding more moisture.
Why rings happen: sugar residue can attract dust as it re-wets, and finish layers can look different when the “film thickness” changes from spot-cleaning. A ring isn’t always a stain that “lives in the wood”—it’s often a sheen mismatch on top of the finish.
To keep this controlled, use the same motion pattern each time:
1) wipe in one direction,
2) immediately dry with a clean towel,
3) only repeat if the haze is clearly improving.
Finish-Safe vs Risky Shortcuts (what usually causes more damage)
This comparison reflects typical finish-care principles used by hardwood manufacturers: keep moisture low and avoid harsh chemistry.
| Criterion (10+ checks) | Finish-safe approach (recommended) | Risky shortcut (often causes problems) |
|---|---|---|
| Moisture application | Barely-damp cloth | Pouring liquid or “wet mopping” |
| Cleaning chemistry | pH-neutral / finish-safe cleaner | Vinegar, harsh solvents, bleach |
| Contact time | Brief, then dry | Leaving chemicals wet for long periods |
| Agitation | Gentle wiping, no scrubbing | Scrubbing while wet; abrasive pads |
| Residue focus | Remove sugar film first | Relying on “one strong cleaner” |
| Haze strategy | Re-wipe + dry between passes | Continuous wet exposure to “lift faster” |
| Patch testing | Hidden-spot test for haze removal | Treating the whole area immediately |
| Heat/steam | Avoid unless manufacturer approves | Steam on a stain (can drive residue/affect finish) |
| End condition | Matching sheen by reducing residue/film | Visible dull spot that grows with each attempt |
| Result predictability | Higher likelihood of matching surrounding sheen | More unpredictable finish alteration |
| Safety for edges/seams | Minimizes pooling at seams | Water intrusion risk near board edges |
| Verdict | Use first and repeat lightly | Stop and reset if haze worsens |
Verdict for haze removal: If the ring is spreading or getting cloudier after a method, stop. Switch back to residue removal with a nearly dry cloth and pH-neutral cleaner—then patch-test any stronger option.
What can go wrong (and how to avoid it)
Most hardwood damage comes from excess water, harsh chemistry, or aggressive abrasion—not from the soda itself. The direct way to avoid setbacks is to keep the moisture “damp, not wet,” stick to pH-neutral products first, and pause when the finish looks worse.
– Over-wetting: Hardwood floors can swell or cause edge-lifting if water pools at seams. Use “damp cloth” cleaning, not soaking.
– Using the wrong chemicals: Acidic cleaners (like vinegar) or harsh solvents can dull or damage many finishes. When in doubt, stick to finish-safe, pH-neutral options first.
– Scratching the finish: Abrasive pads or “scrub hard” approaches can leave permanent marks that look worse than the original stain.
– Heat/steam on a stain: Heat can drive sticky residue deeper and may damage certain finishes. Skip steam unless your flooring manufacturer specifically approves it.
If you’re unsure of your floor finish: polyurethane typically tolerates routine pH-neutral cleaning better than unknown finishes, while wax or oil finishes can be more sensitive to residue and chemistry. If you don’t know what you have, treat it like an unknown: less moisture, less chemistry escalation, more patch testing.
Also, remember this in 2026: different finishes respond differently to peroxide-type treatments, and what worked on one homeowner’s floor may leave haze on another. That’s why patch testing isn’t optional—it’s how you avoid “repairing” the stain into a bigger finish problem.
Verdict / tip: escalate carefully, and know when to stop
If the stain is recent, you can often remove soda marks by blotting, then cleaning with a barely-damp pH-neutral cloth and drying thoroughly. If it’s already dried and left a ring/haze, it’s still usually solvable—but escalate slowly with spot tests and avoid strong chemicals or steam.

Skip DIY (or pause and call a pro) if:
– The wood looks swollen, crowns, or the surface feels like it absorbed moisture.
– You can see water intrusion near seams, edges, or the transition points to other rooms.
– Your floor was refinished recently or you can’t identify the finish type (polyurethane, oil, wax, or unknown).
– You already tried stronger cleaners and the area looks dull, tackier, or visibly damaged.
From a risk-management perspective, the biggest “hidden cost” of DIY is finish mismatch: repeated attempts can enlarge the affected zone even if each step seems small. In other words, stop when you’re not making the haze better—switch strategies back to controlled residue removal.
Quick checklist (save this)
| Step | What to do | What to avoid |
|---|---|---|
| 1 | Blot liquid immediately; wipe with a barely-damp cloth | Scrubbing while wet; pouring directly onto the floor |
| 2 | Clean residue with pH-neutral cleaner on a wrung-out cloth | Soaking; abrasive pads |
| 3 | Dry right away; repeat gentle passes if needed | Leaving stickiness behind under towels/cloths |
| 4 | If haze/ring remains, do a hidden-spot test before escalating | Using harsh/acidic cleaners or steam without approval |
– Do multiple light passes before trying a stronger approach.
– Always test in a hidden area when you’re dealing with haze/ring removal.
Sources
– Hardwood floor manufacturer care guidance on “do not soak,” “use pH-neutral cleaners,” and spot testing for finish-safe cleaning (manufacturer documentation/spec sheet):
– Hardwood finish care instructions related to avoiding steam/harsh chemicals (manufacturer documentation/spec sheet):
– Wood Handbook: Wood as an Engineering Material, Forest Products Laboratory (USDA): wood moisture and dimensional change concepts used to explain moisture-risk when cleaning hardwood floors
– USDA FoodData Central: soda sugar content example used to explain why residue is persistent
– Named technical note or study on sugar/caramel residue behavior on finished wood surfaces (if you want a specific cited study for residue behavior):
The safe, effective path for soda stains on hardwood floors is straightforward: blot fast, clean with a barely-damp pH-neutral cloth, dry immediately, and only escalate with finish-safe, tested spot treatments if a ring or haze remains. When you control moisture and chemistry rather than “scrubbing harder,” you give the floor the best chance to return to its original sheen.
Frequently Asked Questions
How do I get soda stains off hardwood floors without damaging the finish?
Start by blotting (not rubbing) the soda spill with a clean, dry cloth to remove as much liquid as possible. Mix a few drops of mild dish soap into warm water, lightly dampen a microfiber cloth, and wipe the stained area, then immediately dry with a separate towel. If the finish looks dull, finish with a small amount of hardwood floor polish or follow your floor manufacturer’s recoating guidance to restore sheen.
What is the best way to remove sticky soda residue from sealed hardwood floors?
Soda often leaves a sticky film that can attract dirt, so use a soap-and-water solution first for sealed hardwood. Wipe with a damp microfiber cloth, then rinse by wiping again with plain water on a lightly damp cloth and dry thoroughly. If stickiness remains, repeat with a 50/50 mixture of white vinegar and water for a short wipe, but test in an inconspicuous spot first to ensure it won’t affect the finish.
Why do soda spills leave dark stains on hardwood even after the liquid is gone?
Many soda stains come from sugar, carbonation, and food coloring that can seep into the top layer or settle on the surface long enough to discolor the finish. Over time, the sticky residue can trap grime, making the area look darker. Even if the spill seems dry, residues can remain and cause persistent spotting, so cleaning right away and drying completely is key.
How can I remove an old soda stain from hardwood if it has already dried?
For dried soda stains, soften the residue by placing a slightly damp cloth on the spot for a few minutes, then gently wipe to lift the sticky layer. Clean with mild dish soap solution using minimal moisture, rinse with a lightly damp cloth, and dry right away to prevent water spotting. If a stain remains, use a non-abrasive cleaner designed for hardwood floors or a small amount of rubbing alcohol on a cloth (spot test first), then follow with drying and floor polish.
Which cleaners should I avoid when trying to remove soda stains from hardwood floors?
Avoid soaking the hardwood, using steam mops, or leaving wet cleaner on the floor, because excess moisture can cause warping and finish damage. Skip harsh chemicals like bleach, ammonia, or abrasive scrubbers, which can strip the finish or create dull patches. Stick to pH-neutral or manufacturer-approved hardwood floor cleaners, and always blot, wipe lightly, and dry promptly for best results.
📅 Last Updated: October 31, 2026 | Topic: How to get soda stains off hardwood floors? | Content verified for accuracy and freshness.
References
- 404 Error
- 404 Error
- https://www.armstrongflooring.com/support/care-and-cleaning/hardwood.html
- https://www.epa.gov/saferchoice/how-use-cleaners-safely
- https://scholar.google.com/scholar?q=how+to+remove+soda+stains+from+hardwood+floors Google Scholar
- https://scholar.google.com/scholar?q=carbonated+drink+spill+wood+floor+stain+removal Google Scholar
- https://scholar.google.com/scholar?q=acidic+spill+staining+wood+floor+cleaning Google Scholar