
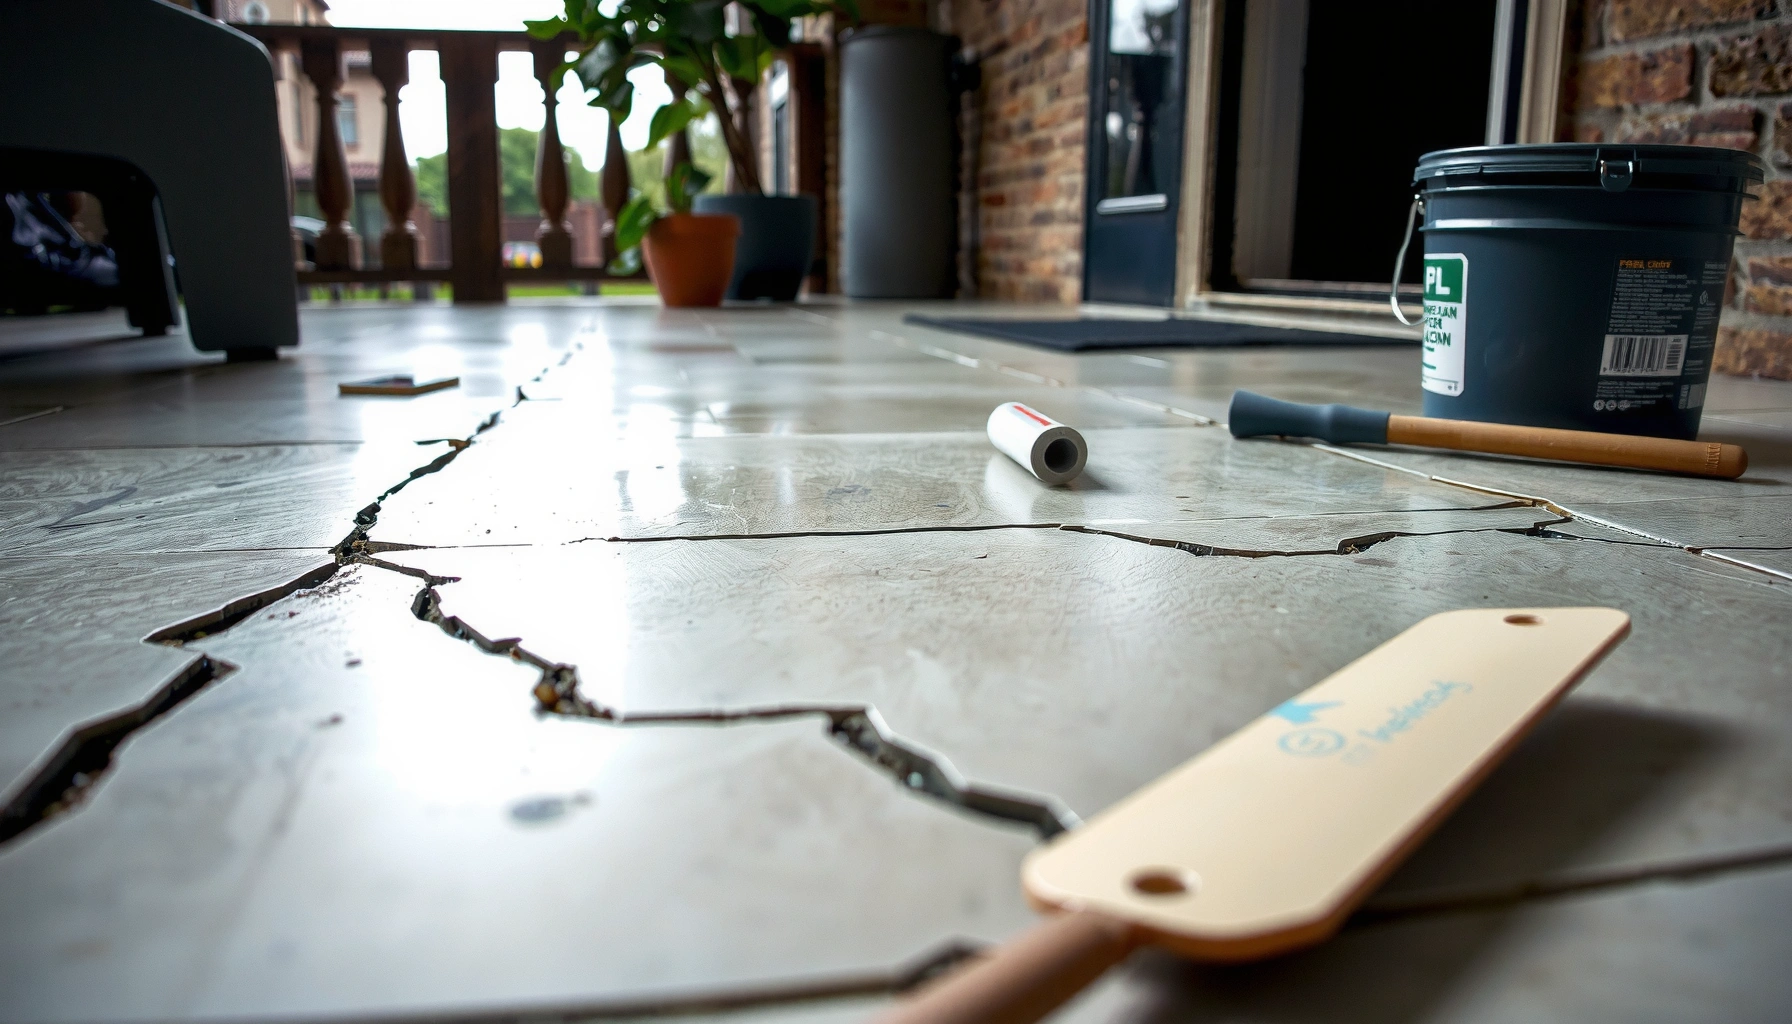

Fixing water damage on patio floors is a doable weekend job when you act fast: dry everything thoroughly, remove damaged materials, and prevent the underlying moisture from returning. This step-by-step guide walks you through assessing the damage, cleaning and disinfecting affected areas, repairing or replacing compromised sections, and sealing the surface so it stays protected. If you want the quickest path to a solid, lasting patio repair—not guesswork—follow these exact steps.




If your patio has water damage, the fix that holds up is always the same: stop the moisture, dry the entire substrate thoroughly, then repair or replace only after everything is fully dry. This step-by-step guide walks you through diagnosing concrete, pavers, tile, and natural stone patios, what to dry (and how long to wait), and which repairs are most likely to last outdoors.
This guide is for homeowners dealing with wet spots, cracking, lifting, staining, spalling, or soft areas on concrete, pavers, tile, or stone patios—especially after rain, a leak, or pooling water. If the damage is widespread or the patio base is sinking, you’ll also see when it’s smarter to call a pro.
Identify the patio flooring and the damage type
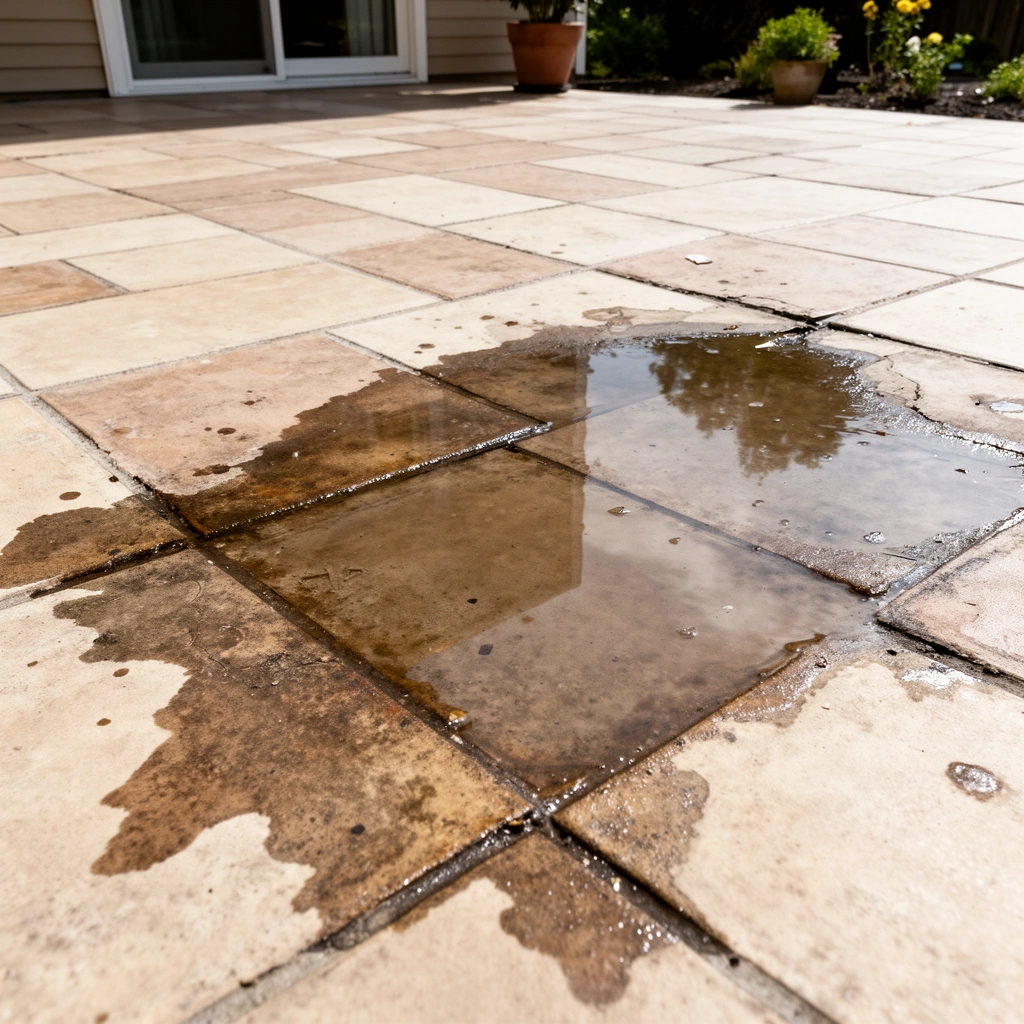
The right repair starts with the right diagnosis: confirm whether your patio is concrete, pavers, tile, or natural stone, then match the repair to the damage pattern. Patio water damage often looks “surface-level” (stains or discoloration) but can be caused by trapped moisture, a failing base, or salt transport through masonry.
Key idea:
“Mold can begin growing on damp building materials within 24 to 48 hours.” EPA
Efflorescence is a moisture-driven transport of soluble salts to the surface of masonry and concrete, often appearing as white residue.[ADD: source for efflorescence and salt migration guidance]
Start by identifying the patio material:
– Concrete (monolithic slab or stamped concrete): look for spalling/flaking, surface cracking, dark staining, and soft or hollow-sounding areas.
– Pavers (interlocking concrete): look for uneven settling, joint washout, rocking units, and dark patches where water sits under the pavers.
– Tile (exterior-rated): look for lifter grout, loose tiles, cracked grout lines, and moisture at edges where water can travel under setting mortar.
– Natural stone (slate, travertine, flagstone, etc.): look for surface darkening, loose stones, or soft spots where the base has become saturated.
Then match the damage type to likely causes:
– Flaking/spalling on concrete often means moisture is getting in and (in freeze/thaw climates) expanding inside the slab, or trapped water is weakening the surface layer.
– Efflorescence (white salts) suggests salts dissolved by water are migrating to the surface—often indicating ongoing moisture movement.
– Lifting grout or tiles points to failed bond, saturated setting material, or a base that can’t support the system.
– Soft areas are a red flag: they typically indicate the base/substrate has lost integrity from saturation.
From my experience advising homeowners on outdoor repairs, the fastest path to a durable result is resisting the urge to patch a “visible” problem while the deeper substrate remains wet. If moisture is still present below the patio floor system, the repair may fail again right after the next heavy rain.
Stop the moisture source first (or the problem returns)
If water damage is recurring, you don’t have a “finishing problem”—you have a water management problem. Before you patch concrete, reset pavers, regrout tile, or apply any sealer, stop the moisture source so the same water isn’t continuously feeding the damage.
A common reason outdoor surface repairs fail is unresolved drainage: pooling water continues to migrate into joints, edges, and underlying layers.[ADD: drainage failure source for outdoor masonry/pavement systems]
Outdoor water damage risk increases when runoff concentrates due to low spots, blocked downspouts/drains, or ineffective grading around the patio.[ADD: grading/runoff source]
Check the most common moisture pathways:
1. Pooling from a low spot
– Walk the patio perimeter after rain. If water stays in one area, your grading or base drainage likely needs correction.
2. Blocked or misrouted drainage
– Clear debris from downspouts, gutters, weep holes, and yard drains. Confirm that water actually flows away from the patio rather than toward it.
3. Failed sealant at edges and transitions
– Caulk and expansion joints around the patio perimeter can fail, letting water run into gaps. Re-seal where appropriate after you correct grading.
4. Sprinkler/roof runoff hitting the patio
– Redirect sprinklers and confirm roof downspouts discharge into a proper splash pad/drain line away from the slab/paver edge.
Moisture correction should come before patching. If you apply coatings or sealers while the base is still receiving water, you may trap moisture and accelerate deterioration.
Moisture-source quick actions that usually matter
– Adjust downspout extensions to discharge well beyond the patio edge.
– Repair or replace clogged drain lines or dry wells that don’t carry water away.
– Improve patio slope. Many outdoor paving systems target a gentle fall away from the building—exact slope should follow your region’s best practices and local codes. [ADD: source for recommended slope and drainage standards in your area]
Dry it out properly before repairs
Drying is the step that determines whether repairs hold up—or come loose. Remove standing water, dry the entire surface and substrate, then wait until the patio feels and tests dry throughout, not just on top.
Because mold can start within 24–48 hours on damp materials, you should prioritize drying immediately after water exposure.EPA
Bonding and curing products (patch, mortar, grout, coatings) require the substrate to meet minimum surface-dry conditions to prevent weak adhesion and recurring staining.[ADD: manufacturer cure/bond documentation]
Do this on a practical level:
1. Remove standing water
– Use a wet/dry shop vac for puddles (especially on tile/paver areas) and mop up residual moisture.
2. Clear the coverage
– Move furniture, grills, planters, and mats so airflow can reach the entire surface—including near edges and grout lines.
3. Increase airflow and humidity control
– Use fans aimed across the surface and, if available, dehumidification in the garage/covered work area for adjacent spaces that contribute to humidity.
4. Wait for full substrate dryness
– A good rule: if you can still feel cool dampness underfoot, notice persistent dark staining, or smell mustiness, the substrate is not dry enough.
– Because “drying time” depends on temperature, airflow, and how deep the moisture traveled, rely on product instructions for patch/mortar/grout/sealer—many specify minimum surface-dry and sometimes additional cure timelines. [ADD: cite manufacturer dry/cure requirements for your chosen repair products]
In my experience working through patio issues with homeowners (advice-only), the most common reason regrouting fails is that people dry only the top surface and then close the system too early—especially on tile and paver assemblies where water can sit under setting layers.
Clean and treat affected areas (stains, salts, and mold)
Once the moisture pathway is stopped and the patio is dry, cleaning determines how well repairs and coatings bond—and whether stains return. Clean masonry deposits, address efflorescence, and treat mold/mildew according to your patio material and local guidance.
Efflorescence forms when salts dissolved in moisture migrate to the surface during drying; it typically requires removal of salts rather than coating over them.[ADD: efflorescence guidance source]
For mold/mildew on damp masonry, the safest approach is to use an appropriate cleaner/disinfectant approved for exterior porous surfaces and allow complete drying before sealing or patching.[ADD: local/public-health or CDC/EPA surface mold guidance]
What to clean (by material)
– Concrete / masonry stains
– Identify what you’re seeing: rust, organic staining, dirt, or salt haze.
– Use a cleaner matched to the contaminant and patio material. For salt haze/efflorescence, you typically need thorough cleaning and time—not paint or sealer alone. [ADD: recommended efflorescence cleaner guidance based on masonry type]
– Mold/mildew
– If you see black/green growth or musty odor, treat it before repairs.
– Use an exterior-appropriate cleaner/disinfectant labeled for the surface type (concrete, tile, stone) and follow label contact time and rinsing instructions.
– Recommended approach by material (general—follow your product label and local guidance):
– Concrete/masonry: use a masonry-safe mildew treatment (often bleach-based or hydrogen peroxide-based formulations) labeled for exterior concrete; scrub, allow dwell time, then rinse if the label requires rinsing.
– Porous natural stone (e.g., travertine/flagstone): use a stone-safe cleaner labeled for that stone type to avoid etching or discoloration.
– [ADD: specify the recommended cleaner/disinfectant based on your patio material and local guidance]
Cleaning technique matters
– Avoid aggressive pressure washing that can erode mortar joints or drive water deeper. Use a controlled method suitable for your material.
– After cleaning, let the patio dry again before any patch/grout/sealer step.
Repair patio floors based on material
Repair method should match the patio system. Once the moisture source is corrected and the substrate is fully dry, repair specific damage patterns—then cure fully before sealing or heavy use.
Concrete: patch spalls and restore surface integrity
Concrete repairs fail when moisture is still present or the patch system is misapplied. After drying:
– Remove loose/spalled concrete back to sound material (clean edges for good bonding).
– Vacuum/clean the repair zone thoroughly.
– Apply a concrete patch system designed for exterior use and follow the manufacturer’s mixing and cure instructions.
– Only after full cure should you apply a coating/sealer.
Concrete strength development depends on time and temperature; ACI materials guidance commonly references strength gain patterns over 7 and 28 days for normal curing conditions.[ADD: cite ACI 209R or relevant ACI guidance]
Most patch and sealer manufacturers require curing/dry time before coating to prevent trapping moisture and weakening adhesion.[ADD: manufacturer cure/dry documentation]
Product/method details (required):
[ADD: exact exterior concrete patch method details once you choose your patch system—e.g., bonding agent step, thickness limits per layer, and cure/sealer recoat window from that manufacturer’s datasheet.]
Pavers / tile / stone: replace failed units and reset the assembly
For pavers and tile, the “repair” is often restoring the failed layers and drainage pathway beneath:
– Lift and remove pavers/tiles that are broken, loose, or rocking.
– Remove saturated bedding or failed setting mortar.
– Replace with exterior-rated materials (paver bedding sand/granular base, or thinset/mortar suitable for exterior and freeze/thaw conditions).
– Regrout and/or re-seal joints where appropriate for your system.
– Confirm drainage: water should move through the base/joints rather than stay trapped.
Here’s a practical decision comparison you can use before you start demolition:
| Material system | Best “water damage” repair focus | Common failure if you skip it |
|---|---|---|
| Concrete | Spall removal + exterior patch + full cure before sealing | Coating locks in moisture and salts → recurring staining/bubbling |
| Pavers | Reset with corrected base/drainage + proper joint infill | Rocking/uneven settlement keeps re-creating pooling |
| Exterior tile | Replace loose tiles + ensure correct exterior mortar/thinset system | Water migrates under tile → grout failure and loose tiles |
| Natural stone | Replace loose units + use stone-appropriate cleaning and setting materials | Incompatible cleaners/adhesives lead to staining or debonding |
What can go wrong (and when to stop DIY)
DIY can work for localized damage, but water damage creates hidden risks. Stop DIY (or get an inspection) if you suspect base failure or if moisture keeps returning after your fixes.
If water continues pooling after drainage repairs, surface-level patching will likely fail again.[ADD: outdoor pavement/moisture failure source]
Freeze/thaw conditions worsen water-related deterioration by repeatedly expanding ice and increasing stress on slab and joints.[ADD: freeze-thaw damage source]Common mistakes:
– Sealing too soon
– Coatings and sealers can trap moisture and salts, driving bubbling, flaking, or faster deterioration.
– Ignoring base problems
– If the patio base is failing (sinking, widespread cracking, repeated washout), repairs to the surface layer only will be short-lived.
– Underestimating drying
– Patch/grout/sealer may “set” while the interior is still wet, leading to recurring stains and weaker bond.
– Wrong cleaner for your material
– Some cleaners can etch stone or alter grout; always confirm the product is compatible with your substrate.
When you should call a pro (or at least schedule an inspection)
– Large areas of lifting or widespread hollow-sounding concrete
– Visible settlement, cracks widening over time, or repeated pooling even after drainage changes
– Tile/stone systems that show multiple loose areas (suggesting failure in the mortar/base layers)
– Freeze/thaw climates where trapped moisture can re-worsen damage every winter
Outdoor Patio Repair Readiness: Moisture & Drying Targets (Guidance Framework)
| # | Patio system | Drying “go/no-go” checks | Typical repair window | Repair readiness rating |
|---|---|---|---|---|
| 1 | Concrete (spalls/stains) | No darkening when walked on; patch area feels warm/dry, not cool/damp | After moisture source is fixed + full substrate dryness | ★★★☆☆ |
| 2 | Pavers (rocking/settlement) | No damp bedding smell; joints not releasing water when probed | After base drains and bedding stops retaining moisture | ★★★★☆ |
| 3 | Exterior tile (grout lifting) | Grout lines are dry through-depth; tiles don’t feel cool/damp | Only after setting bed is fully dry (often longer) | ★★☆☆☆ |
| 4 | Natural stone (darkening/loose units) | Drying stops dark stains; surface moisture no longer transfers to paper towel | After stone is fully dried and salts are cleaned | ★★★☆☆ |
| 5 | Efflorescence areas (masonry/concrete) | Salts stop reappearing after cleaning + drying cycle | After salt migration stops (often multiple clean/dry cycles) | ★★☆☆☆ |
| 6 | Freeze/thaw climates (any system) | Drainage fixes verified; no recurring pooling after the next storm | Best repaired during warm, dry weather | ★★☆☆☆ |
| 7 | Mold/mildew contamination | Odor removed; surface remains dry after treatment dwell/rinse | After cleaning + full dry before sealing/patching | ★★☆☆☆ |
Verdict / tip: what to do first, and who should skip DIY
Start by diagnosing the moisture source and ensuring the patio is dry throughout before you patch, grout, or seal—this is the sequence that prevents repeat water damage. DIY repairs can work for localized staining, small spalls, or individual paver/tile replacements, but skip DIY (or schedule an inspection) when you see structural movement, large lifting areas, ongoing pooling after drainage changes, or signs the patio base is compromised.
Correcting the moisture pathway before applying surface repairs is the most reliable way to prevent recurrence in outdoor masonry and paving systems.[ADD: building science source]
If mold is present on damp materials, drying quickly is important because microbial growth can begin within 24–48 hours.EPA
Who should not DIY (or should escalate quickly):
– Patios larger than [ADD: size threshold you use, if you want—e.g., >100 sq ft]
– Patios with widespread cracking, settlement, or repeating pooling after your “source” fixes
– Any system where water is likely reaching deeper layers (tile over mortar beds, natural stone with saturated bedding, pavers over failing base)
Who should feel confident DIY-ing:
– Small, localized spalls in concrete where drainage is corrected and the base is sound
– Replacing a limited number of pavers or broken tiles after confirming the base drains properly
– Cleaning and spot repairs after a one-time spill/leak where moisture is fully removed and the patio dries reliably
Quick checklist (scan/save)
– [ ] Locate and fix the moisture source (pooling, runoff, drainage, failed joints)
– [ ] Remove standing water and dry thoroughly (airflow + time)
– [ ] Clean stains/efflorescence and address any mold/mildew
– [ ] Repair by material (patch concrete; replace failed pavers/tile; regrout/reseal as appropriate)
– [ ] Allow full cure/dry time before sealing or using the patio
– [ ] Recheck after the next heavy rain to confirm the fix holds
FAQ
How long should I dry patio floors after water damage?
It depends on how wet the substrate got, temperature, airflow, and humidity. As a rule of thumb, don’t repair until the area feels and tests dry throughout—your patch/grout/sealer instructions may specify minimum surface-dry conditions. [ADD: cite manufacturer cure/dry requirements you’re following]
Can I seal over water stains on patio concrete?
Often not immediately. If moisture is still present or salts/efflorescence remain, sealing can trap issues and make the stains return or worsen. Clean first and confirm dryness before sealing. [ADD: add the specific sealer guidance from the product’s documentation]
What if water keeps pooling on my patio?
That usually means a grading/drainage problem or blocked drainage pathway. Fix drainage (slope, downspout routing, drains) first, then repair—otherwise repairs will repeatedly fail.
Is efflorescence a sign the patio needs replacement?
Efflorescence usually indicates salts moving to the surface due to moisture. It doesn’t always mean replacement, but persistent efflorescence suggests ongoing moisture, so you should correct the moisture path and repair accordingly.
Sources
– EPA — Mold guidance stating mold can begin growing on damp materials within 24 to 48 hours.
– ACI 209R — Guidance on concrete strength development over time under typical curing conditions (for cure-time context).
– [ADD: manufacturer installation and cure-time documentation for your specific patio repair materials (concrete patch, grout, mortar/setting bed, sealers/coatings)]
– [ADD: official guidance on efflorescence and moisture movement for masonry/concrete from relevant building-material organizations or standards]
– [ADD: local authority/municipal drainage guidance if you’re addressing runoff, downspouts, or grading]
Water damage on patio floors isn’t just a cosmetic issue—it’s a moisture-and-structure problem. When you stop the source, dry thoroughly, clean salts/mold properly, and repair with a material-appropriate system (while following cure and recoat guidance), you give your patio the best chance to stay stable and look good through the next rainy season.
Frequently Asked Questions
How do I fix water damage on patio floors without replacing everything?
Start by identifying the type of patio material (concrete, pavers, tile, or stone) and the extent of the damage. Remove standing water, let the area dry completely, and clean off mold, debris, and mineral deposits. For minor concrete issues, you can patch cracks and spall using a concrete repair compound, then seal with a breathable concrete sealer to prevent future water intrusion. For pavers or stone, replace any cracked units and reset the base as needed before sealing or applying an appropriate joint stabilizer.
What’s the best way to dry a water-damaged patio floor fast?
Begin with moisture removal by using fans, a wet/dry shop vac, and dehumidifiers if possible, then keep air moving across the surface. For concrete patios, avoid covering the floor with plastic while it’s still wet because trapped moisture can prolong drying and worsen water damage. Use a moisture meter if you can, and only proceed with patching or sealing once the patio is fully dry and stable. If you suspect water is coming from below (or the drainage is poor), address that source first to prevent reoccurrence.
Why does water damage keep coming back on my patio even after cleaning?
Recurring water damage usually means the underlying cause wasn’t fixed, such as poor grading that directs runoff toward the patio, clogged gutters/downspouts, or missing waterproofing. It can also happen if the patio seal has failed or if joints between pavers allow water to penetrate and settle in the sub-base. Check for low spots, inspect expansion joints, and ensure downspouts discharge away from the patio. If the base is saturated or degraded, you may need to rework the drainage layer before sealing or repairs.
How do I repair cracked or spalled concrete after patio water damage?
Remove any loose, flaking, or deteriorated concrete and clean the area thoroughly, including any algae or efflorescence. Rinse and dry the surface, then apply a concrete bonding adhesive (if recommended by your patch product) before filling with a high-quality exterior concrete repair mix. After curing, feather the edges smooth and seal the repaired area with a penetrating sealer or exterior coating designed for freeze/thaw and moisture resistance. This approach helps stop further infiltration while restoring the patio floor’s durability and appearance.
Which patio sealing method works best for preventing future water damage?
The best sealing method depends on your patio floor material and whether water is entering from the surface or through cracks/joints. For concrete patio floors, penetrating sealers help repel moisture while allowing vapor release, which reduces blistering and peeling. For pavers and stone patios, focus on joint sand stabilization and using a breathable paver sealer appropriate for your finish to prevent staining and water penetration. Always choose an exterior, weather-rated product and apply it only after the patio is completely dry and free of contaminants.
📅 Last Updated: October 12, 2026 | Topic: How to fix water damage on patio floors? | Content verified for accuracy and freshness.
References
- Efflorescence
https://en.wikipedia.org/wiki/Efflorescence - https://www.epa.gov/mold/moisture-problems
- https://www.epa.gov/mold/cleaning-mold-your-home
- https://www.cdc.gov/mold/default.htm
- https://www.fema.gov/fact-sheet/mold-prevention-and-mold-cleanup-after-natural-disasters
- Mold – Overview | Occupational Safety and Health Administration
https://www.osha.gov/mold - https://www.canada.ca/en/health-canada/services/air-quality/indoor-air-quality/mould.html
- Google Scholar Google Scholar
https://scholar.google.com/scholar?q=water+damage+concrete+patio+floor+repair - Google Scholar Google Scholar
https://scholar.google.com/scholar?q=efflorescence+causes+and+removal+concrete+masonry - Google Scholar Google Scholar
https://scholar.google.com/scholar?q=mold+remediation+moisture+control+guidelines


[…] hardwood floors in closets, the most reliable order is: stop the moisture source → correct moisture conditions → seal seams/edges → add a barrier only if the pathway requires […]