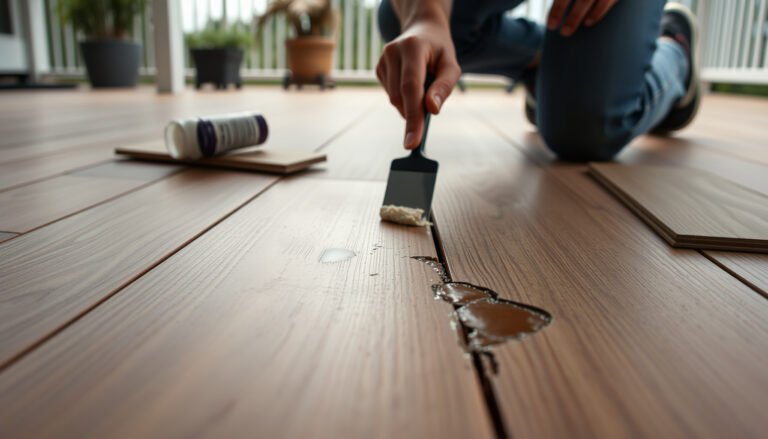

Peeling on commercial floors doesn’t have to be a recurring problem—this guide shows you how to fix peeling floors fast and correctly. You’ll learn the most common causes of peeling, the prep steps that stop it from coming back, and the exact repair approach to use based on whether the issue is coating failure or surface contamination. Follow these steps and you can restore a durable, professional finish instead of patching the same spot over and over.




Peeling on commercial floors usually means the existing coating system has lost adhesion—most often from moisture or poor surface prep—and the fastest lasting fix is to remove the failing layers and recoat with a compatible commercial system. Start by diagnosing moisture and substrate contamination, then mechanically remove unsound material, repair the concrete as needed, prime correctly, and apply the right primer/topcoat set under proper cure conditions so the failure doesn’t return.
If you manage a warehouse, office, retail space, school, or other high-traffic facility, peeling paint, epoxy, urethane, or even resilient/VCT-type wear layers are a business-critical issue: they can create slip hazards, expand repair area fast, and drive downtime. This guide helps you decide whether you can patch safely or whether you should resurface across a larger zone.
1) Confirm what’s peeling (and why it’s happening)
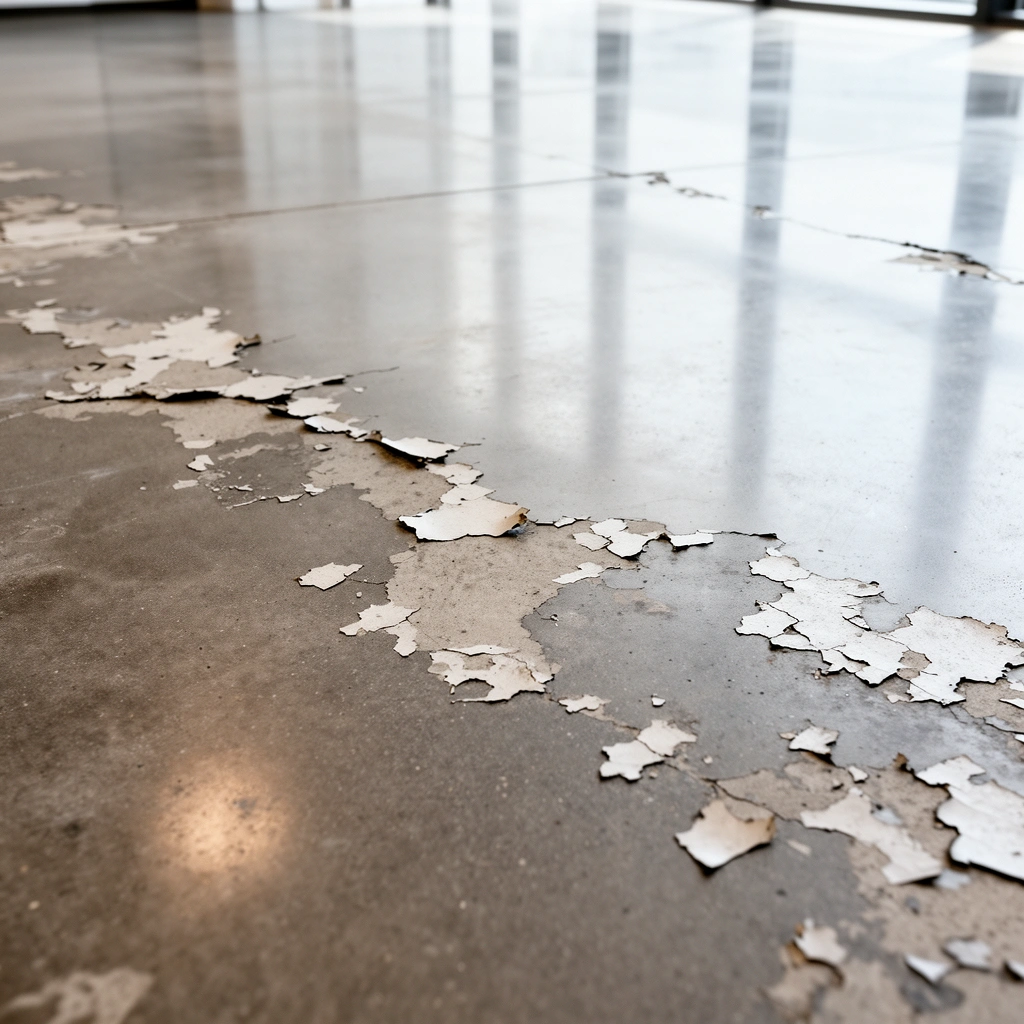
If the floor is peeling, you need to identify the failure type first—because the “right” repair method depends on whether you’re dealing with a coating system (paint/epoxy/urethane), a self-leveler, or resilient wear-layer issues. Once you know what’s lifting (and where the lifting starts), you can narrow the cause to moisture, prep/contamination, or coating incompatibility.
Peeling that forms bubbles and lifts after wet days is commonly linked to moisture/pressure under the coating, not just “surface dirt.” [ADD: source for coating adhesion failures related to moisture pressure]
Delamination that tracks along edges, joints, or prior patch lines often points to inadequate surface profiling, contamination, or system incompatibility at those interfaces. [ADD: source for typical causes of coating edge delamination]
If you see powdery residue on the concrete surface after removing coating, adhesion can fail due to poor prep or weak substrate chemistry (e.g., curing compounds or residual sealers). [ADD: source for curing compound/contaminant impact on adhesion]
Identify the layer and the failure pattern
Start with a visual walkthrough and a few simple observations:
– What exactly is peeling?
– Paint/epoxy/urethane coating: looks like a film layer lifting in sheets or flakes.
– Self-leveler: may peel as a thick “skin,” sometimes with cracking first and lifting later.
– Vinyl/laminate wear surface: may not “adhere peel” like coatings; instead you may see wear-layer separation, edges curling, or adhesive failure beneath.
– Where did it start?
– Wet-day lifting / bubbles / blistering typically indicates moisture traveling upward through the slab or condensation tied to HVAC airflow.
– Edge/joint lifting can indicate contamination (sealant, patch materials), or poor preparation where layers met.
– Powdery chalking under the coating often means the substrate surface wasn’t fully prepped and is acting as a weak release layer.
– How extensive is it?
– Localized failure (small spots/lanes) can sometimes be repaired.
– Broad, area-wide peeling usually means the root issue affects the entire surface—moisture, incompatible coatings, or sitewide prep failure.
From my work advising facility teams (and reviewing repair scope documentation), the fastest way to avoid repeating the same problem is to treat “what’s peeling” as a diagnostic step—not a cosmetic detail—because incompatible products and hidden moisture migration can make patching fail quickly.
Use moisture and adhesion clues to narrow the cause
Moisture isn’t just “water on top.” Many concrete slabs release moisture vapor for years, and coatings can trap it or lose bond when the slab can’t meet the system’s moisture tolerance. Industry-referenced moisture thresholds commonly used for epoxy and similar systems include:
– 3 lb/1000 sq ft/24 hours moisture vapor emission testing (ASTM F1869) is frequently used as a decision limit for many epoxy systems. [ADD: manufacturer guidance or ASTM F1869 interpretation used by common epoxy systems]
– 75% RH (relative humidity) using in-situ probes (ASTM F2170) is often cited as an approval limit for many epoxy floor coatings (varies by product). [ADD: manufacturer guidance referencing ASTM F2170 RH limits]
– Plastic-sheet tests (often tied to ASTM D4263) are commonly used as a quick screen for moisture condition, though they’re not a substitute for numeric testing where compliance is required. [ADD: ASTM D4263 reference and limitations]
If you can’t confirm moisture, the safest approach is to assume it’s a risk until proven otherwise—because adhesion failures frequently look similar on the surface while having different underlying causes.
2) Inspect the substrate and look for moisture and contamination
A peeling commercial floor is rarely just a coating problem—it usually starts with the substrate conditions: moisture activity or contaminants that prevent proper bonding. Your goal in this step is to identify active moisture sources and determine whether oil/grease, dust, curing compounds, sealers, or residue from prior coatings are interfering with adhesion.
Concrete moisture testing methods (ASTM F1869 or ASTM F2170) are designed to prevent coating failures driven by moisture vapor transmission under the slab. [ADD: ASTM F1869/F2170 references]
Oil, grease, dust, and prior sealer residues are common adhesion killers because coatings can’t form strong chemical or mechanical bonds over contaminated surfaces. [ADD: coating manufacturer surface prep requirements referencing contamination]
HVAC-driven condensation can create localized moisture cycles that cause blistering and delamination even when the slab doesn’t appear wet. [ADD: HVAC condensation and flooring moisture linkage reference]
Look for moisture sources your coating can’t “outcoat”
Walk the building like a plumber and a facilities engineer:
– Leaks: roofs, plumbing lines, condensate drains, sprinkler heads, hose bibs.
– Condensation: cold supply air over slab areas; unsealed pipe chases; high humidity periods.
– Cleanouts and slab penetrations: moisture often travels through control joints and penetrations.
– Traffic and cleaning chemistry: repeated wet mopping or alkaline cleaners can keep a surface condition unstable.
If you have access to facility logs, correlate peeling onset with:
– seasonal humidity changes,
– recent repairs to piping/HVAC,
– changes in cleaning chemicals,
– or a shift in how the space is used.
Assess contamination and substrate chemistry
Even a slab that isn’t “wet” can fail if the surface is contaminated or chemically incompatible with the new coating.
Common contamination and where you’ll see it:
– Oil/grease (warehouses, loading docks): often shows as persistent dark patches or “fisheyes” during coating application (if applied).
– Dust and laitance (insufficient grinding): creates a weak boundary layer.
– Curing compounds or densifiers: can block adhesion if not removed/neutralized.
– Previous coating residue: sanding that doesn’t fully profile or residue that remains in pores can act as a release layer.
Before recoating, confirm what’s on the surface. In practice, that usually means sanding/grinding a small test area down to a stable substrate and inspecting the exposed concrete.
3) Remove the failing material correctly
If the coating is peeling, the long-term fix requires removing the unsound layers until you reach a stable, well-bonded substrate. The worst “cost trap” is skimming over lifting edges—because the new system will bond to a boundary that’s already failing.
Mechanical removal to stable substrate is standard practice when coatings are delaminating because chemical bonding cannot restore adhesion across an unsound interface. [ADD: coating manufacturer guidance on removal when adhesion fails]
Grinding/scarifying profiles increase mechanical anchorage, which helps new coatings lock into the concrete texture after removal. [ADD: manufacturer surface profiling requirements]
Localized removal must be blended to avoid creating “feathered edges” that become stress concentrators and can fail again. [ADD: resurfacing blending guidance reference]
Remove all loose coating—no “thin edge tolerance”
Plan removal like this:
1. Map the failure area (mark boundaries with tape/chalk).
2. Remove loose material beyond the visible edge of peeling.
3. Stop only when the remaining coating is tightly bonded (sound) or you reach the targeted substrate type.
In coatings, peeling rarely ends exactly where you see it. Adhesion loss can extend laterally beyond the obvious lift point.
Match your removal method to the floor type
– Concrete coatings (paint/epoxy/urethane): typically require grinding or scarifying to remove coating and create the profile needed for bonding.
– Self-leveler failures: remove until you reach a stable base layer (often requiring broader removal than expected because self-levelers can delaminate at the interface).
– Resilient flooring wear-layer separation (vinyl/laminate): localized scraping may not be enough if the adhesive bond has failed—removal strategy must protect the substrate and adhesives layer plan.
The key is that the removal stage defines the substrate you’re bonding to. If the new system can’t anchor mechanically and chemically to that surface, you’re setting yourself up for another cycle of peeling.
4) Prep, repair cracks/spots, and recoat with the right system
Once the failing layers are removed and the substrate is stable and dry, you can recoat successfully—but only if you prep correctly and install a compatible primer/topcoat system. Your recoat plan should be driven by manufacturer requirements for surface profile, priming, mixing, environmental limits, and application thickness.
Surface profiling and manufacturer-directed priming are the core steps that determine whether a new coating system will maintain adhesion after installation. [ADD: manufacturer TDS surface prep + priming requirements]
Cracks, spalls, and hollow spots must be repaired before coating because defects create voids and stress points that lead to repeat delamination. [ADD: flooring repair guidance referencing crack/spall prep]
If the existing system is unknown or incompatible, the safest approach is to follow a full compatible system design rather than guessing primer chemistry. [ADD: manufacturer compatibility guidance]
Profile and prime for mechanical and chemical bond
A reliable recoating workflow usually includes:
– Cleaning to remove dust produced during grinding (often by vacuum systems appropriate to coatings dust).
– Mechanical profiling sized for the new system’s bond needs (follow the coating manufacturer’s profile guidance).
– Priming with a primer matched to:
– concrete condition,
– moisture tolerance needs,
– and topcoat chemistry.
Repair defects before you coat
Address issues before priming so the coating doesn’t bridge problems:
– Cracks: fill/repair per crack type and movement risk (rigid fills vs flexible systems).
– Spalls/pitting: patch to restore a uniform substrate plane.
– High/low spots: correct so you don’t end up with thin coating elsewhere (thin film areas can fail faster).
Recoat with compatible products at correct conditions
Recoating success depends on more than “choosing epoxy/urethane.” It requires:
– correct mix ratios,
– recoat windows (when multiple coats are allowed without sanding),
– correct DFT (dry film thickness) goals and coverage,
– and compliant temperature/humidity ranges.
If you don’t know what was applied previously, treat compatibility as uncertain. Many repeat failures come from mismatched systems—e.g., coating over a chemistry that blocks adhesion or over residues that were never truly removed.
5) What can go wrong (common mistakes and edge cases)
Even when you remove and recoat, peeling can return if moisture, preparation, or system compatibility is still wrong. Use this section to sanity-check your plan before you spend labor and downtime on a recoat that may fail early.
Coating over lifted adhesion points commonly leads to re-peeling because the new layer bonds to an already failing interface. [ADD: manufacturer guidance on delamination and removal]
Moisture-related failures can keep recurring if moisture migration continues, even after good-looking prep. [ADD: moisture migration and coating failure reference]
Cure schedules matter: applying coatings outside recommended cure/recoat windows can trap solvents/moisture and weaken intercoat bonding. [ADD: manufacturer cure time and recoat window guidance]
Common mistakes that drive repeat peeling
– Leaving “sound-looking” thin edges of a failing coating system. If it’s lifting anywhere, it’s telling you the interface is compromised.
– Assuming the slab is dry without numeric moisture testing when moisture is suspected (or when there’s a history of wet conditions).
– Using the wrong primer/topcoat match because the prior system’s chemistry is unknown.
– Rushing cure and recoat timing—intercoat adhesion depends on staying inside the manufacturer’s window.
– Spot fixes when the problem is systemic (sitewide moisture, widespread contamination, or broad incompatible recoat). Partial repairs can fail at the boundary and force a bigger job.
Edge cases: where your decision (patch vs resurface) changes
Use a broader resurfacing plan if:
– peeling covers multiple lanes/traffic paths,
– peeling appears after repeated wet seasons,
– many separate areas fail in the same way,
– or structural issues are present (deep spalls, wide cracking, slab movement).
Quick comparison: patch repair vs full resurfacing
| Option | Best When | Main Risk |
|---|---|---|
| Targeted patch | Peeling is limited to small, clearly bounded areas and moisture/contamination is localized and corrected | Repeat failure at boundaries if moisture/system incompatibility is broader than it appears |
| Full resurfacing (or system-wide recoat) | Peeling is widespread, recurring, or the diagnostic points to moisture migration or sitewide surface prep mismatch | Higher downtime and cost—but lower likelihood of “same-failure” recurrence |
6) Verdict / tip (when to DIY vs. when to call pros)
The best approach is usually to repair only when you can confidently identify the cause and confirm moisture/contamination is addressed; otherwise, plan a broader resurfacing with a compatible commercial system. If moisture is suspected but not confirmed, or if peeling is widespread, it’s smart to call an experienced commercial coatings or flooring contractor.
DIY can work when peeling is localized and the failed coating is removed to stable substrate with manufacturer-matched priming and topcoat. [ADD: manufacturer installation guidance as referenced by your chosen coating]
When moisture is suspected, moisture testing and system design become decision-critical—contractors can help prevent repeat delamination. [ADD: ASTM F1869/F2170 decision-making guidance reference]
When DIY is reasonable
DIY (or small-scope contractor help) can make sense if:
– peeling is limited and clearly bounded,
– you can remove all unsound coating and reach stable substrate,
– you can follow the coating manufacturer’s TDS (technical data sheet) precisely,
– and the moisture risk appears low (no recurring wetting, leaks, or damp slab patterns).
When to call pros immediately
Skip DIY and engage pros if:
– you suspect moisture migration but can’t confirm with appropriate tests,
– the floor is structural-critical (wide cracking/spalling),
– peeling is widespread across the facility,
– you need fast turnaround with documented compliance requirements,
– or prior attempts already failed.
A candid downside to watch for
Even with good workmanship, misidentifying the existing system or missing a moisture issue can make peeling return quickly. In most repeat-failure scenarios, the root cause wasn’t fully corrected—removal and recoating alone didn’t solve the substrate condition.
Moisture Criteria Commonly Used Before Epoxy-Style Recoats (Commercial Slabs)
| # | Test method | Typical decision limit | Unit | Best used for |
|---|---|---|---|---|
| 1 | ASTM F1869 (CaCl₂ moisture vapor emission) | ≤ 3 | lb/1000 sq ft/24h | Moisture screening for many epoxy systems |
| 2 | ASTM F2170 (in-situ RH probes) | ≤ 75 | % RH | Slab RH profiling across the project |
| 3 | ASTM D4263 (polyethylene sheet test) | No visible condensation* | — | Quick moisture screen (not a numeric limit) |
| 4 | Surface profile check (grind/shot profile verification) | Per coating TDS | (profile rating) | Ensures mechanical bond potential |
| 5 | Concrete temperature at application | Follow TDS | °F/°C | Prevents rapid cure/condensation risk |
| 6 | Relative humidity at application (ambient) | Follow TDS | % RH | Avoids cure/film defects from moisture-laden air |
| 7 | Substrate cleanliness acceptance (dust/oil removal) | No transfer residue | qualitative | Prevents weak bond over contaminants |
ASTM D4263 is typically treated as a qualitative screening test; numeric moisture limits come from numeric methods like ASTM F1869 or ASTM F2170 and from the specific coating manufacturer’s TDS.
Quick checklist (scan before you start)
– [ ] Identify what’s peeling (coating vs. surface wear) and where it started
– [ ] Look for moisture sources (leaks, condensation, damp slab areas)
– [ ] Confirm moisture/adhesion risk using the appropriate testing method(s) if moisture is suspected [ADD: ASTM/standard references]
– [ ] Remove all loose material to stable substrate
– [ ] Clean and profile per coating manufacturer instructions [ADD: coating TDS surface prep requirements]
– [ ] Repair cracks/spalls before priming
– [ ] Use manufacturer-matched primer + topcoat system [ADD: coating system compatibility guidance]
– [ ] Apply only under recommended temperature/humidity conditions [ADD: TDS application conditions]
– [ ] Allow full cure before opening to traffic [ADD: TDS cure and recoat windows]
FAQ
Can peeling be fixed without removing the old coating?
Usually no. If the coating is already lifting, patching over the unsound layer commonly leads to repeat failure because the new system can’t build a durable bond over an interface that’s already compromised. Removal to stable substrate is typically required.
Why does commercial flooring peel after it looks fine for a while?
Peeling often starts after repeated wetting, seasonal humidity changes, cleaning chemical changes, or after the coating experiences mechanical stress cycles. Moisture migration, contamination, and incompatible primer/topcoat chemistry are the most common root causes [ADD: manufacturer adhesion failure documentation].
Does temperature or humidity affect peeling?
Yes. Many commercial coating systems specify application and curing conditions because film formation and intercoat bonding are sensitive to ambient conditions. If the slab or air environment is outside the manufacturer’s range, adhesion can fail [ADD: coating TDS application/environmental limits].
What if the peeling is widespread across the whole space?
Broad peeling usually indicates a systemic issue such as moisture migration, sitewide incompatible recoat chemistry, or inadequate surface preparation. In those cases, localized patching may not restore performance, and a larger resurfacing plan is often more cost-effective.
Sources:
– [ADD: manufacturer surface-prep and recoating instructions for the specific coating/primer you’re using]
– [ADD: manufacturer technical data sheet (TDS) for the primer and topcoat system]
– [ADD: official guidance for moisture testing methods from ASTM (e.g., ASTM F1869, ASTM F2170, ASTM D4263) or other relevant standards body used by the coating industry]
The core takeaway is simple: peeling on commercial floors is an adhesion failure that’s usually driven by moisture and/or contaminated/insufficiently prepared substrate—and the durable repair requires removal to stable material, proper profiling, manufacturer-matched priming, and a compatible topcoat system installed under correct cure conditions. If peeling is extensive or moisture is even a reasonable concern, treat diagnosis as part of the repair (not extra work), and bring in experienced contractors so you don’t pay twice for the same root cause.
Frequently Asked Questions
What causes commercial floor peeling and how can I identify the root issue?
Commercial floor peeling is usually caused by moisture intrusion, poor subfloor preparation, contamination (dust, grease, curing compounds), or adhesive failure. Look for signs like bubbling, dark spots, or soft spots in the substrate, and check whether peeling occurs around wet areas, edges, or high-traffic lanes. Identifying whether the problem is moisture-related, surface-related, or adhesion-related helps prevent repeat repairs and unnecessary replacement.
How do I fix peeling on commercial floors without damaging the existing surface?
Start by removing all loose or lifting material using scraping, grinding, and careful edge cutting until you reach a sound, firmly bonded base. Clean thoroughly with an appropriate degreaser or cleaner, then profile the surface (lightly mechanically abrade) so the new patch or leveling compound bonds correctly. Use a compatible primer designed for your floor system and apply the repair material per manufacturer instructions, finishing with the correct topcoat or wear layer so the commercial floor stays durable.
How do I repair peeling vinyl or resilient flooring in a commercial setting?
For peeling vinyl and other resilient floors, you typically need to remove the affected sections and inspect the subfloor for moisture, cracks, or contamination. After cleaning and profiling, apply the correct resilient flooring adhesive and primer (if required) and allow proper cure time before reopening the area. If the surrounding flooring is already failing, a partial section replacement is often more cost-effective than repeatedly patching the same peeling area.
Which products and adhesives work best for fixing peeling commercial flooring?
The best products depend on the floor type—vinyl, epoxy, tile grout, rubber, or epoxy coating—and the cause of the peeling. Use adhesives, primers, patching compounds, and topcoats that are explicitly labeled compatible with your existing system and substrate, including moisture-mitigation primers when needed. A strong bond usually comes from pairing the right primer and adhesive with correct surface prep (mechanical abrasion and thorough cleaning) and correct application thickness.
Why does commercial floor peeling keep coming back after repairs, and what’s the prevention plan?
Peeling often returns when the underlying cause—like ongoing moisture, inadequate surface prep, or wrong adhesive chemistry—wasn’t fully addressed. Prevent recurrence by performing moisture testing, removing all failing layers down to a stable substrate, and using a primer/adhesive system designed for the specific floor finish and conditions. Establish maintenance steps like regular cleaning with compatible solutions and controlling water exposure in wet areas to keep the commercial floor from failing again.
📅 Last Updated: October 12, 2026 | Topic: How to fix peeling on commercial floors? | Content verified for accuracy and freshness.
References
- Google Scholar Google Scholar
https://scholar.google.com/scholar?q=peeling+floor+coating+delamination+commercial+floors+concrete+surface+preparation - Google Scholar Google Scholar
https://scholar.google.com/scholar?q=epoxy+coating+failure+causes+adhesion+peeling+concrete - Google Scholar Google Scholar
https://scholar.google.com/scholar?q=vinyl+flooring+adhesive+failure+peeling+commercial+maintenance - https://en.wikipedia.org/wiki/Peeling_paint
- Lead Renovation, Repair and Painting Program | US EPA
https://www.epa.gov/lead/renovation-repair-and-painting-program - https://www.hud.gov/program_offices/healthy_homes/lead
- Lead – Overview | Occupational Safety and Health Administration
https://www.osha.gov/lead - https://www.cdc.gov/lead/index.htm
- Lead | National Institute of Environmental Health Sciences
https://www.niehs.nih.gov/health/topics/agents/lead - https://pubmed.ncbi.nlm.nih.gov/?term=lead+hazards+peeling+paint+floors