
Need to fix scratches on wood-look tile floors? You’ll get the fastest, most reliable step-by-step method to remove light scuffs and repair deeper marks without making the finish look patchy. Follow these simple steps to clean, match the right filler or touch-up product, and restore the tile’s sheen so the damage blends in.



Scratches on wood-look tile floors usually come down to one thing: whether they’re only in the surface glaze or they’ve actually chipped through it. Start by cleaning the area and checking scratch depth—surface-level scuffs can often be filled and blended with a color-matched tile repair kit, while deeper chips typically require epoxy filler or, for damaged design layers, tile replacement for a durable finish. In this guide, you’ll learn how to identify the scratch type and choose the right fix step-by-step.
If you’ve got scuffs or scratches on ceramic/porcelain “wood-look” tile (the kind with a printed wood pattern under/behind a glaze), this is for you—especially if you want to avoid full floor replacement and you’re comfortable doing small, careful repairs.
How to tell what kind of scratch you have
Most scratch fixes succeed when you correctly classify the damage before you buy a repair product. Light, glaze-level marks respond well to blending compounds, while grooves or chips that break through the decorative layer usually need epoxy filler or tile replacement.
According to ASTM C373, porcelain tile has very low water absorption (≤0.5% by mass), which is one reason glazed “wood-look” floors can resist staining even after surface scuffing—until the glaze is compromised.
According to ANSI A137.1, glazed tile wear ratings (often referenced as PEI) run on a 0–5 scale, so abrasion resistance can differ widely by tile class even when both look “wood-like.”
In my experience repairing wood-look tile scratches, the fastest way to avoid making things worse is to feel the scratch edge under angled light—depth is the deciding factor for whether you can blend, fill, or must replace.
Run a fingertip across—carefully—to judge depth
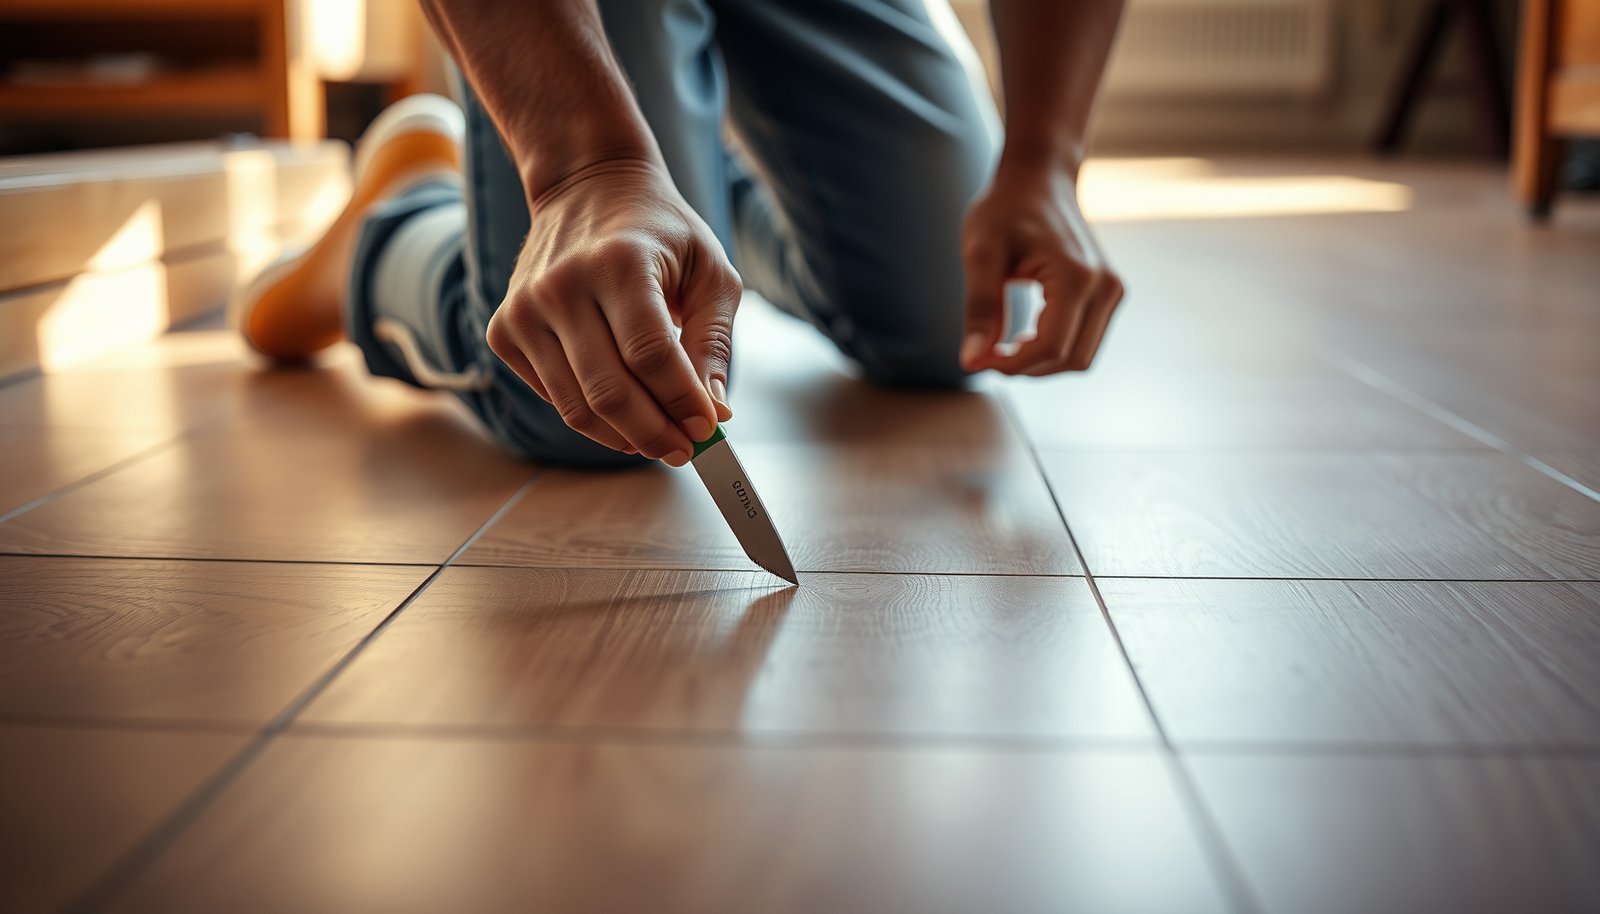
Run a fingertip gently across it (carefully): if you mostly feel a rough “lift” on top, it’s often surface/glaze-level. If you can feel a groove that catches (especially with a fingernail), it may be deeper than the glaze.
Because wood-look tile uses a printed wood pattern beneath/behind a top glaze, the visual goal is also different: glaze-only scratches may disappear with proper color matching, while deeper damage can expose raw layers that do not blend naturally into the grain.
Look for color and pattern disruption
Look for color change at the scratch: a scratch that darkens/empties the pattern is more likely cutting through the decorative layer. If the scratch line looks like it interrupts the “grain” consistently (rather than just whitening the surface), you’ll usually need more than a wax-like surface filler.
Also check whether it’s a chip vs. a long scratch: chips usually need filler matched to the tile body and glaze transition, while long scratches may respond to color blending only if they’re shallow.
Quick decision rule for wood-look tile scratches
Here’s the practical rule most installers use: if the wood-look “image” is still intact and only the glaze is marred, start with a glaze repair kit. If the scratch interrupts the printed pattern or you see missing material, plan for epoxy filler and careful leveling—or replacement if the appearance can’t be matched.
Prep the floor so the repair actually bonds
Surface repair fails most often because the area wasn’t cleaned to the level the repair product expects. Good bonding starts with removing grit that acts like sandpaper and prevents epoxy/compound from wetting the surface.
Routine tile maintenance guidance from the Tile Council of North America (TCNA) emphasizes using appropriate cleaners for ceramic/porcelain tile and avoiding harsh chemicals that can damage finishes.
According to ASTM C373, porcelain tile’s low porosity means surface contamination—not the tile body—often drives adhesion problems, so cleaning matters before you apply any wood-look tile scratch repair compound.
Clean first (no shortcuts)
Clean first (no shortcuts): use a pH-neutral tile cleaner and a microfiber cloth to remove grit that will smear or prevent adhesion. For wood-look tile floors, treat the printed grain like part of a finish—scratching harder while cleaning is a common “repair setback.”
If you’ve got sticky residue (shoe rubber, tracked-in adhesive, or cleaner buildup), wipe again with clean water after the pH-neutral cleaner, then dry.
Dry completely and control dust
Dry completely: repairs (markers/fillers/epoxies) won’t blend well on damp tile. Even a thin film of moisture can change how a resin spreads and can trap haze in the repaired wood-look line.
Let the area air-dry, then do a final wipe with a clean, dry microfiber.
Mask around the damage
Mask around the damage: use painter’s tape to protect nearby areas so excess filler doesn’t spread into the wood-grain pattern. This step is especially important on wood-look tile because the “grain direction” is part of the visual design—compound smears can look like a repeated paint stroke.
From my experience, if the repair line spreads beyond the scratch, the finished result looks less like “restoration” and more like “the floor shows where you worked.”
Fix light surface scuffs (glaze-only)
Glaze-only scratches are the easiest to restore because you’re typically filling and leveling a surface defect, not rebuilding missing tile layers. The fastest path is a color-matched tile scratch repair kit designed for glazed ceramic/porcelain.
A glaze repair kit works because it’s formulated to adhere to and blend within the top decorative finish; TCNA maintenance guidance supports using systems intended for ceramic/porcelain finishes rather than generic fillers.
Because glazed tile is typically less absorbent (especially porcelain with ≤0.5% water absorption by mass per ASTM C373), surface-level repairs rely heavily on clean, dry contact for best results.
Use a scratch repair kit designed for tile/glaze
Use a scratch repair kit designed for tile/glaze: these typically use a color-matched compound (often resin or wax-like) and a blending step. Avoid “wood floor scratch” products—wood-finish chemistry and bonding behavior are different from glazed ceramic/porcelain.
Look for kits that explicitly mention ceramic or porcelain tile and use the included applicators rather than substituting random putty.
Apply in thin layers to prevent shiny blobs
Apply in thin layers: add a small amount, let it set per the kit directions, then wipe/level gently so you don’t create a shiny “blob.” With wood-look tile, the top glaze sheen is part of the pattern match—too much compound can read as a separate patch.
Blend to the pattern: work along the scratch line and keep the compound slightly under the surrounding surface so it doesn’t stand proud. In wood-look tile floors, you’re not just filling—you’re restoring the “grain continuity,” so align your blending strokes with the direction of the printed wood effect.
Let it cure fully before re-checking
Let it cure fully before you judge the final look. Many kit materials change appearance as they set, and rushing to clean too early can pull color back out of the repaired wood-look line.
Repair deeper scratches or chips (when filling is needed)
When a scratch turns into a groove or a chip breaks the decorative layer, you generally need a deeper-build filler/epoxy rather than a surface-only glaze kit. The goal shifts from “blending” to “reconstructing level and depth,” then matching color as closely as possible.
For porcelain tile, low porosity (≤0.5% water absorption by mass per ASTM C373) means fillers bond best when they’re applied to a clean, properly prepared surface—not when applied over dust, oils, or moisture.
If the repaired area affects traction, note that slip requirements often reference a minimum dynamic coefficient of friction (e.g., ANSI A326.1 commonly ties “wet” or accessible-path thresholds to tested DCOF values such as 0.42 in many compliance discussions).
Use a tile repair epoxy/filler meant for ceramic/porcelain
Use a tile repair epoxy/filler meant for ceramic/porcelain: these are generally stronger than wax-style fillers for real depth, but they require careful color matching. They also usually demand more precision—overfilling makes leveling mandatory, and leveling on glaze can create visible edge halos.
Apply the epoxy/filler with minimal excess, then let it cure undisturbed according to the product label.Level after curing—only with the manufacturer’s method
Level after curing: after the filler cures, you may need very light leveling with the method specified by the repair product (often a fine abrasive).
– If you’re not sure what’s safe for your specific tile, stick to the kit’s instructions.
This matters because wood-look tile can have a textured or satin glaze feel, and sanding the wrong way can make the repaired line catch light differently.
When color won’t disappear, replace the tile
When color won’t disappear, replace the tile: if the scratch exposes raw material or the wood pattern is badly disrupted, a “perfect” cosmetic match may be impossible—replacement is the most durable way to restore the look.
A common reality in wood-look tile repairs is that even when epoxy “sets flat,” the printed grain can’t fully reappear once the decorative layer is gone.
Scratch Sources by Abrasive Hardness (Mohs scale, typical values)
| # | Material often tracked onto floors | Typical Mohs | Scratch potential ★ | Impact direction |
|---|---|---|---|---|
| 1 | Aluminum oxide (common abrasive dust) | 9.0 | ★★★★★ | High hardness |
| 2 | Quartz sand (grit from shoes) | 7.0 | ★★★★☆ | High hardness |
| 3 | Porcelain tile glaze/cookware-grade ceramics (typical) | 7.5 | ★★★★☆ | High hardness |
| 4 | Granite (stone dust) | 6.5 | ★★★☆☆ | Moderately high |
| 5 | Glass fragments | 5.5 | ★★★☆☆ | Middle hardness |
| 6 | Steel (legs/hardware) | 4.0 | ★★☆☆☆ | Lower hardness |
| 7 | Rubber/silicone chair feet (typical) | 2.0 | ★☆☆☆☆ | Soft material |
What can go wrong (and how to avoid it)
Even small wood-look tile scratch repairs can backfire if the process removes more glaze than the scratch itself. In 2026, the most common problems still come from over-sanding, wrong chemistry, and rushed cure times.
Because glazed tile surfaces can have different sheen and wear layers, excessive abrasion can make a repair line visible by changing how light reflects off the glaze—this is why repair instructions typically restrict leveling to specific, fine methods.
For safety and compliance planning, slip testing and minimum friction discussions often refer to quantified thresholds (for example, DCOF values discussed under ANSI A326.1)—so avoid sanding that creates a gloss/texture mismatch that changes traction locally.
In my experience with wood-look tile floors, the “patched line” look is almost always a color match issue or an excess-material issue, not a true failure of the repair product.
Sanding too aggressively
Sanding too aggressively: sanding can remove more of the glaze and make the damage more visible. If you start leveling, go minimal and stop frequently. If the scratch is glaze-only, you generally shouldn’t need to remove surrounding surface—build up only where the damage exists.
Wrong product for the tile type
Wrong product for the tile type: some “wood floor scratch” products are not meant for glazed ceramic/porcelain. Use a repair product labeled for tile/glaze (or for ceramic/porcelain specifically). Wood floor repair chemistry may not bond to glaze, and it can smear into the wood-look pattern.
Color mismatch in wood-look tile scratches
Color mismatch: wood-look tiles vary a lot by batch and shade. If the repair compound is even slightly off, it can look like a “patched line” instead of a natural continuation of the grain. This is more noticeable on darker browns and high-contrast “knots” common in wood-look designs.
If your kit offers multiple tones, mix sparingly and test in a less visible area first.
Not following cure times
Not following cure times: epoxy-type fillers can smear or haze if disturbed too early. Use the cure/set time from the product label.
A key practical point: cure timing is usually about hardness and solvent release, not just “dry to the touch,” so don’t accelerate by wiping aggressively.
DIY vs replacement: which route fits the damage?
When wood-look tile scratches remove the decorative layer, the “best-looking” solution may be replacement—not more patching.
| Approach | Best for | Main advantage | Main drawback |
|---|---|---|---|
| Glaze scratch repair kit | Surface scuffs where the printed pattern is intact | Fast, low disruption | Limited to glaze-level damage |
| Epoxy/filler for chips | Grooves/chips that need depth rebuilt | Stronger and longer-lasting | Requires careful leveling + color matching |
| Tile replacement | Decorative layer is gone or pattern is too disrupted | Restores look consistently | More labor and cost, requires matching tile |
Verdict / tip: when DIY helps—and when to stop
DIY repair is worth it when the scratch is shallow, the tile is not chipped, and the damage is small enough that careful color blending can make it visually disappear. For wood-look tile floors, the best DIY outcomes happen when the printed grain stays intact and you’re only repairing the top glaze.
The downside is that “wood grain” pattern matching is never guaranteed—especially on darker browns, high-contrast grains, or scratches that cut through the decorative layer.
Skip DIY and consider a pro (or tile replacement) if:
– The scratch feels like a trench or you can see missing tile material.
– The tile has multiple damaged areas in one section (repair patches can stack up visually).
– You’re unsure whether your “wood-look tile” is truly glazed ceramic/porcelain versus a different surface finish—using the wrong method can permanently worsen the look.
Also consider pro help if the affected area sits in a high-traffic or wet-exposure zone, where any texture change can influence cleanability and traction. For slip-prone areas, stay aligned with quantified friction guidance such as ANSI A326.1 discussions.
Quick checklist (save this)
| Step | What to do | Done? |
|---|---|---|
| 1 | Clean with pH-neutral cleaner and dry fully | ☐ |
| 2 | Check scratch depth by feel (glaze vs groove) | ☐ |
| 3 | Mask nearby areas with painter’s tape | ☐ |
| 4 | Pick the right approach: kit for light scuffs, epoxy/filler for chips | ☐ |
| 5 | Apply in thin amounts and blend to the grain direction | ☐ |
| 6 | Level only as allowed by the product instructions | ☐ |
| 7 | Allow full cure/set time before walking on it | ☐ |
Sources
– ASTM C373, Standard Test Method for Water Absorption, Bulk Density, Apparent Porosity, and Apparent Specific Gravity of Fired Whiteware Products and Related Porcelain Products (porcelain water absorption threshold).
– ANSI A137.1, American National Standard Specifications for Ceramic Tile (including wear classification references such as PEI scale used in practice).
– ANSI A326.1, Standard for the Specification of Coefficient of Friction for Ceramic Tile (used in many compliance discussions around traction).
– Tile Council of North America (TCNA), maintenance guidance for ceramic/porcelain tile care and cleaning practices.
A durable fix for wood-look tile scratches is mostly about correctly identifying whether the damage is glaze-only or a chip/groove that breaks through. Clean and dry thoroughly, use the right product type (glaze kit vs epoxy/filler), apply in thin layers, and level only as your repair system allows—then respect full cure time. If the printed grain layer is badly disrupted, replacement is often the only way to get the clean wood-look appearance back without repeated patching.
Frequently Asked Questions
What’s the best way to fix scratches on wood-look tile floors?
Start by cleaning the scratched area with a tile-safe cleaner so dirt doesn’t become a visible haze in the scratch. For light surface scuffs, use a wood-look tile scratch repair kit or a color-matched refinishing marker/polish made for ceramic or porcelain tile. If the scratch is deeper and you can feel an edge with your fingernail, you may need a matching tile repair epoxy or filler, then let it cure fully and buff it to blend.
How do you remove minor scuffs on wood-look tile without damaging the finish?
Use a microfiber cloth and a gentle, non-abrasive cleaner to remove grime first, since debris can make scratches look worse. Then try a mild abrasive step such as a non-scratch polishing pad or a ceramic-safe scratch remover, working in small circles and wiping clean between passes. Avoid harsh sandpaper or strong chemicals unless the product explicitly says it’s safe for glazed tile, because you can worsen the finish.
How can you tell if a scratch on wood-look tile is just surface damage or something deeper?
Run a fingertip lightly over the scratch—if it catches or feels raised, it’s likely a deeper chip or gouge rather than a superficial scuff. Check under bright, angled light: surface scratches usually look like thin lines that don’t disrupt the glaze, while deeper damage can appear as exposed material or rough edges. This assessment helps you choose between a scratch repair marker/polish and a filler/epoxy repair for wood-look tile floors.
Which products are safest and most effective for repairing scratches on wood-look porcelain or ceramic tile?
Look for products labeled specifically for ceramic or porcelain tile scratch repair, such as color-matched tile repair compounds, epoxy fillers, or scratch remover polishes. If you use markers or wax sticks, choose shades intended for “wood-look” finishes and test in a hidden area first. Skip general-purpose “wood fillers” or aggressive grout/sanding products, because they may not bond correctly to tile and can create a noticeable patch.
Why do scratches show up more on wood-look tile floors, and how can you prevent them after repairing?
Wood-look tile has a glazed surface with printed grain and high-contrast “wood” shading, so even small abrasions can disrupt the pattern and make the scratch more visible. After repairs, protect the floor by using felt pads under furniture, adding entryway mats, and avoiding grit that can act like sandpaper in daily traffic. For extra protection, consider a tile-safe sealer or maintenance product recommended for your specific wood-look tile finish (especially if your floor is more matte or textured).
📅 Last Updated: October 16, 2026 | Topic: How to fix scratches on wood-look tile floors? | Content verified for accuracy and freshness.