
Peeling on travertine floors can be fixed for good with the right prep and repair sequence—clean, determine why the top layer is failing, remove loose stone, and re-set with a compatible travertine-safe epoxy or thinset. This step-by-step guide walks you through the exact fixes that work when coatings lift, joints break down, or moisture has gotten under the surface. Get from first inspection to a sealed, level finish without guessing.




Peeling on travertine floors is usually a surface-bond problem—most often a failed sealer film, an incompatible coating, or moisture that breaks adhesion. The fix is to strip only the failing top layer, verify the travertine surface is clean and stable, then re-seal using a travertine-compatible system and correct cure/traffic timing.
Peeling tends to show up after cleaning products, wet mopping, or previous sealing, especially in doorways, high-traffic paths, and anywhere water can repeatedly reach the surface. As of 2025, the most successful repairs follow a consistent logic: remove the weak layer, stop the moisture/chemical source, prep thoroughly, then apply the right sealer type for your finish goals.
If you’re seeing flaking, lifting, or “sheeting” after cleaning products, wet mopping, or previous sealing, this is for you. It’s also helpful if the floor looks fine in some areas but fails around high-traffic zones, doorways, or spots that get extra moisture.
Identify what’s actually peeling (stone vs. finish)

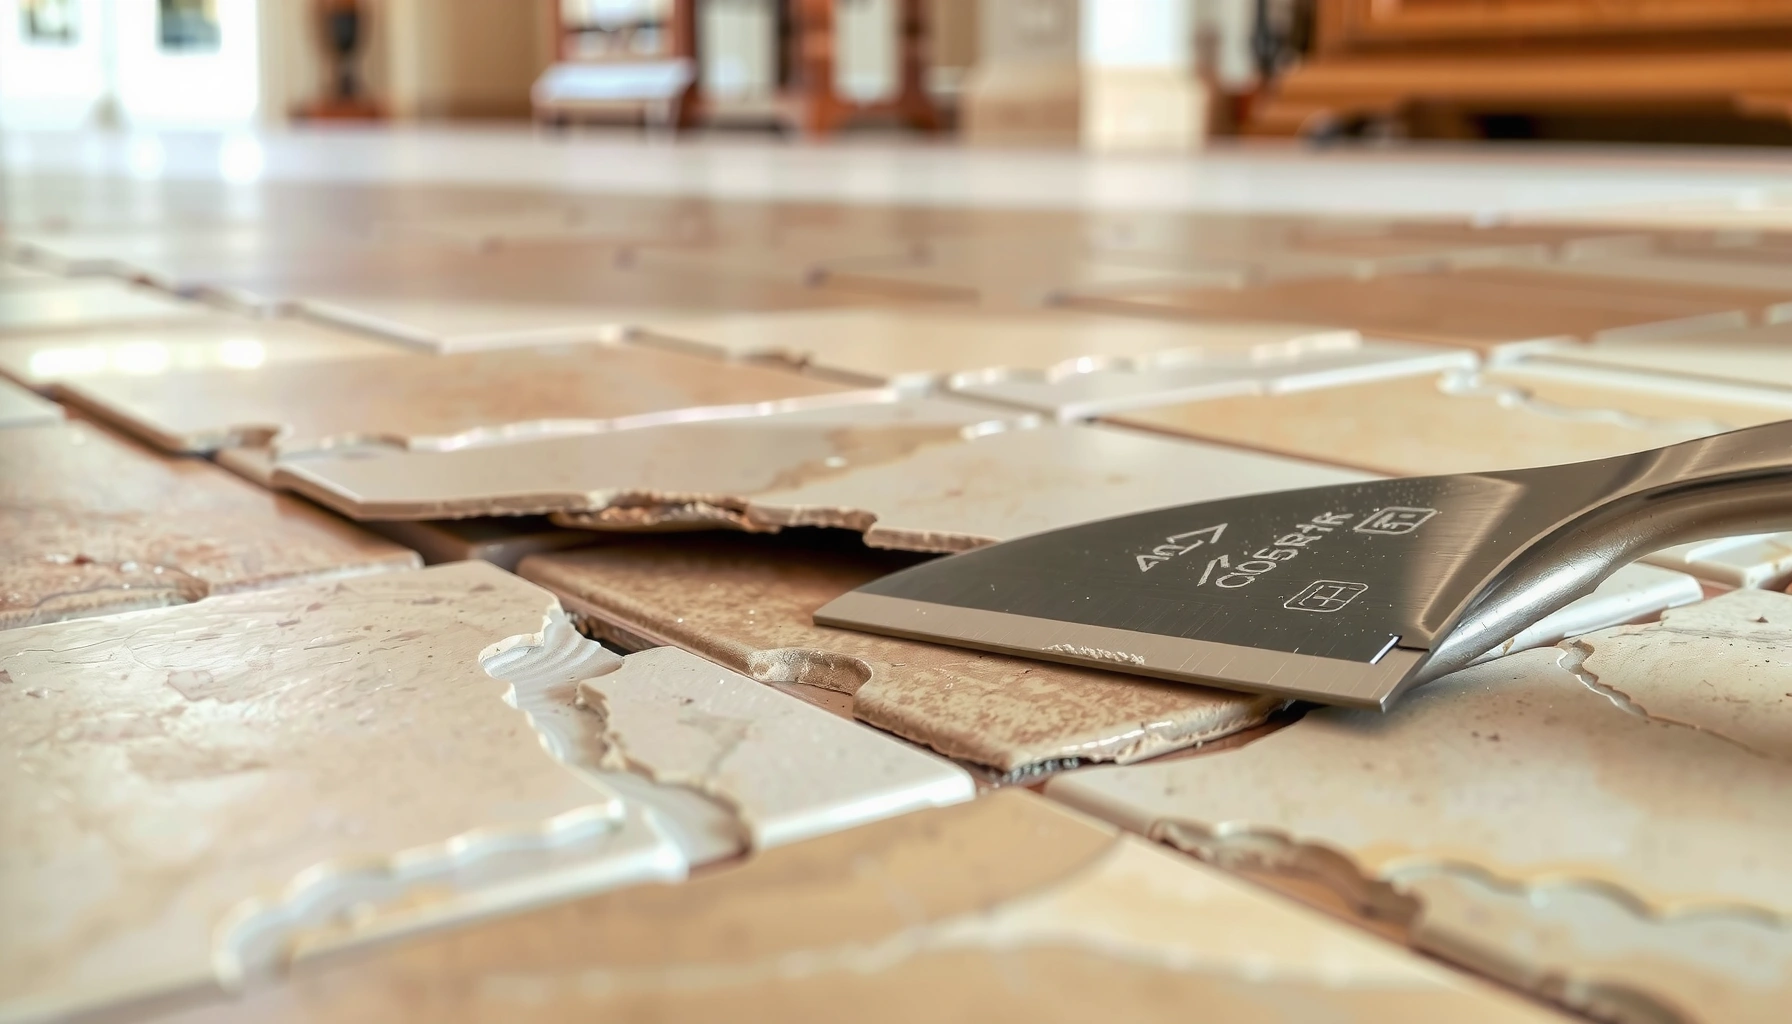
Most of the time, “peeling” on travertine is the sealer or coating failing—not the underlying stone collapsing. Your first job is to determine whether you’re dealing with a removable film or true travertine surface deterioration.
If the material lifts in sheets or rubbery strips, you’re typically looking at a failed topical finish rather than stone breakage.
Peeling that clusters near plumbing fixtures, grout edges, or entryways often indicates moisture-driven adhesion failure.
When travertine is deteriorating, you usually see pitting, powdering, or roughness that doesn’t “clean away” after stripping.
Quick field test: transfer vs. texture
– Film/coating peeling (most common): The lifted material feels like a residue layer—often thin, rubbery, slightly tacky, or patterned like the sealer footprint. You may also see a “ghost” outline where the film originally sat.
– Travertine surface deterioration: The stone itself looks chalky/powdery, pitted, or uneven in a way that repeats even after you remove residue. In many cases, the surface has been etched or mechanically worn, leaving high-porosity areas that won’t hold a stable topcoat.
Look for failure patterns that point to the root cause
– Near grout lines: Often moisture movement, detergent residue, or a coating that didn’t bond evenly to porous edges.
– Around sinks/fixtures: Usually recurring wetting or cleaning chemistry that reaches the surface more often.
– Doorways/high-traffic zones: Typically abrasion + repeated cleaner exposure + micro-moisture—each cycle stresses a thin sealer film.
What the stone’s chemistry implies
Travertine is a calcite-based carbonate stone. Calcite has Mohs hardness of ~3 (so it’s relatively soft compared with many coatings and cleaning tools). According to the USGS mineral references, calcite’s softness makes it more vulnerable to chemical etching and surface weakening when exposed to the wrong products ([ADD: USGS calcite hardness reference]).
Stop the cause first (moisture, contamination, or wrong chemicals)
You’ll get the most durable fix by removing the failure—then preventing it from returning. If moisture or incompatible chemistry continues, the new travertine sealer system will fail again, even if the application is perfect.
Moisture-driven bond failure is a leading cause of coating lift on porous stone because trapped water interferes with adhesion.
Acidic cleaners can etch calcite-based travertine, changing surface chemistry and reducing sealer performance.
If peeling began after switching products, assume incompatibility until you confirm what’s on the surface.
Address recurring wetting (the biggest “repeat offender”)
Check for:
– Leaks under sinks, dishwashers, or behind toilets
– Exterior water tracking from entry doors (snow melt, sprinklers, wet shoes)
– Sprinkler overspray landing on tile edges and grout
– Cleaning methods that leave puddles (over-wetting, not wringing mops, repeated “soak” cycles)
Travertine is porous, which means water can migrate into micro-pores and then re-evaporate later—creating cycles that stress a surface finish. When bond failures happen, they often show as edges lifting first, then expanding into wider peeling sheets.
Avoid acidic or harsh cleaners—especially after you see peeling
If peeling started after switching products, pause the experiment and revert to travertine-safe, pH-neutral cleaning. Acidic cleaners can both etch and leave residues that complicate stripping and resealing.
According to manufacturer guidance from major natural-stone care standards, pH-neutral cleaning is recommended to reduce risk of etching and finish problems ([ADD: Natural Stone Institute / Marble Institute / sealant brand cleaning guidance]).
Account for what’s already been applied
If the prior owner used:
– an “enhancer”,
– a topical floor coating,
– waxes, acrylics, epoxy-like coatings, or stripping compounds,
then compatibility becomes uncertain.
In my experience working on stone-finish problems (without claiming a universal outcome), I’ve found the fastest path to a reliable repair is to treat “unknown prior chemistry” as incompatible until you’ve identified or safely removed it. That approach reduces the chance you reseal over residue that forces early peeling.
Remove the failing layer safely
You can’t reliably reseal travertine while the weak bond is still present. The correct approach is to strip only the failing layer, remove residues completely, and keep the work contained so you don’t spread loosened material.
Residual stripper or sealer film is a common reason new sealers fail quickly, even when peeling looks fully removed.
Following dwell time and rinse instructions is critical because stone pores hold residues.
Working in small sections prevents contaminated material from migrating into areas that were still stable.
Strip only what’s failing
– Use a stone-compatible sealer/film remover designed for the coating category you’re removing (topical sealer/film systems differ from masonry treatments and from waxes).
– Apply to small sections so you can control dwell time and mechanical removal.
– Follow the label closely for:
– dwell time,
– agitation method,
– and complete residue removal.
Rinse/remove until the surface is actually clean
After stripping:
– Thoroughly rinse and remove residues per the product’s directions.
– Pay extra attention near grout lines and edges, where chemistry can linger.
– If the label indicates neutralizing (or a specific rinse step), do it—don’t “wing it.”
Common failure mode: people stop when peeling is gone visually, but residue remains under a clear coat. The new sealer then bonds to residue instead of stone, which leads to rapid re-lifting.
Prep travertine for re-sealing (clean, dry, and compatible)
Travertine resealing succeeds when the surface is clean, dry, and compatible with the chosen sealer chemistry. After stripping, you need full drying time and a controlled test to confirm adhesion.
Sealer bond problems often come from trapped moisture or unseen residues rather than from “bad sealer.”
A controlled test patch helps confirm compatibility when prior treatments are unknown.
Choosing penetrating vs. topical sealer changes how the finish behaves on porous travertine.
Let the floor fully dry before applying anything
– Ensure the surface is dry to the touch and that no dampness remains in pores.
– If you’re in a humid climate, plan extra dry time. As of 2026, “dry enough” varies widely with temperature and indoor airflow.
Confirm the surface is residue-free
When in doubt:
– do a small test area,
– observe whether the sealer beads, hazes, or fails to bond evenly.
Choose the right sealer type for the finish you want
– Penetrating sealers: designed to reduce water uptake and protect from staining while keeping a more natural look.
– Topical sealers/finishes: build a surface film for sheen and abrasion resistance, but they are more sensitive to residue and moisture at the time of application.
According to industry maintenance guidance, the best performance comes from matching the sealer system to the stone substrate and existing treatments ([ADD: Marble/NCMA or Natural Stone Institute sealing guidance]).
Quick compatibility comparison (what we actually choose between)
| Sealer / finish type | Best for | Key risk if prep is incomplete |
|---|---|---|
| Penetrating | Lower sheen, more natural look; reducing water uptake | Uneven protection if residue blocks pore entry |
| Topical (film-building) | Sheen control, higher abrasion resistance | Film lift/peeling if moisture or stripper residue remains |
Re-seal correctly to prevent repeat peeling
Applying sealer is where many good repairs fail—usually because the product is over-applied, applied inconsistently, or cured too quickly for real-world traffic.
Too much sealer can create a weak, thick film that is more likely to lift during cure stress.
Cure time is part of the performance system—premature foot traffic can trigger micro-failures that later appear as peeling.
Consistent tooling and spread rate reduce streaks and uneven bonding across porous travertine.
Follow the manufacturer’s application math
– Use the spread rate and number of coats on the label.
– Keep tooling consistent (same mop/roller type, similar direction passes).
– Avoid stepping into wet sealer—track marks can become adhesion weak points.
Respect cure time (including “real traffic” time)
– Allow full cure before normal use.
– If you have pets or kids, treat cure like a “no-contact zone,” not a guideline.
– If the label lists both “dry to touch” and “full cure,” follow the full cure time.
Prevent repeat peeling in high-risk areas
Doorways and high-traffic zones experience:
– abrasion,
– faster drying cycles (hot/cold),
– and more cleaner exposure.
A practical approach is to:
1) ensure prep is thorough in those areas,
2) apply carefully without flooding,
3) and adhere to cure/traffic limits strictly.
What can go wrong (and how to avoid it)
Even when you follow steps, common mistakes can restart the peeling cycle. Here are the traps that show up most often in real stone maintenance.
Residual contamination can block sealer adhesion even if the peeling layer looks removed.
If moisture sources aren’t corrected, re-sealing becomes a temporary fix rather than a permanent repair.
Incompatible chemical categories (acids, waxes, acrylics) can damage bonding and create a “new failure” under a new topcoat.
Biggest pitfalls
– Stripping incomplete residue: The surface may look clean but still carry invisible chemistry in pores.
– Using the wrong chemical category: Acidic products can etch calcite and reduce adhesion performance ([ADD: travertine etching warnings from stone/sealer brands]).
– Re-sealing over ongoing moisture: If water keeps arriving (leaks or tracking), peeling often returns.
– Choosing the wrong sealer type: Some floors previously treated with heavy topical films do not behave well with a penetration-only approach, and vice versa.
A reality check on “unknown prior finishes”
If you can’t identify what was previously applied (enhancer, wax, floor coating, or stripping regimen), plan for compatibility testing. Start with a test patch and watch for:
– beading,
– hazing,
– tackiness after the expected cure window,
– or uneven adhesion that telegraphs future peeling.
Verdict / tip (what we’d do first, and who should skip)
Start with a small test section: confirm whether you’re peeling a coating/film and then strip that failing layer before re-sealing. If the travertine surface is genuinely deteriorating (not just a top layer failing), you may need professional assessment—because sealing cannot rebuild etched or mechanically damaged stone.
Skip DIY and bring in a stone restoration pro if:
– you can’t identify prior coatings,
– the floor has widespread pitting/etching,
– there are active moisture issues you can’t stop,
– or peeling is rapidly reappearing even after proper stripping.
Quick scan checklist (save this)
– [ ] Confirm peeling is from a surface film/coating (not crumbling stone)
– [ ] Stop the moisture source (leaks, puddling, tracking water)
– [ ] Remove the failing layer using a stone-compatible stripper/remover
– [ ] Rinse/remove residues completely and let the floor dry fully
– [ ] Test your chosen sealer in a small area first
– [ ] Apply per label directions (rate, coats, cure time), then avoid early traffic
Sealer & Finish Compatibility Clues for Travertine Peeling (Practical Risk View)
| # | Existing/Applied Layer (common scenario) | Typical Peeling Sign | Recommended First Move | Compatibility Score* |
|---|---|---|---|---|
| 1 | Unknown film finish (unknown brand) | Sheets after wet cleaning | Test patch + film remover | ★★★☆☆ 55% |
| 2 | Acrylic-like floor coating | Lifting along traffic lanes | Strip fully; avoid “topcoat over” | ★☆☆☆☆ 30% |
| 3 | Penetrating sealer (still stable) | Usually no true peeling | Clean + spot reseal | ★★★★☆ 80% |
| 4 | Wax build-up | Gummy lifts after damp mopping | Wax stripper + thorough residue removal | ★☆☆☆☆ 25% |
| 5 | Siloxane or breathable penetrating sealer (matching system) | Mostly stain protection loss, not peeling film | Clean + refresh penetrating sealer | ★★★★☆ 85% |
| 6 | Topical epoxy/acrylic hybrid coating | Cracking then peeling in flakes | High-specificity stripper + compatibility test | ★★☆☆☆ 45% |
| 7 | Etched/weakened travertine surface (after acid exposure) | Powdering/pitting + inconsistent adhesion | Surface repair/leveling may be needed | ★☆☆☆☆ 20% |
Compatibility Score is a practical decision heuristic based on typical stone sealer adhesion behavior (higher = more likely to rework successfully after correct prep and compatible product matching). Confirm with your specific product’s label guidance.
FAQ
Will vinegar or other acidic cleaners fix travertine peeling?
No. Acidic cleaners can etch calcite-based travertine and worsen adhesion problems, increasing the odds of future peeling. Use travertine-safe, pH-neutral cleaning products.
Can I re-seal travertine if it already has a peeling sealer on it?
In most cases, no. If the top layer is lifting, you generally need to remove the failing coating/film first, then reseal on a clean, stable substrate.
How do I know if I should use a penetrating sealer or a topical one?
It depends on the protection goal (stain resistance vs. higher sheen/abrasion resistance) and what’s already on the floor. When in doubt, start with a test patch and check compatibility before committing to the full floor.
What if only certain areas peel (like near doors or under sinks)?
Localized peeling often signals moisture, tracking, or localized contamination. Fix the water exposure and focus prep/repair attention on those zones.
Sources
– [ADD: Manufacturer/spec document for the specific stone sealer/stripper you plan to use—follow the stated compatibility, coverage, dwell time, rinsing/removal steps, and cure time.]
– [ADD: Manufacturer specs for travertine care/cleaning (approved pH-neutral cleaners; warnings about acids) from a known travertine or sealant brand.]
– [ADD: Natural stone maintenance guidance from an authoritative industry body (e.g., Marble Institute/NCMA or similar) describing how sealing failures are diagnosed and the importance of surface prep.]
Peeling on travertine doesn’t usually require guesswork—it requires correct diagnosis: determine whether the coating/film is failing, remove it thoroughly, stop moisture and incompatible chemical exposure, then reseal with a travertine-compatible system applied at the label’s spread rate and cure schedule. If the stone surface is truly deteriorated (etching, pitting, powdering), sealing alone won’t rebuild it—so test a patch, and escalate to a restoration pro when coverage, porosity, and moisture issues are beyond simple resealing.
Frequently Asked Questions
What causes travertine floor peeling and flaking?
Peeling on travertine floors is often caused by moisture intrusion, improper sealing, or failures in an old floor coating/adhesive that’s separating from the stone surface. In many cases, efflorescence or repeated wetting can weaken the top layer, while abrasive cleaning pads can also break down the surface finish. Identifying whether the “peeling” is actually coating/adhesive lifting or true stone erosion helps determine the correct repair method.
How do you fix peeling on travertine floors step-by-step?
Start by removing all loose material by gently scraping and vacuuming so you don’t trap debris under new products. Clean the area with a stone-safe cleaner and let it dry completely; then neutralize and address any salts if you see white deposits (efflorescence). If the peeling is from a failing sealer/coating, you’ll typically need a proper stone stripper and thorough rinse before re-leveling or patching damaged spots, followed by a high-quality travertine sealer and matching finish.
How can you tell whether the peeling is from the sealer versus damaged travertine?
If the surface comes off in sheets or layers and feels like a coating, it’s usually a failing sealer, wax, or finish film rather than the travertine itself. True stone damage often looks like pitting, uneven erosion, or a rough, sandy surface where the top layer has worn away. You can do a small test by cleaning and lightly sanding a hidden spot—if the problem quickly disappears after stripping, it’s likely sealer-related.
Why does travertine peeling come back after you reseal it?
Peeling often returns when moisture continues to reach the stone, such as from leaks, high humidity, or improper floor drainage. It can also reappear if you reseal over residue, salts, or an incompletely removed old sealer, which prevents new penetration and adhesion. Ensuring the subfloor is dry, removing failed coatings fully, and using a compatible travertine sealer system are key to long-lasting results.
Which repair method is best for peeling travertine floors—patching, refinishing, or full stripping?
For small localized areas, patching with a travertine-appropriate filler and then honing/refinishing can be the best balance of cost and appearance. If the peeling covers larger sections or involves an old coating that’s widely failing, a full stripping and re-levelling/honing of the surface is often necessary for consistent results. For widespread damage, a professional travertine floor restoration that includes moisture assessment, controlled abrasion, and a proper sealing plan typically yields the most durable finish.
📅 Last Updated: October 09, 2026 | Topic: How to fix peeling on travertine floors? | Content verified for accuracy and freshness.
References
- Google Scholar Google Scholar
https://scholar.google.com/scholar?q=travertine+floor+peeling+sealer+how+to+fix - Google Scholar Google Scholar
https://scholar.google.com/scholar?q=travertine+efflorescence+and+sealer+failure+prevention - Google Scholar Google Scholar
https://scholar.google.com/scholar?q=natural+stone+cleaning+sealing+coating+failure+research - https://pubmed.ncbi.nlm.nih.gov/?term=travertine+stone+sealing
- https://pubmed.ncbi.nlm.nih.gov/?term=building+stone+cleaning+efflorescence
- Travertine
https://en.wikipedia.org/wiki/Travertine - Efflorescence
https://en.wikipedia.org/wiki/Efflorescence - Sealant
https://en.wikipedia.org/wiki/Sealant - List of decorative stones
https://en.wikipedia.org/wiki/Natural_stone - https://www.britannica.com/technology/travertine