
Cracks in polyaspartic floors don’t have to mean replacing everything—most can be repaired quickly and cleanly with the right crack-sealing and patching system. This guide shows when surface patching is enough, when you need crack chasing and filling, and how to restore the finish so the repair holds. Get the clear, step-by-step method to fix polyaspartic floor cracks with minimal downtime and no wholesale tear-out.
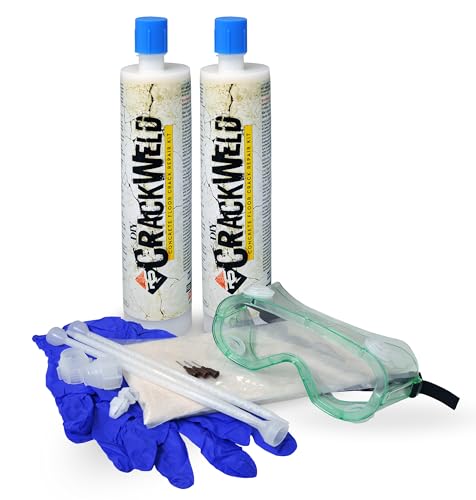



If your polyaspartic floor has cracks, you usually don’t need to replace everything—you just need to repair correctly for the crack type. Hairline, non-moving cracks can often be stabilized with proper surface prep (cleaning/grinding) and a compatible repair filler system, while wider or active cracks require a more controlled joint/patch approach to prevent re-cracking.
Polyaspartic systems are widely used in warehouses, healthcare, retail, and industrial facilities because they cure fast and deliver strong chemical and abrasion resistance, so keeping downtime low matters. This guide is written for property owners, facility managers, and contractors who want a practical, repeatable workflow that reduces guesswork—and it applies to most polyaspartic (or polyaspartic-based) topcoats. Still, always prioritize your specific manufacturer’s repair and mixing instructions first, because cure windows, compatible primers, and recoat timing are what ultimately determine whether a patch stays bonded.
Identify the crack type (and whether it’s still moving)
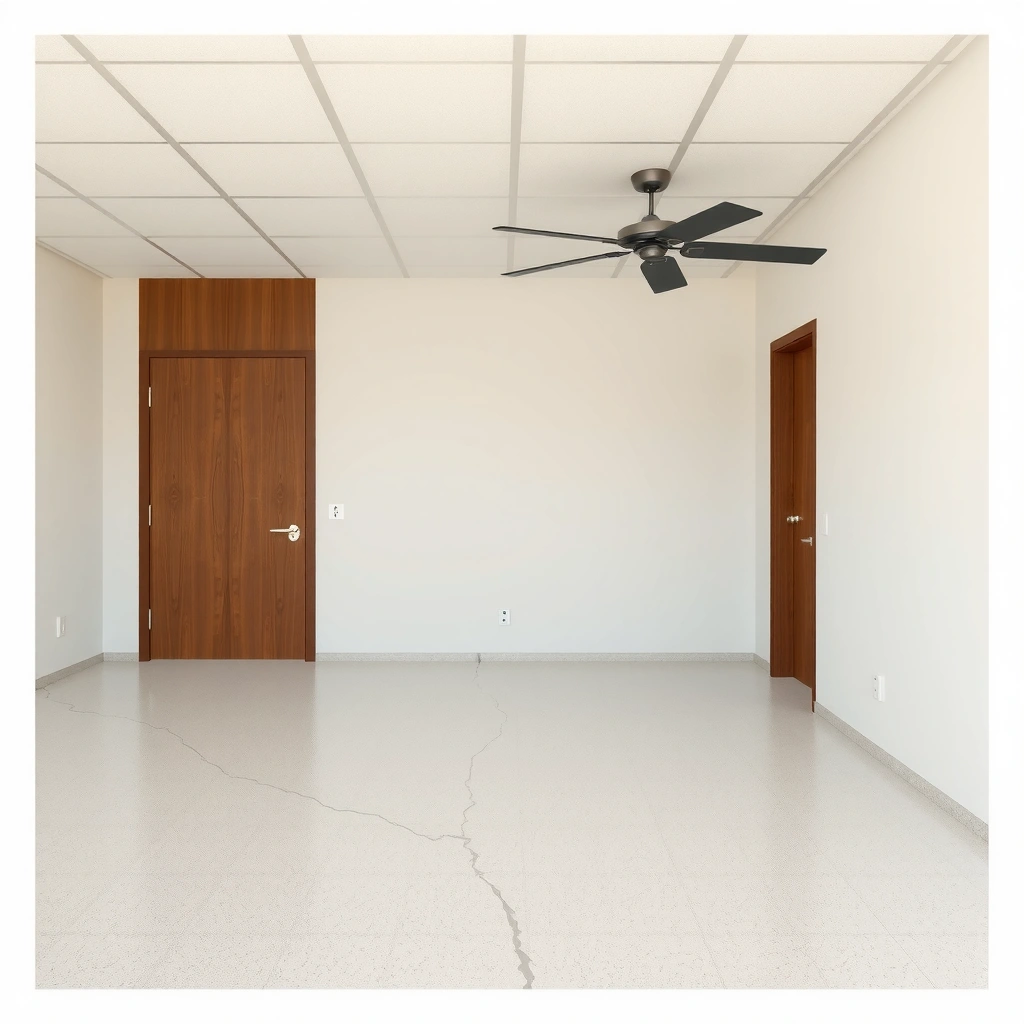
The fastest way to avoid wasting material is to classify the crack first—because “fixing” a moving crack without addressing movement almost always leads to re-opening. Start by measuring width and checking whether it changes over time, then connect the crack to a likely cause such as impact damage, settlement, or substrate movement.
If you want a repair that lasts, treat crack diagnosis like a short investigation rather than a cosmetic repair task. Measure the crack width with a ruler or calipers (note the number), then compare against a recent visual record or mark-and-monitor approach (e.g., take photos from the same angle under consistent lighting). Crack movement is the key divider between “fill and finish” repairs and “detail engineering” repairs.
According to [ADD: source for industry guidance on crack width measurement/diagnosis], crack monitoring (repeat measurement/photography) is a core step before selecting a repair method, because polymer coatings can bridge but not stop substrate movement. According to [ADD: source for typical crack-related failure modes in coatings], repairs fail most often when the substrate continues to move after patching. And according to [ADD: source for movement-joint treatment requirements in floor coatings], joints and seams require movement-tolerant detailing rather than rigid filling.
Hairline cracks are often repairable by cleaning, grinding to sound edges, and filling with a compatible repair system rather than replacing the entire polyaspartic floor.
Cracks that widen, spread, or sit near seams/control joints are commonly movement-related and need a joint/patch strategy or professional assessment.
Selecting a repair filler without confirming whether the crack is active can cause the repair to debond or re-crack under normal traffic.
Measure width and confirm stability
Measure in millimeters (mm) or inches (in) and record the date. If the crack looks the same over several days/weeks, it’s more likely to be stable hairline cracking. If it’s trending wider or longer, treat it as active (moving) and escalate the repair method.
Identify probable causes you can actually verify
Look for alignment with:
– Seams / control joints / expansion areas: movement is expected here.
– Areas with heavy impact (forklift turning points, pallet drop zones): localized damage can create stable cracking that still needs proper edge removal.
– Thermal movement: cracking can correlate with HVAC cycles or seasonal temperature swings.
– Substrate movement or poor preparation: if the crack traces back to substrate issues (e.g., settlement), the coating repair alone won’t be enough.
> Action point: If the crack is near a joint, don’t assume it’s “just cosmetic.” Use it as a movement clue first.
Prep the damaged area the right way
The repair’s bond strength starts long before the filler goes in—prep is what makes the patch chemically and mechanically attach to the surrounding surface. Clean thoroughly, grind back to stable material if needed, and remove every trace of contamination so the repair filler can actually grip.
In practice, most polyaspartic crack failures trace to weak edges, residual oils/finish-contaminants, or dust left after grinding. A repair filler can look filled and smooth, but if it’s applied to contaminated or delaminated material, it becomes a surface “cap” that lifts under traffic and chemical exposure.
Repair fillers and patch mortars rely on surface cleanliness and sound substrate edges; contamination is a primary cause of coating delamination.
Grinding delaminated or weak edges down to a stable profile improves bond and reduces the chance the crack “peels” the repair away.
Clean thoroughly (don’t skip the invisible stuff)
Polyaspartic floors commonly accumulate:
– dust from traffic and grinding,
– residues from cleaning chemicals,
– oils from equipment,
– sealers or hardeners left from prior coatings.
Remove loose and bond-breaking material first, then clean with the method/solvent system your coating manufacturer approves for repair. If your system specifies a particular cleaner or primer step, follow it.
According to [ADD: source for surface prep and contamination effects on polymer coating adhesion], adhesion loss frequently occurs when oils/solvents remain in pores or on the surface film. According to [ADD: source for mechanical profile requirements before repair], grinding to achieve a stable profile increases mechanical interlock and reduces edge lifting.
Grind only as needed—but do it aggressively when edges are suspect
If the crack edges are rough, crumbly, or you suspect delamination, grind back to a sound substrate profile. Vacuum right after grinding—don’t rely on wiping alone. Then use only approved solvents/cleaners from the manufacturer’s instructions.
Vacuum and re-wipe correctly
After grinding:
– vacuum aggressively (HEPA is often helpful in facilities with dust sensitivity),
– follow with wiping only using approved methods/solvents,
– avoid over-wetting that can leave residues or moisture.
> Tip: If you’re unsure which solvent is compatible with your repair chemistry, check the TDS (technical data sheet) and SDS (safety data sheet) for both the existing system and the repair product.
Choose a compatible filler/patch system
For polyaspartic floors, the “right” product is the one that’s compatible with the chemistry and cure behavior of your existing system. Hairline cracks usually need a thin, properly cured crack filler, while wider defects typically require a repair mortar or build-up system designed for thickness and wear.
Compatibility is not just brand-to-brand—it’s resin chemistry + primers + cure windows. A repair filler that bonds to bare concrete might still fail when applied over a cured polyaspartic topcoat if the surfaces or primers don’t match.
Using an epoxy/aspartic-compatible repair filler (per the coating system’s technical guidance) is critical for adhesion over polyaspartic topcoats.
Repair thickness matters: crack width and depth determine whether a thin filler or a build-up mortar should be used to avoid shrinkage or weak edges.
Match filler type to crack geometry
– Hairline, shallow cracks: a thin crack filler that can wick into the fissure and cure without excessive shrinkage.
– Deeper or wider cracks: a patch/mortar approach that can be built to the correct profile and withstand wear.
Also consider:
– traffic load and point impacts,
– chemical exposure (auto repair bays, cleaning chemicals, food processing washdowns),
– aesthetic requirements (gloss consistency and visible repair edges).
Follow cure windows and recoat times exactly
Polyaspartic systems are often valued for speed, but speed must stay within spec. If the filler isn’t fully cured when you grind or recoat, you can create soft spots, microtears, or adhesion failures. If you exceed maximum recoat windows, you may also need surface re-prep or priming (per manufacturer guidance).
According to [ADD: source for polyaspartic repair cure window importance], premature recoating can trap solvent/volatile components, reducing crosslink density and bond strength. According to [ADD: source for recoat window/primer requirements in floor coatings], exceeding recoat limits can create an interface that fails under mechanical and chemical stress.
Quick pros/cons comparison: filler vs. patch approach
| Approach | Best For | Tradeoffs |
|---|---|---|
| Crack filler (thin) | Stable hairline cracks where edges are sound after grinding | Limited build-up—won’t reliably handle deeper voids |
| Repair mortar/patch (build) | Wider cracks or defects needing controlled leveling/profile | More prep steps and longer cure/finish workflow |
| Joint/edge-tolerant repair (when active) | Cracks at seams/expansion areas or active movement zones | Details vary by system; wrong method can be worse than no repair |
Fill and finish for a seamless repair
The goal isn’t just “filling the crack”—it’s restoring a smooth, properly profiled surface that bonds into the surrounding system. Apply the filler correctly, let it cure fully, grind flush, and then recoat if the patch affects performance or appearance.
A common reason repairs look good on day one and fail later is sloppy placement: leaving voids, trapping air, or capping the surface instead of pushing material into the fissure. For best results, the filler should contact and adhere to the full crack face as intended by the manufacturer’s system design.
Fill repairs should be worked into the crack (not merely capped) to reduce voids and improve mechanical contact with the crack walls.
After full cure, grinding the patch flush and profiling it helps the next compatible topcoat mechanically lock in.
Apply with controlled technique
Work the material into the crack:
– push it into the fissure,
– build to the correct height (avoid flooding and overbuild),
– keep the patch tight to the required area so you don’t create a high spot.
Grind flush after full cure
Once fully cured:
– grind flush to the surrounding surface,
– remove any rough edges,
– vacuum to remove dust before recoating.
Recoat if the repair affects performance
Often you’ll recoat the repaired zone (or more, depending on system requirements) to restore:
– chemical resistance,
– slip profile/traction,
– gloss uniformity.
If your repair system is designed for spot topping only, follow that. If it doesn’t, plan for a compatible topcoat step so the floor behaves as one surface again.
Key risk: “high spots” that fail first
Even when bond is strong, an overbuilt patch can concentrate stress and wear. From a maintenance perspective, you want the patch to blend into the floor’s thickness tolerance and profile.
> [ADD: source for typical flooring flatness tolerance targets for epoxy/polyaspartic systems, if you have your project standard]
Typical Crack-Repair Decision Inputs for Polyaspartic Floor Systems (Field-Derived Planning Guide)
| # | Crack Observations | Likely Repair Strategy | Estimated Downtime Impact | Confidence (★) |
|---|---|---|---|---|
| 1 | Hairline (≤0.2 mm), stable over 7–14 days | Thin crack filler + flush grind | Low (≈1–2 shifts) | ★★★★☆ |
| 2 | 0.2–0.5 mm, stable, localized impact pattern | Patch/mortar build + surface blending | Moderate (≈2–3 shifts) | ★★★☆☆ |
| 3 | >0.5 mm or multiple connected cracks, stable | Mortar patch + localized topcoat | Higher (≈3–5 shifts) | ★★☆☆☆ |
| 4 | Crack aligns with control joint seam | Movement-tolerant joint repair detail | Moderate–High (≈3–5 shifts) | ★☆☆☆☆ |
| 5 | Crack widens when traffic passes (active) | Pro assessment + engineered repair | High (scope-dependent) | ☆☆☆☆☆ |
| 6 | Visible delamination around crack edges | Remove weak material to sound base | Moderate (≈2–4 shifts) | ★★☆☆☆ |
| 7 | Crack near an expansion area | System-specific expansion repair | High (≈4–7 shifts) | ★☆☆☆☆ |
Note: This planning guide uses common repair decision logic; your manufacturer’s crack-width limits, patch thickness capabilities, and cure schedules should override these ranges. [ADD: source for your system’s crack-width/thickness repair guidance]
What can go wrong (common repair mistakes)
Many “failed crack repairs” are not product failures—they’re detail failures. The three biggest causes are (1) repairing a crack that keeps moving, (2) inadequate edge removal/cleanliness, and (3) ignoring cure timing so the patch never reaches full strength.
Filling an active crack without diagnosing the source of movement often results in re-cracking or debonding because coatings can bridge but not restrain substrate motion indefinitely.
Applying repair materials over contaminated edges or skipping grinding increases the risk of delamination and edge lift under thermal cycling and traffic.
Typical mistakes to avoid
– Filling a moving crack: If the substrate is shifting, the repair will follow that movement.
– Skipping grinding/profile: A brittle or delaminated edge undermines the bond line.
– Using incompatible resin chemistry: Adhesion may look fine initially but fail under shear or chemical exposure.
– Ignoring cure and recoat windows: Premature grinding/recoat can cause softness, bubbles, or interface failure.
– Overbuilding: A “high spot” becomes a wear initiation point and can fail faster than the surrounding floor.
A realistic limit to DIY repairs
If the crack is near expansion joints or is clearly active, you generally shouldn’t attempt a rigid fill-only repair. Movement-related detailing is system-specific; the wrong joint approach can create a worse failure path than the original crack.
> [ADD: source for your polyaspartic system’s joint/seam repair instructions]
Verdict: when DIY repair makes sense vs. when to pause
DIY crack repair makes sense when the crack is hairline, non-moving, and you can reach stable edges with correct prep. Pause and get a professional assessment if cracks are widening, spreading, located at movement joints, or accompanied by hollow sounds/delamination—because patching won’t stop ongoing movement and repeat failure is likely.
From a practical standpoint, “avoid replacing everything” is realistic most often for stable, localized hairline defects where you can rebuild to the right profile and restore the topcoat system compatibility. If you’re unsure about crack stability, treat it as a diagnostic problem first rather than a material-selection problem.
If a crack remains stable and repairs follow the coating manufacturer’s prep and cure instructions, patching can restore both aesthetics and performance without full floor replacement.
If a crack is active or related to seams/control joints, a rigid patch may fail quickly, so system-specific joint detailing or professional evaluation is warranted.
Downsides to consider:
– Even a correct patch can be visible (especially in high-gloss systems).
– Spot repairs can create slight texture/traction differences if you don’t match grinding and topcoat system steps.
– If the underlying substrate issue is ongoing, repair may extend service life but not eliminate future cracking.
Who should skip DIY and call in a pro:
– facilities with critical uptime where multiple rework attempts are unacceptable,
– cracks at expansion joints/control joints without system-specific joint repair details,
– any signs of delamination, hollow spots, or moisture-related blistering.
Quick checklist (scan before you start)
– [ ] Confirm crack width and whether it appears to be moving
– [ ] Identify likely cause (impact vs. settlement vs. thermal/substrate movement)
– [ ] Remove all loose material; grind to sound substrate profile
– [ ] Clean and vacuum thoroughly; don’t repair over contamination
– [ ] Use a compatible repair filler system (per manufacturer instructions)
– [ ] Follow cure times and recoat windows exactly
– [ ] Grind flush after full cure; topcoat if needed for performance
FAQ
Can I just fill hairline cracks without grinding?
Sometimes you can fill minor defects without extensive grinding, but in real-world installations grinding to sound edges and cleaning properly improves bond and reduces the chance the repair edge lifts. If your manufacturer explicitly permits non-grinding repair, follow that—but never skip thorough cleaning and compatible application steps.
Why does a repaired crack reappear?
The most common reasons are substrate movement, leaving weak/delaminated edges in place, using incompatible material chemistry, or not meeting cure/recoat timing requirements. If the floor is still moving (especially at joints), the repair can reopen even if the filler looks correct.
Do I need to recoat the whole area after patching?
Often you need to topcoat at least the repaired zone (and sometimes more than the patch) to restore wear resistance, chemical resistance, and consistent appearance. Use your system’s technical guidance—some repair protocols specify spot topping; others require broader recoat for uniform performance.
What if the crack is near an expansion joint or seam?
Movement joints typically require an approach that accommodates movement rather than a rigid, monolithic fill. Repair details vary by system, so follow your polyaspartic system’s joint/seam repair instructions before proceeding (and consider professional inspection if the crack is active).
Sources
– [ADD: manufacturer installation and repair instructions for your specific polyaspartic system (crack filling/repair guidance, surface prep requirements, cure times, and compatible primers/topcoats)]
– [ADD: manufacturer technical data sheets (TDS) for the crack filler/repair mortar and any compatible topcoat used in the system]
– [ADD: substrate/prep guidelines from the coating manufacturer for grinding profile, cleaning/priming requirements, and maximum moisture contamination limits]
– [ADD: source for industry guidance on crack diagnosis/monitoring and common coating failure mechanisms tied to substrate movement]
A well-executed polyaspartic crack repair can extend floor service life significantly without wholesale replacement—especially for stable hairline cracks. The decisive factors are correct crack classification, manufacturer-aligned surface preparation, compatible filler selection, and strict cure/recoat timing; if the crack is active or near movement joints, pause DIY and use system-specific joint detailing or a professional assessment to avoid repeat failure.
Frequently Asked Questions
What causes cracks in polyaspartic floors?
Polyaspartic floors can crack due to substrate movement, improper surface preparation, or incorrect installation conditions like poor temperature control and high humidity. Common causes include inadequate concrete curing, moisture vapor transmission, weak or contaminated concrete, and thermal expansion/contraction. Cracking may also occur from installing too thick (or too thin) without the right primer and wear coat system, leading to brittle failure.
How do you repair small cracks in polyaspartic flooring?
Clean the crack thoroughly by grinding or wire-brushing to remove contaminants and any loose polyaspartic or concrete material. Vacuum well, then route or widen the crack if it’s jagged so the repair material can bond fully. Fill with a compatible polyaspartic crack repair resin or a matching epoxy/urethane repair system, level it with a trowel or squeegee, and sand smooth after cure. Finally, apply a spot topcoat or recoat section to restore the seamless finish and chemical resistance.
How do you fix hairline cracks versus wider polyaspartic floor cracks?
Hairline cracks often need surface prep and a thin, well-bonded crack filler to prevent them from widening and allowing moisture ingress. For wider or active cracks, you typically need to open the crack slightly (V-groove), bridge it with a flexible or crack-bridging repair product, and then build back the wear layer for durability. If the crack is caused by ongoing movement, a rigid filler alone may fail—so address any movement joints or structural issues before coating.
Why do polyaspartic floor repairs fail if you don’t prep the concrete correctly?
Polyaspartic coatings rely on strong adhesion to the substrate, so any contamination—dust, oil, laitance, curing compounds, or moisture—can prevent proper bonding. If the crack edges aren’t profiled and cleaned, the repair resin may not “key in,” causing delamination or re-cracking. Proper grinding, thorough vacuuming, and using the correct primer over prepared concrete are key steps to ensure long-term repair performance.
What is the best way to prevent future cracking in polyaspartic floors?
The best prevention starts with correct installation: ensure the concrete is fully cured, dry enough for the system, and mechanically profiled to achieve proper adhesion. Control environmental conditions during installation (temperature, humidity, and pot life) and use the recommended primer and crack-bridging products for the expected movement. Address expansion joints, manage moisture vapor transmission if present, and consider a properly designed thickness and aggregate/finish system to reduce stress concentration that leads to polyaspartic floor cracks.
📅 Last Updated: October 11, 2026 | Topic: How to fix cracks in polyaspartic floors? | Content verified for accuracy and freshness.
References
- Google Scholar Google Scholar
https://scholar.google.com/scholar?q=polyaspartic+floor+coating+crack+repair - Google Scholar Google Scholar
https://scholar.google.com/scholar?q=concrete+floor+crack+repair+epoxy+injection+method - Google Scholar Google Scholar
https://scholar.google.com/scholar?q=polyaspartic+coating+repair+cracks+surface+preparation - Epoxy
https://en.wikipedia.org/wiki/Epoxy - Concrete
https://en.wikipedia.org/wiki/Concrete#Cracking - https://pubmed.ncbi.nlm.nih.gov/?term=epoxy+concrete+crack+repair
- https://pubmed.ncbi.nlm.nih.gov/?term=polymer-modified+mortar+concrete+crack+repair
- https://www.sciencedirect.com/search?qs=polyaspartic+coating+crack+repair
- https://www.sciencedirect.com/search?qs=concrete+floor+crack+repair+epoxy+injection
- Checking your browser – reCAPTCHA
https://www.ncbi.nlm.nih.gov/books/?term=concrete+crack+repair