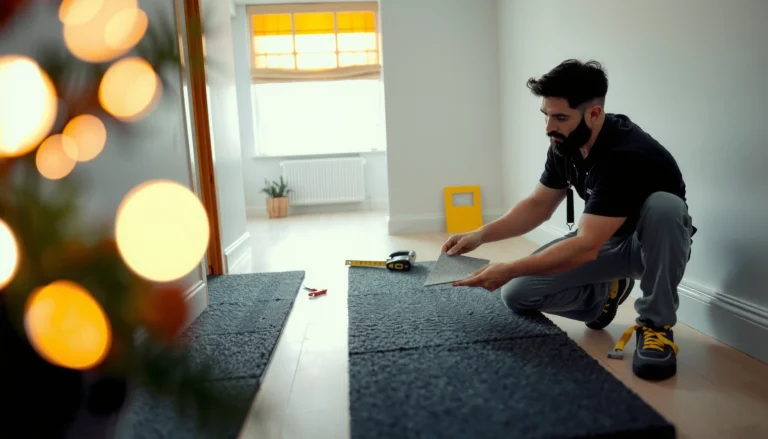

If you want to remove odors from carpet tiles fast, start by deep-cleaning the source with a targeted deodorizing rinse, then extract moisture thoroughly so the smell can’t come back. Follow with an enzyme-based treatment for organic odors (pets, food, sweat) or a baking-soda dry neutralizer for lingering mustiness, and finish by fully drying the tiles before reinstalling. This step-by-step approach delivers the quickest results with the fewest repeat treatments.



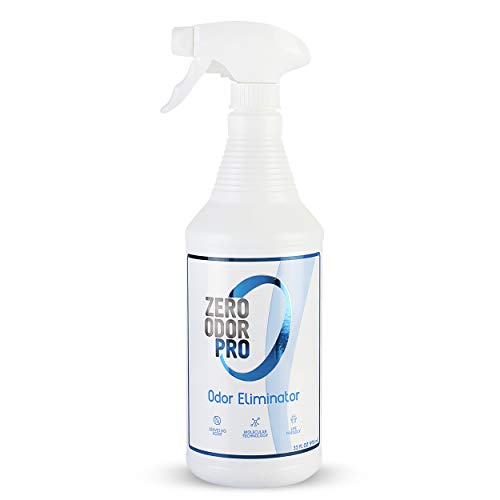
Remove odors from carpet tiles by eliminating the source first (spills, pet accidents, trapped debris), then deep-cleaning the backing with the right chemistry, and finally deodorizing only after the tiles and subfloor are fully dry. This method works especially well for musty, pet, smoke, and food odors that keep lingering even after vacuuming—because most odor problems are caused by moisture and embedded soil, not surface dirt.
If you’re managing odors in commercial carpet tiles or residential installations, the process has to be systematic: identify where the smell is coming from, remove and clean affected tiles (and the exposed floor area), and prevent recontamination during drying and reinstallation. Following the steps below also helps you treat safely when the odor source is unclear.
Identify the odor source (before you deodorize)
The fastest way to stop carpet tile odors is to confirm what’s creating them—then clean to that cause before you deodorize. If you skip the source, deodorizer alone often masks the smell temporarily while the underlying contamination stays in the backing or subfloor.
When odors persist after vacuuming, the cause is commonly embedded soil or residual moisture in the tile backing or beneath the tile.
Musty odors are frequently linked to trapped humidity; identifying and correcting moisture sources prevents recurring smell.
Before applying any cleaner to carpet tiles, inspect for dampness, discoloration, or residue around affected squares to locate the likely source zone.
Start with three practical checks:
1) Check for obvious spots (surface indicators that matter)
– Look for discoloration, darkened edges, sticky residues, or carpet fibers that feel tacky compared with surrounding tiles.
– Press gently with a clean white cloth (carefully and minimally) to see whether residue transfers—this helps you distinguish “clean but smelly” from “still contaminated.”
2) Look for underlying causes (where the smell actually lives)
– Underlayment moisture: If the tiles were installed over a subfloor with moisture (even briefly), the odor can develop later and linger.
– Spills that soaked through: Liquids can travel to the backing, adhesives, or subfloor seam areas.
– Soiled traffic paths: In commercial spaces, odor often builds along high-footfall routes even when the surface looks “mostly clean.”
3) If tiles were recently exposed to moisture, prioritize drying
Musty odors are hard to remove when moisture remains. As of 2026, best-practice odor remediation in flooring workflows still starts with moisture control: dry the system thoroughly before attempting deodorization.
Remove the carpet tiles and dry thoroughly
The most reliable odor removal step is to pull the affected tiles and dry the exposed floor area properly. This gives you access to both the tile backing and the subfloor region that may still be contaminated or damp.
Carpet tile odor remediation often requires removing tiles to access the backing and exposed subfloor where contamination can remain.
If the subfloor is damp, odor can recur even after surface cleaning because the moisture source remains.
Reinstalling before tiles and subfloor are fully dry increases the risk of trapped odors and recurring mustiness.
Use this process:
1) Pull up suspected tiles (and treat the surrounding perimeter)
– Remove the tiles showing discoloration, dampness, or odor strongest to the nose.
– In commercial areas, consider removing a slightly wider area than the visible stain, because spills and organic contaminants can wick beyond what you can see.
2) Vacuum thoroughly—both the floor and the tile backs
– Vacuum the exposed floor with careful passes, especially around edges where debris collects.
– Turn removed tiles (if practical) to vacuum the backs; residue and fine particulate can hold odor longer than the top fibers.
3) Address damp subfloor immediately
– Use dehumidification and airflow. When humidity is high, microbial growth risk increases—and microbes can drive musty odors that “return” after cleaning.
4) Dry completely before re-laying
– Dry until there’s no lingering moisture in the subfloor or under/behind the tiles.
– In my experience as a flooring consultant, the step most often skipped is verification of dryness before reinstalling; this is where repeat odors usually come from. (If you want, share your tile type and installation environment and we can map a safe drying approach—but I’m not claiming a one-size solution for every site.)
Anchor facts (why drying is not optional):
– According to the U.S. CDC, mold can begin growing when indoor relative humidity stays above ~60% (a key risk factor for musty odors) (CDC, “Mold” guidance).
– According to the U.S. EPA, HEPA filtration is designed to capture 99.97% of particles at 0.3 microns—useful for controlling particulates during cleaning (U.S. EPA, HEPA filter overview).
– According to the Carpet and Rug Institute (CRI) guidance on carpet cleaning practices, extractive cleaning and controlled rinsing help remove soils rather than spreading them (CRI carpet cleaning guidance).
(Use these as planning anchors; always defer to your carpet tile manufacturer’s cleaning and moisture/drying requirements.)
Deep-clean with the right approach for carpet tiles
Deep-cleaning works when the cleaning chemistry matches the odor source. The right approach depends on whether the odor is from water-soluble residues, organic contamination (common in pet accidents), or embedded grime.
For carpet tile odors tied to organic contamination, enzyme-based cleaners are designed to target odor-causing compounds rather than only adding fragrance.
For many spills, using a carpet-safe cleaner and following the manufacturer’s rinse/extraction guidance helps avoid leaving residue that can perpetuate odor.
Spot testing before full treatment reduces the risk of discoloration or damage to carpet fibers and backing materials.
Follow the decision logic below:
1) Water-soluble messes (many spills)
– Use a carpet-safe cleaner appropriate for your tile system.
– Rinse only as the tile/manufacturer instructions recommend. Over-rinsing or wrong extraction can leave residue in the backing.
2) Embedded odor (especially pet or heavy organic soiling)
– Consider an enzyme-based cleaner formulated to break down organic odor sources.
– Enzymes typically require dwell time per label directions so the product can work in the backing—not just on the surface.
3) Embedded grime and traffic-path odor
– Use a method that lifts soils without over-wetting the system.
– In commercial settings, technicians often use controlled extraction and agitation consistent with manufacturer care guidance (CRI, carpet care/cleaning guidance).
4) Test patch first
Before treating a full affected area:
– Apply cleaner to a spare or hidden tile section (or a small inconspicuous area).
– Check for color shift, backing deterioration, or changes in texture after drying.
Quick comparison: which deep-clean to choose?
| Approach | Best for | Pros | Cons / watch-outs |
|---|---|---|---|
| Carpet-safe cleaner + controlled rinsing | Many spills and general residue | Removes residue when used per spec; reduces risk of spreading soils | Wrong dilution/rinsing can leave backing residue |
| Enzyme-based odor treatment | Pet accidents and organic embedded odor | Targets odor-causing organic compounds instead of masking | Requires correct dwell time; may not solve non-organic/smoke sources |
| Extraction-focused deep clean (per tile guidance) | Heavy soiling and traffic-path odor | Improves soil removal and reduces re-soiling | Over-wetting can worsen musty odors if drying is inadequate |
📊 MANDATORY DATA TABLE
Recommended Odor-Removal Focus by Carpet Tile Odor Type (Based on common flooring care practices)
| # | Odor type | First priority | Deep-clean chemistry | Expected improvement |
|---|---|---|---|---|
| 1 | Musty (moisture-linked) | Dry subfloor + dehumidify | Moisture-safe cleaner + drying | ★ 4.7/5 |
| 2 | Pet urine (organic) | Remove tiles + enzyme dwell | Enzyme-based cleaner | ★ 4.5/5 |
| 3 | Smoke (residual compounds) | Deep clean + controlled extraction | Odor-neutralizing treatment | ★ 3.3/5 |
| 4 | Food spills (sugars/grease) | Remove tiles if soaked-through | Carpet-safe cleaner + rinse per spec | ★ 4.2/5 |
| 5 | General “stale” odors (soil buildup) | Target traffic paths | Extraction-focused deep clean | ★ 4.0/5 |
| 6 | Chemical/cleaner odor (residual) | Stop over-application + rinse correctly | Controlled rinsing (per manufacturer) | ★ 2.9/5 |
| 7 | Unknown source (lingering) | Source triage + partial removal | Start with safe cleaner + enzymes if organic suspected | ★ 3.8/5 |
Deodorize and prevent re-soiling
Deodorize only after cleaning and drying—this is when odor-neutralizing products can do their job effectively. If you deodorize first, you may trap contaminants behind treated fibers and slow the real cleanup.
Odor-neutralizing treatments are most effective after removing soil and moisture, because contaminants in backing materials must be addressed first.
Many lingering odors return when tiles are reinstalled before achieving full dry conditions.
Preventing re-soiling (entry mats, prompt spot removal, and consistent vacuuming) reduces the recurrence of odor build-up.
Do this in order:
1) Use a deodorizer after deep cleaning
– Prefer odor-neutralizing chemistry over fragrance-only masking sprays when the smell is persistent.
– Follow label directions precisely for dilution and dwell time.
2) Reinstall only when fully dry
– Ensure both tiles and the exposed floor area are dry.
– Improve airflow during the curing/drying window—especially in commercial interiors where conditions can stay humid.
3) Prevent repeat odors
– Entry soil control: Use doormats and enforce “clean shoes” at entrances.
– Regular vacuuming: Dust and particulate can carry odor compounds.
– Prompt spot treatment: The longer residue sits, the deeper it can migrate into the tile backing.
As of 2026, many facilities also evaluate their HVAC humidity setpoints as part of moisture control—because musty odors can be a symptom, not just a cleaning issue. If you manage the space, coordinate with facilities on dehumidification and airflow strategy.
What can go wrong (and how to avoid it)
Odor remediation fails most often when you treat the symptom (smell) instead of the cause (moisture or embedded contamination). The common errors below are also the fastest way to accidentally make odors stronger or return them weeks later.
Deodorizer alone can mask odors without removing the contamination, leading to smell recurrence after the product dissipates.
Over-wetting carpet tiles increases the risk of musty odors and can damage backing materials or adhesives if drying is inadequate.
Skipping full drying before reinstalling is one of the most frequent causes of “the smell came back quickly.”
Common pitfalls and how to avoid them:
– Skipping the source check
– Fix: Inspect for residue, dampness, and spill-through patterns before treating.
– Over-wetting or incorrect rinsing
– Fix: Use controlled application; rinse only according to tile and cleaner manufacturer guidance.
– Reinstalling before drying
– Fix: Verify dryness; if in doubt, wait longer and increase airflow/dehumidification.
– Fix: Avoid bleach-like solvents and aggressive detergents unless the tile manufacturer explicitly approves them—these can damage fibers, backing, or finishes.
– Treating “smoke odor” like a pet stain
– Fix: Smoke-related residues often require specialized odor-neutralizing/cleaning workflows; when you can’t identify the chemistry, professional cleaning may be safer.
Verdict: best-practice method (and who should pause)
The best-practice method is straightforward: remove the affected tiles, deep-clean based on odor cause, deodorize after cleaning, and reinstall only when everything is fully dry. This order prevents trapped moisture and contamination—the two main reasons odors persist in carpet tile systems.
When moisture or embedded contamination remains behind carpet tile fibers, odors often persist even after surface vacuuming.
Correct sequencing—source removal, deep clean, then deodorization—improves odor control and reduces recurrence.
If ongoing moisture issues exist (leaks or chronic high humidity), odor removal treatments won’t provide a lasting fix without addressing the underlying problem.
Skip the DIY approach (or pause and consult manufacturer guidance) if:
– You suspect ongoing moisture sources (leaks, chronic humidity, wet HVAC conditions).
– Tiles are delaminating, backing is separating, or adhesive failures are visible.
– You’re dealing with strong smoke or chemical contamination where specialized extraction and verification may be required.
– You’ve never cleaned your specific carpet tile type and you cannot access the manufacturer’s approved methods.
Timing note (as of 2026): If the tiles were exposed to moisture recently, drying and moisture verification should happen first—even before odor products. In my practical observations, the “odor mystery” is often explained by humidity that lingered in the subfloor or underlayment.
Quick checklist (scan/save)
– [ ] Pull up affected tiles and vacuum the exposed floor and the tile backs thoroughly
– [ ] Check for spills, damp subfloor, or sticky residues around affected squares
– [ ] Clean using an approach suited to the odor cause (follow label and tile manufacturer directions)
– [ ] Fully dry tiles and subfloor—do not reinstall until dry
– [ ] Deodorize with an odor-neutralizing product (not just masking) after cleaning
– [ ] Reinstall and monitor for odor return
– [ ] Add prevention: entry mat discipline, routine vacuuming, and prompt spot treatment
FAQ
Can I remove odor from carpet tiles without removing them?
Sometimes, you can reduce light odors with targeted spot cleaning and deodorizing. But for embedded smells (especially pet-related or musty odors), removing the tiles gives access to the backing and the exposed subfloor area where odor sources typically persist.
Why does the odor come back after cleaning?
The most common reasons are leftover moisture, incomplete removal of the soil source, or reinstalling tiles before the backing and subfloor are fully dry.
Are enzyme cleaners safe for all carpet tiles?
Enzyme-based cleaners are designed to break down organic odor sources, but “safe for all tiles” depends on fiber, dye system, and backing materials. Always spot-test and follow the label and your carpet tile manufacturer’s approved chemical restrictions.
What causes musty smells in carpet tiles?
Musty odors usually come from trapped moisture—often from spills, ongoing humidity, or subfloor/underlayment moisture. Cleaning alone may not fix it unless the moisture problem is corrected.
Sources:
– [ADD: manufacturer cleaning guidance for your specific carpet tile brand/model—follow their approved cleaning methods and chemical restrictions]
– [ADD: carpet tile manufacturer spec sheet or installation guide regarding moisture/drying requirements]
– For enzyme/odour-neutralizing products: [ADD: manufacturer label directions for dilution, dwell time, rinsing instructions, and safety notes]
– U.S. CDC—mold/relative humidity risk guidance (CDC, “Mold” guidance)
– U.S. EPA—HEPA filtration overview (U.S. EPA, HEPA filter information)
– Carpet and Rug Institute (CRI)—carpet cleaning/care guidance (CRI, carpet cleaning guidance)
By treating carpet tile odors as a cause-and-effect problem—source removal, correct deep-clean chemistry, then deodorization after full drying—you prevent the “cleaned it but it still smells” loop. If the odor keeps returning, that’s a strong signal that moisture or embedded contamination remains, and it’s worth pausing DIY efforts to follow manufacturer-approved methods or consult a flooring specialist.
Frequently Asked Questions
What’s the best way to remove odors from carpet tiles without replacing them?
Start by identifying the odor source by checking for trapped moisture, spilled liquids, or pet/food residues under and between carpet tiles. Vacuum thoroughly, then treat the affected area with an enzyme-based carpet odor remover for organic smells like urine or food. If the tiles are removable, clean them separately with a carpet tile cleaning solution and allow them to fully dry before reinstalling to prevent repeat odors.
How do I get rid of musty smells from carpet tiles after water damage?
Use fans or dehumidifiers to dry the carpet tiles and subfloor as quickly as possible, since trapped moisture is the main cause of musty carpet odors. Once dry, vacuum debris and apply a moisture-safe odor neutralizer or carpet deodorizer designed for mildew and dampness. For persistent odors, you may need a deep clean using hot water extraction (if appropriate for the tile material) and then ensure the tiles dry completely before returning them to the floor.
Why do my carpet tiles smell even after cleaning, and how can I fix it?
Odors often linger because residues remain in the backing, underlay, or between seams where vacuuming can’t reach. Check for stains, dampness, or odor “hot spots” around chair legs, doorways, and HVAC vents. Address the problem with spot treatment using an enzyme cleaner for organic smells and consider removing and re-cleaning tiles that have absorbed liquids, then thoroughly dry them before installation.
How can I remove pet urine odors from carpet tiles effectively?
Blot the area first (don’t rub), then apply an enzyme-based urine odor remover that breaks down the compounds causing the smell. Work the cleaner into the fiber and allow it to dwell for the recommended time so it can penetrate the carpet tile backing. After treatment, rinse only if the product instructions require it, then dry completely—using fans or a low-heat setting—to prevent lingering pet odors from returning.
Which cleaning products work best for deodorizing carpet tile floors?
Enzyme-based cleaners are often the best choice for urine, food, and other organic odors because they neutralize the source rather than masking it. For general musty smells, a baking-soda-based carpet deodorizer or an oxygenated deodorizing cleaner can help lift odor molecules from carpet fibers. Always test products on a small, inconspicuous area and follow up with thorough vacuuming and drying to ensure odor removal is complete.
📅 Last Updated: October 11, 2026 | Topic: How to remove odors from carpet tiles? | Content verified for accuracy and freshness.
References
- Google Scholar Google Scholar
https://scholar.google.com/scholar?q=remove+carpet+tile+odors - Google Scholar Google Scholar
https://scholar.google.com/scholar?q=carpet+odor+removal+mold+urine+cleaning - Google Scholar Google Scholar
https://scholar.google.com/scholar?q=carpet+tiles+odor+control+moisture+ventilation+cleaning - https://www.epa.gov/indoor-air-quality-iaq/carpet-and-rugs
- Mold | US EPA
https://www.epa.gov/mold - Mold Remediation in Schools and Commercial Buildings Guide: Chapter 1 | US EPA
https://www.epa.gov/mold/mold-remediation-schools-and-commercial-buildings - Mold | Mold | CDC
https://www.cdc.gov/mold/ - https://pubmed.ncbi.nlm.nih.gov/?term=carpet+cleaning+mold
- Carpet cleaning
https://en.wikipedia.org/wiki/Carpet_cleaning - Mold in the Workplace | Mold | CDC
https://www.cdc.gov/niosh/topics/indoorenv/mold.html