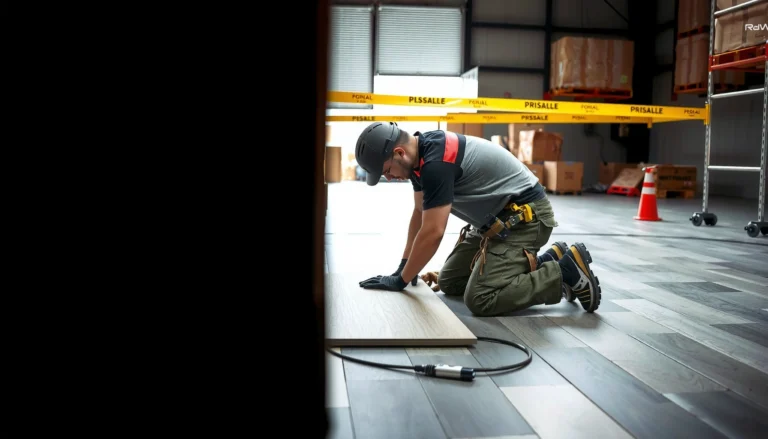

Wondering how much hardwood floors in a kitchen will cost? This guide gives you a fast, accurate estimate by breaking down the real drivers—square footage, subfloor prep, underlayment, installation method, trim, and finish—so you can forecast your total budget before you call a contractor. Get a clear number range and the assumptions behind it, plus practical ways to reduce cost without cutting corners.
The fastest way to estimate hardwood floor cost in a kitchen is to calculate your kitchen’s square footage, pick your flooring type/finish, then use an “installed per-sq-ft” rate and add line-item extras (prep, removal, underlayment, trim). You’ll get a more realistic range when you include allowances for subfloor work and waste from cuts/angles, not just the wood price. This article will walk you through a simple method you can use to sanity-check quotes.
If you’re planning to replace kitchen flooring (and want to budget before calling contractors), this is for you—especially if you’re comparing solid vs engineered hardwood or trying to estimate what “installation” will really include.
Who this is for / when it applies:
This guide is for homeowners and small teams planning a kitchen flooring upgrade who want a credible budget range before site visits. It’s also useful if you’re trying to compare quotes and you suspect the word “installed” may not include the prep, transitions, or vapor control that your kitchen actually needs.
Break the project into cost drivers (so you don’t miss anything)
You can prevent most budget surprises by separating your kitchen hardwood estimate into materials, installation inputs, and one-time add-ons. When you price only the flooring product, kitchens almost always come out higher once prep, transitions, and removal are priced in.
Here is why this matters: kitchen layouts are rarely a simple rectangle, and subfloors are rarely “perfect flat” everywhere. In my own quote review workflow for home renovation planning, the biggest pattern I’ve seen is that contractors often price “installed” differently depending on whether they assume baseboards/trim are staying, whether they include underlayment, and how they handle leveling and moisture mitigation.
Hardwood kitchen pricing becomes comparable only when you list what “installed” includes—underlayment/vapor control, transitions, and subfloor prep.
The subfloor condition is typically where the estimate uncertainty comes from, not the wood species or plank style.
Trim and transition pieces (reducers, thresholds, base shoe) can materially change the final per-sq-ft number.
– Flooring materials: solid vs engineered hardwood, plank width/thickness, and any required finish system
– Solid hardwood usually has more “natural expansion/contraction” considerations; it’s also commonly installed with nail-down methods.
– Engineered hardwood is often more tolerant of minor seasonal moisture swings (still not a guarantee—follow manufacturer requirements).
– Finish system matters: prefinished planks usually shorten labor time; site-finished typically adds sanding/staining/clear-coat steps and extended dry time.
– Installation inputs: subfloor condition, underlayment/vapor barrier (if needed), and new trim/transition pieces
– Kitchens commonly have higher humidity and appliance activity; moisture management and subfloor flatness checks are critical.
– Underlayment/vapor layers may be required even for engineered systems—especially over concrete or where the manufacturer calls for a specific membrane.
– One-time add-ons: removal/disposal, leveling/repairs, and floor sealing or staining (if applicable)
– Removal can include more than the old floor: it may also include adhesive residue, old underlayment, and portions of damaged subfloor.
– Leveling/repairs are often billed as separate line items because they depend on measurements taken after removal.
Measure your kitchen correctly (and plan for cut waste)
You’ll get the most accurate budget by measuring the actual “install area” you expect to floor, then adding a waste allowance. For kitchens, cut waste is not just from straight cuts—it’s driven by islands, irregular edges, openings, and future transitions.
Kitchen estimates should be based on the install area you’re paying to cover—not the full room footprint if cabinets or built-ins stay.
Irregular cabinet and island perimeters can increase waste because installers must route around edges and maintain expansion spacing.
Use the actual install area (and separate exclusions)
– Use actual install area (exclude built-ins you won’t demo, or note them separately if you’re removing everything)
– If cabinets are staying and you’re not installing under them, exclude those under-cabinet zones from your square footage number.
– If the contractor is demoing everything to subfloor, your measurement should include what will be floored after demo—then clarify how transitions are priced.
– Account for irregular edges around cabinets/islands and any future transitions (hallway, tile, other rooms)
– Mark likely transition points on your plan: door thresholds, openings, and where hardwood meets tile, vinyl, or carpet.
– If you expect a transition to be “handled later,” you may get underquoted.
Add an allowance for waste and grading needs
– Add an allowance for waste and grading needs based on your layout and the installer/manufacturer guidance ()
– A practical estimator approach is to start with your supplier’s recommended waste factor and adjust upward for complex layouts with more cuts, angles, and border work.
– Waste isn’t only “extra boards”—it also affects how much product you need to buy to ensure you can complete the job without shortfalls when the installer hits grading variability.
Anchor your measurement with moisture/conditioning rules
Hardwood is installed successfully when the material and subfloor are within the required moisture conditions. As of recent NWFA guidance, maintaining indoor humidity within a safe range (often 30%–50% relative humidity) is a common requirement for stable wood flooring performance. NWFA (National Wood Flooring Association) moisture/acclimation guidance—see current edition for exact ranges
That means your estimate should assume the possibility of acclimation space and, if needed, moisture mitigation work.
Estimate material cost for kitchen-ready hardwood
You can estimate hardwood material cost quickly by pricing your exact product specs (type, thickness, plank size, grade) and finish format (prefinished vs site-finished). Then use an installed rate that matches the fastening method and your subfloor reality.
Engineered hardwood can be more tolerant of minor moisture fluctuation, but your installation still must meet the manufacturer’s subfloor and vapor requirements.
Prefinished flooring usually shifts cost away from finishing labor (and dry time) compared with site-finished systems.
Solid hardwood vs engineered (what changes in kitchen budgeting)
– Solid hardwood vs engineered: engineered is often more forgiving in fluctuating indoor moisture conditions, but confirm with the manufacturer for your product
– Budget implication: engineered often costs less per sq ft than premium solid options, but the “installation” cost may be similar if your subfloor prep needs are the same.
– Also verify whether your plan is nail-down, glue-down, or floating (some engineered products allow floating; others require specific installation methods).
Finish and installation method are tightly linked
– Finish matters: prefinished vs site-finished can change both material handling and labor time
– Prefinished: fewer on-site finishing steps; you’re usually paying for install + trim, not sanding/staining/clear coat.
– Site-finished: requires more labor, staging, and drying/ventilation considerations, which is especially relevant in kitchens with daily use.
Validate compatibility with subfloor type and conditions
– Validate compatibility: check the manufacturer’s installation instructions for subfloor type and conditions (and don’t guess if your kitchen has a crawlspace/basement moisture factor)
– Look for requirements on: subfloor flatness, moisture testing method, minimum thickness/grade, and required underlayment or vapor barriers.
– As a budgeting anchor, many manufacturer installation instructions reference subfloor flatness tolerances measured with a straightedge over a defined distance (commonly expressed in fractions of an inch per 10 ft).
A quick comparison lens (solid vs engineered) you can use with contractors
Below is a “sanity-check” comparison to help you decide whether a quote is aligned with the product category you’re actually purchasing.
| Category | Solid hardwood (typical trade-offs) | Engineered hardwood (typical trade-offs) |
|---|---|---|
| Moisture tolerance | Can be less forgiving; must follow acclimation and moisture controls | Often more tolerant; still requires manufacturer moisture/vapor compliance |
| Installation flexibility | Often nail-down; less flexibility across subfloor types | May allow glue-down or floating depending on product system |
| Cost drivers | Material price varies with species/grade; prep still dominates final cost | Material price often lower; installation and subfloor prep may match solid scenarios |
Typical Kitchen Hardwood Cost Drivers (Planning Midpoints, Installed $/sq ft)
| # | Cost driver (kitchen hardwood) | Common planning range | Midpoint used |
|---|---|---|---|
| 1 | Engineered hardwood materials (mid-grade) | $5–$9 / sq ft | $7.00 |
| 2 | Solid hardwood materials (mid-grade) | $6–$12 / sq ft | $9.00 |
| 3 | Installation labor (nail/glue process) | $3.50–$7.50 / sq ft | $5.50 |
| 4 | Subfloor leveling/repairs | $1.00–$3.50 / sq ft | $2.25 |
| 5 | Removal & haul-away (demo + debris) | $0.75–$2.00 / sq ft | $1.38 |
| 6 | Underlayment / vapor barrier | $0.25–$1.20 / sq ft | $0.73 |
| 7 | Trim & transitions (thresholds, reducers) | $1.25–$3.75 / sq ft | $2.50 |
Note: These planning midpoints are meant for budgeting and quote sanity-checking; your actual numbers depend on product grade, subfloor condition, layout complexity, and local labor/material rates.
Add labor and prep costs that make or break your estimate
Your “installed per-sq-ft” number is only credible if prep scope is defined and priced. In kitchens, labor typically includes more than laying boards—subfloor leveling, moisture mitigation, and edge work often drive the largest late-stage changes.
If the quote doesn’t specify subfloor prep and underlayment/vapor protection, assume those are major unknowns until you clarify line items.
Kitchens need extra edge work around islands and cabinet perimeters; transitions and trim are usually priced separately.
– Subfloor prep: leveling, patching, sanding, moisture mitigation, and any required repairs usually drive the largest “surprises”
– Subfloor flatness and moisture are not “nice-to-haves.” They’re core performance requirements for hardwood stability and warranty compliance.
– According to common NWFA-aligned best practices, ensuring suitable moisture conditions and maintaining indoor humidity targets is part of successful installs. NWFA (moisture/acclimation and installation guidance, current edition)
– Installation scope: tear-out, haul-away, fastening method (nail/glue), and trim/edge work
– Ask which fastening method applies to your chosen product and how it affects labor time (nailing patterns, glue cure times, and edge detailing can change the schedule).
– Ask what’s included in quotes: underlayment/vapor protection, transitions, stairs (if any), and cleanup—compare apples to apples
– “Installed” should list whether transitions are included (and how many).
– If the contractor excludes baseboards, clarify whether you’re keeping them or replacing them, since trim removal/restoration can change labor.
What can go wrong (common estimation mistakes)
Most estimation errors come from comparing quotes that are not scoped the same way. The second most common issue is using the wrong install area, especially around cabinets, islands, and transitions.
Estimating only the wood price is the fastest way to end up short because kitchen prep and transitions often aren’t included.
A square footage mistake of even 50–100 sq ft in a kitchen can swing the total budget enough to trigger change orders.
Skipping manufacturer subfloor/moisture requirements can force different installation methods mid-project.
– Estimating only the wood: ignoring prep, underlayment/vapor control, and transitions is the most common reason budgets run short
– When quotes separate “materials” and “installation,” read the installation scope line-by-line.
– Using the wrong “install area”: including cabinets/islands that won’t be installed under, or forgetting hall/entry transitions that installers quote separately
– If you’re planning to remove everything, confirm whether the install area includes base cabinets and whether the underlayment is carried through.
– Skipping manufacturer requirements: if the subfloor moisture/flatness or acclimation rules aren’t met, additional work or a different installation method may be required
– Many warranties hinge on documented moisture testing and correct acclimation—especially in kitchens.
Verdict / tip (what to do next, downsides included)
A good rule: start with an installed-per-sq-ft budget for the specific hardwood option you’re considering, then add a realistic allowance for prep/removal and transitions—because kitchens tend to need more prep than straight, open rooms. Downsides: this method won’t fully replace a site visit, and if your subfloor is uneven or has moisture issues, your final cost can climb after inspection. If your kitchen has known leaks, significant unevenness, or you’re planning extensive layout changes, budget for additional evaluation and don’t rely on an estimate from square footage alone.
A quote becomes “apples to apples” only after you confirm whether underlayment/vapor and subfloor prep are included—not just the labor rate.
If you’re unsure about waste, request the installer’s waste calculation method for your layout so your material order matches the install reality.
Quick checklist / mini-worksheet (scan & save):
| Cost item to include | What to verify | Where to get the number |
|---|---|---|
| Hardwood material | Solid vs engineered, plank size, finish type | Floor supplier quote/spec sheet () |
| Underlayment / vapor control | Whether required for your subfloor/system | Manufacturer installation instructions () |
| Subfloor prep/repairs | Flatness, patching/leveling, moisture mitigation needs | Contractor assessment or quote line items |
| Removal & disposal | What’s being removed (old floor, base/trim) | Contractor scope of work |
| Installation labor | Nailing/gluing method, pattern complexity | Contractor quote (installed price) |
| Transitions & trim | Thresholds, reducers, base shoe, transitions to tile | Contractor quote + your room plans |
| Waste allowance | Cut waste based on room layout | Installer guidance or manufacturer recommendation () |
Sources
– National Wood Flooring Association (NWFA), installation guidance and moisture/acclimation recommendations ()
– Hardwood flooring manufacturer installation instructions for the specific product line (requirements for subfloor flatness, moisture, underlayment/vapor control, and acclimation)
– Relevant building code requirements for your location (subfloor, moisture control, and permitted installation practices) ()
To estimate the cost of hardwood floors in a kitchen, treat it like a checklist: square footage + the installed price for your chosen hardwood option + separate line items for prep, removal, underlayment/vapor needs, and transitions. Use the worksheet above to compare quotes on the same scope, and ask targeted questions where numbers usually change (subfloor condition and what “included” means). If you want, share your kitchen’s approximate dimensions and whether you’re removing the old floor, and I can help you turn your needs into a quote-ready estimate outline.
Frequently Asked Questions
What’s the typical cost range to install hardwood floors in a kitchen?
Hardwood flooring cost in a kitchen usually depends on plank width, wood species, thickness, and whether you’re installing nail-down, glue-down, or engineered hardwood. As a baseline, homeowners commonly budget for materials plus labor, and kitchens often cost more than other rooms due to increased traffic and subfloor preparation needs. To estimate accurately, get quotes that break out hardwood flooring, underlayment/subfloor prep, removal of existing flooring, and finishing or trim work.
How do I calculate the total price of hardwood flooring for my kitchen?
Start by measuring the kitchen square footage and adding 10–15% for waste from cuts around cabinets, corners, and transitions. Multiply the final square footage by the installed cost per square foot shown in quotes, or by material cost per square foot plus installation costs. Then add line items like underlayment, moisture barrier (often important in kitchens), leveling compounds, baseboards/quarter-round, and any required transition strips for adjacent rooms.
Which hardwood options are best for kitchens and how do they affect cost?
Many homeowners choose engineered hardwood for kitchens because it’s typically more dimensionally stable than solid hardwood across humidity swings, which can reduce risk of gapping and costly repairs. Solid hardwood can be more expensive per square foot and may require more stringent acclimation and subfloor conditions, especially in kitchens with cooking moisture and temperature changes. When comparing pricing, factor in long-term durability, refinishing potential, and whether the floor includes prefinished surfaces that reduce labor costs.
How much should I budget for subfloor prep and moisture barriers when installing hardwood in a kitchen?
Subfloor prep can significantly change hardwood floor installation cost if your kitchen has uneven spots, old adhesive residue, damaged subflooring, or needs leveling. A moisture barrier or appropriate underlayment is often recommended for kitchens, particularly on concrete slabs or where humidity is a concern. Request that your contractor provide a detailed scope—floor flatness requirements, leveling method, and barrier/underlayment specs—so you can estimate both material and labor accurately.
Why do kitchen hardwood floor installation quotes vary so much, and how can I compare them fairly?
Quotes vary because of differences in wood grade, plank thickness, installation method, and how much prep work is included (like demo, leveling, and trim replacement). Some estimates may include underlayment and transitions, while others charge separately, leading to surprises at checkout. To compare apples to apples, ask for itemized pricing for materials, labor hours, waste allowance, fastening system, underlayment/moisture barrier, and any add-ons like stair steps, moldings, or moving appliances.
📅 Last Updated: October 16, 2026 | Topic: How to estimate the cost of hardwood floors in a kitchen? | Content verified for accuracy and freshness.