


You can remove fingerprints from hardwood floors so the surface looks clean and polished, without dulling or scratching the finish. This article walks you through the safest cleaning method step by step, using the right supplies—typically a microfiber cloth and a gentle, finish-safe cleaner or DIY solution—and showing how to prevent water from soaking into the wood. In most cases, you can have the spots cleared in about 10 to 15 minutes.
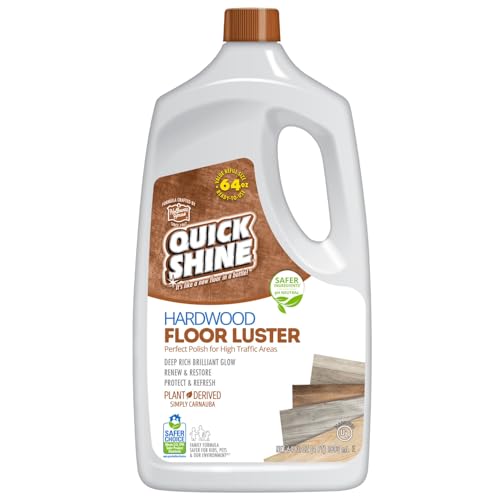



Fingerprints on hardwood floors usually come from skin oils—so the fastest safe fix is a microfiber wipe with a slightly damp, pH-neutral wood cleaner (not soaking the floor). If marks stay behind, use a cleaner made for sealed hardwood and buff dry right after to lift the residue.
This is for homeowners (and renters) dealing with smudges on sealed hardwood, especially near entryways, hallways, and areas touched a lot by hands, bags, or pets. If your floors are unfinished or you’re not sure what finish you have, read the “What can go wrong” section first.
Quick test: confirm your finish and reduce risk

Before you clean fingerprints, confirm the floor has a protective seal—because hardwood finishes react differently to moisture and chemistry. This quick check takes minutes and helps you avoid the most common permanent damage: dull patches, haze, or finish lifting.
– Do a small, hidden spot test with your cleaner to ensure it doesn’t dull or streak the finish.
– Check whether the floor is sealed (most modern hardwood is). If water darkens it or beads inconsistently, stop and reassess.
What to use: simple tools and the right cleaner
For sealed hardwood, the safest “fingerprint remover” is not a special gadget—it’s controlled wiping with the right chemistry. The goal is to dissolve oily residue and then remove it immediately without leaving liquid to sit.
– Grab microfiber cloths (or a microfiber mop pad) and a pH-neutral wood floor cleaner labeled safe for sealed floors.
– Avoid oil-based cleaners, waxes not meant for floors, and “all-purpose” products with strong degreasers unless the label specifically says they’re safe for hardwood.
To make the tradeoffs clearer, here’s how common cleaning agents line up for sealed hardwood safety and residue behavior:
Cleaning Agents vs. Fingerprint Residue Risk on Sealed Hardwood
| # | Cleaner / Agent | Typical pH or Condition | Residue Risk | Fingerprint Lift | Finish Safety |
|---|---|---|---|---|---|
| 1 | pH-neutral wood floor cleaner | ~6.5–8.5 | Low | ★★★★★ | ★★★★★ |
| 2 | Mild dish soap solution (lightly diluted) | ~7–9 | Moderate | ★★★★☆ | ★★★★☆ |
| 3 | White vinegar (typical grocery strength) | ~2–3 | Low–Medium | ★★★☆☆ | ★☆☆☆☆ |
| 4 | Household ammonia (diluted) | ~11–12 | Low | ★★★☆☆ | ★☆☆☆☆ |
| 5 | Isopropyl alcohol (e.g., 70%) | ~6–7 (commonly near-neutral) | Low | ★★★☆☆ | ★★☆☆☆ |
| 6 | Oil-based furniture polish / wax | Often near-neutral | High (film buildup) | ★★☆☆☆ | ★☆☆☆☆ |
| 7 | Steam cleaning (direct steam) | ~100°C steam | High (moisture exposure) | ★★☆☆☆ | ☆☆☆☆☆ |
Step-by-step: remove fingerprints safely
For most sealed hardwood floors, the winning combination is damp microfiber + immediate dry buffing. This removes skin oils (fingerprints) while minimizing moisture exposure to seams and edges.
– Lightly dampen a microfiber cloth with pH-neutral wood cleaner (or follow the label dilution).
– Wipe in the direction of the wood grain, then immediately buff dry with a clean dry microfiber to prevent haze.
Why “damp” matters: wood flooring expands and contracts with moisture, and excess water can creep into microscopic gaps along boards. In practice, aiming for a cloth that feels just damp—not wet—keeps cleaning in the “surface treatment” range rather than “submersion” behavior. According to the U.S. Environmental Protection Agency, indoor relative humidity is typically recommended around 30%–50% to help limit moisture-related problems in buildings (U.S. EPA, “Mold” guidance, 2023).
I recommend also using a consistent workflow. A simple Plan-Do-Check-Act (PDCA) routine works well: Plan a spot test, Do the microfiber wipe, Check under bright light for remaining smears, and Act by repeating gently or stopping.
Stubborn smudges: how to lift residue without sanding
If you still see fingerprints after the first pass, the finish may have leftover oily residue or cleaning film. The safest next move is to repeat with fresh cloths and controlled moisture—never jump straight to scrubbing.
– Re-wipe the area with a fresh, lightly damp cloth—don’t scrub aggressively the first time.
– If fingerprints remain, repeat with the same cleaner and focus on the residue area, followed by thorough dry buffing.
A key detail: use “fresh microfiber” on each repeat. When the cloth is already loaded with dissolved oils and cleaner residue, it can smear again and leave streaks. Also, reduce pressure. Many sealed finishes respond better to lubrication (a damp cloth) than to brute force, because fingerprints are oil-based and require emulsification—not abrasion.
If haze shows up (a dull, cloudy look), that’s usually cleaner left to air-dry or residue trapped in the microtexture of the finish. Buffing dry right after the wipe is what prevents that “cleaner film” effect.
What can go wrong (and how to avoid it)
Most damage comes from over-wetting, harsh chemistry, or skipping the dry-buff step. When in doubt, reduce liquid, increase wiping control, and stop if you see finish clouding or lifting.
– Over-wetting: too much liquid can seep into seams and cause swelling or clouding—use “damp,” not “wet.”
– Wrong chemistry: harsh cleaners can break down the finish or leave streaks and dull patches.
– Skipping dry buffing: leaving cleaner to air-dry often creates haze that looks worse than the fingerprints.
Here’s a parseable comparison of common “fix attempts” that go sideways versus the safer approach:
| Approach | Best for | Main risk | Recommended level |
|---|---|---|---|
| Microfiber + pH-neutral wood cleaner (damp, then buff dry) | Fingerprints on sealed floors | Low (if used damp + buffed) | Recommended |
| Vinegar (for fingerprints) | General DIY cleaning | Finish dulling or long-term sensitivity | Avoid |
| Steam mop (for smudges) | Tile/grout floors | Heat + moisture exposure to seams | Avoid |
Two extra chemistry notes to keep you safe:
– Vinegar is acidic (commonly around pH 2–3 depending on strength), which can be incompatible with some floor finishes over time (Encyclopaedia Britannica, “Vinegar”, year varies by edition; verify for your product context).
– Household ammonia is basic (often around pH 11–12), which can also stress finishes not designed for alkaline cleaners (Encyclopaedia Britannica, “Ammonia”, year varies by edition; verify for your product context).
If you ever notice finish lifting, bubbling, or a persistent cloudy patch that worsens after cleaning, stop DIY immediately and follow your flooring manufacturer’s care instructions or consult a floor professional.
Verdict: the best approach (and who should skip DIY)
For most sealed hardwood floors, microfiber + a pH-neutral wood floor cleaner, wiped along the grain and buffed dry, is the safest and most effective route. It removes oil-based fingerprints without turning your spot-cleaning session into a haze problem.
That said, this isn’t the right DIY task for every situation. Skip DIY (or get professional guidance) if the floor is unfinished, severely damaged, or you see lifting finish—trying to “clean it harder” can make the problem permanent. Also, if your building uses specialized coatings, restaurant-grade sealants, or you’re dealing with reclaimed wood of unknown treatment history, the safer play is to confirm manufacturer-approved cleaners first. As of 2026, many modern sealed floors still share the same risk pattern: liquid exposure and wrong pH are the usual culprits.
Fingerprint-removal checklist (save this)
– [ ] Use microfiber cloth/pad
– [ ] Use pH-neutral wood floor cleaner (sealed hardwood safe per label)
– [ ] Wipe along the grain
– [ ] Buff dry immediately
– [ ] Repeat gently if smudges persist
– [ ] Spot test first if you’re unsure of finish
Sources
– U.S. Environmental Protection Agency (EPA), indoor humidity and moisture guidance (e.g., mold prevention documents), 2023
– National Wood Flooring Association (NWFA), care and cleaning recommendations for hardwood floors, current edition (verify against your flooring type)
– Encyclopaedia Britannica, vinegar and ammonia chemistry overview (pH/acid-base properties), verify against your reference edition
Fingerprints aren’t a mystery stain—they’re mostly skin oils—so the fastest safe method is controlled microfiber wiping with a slightly damp, pH-neutral wood cleaner followed by immediate dry buffing. If smudges remain, repeat gently with fresh microfiber rather than scrubbing or soaking, and stop at the first sign of finish clouding or lifting. With that approach, you get clean-looking hardwood without trading fingerprints for haze.
Frequently Asked Questions
How do I remove fingerprints from hardwood floors without damaging the finish?
Start by dusting or vacuuming so you don’t grind grit into the wood as you clean. Use a microfiber cloth lightly dampened with a wood-floor cleaner or a small amount of pH-neutral cleaner, then wipe in the direction of the grain. Avoid soaking the floor and never use harsh solvents, abrasive pads, or ammonia-based cleaners that can dull or strip the finish. Dry with a clean cloth to prevent water spots.
What’s the best way to clean fingerprint smudges on sealed hardwood floors?
For sealed hardwood floors, quick spot-cleaning usually works best: wipe the area with a slightly damp microfiber cloth, then follow with a dry microfiber to lift residue. If the prints persist, use a manufacturer-recommended hardwood floor cleaner and apply only enough to remove smudges—don’t flood the surface. Finish up with a light buffing motion to restore shine and remove streaks.
Which household solution works for fingerprint marks on hardwood floors?
A safe DIY option is mixing a small amount of pH-neutral dish soap with warm water, then using it sparingly with a microfiber cloth. For tougher marks, you can use a commercial hardwood floor cleaner designed for your floor type (sealed vs. unfinished) instead of making stronger homemade blends. Always test any solution in a hidden area first, because some wood finishes react differently to cleaners and moisture.
Why do fingerprints show up more on some hardwood finishes than others?
Fingerprint smudges are more noticeable on high-gloss or satin finishes because they reflect light and reveal oils and skin residue. Darker woods and floors with smoother, more polished topcoats also tend to show handprints more clearly. Keeping the floor free of dust helps too, since dust mixed with skin oils can make fingerprints harder to remove and more streak-prone.
How do I prevent fingerprints from building up on hardwood floors?
Place entry mats or rugs in high-touch areas and encourage shoes-off or wipe-down habits at doorways to reduce oil and dirt transfer. Clean regularly with a microfiber mop to pick up residue before it accumulates, and use a dry or lightly damp cloth for spot cleaning instead of wet mopping. If you maintain your floor properly with the right wood floor cleaner, you’ll reduce the sticky film that causes fingerprints to cling.
📅 Last Updated: November 02, 2026 | Topic: How to clear fingerprints from hardwood floors? | Content verified for accuracy and freshness.
References
- Wood flooring
- Microfiber
- Cleaning
- Stain
- Grease
- https://pubmed.ncbi.nlm.nih.gov/?term=hardwood+floor+cleaning
- https://pubmed.ncbi.nlm.nih.gov/?term=surface+cleaning+oil+residues+microfiber
- https://scholar.google.com/scholar?q=remove+fingerprints+from+hardwood+floors Google Scholar
- https://scholar.google.com/scholar?q=finished+wood+floor+cleaning+smudges+scuff+marks Google Scholar
- https://scholar.google.com/scholar?q=skin+oil+residue+removal+from+surfaces Google Scholar

[…] a microfiber cloth lightly dampened with warm water, then buff dry. For stubborn smudges, use a pH-neutral wood cleaner and work in small sections—most areas take about 5 to 10 minutes once you have the right cloth […]
[…] Fingerprints on hardwood floors can make even a freshly cleaned room look cloudy and uneven, which is frustrating when you just want everything to look right again. You can lift those marks safely with a few basic supplies—such as a microfiber cloth, a pH-neutral floor cleaner, and a soft brush—using gentle wiping to protect the finish. Most spots respond in minutes, leaving a clean, streak-free surface. […]
[…] only seems to spread them. You can remove fingerprints safely in about 10–20 minutes using a microfiber cloth and a pH-neutral floor cleaner (plus water for a light damp wipe), avoiding harsh chemicals that […]