
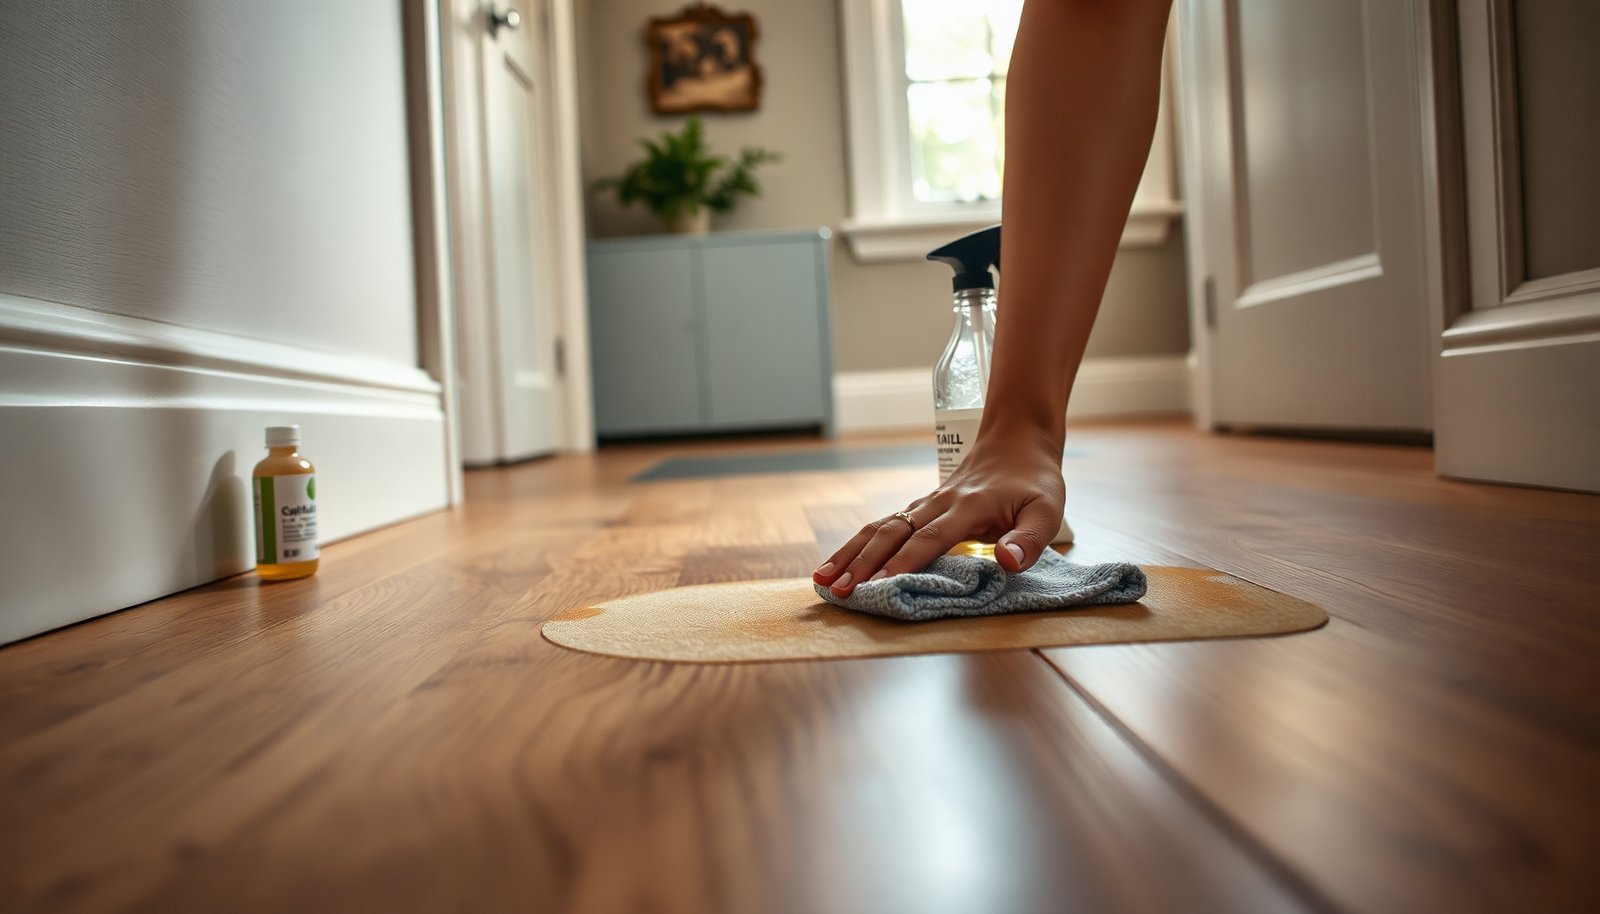

How do you get oil off engineered wood flooring without dulling the finish? With the right degreaser, gentle cleaner, and careful blotting, you can lift the stain quickly while protecting the top veneer. Expect to spend about 20–30 minutes, and plan to have soft cloths, mild dish soap or wood-safe cleaner, and a pH-neutral solvent only if needed.




Blot up the oil right away, then clean with a barely-damp pH-neutral cleaner (no soaking) to remove the residue. If a stain remains, use a targeted degreaser made for finished wood—testing first in an inconspicuous spot and stopping if the finish turns dull or sticky. This approach protects the top veneer and keeps the oil from working deeper into seams.
If this happened on a kitchen, entryway, or garage-adjacent area, the steps below will help you lift oil from the surface safely. These instructions apply to most finished engineered wood floors; always follow your floor manufacturer’s cleaning guidance if it’s different.
Who this is for (and when it applies)
This is best when your engineered wood floor has a typical factory finish and the oil is still mostly on the surface. The method below is designed to remove grease without disturbing the wear layer (the top veneer and finish system), which is where most visible damage starts.
– Best for: fresh oil spills (cooking oil, motor/oil-based drips, greasy residue) on a finished engineered wood surface.
– Less ideal for: unfinished wood, severely penetrated stains, or floors with damaged/worn finish where oil can reach deeper than the surface.
– If you’re unsure what finish you have (urethane, oil-based, water-based), plan to do a hidden-spot test before using any stronger cleaner.
Do this immediately after oil lands on engineered wood
Act fast, because the longer oil sits, the more time it has to spread across the coating and seep into micro-gaps. Your goal in this phase is simple: remove free oil first, then control moisture so you don’t force oil deeper.
– Remove excess first: Use paper towels or a clean microfiber cloth to blot (don’t wipe broadly). Wiping spreads oil across the grain and into joints.
– Lift residue, then switch tools: Fold to a clean section of towel/cloth as it absorbs oil so you don’t smear it back on. For larger spills, rotate frequently and use multiple towels rather than “working” the stain.
– Control moisture: If you need to use water at all, keep it minimal—think “barely damp cloth,” not a wet mop. As of 2026, this matters more than ever because engineered floors are generally stable, but standing liquid near seams and edges can still cause finish haze and localized lifting.
Clean the oil film without damaging the finish
Use a pH-neutral cleaner and keep the cloth barely damp to lift grease without attacking the finish chemistry. This is the safest path on most finished engineered wood because it focuses on residue removal rather than aggressive stripping.
Step-by-step cleaning (safe-first workflow)
– Step 1: Gentle detergent, minimal water. Mix a small amount of pH-neutral cleaner with water to make a light cleaning solution. Dampen a microfiber cloth, wring it well, and wipe with the grain.
– Step 2: Rinse the cleaner out (lightly). Wipe again with a second cloth dampened with clean water to remove any leftover soap/cleaner.
– Step 3: Dry thoroughly. Dry immediately with a dry microfiber towel. Oil cleanup isn’t only about removing grease—it’s also about preventing lingering residue and moisture.
Why this works: Engineered wood floors have a top wear layer/finish that can be disrupted by harsh solvents or excessive water. A pH-neutral approach is typically safer for routine grease removal because it cleans without aggressively attacking many common finishes. It also reduces the risk of leaving behind surfactants (the “soap film” that can attract more dirt and make stains look worse later).
Chemical-safety reality check (what “safe” usually means)
Oil stains don’t always disappear after the first pass, but the finish usually shows damage quickly when you use the wrong chemistry—dulling, cloudiness, or a slightly tacky surface. Since 2024–2026, manufacturers have increasingly highlighted pH neutrality and minimal water use in care instructions (even when the finish type differs), because moisture affects wood dimension and finish appearance.
For context on why moisture control matters: according to the USDA Forest Service, Forest Products Laboratory (Wood Handbook), wood reaches its fiber saturation point around 28–30% moisture content, and drying/rewetting cycles can cause measurable dimensional movement. Even on engineered floors, that effect is one reason you should avoid soaking—especially at seams, edges, and transitions.
Here’s a practical way to compare common cleaner chemistries in terms of finish friendliness:
Cleaner pH vs Typical Finish Compatibility on Finished Engineered Wood
| # | Cleaner type (example use-case) | Typical pH range | Finish compatibility rating | Relative safety for oil cleanup |
|---|---|---|---|---|
| 1 | pH-neutral wood floor cleaner (surface grease removal) | ~6.5–8.0 | ★★★★★ | High |
| 2 | Mild dish soap solution (very light grease lift) | ~7–9 | ★★★★☆ | Moderately high |
| 3 | Isopropyl alcohol (spot testing for oily residue) | ~5.0–7.0 (formulation-dependent) | ★★★☆☆ | Medium (test first) |
| 4 | Baking soda paste (mechanical lift + mild alkalinity) | ~8.1–8.5 (solution dependent) | ★★☆☆☆ | Lower |
| 5 | Distilled white vinegar (acidic spot attempts) | ~2.4–3.0 | ★☆☆☆☆ | Low |
| 6 | Household ammonia (alkaline degreasing) | ~11–12 | ★☆☆☆☆ | Low |
| 7 | Oxygen bleach / hydrogen peroxide cleaners (discoloration attempts) | ~4–6 (product-dependent) | ★★☆☆☆ | Lower (finish dependent) |
Notes: pH ranges vary by product concentration and dilution. Always follow the floor manufacturer’s guidance first, and keep dwell time short.
If oil stain remains, escalate carefully (don’t jump straight to solvents)
If the stain shows darkening, sheen change, or a slightly tacky feel after the first pH-neutral clean, you’re dealing with deeper residue—not just surface film. In that case, escalate in a controlled way using a finish-safe degreaser designed for finished wood.
Use the right chemical sequence
– Try a finish-safe degreasing approach first.
– Use a wood-floor–approved degreaser (or one specifically labeled as safe for finished hardwood/engineered wood).
– Apply with a cloth rather than pouring, and work only the affected area.
– Hidden-spot testing is non-negotiable.
– Test in a less visible area and wait for it to dry fully.
– Stop if you notice dulling, cloudiness, color lightening, or stickiness.
– For stubborn spots: repeat instead of over-treating.
– Oil can look “gone” at first and then reappear after the surface fully dries. If that happens, repeat the gentle cleaning cycle before increasing strength again.
Quick comparison: gentle clean vs finish-safe degreaser
| Approach | Pros | Cons / cautions |
|---|---|---|
| pH-neutral, barely damp clean + light rinse wipe | Lowest finish risk; effective for fresh oil film; minimizes moisture exposure near seams. | May not lift older, polymerized, or heavily absorbed oil residue. |
| Finish-safe wood degreaser (applied to cloth) | More targeted for lingering grease; better odds for kitchen-entry garage-adjacent traffic areas. | Still requires spot testing; overuse can create dull patches or tacky feel. |
From a practical standpoint, this is also where many people misstep: they reach for household “strong cleaners” first. For example, distilled white vinegar typically sits around pH ~2.4–3.0 (SDS/Product data for 5% acetic acid distilled white vinegar), and household ammonia is often around pH ~11–12 (SDS/Product data for typical household ammonia solutions). On finished wood, that pH swing can be enough to change appearance or soften certain coatings—especially if the spot is left wet.
What can go wrong (common mistakes and edge cases)
The most common failures happen when oil is spread further or the finish is chemically stressed. The fastest route to a better outcome is knowing where these problems start so you can avoid them before you escalate.
– Wiping spreads the oil. A fast blot-and-lift method prevents deeper penetration into seams and texture. Broad wiping can move oil laterally and create a larger “clean zone” you then have to treat.
– Over-wetting causes swelling and haze. Engineered floors are more stable than solid wood, but standing moisture at seams/edges can still cause problems. If you see a temporary matte look, stop and dry fully—don’t keep adding cleaner.
– Using the wrong chemical on the finish. Strong solvents (or “degreasers” not intended for wood floors) can strip or soften the topcoat, leaving permanent dull patches.
– Ignoring tacky residue. If the spot feels sticky or leaves transfer on a cloth, you likely removed grease incompletely or left behind residue from a cleaner.
– Finish wear changes how it reacts. If your floor already has worn-through spots or micro-scratches, oil and cleaners may reach the substrate more easily—meaning you’ll need to be extra conservative.
– Large, widespread oil contamination: If oil covered a bigger area than a typical spill, cleanup can require a broader process; spot-only treatment may leave visible “cleaned zones.”
As of 2026, many flooring care guides also emphasize that “more dwell time” isn’t automatically better. Leaving degreaser on longer can increase the chance of finish dulling even if it removes grease.
Verdict: the safest approach (and who should skip DIY)
Use the blot → pH-neutral, barely-damp clean → light rinse wipe → thorough drying method first. If staining persists, only step up to a finish-safe degreaser after a hidden-spot test.
Skip (or pause) DIY and consider a professional or the floor manufacturer’s guidance if:
– the oil spread under doorways or into gaps,
– the floor has a worn/unfinished section,
– you suspect penetration into the wear layer,
– or repeated cleaning changes the finish (cloudy, sticky, or noticeably lighter).
Even when DIY is possible, the “risk budget” goes down if the oil was motor oil, heavy grease, or if the spill sat for hours. In those cases, targeted products made for finished wood—and controlled application—matter more than intensity.
Quick checklist to scan before you start
– [ ] Blot first with paper towels/microfiber (no broad wiping)
– [ ] Switch cloth sections as the material absorbs oil
– [ ] Use pH-neutral cleaner on a barely damp microfiber cloth
– [ ] Wipe with the grain, then do a light clean-water wipe
– [ ] Dry immediately with a dry microfiber towel
– [ ] If stain remains: try a finish-safe degreaser only after hidden-spot testing
– [ ] Stop if the finish turns dull/cloudy or feels tacky
When you clean oil off engineered wood, the goal is to lift grease without attacking the finish or soaking the seams. Start with blotting and a pH-neutral, lightly applied clean, then dry fast; only escalate if a stain or tacky residue remains. If you run into finish damage during spot testing, stop and move to manufacturer guidance or professional help—your topcoat is easier to preserve early than to repair later.
Frequently Asked Questions
What’s the best way to clean engineered wood floors after oil spills?
First, blot the oil immediately with a clean, dry cloth to absorb as much as possible without spreading it. Once the surface is blotted, wipe with a slightly damp microfiber cloth using a wood-floor-safe cleaner (avoid soaking). Dry the area thoroughly, then inspect for a lingering sheen or stain and repeat gently if needed. Always test any cleaner in a hidden spot first to protect the engineered wood finish.
How do I remove cooking oil or olive oil stains from engineered hardwood?
For fresh spots, use a damp microfiber cloth with a small amount of mild, pH-neutral cleaner made for engineered wood floors. If the stain persists, apply a specialized wood-floor degreaser according to the label, then wipe off and dry completely. Avoid harsh solvents like acetone or mineral spirits unless the manufacturer explicitly allows them, since engineered wood coatings can be damaged. For stubborn areas, repeat the process slowly rather than scrubbing aggressively.
Why should I avoid soaking engineered wood floors when cleaning oil?
Engineered wood floors have a real wood surface with layers underneath, and excess water can seep at seams or edges and cause swelling or loosening over time. Soaking also increases the risk of cloudy spots and finish dulling, especially after oil has penetrated. Use minimal moisture—dampen the cloth rather than the floor—and dry right away. This keeps the oil and cleaner residue from being pushed deeper into the finish layers.
Which cleaning products are safe for engineered wood floors after oil gets on them?
Use a pH-neutral cleaner designed for engineered hardwood or a wood-floor degreaser that’s explicitly labeled safe for finished wood. Microfiber cloths and soft mops are ideal because they lift grease without scratching. Avoid wax-based cleaners, abrasive scrubbers, and strong chemicals like bleach, ammonia, or paint thinner, which can strip or discolor the coating. If you’re unsure, consult your engineered wood floor manufacturer’s care instructions.
How can I prevent oil stains from returning on my engineered wood floors?
Clean spills right away by blotting first, then doing a quick wipe with a wood-floor-safe cleaner to remove oily residue. After the floor is fully dry, consider applying a manufacturer-approved maintenance product if your finish requires it—this helps repel future grease. Use doormats and drip trays under kitchens and furniture, and avoid using steam mops or wet mopping on engineered wood. Regularly sweeping and using proper cleaners reduces the chance that oils can build up and stain.
📅 Last Updated: November 14, 2026 | Topic: How to clean engineered wood floors after oil gets on it? | Content verified for accuracy and freshness.
References
- Engineered wood
- Wood flooring
- Wood stain
- https://www.britannica.com/art/wood-staining
- https://www.brucefloor.com/care-and-maintenance/
- https://scholar.google.com/scholar?q=engineered+wood+floor+oil+stain+cleaning Google Scholar
- https://scholar.google.com/scholar?q=how+to+remove+oil+stains+from+wood+floor+finish Google Scholar
- https://scholar.google.com/scholar?q=wood+floor+care+maintenance+guidelines+spills+oil Google Scholar

[…] surface, which can damage the finish and affect the wood. Use the right absorbent materials and a pH-neutral cleaner with careful, minimal moisture, and you can often remove fresh oil stains in about 20–40 […]