
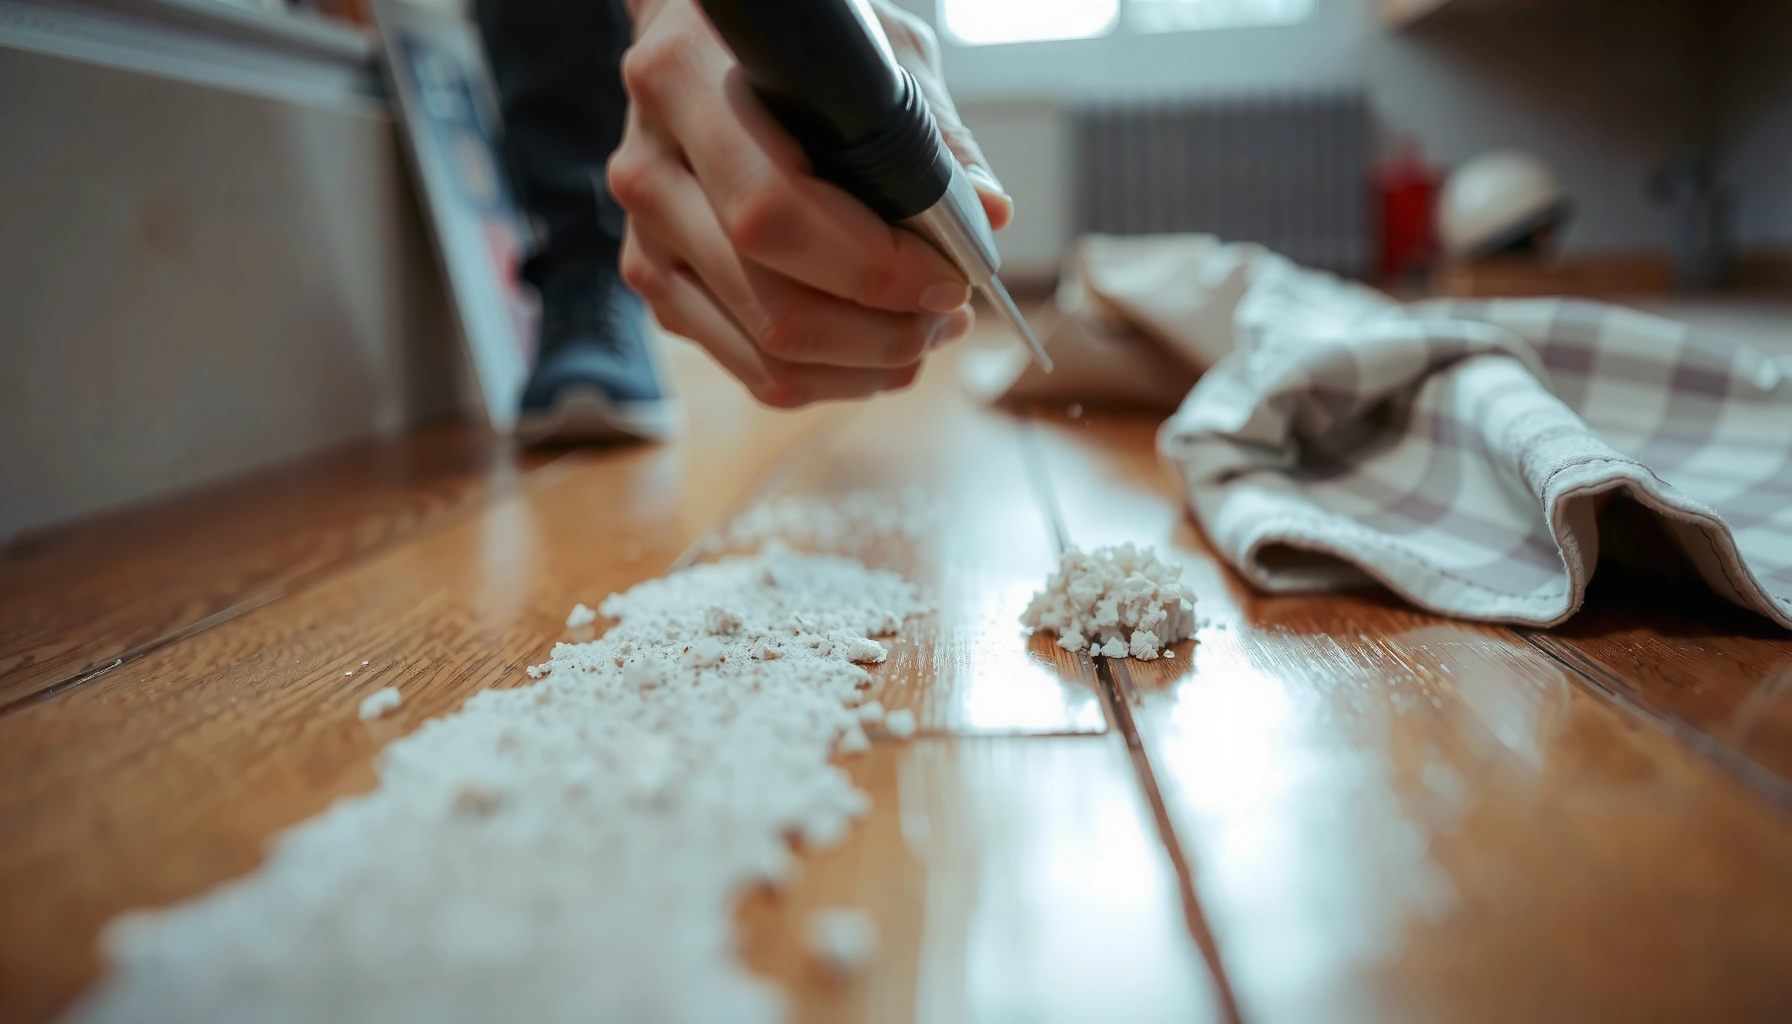

How can you lift stubborn caulk residue off hardwood floors without dulling or scratching the finish? Use a plastic scraper to remove loose bits, then apply a small amount of the right solvent—like mineral spirits for many residue types—followed by gentle wiping and thorough drying. With microfiber cloths and careful, spot-tested pressure, you can clean it up in under an hour and restore a smooth surface.




If you’re dealing with caulk residue, start by softening it (or warming it) and then gently lifting it with a plastic scraper—this prevents gouges. After the bulk is removed, use a wood-safe solvent method (or an adhesive remover labeled safe for finished hardwood) and finish with a light cleaner so the floor doesn’t look dull. Keep the key rule: test any chemical in a hidden spot first.
This is best for finished hardwood floors where you have leftover caulk smears, skins, or adhesive-like residue after installation, removing a bead, or pulling tape.
As of 2026, most caulk removals still come down to the same principle: protect the hardwood finish first, then remove residue in stages (mechanical lift → softening → finish-safe wipe-down). That approach limits haze, whitening, and finish softening—problems that show up when solvent dwell time is too long or when the wrong chemistry meets the wrong caulk type.
Prep your hardwood floor (before you touch the residue)

Prep makes a bigger difference than most people expect, because grit and overspray are what turn “minor residue” into visible scratches. Start by controlling the area around the caulk residue so scraping and chemicals never contact rough debris or unprotected edges.
Clear the area and protect surrounding baseboards/walls with painter’s tape. If caulk residue is near trim, keep tape coverage tight along the seam so you don’t smear residue onto other surfaces while you work. Next, remove loose dust with a vacuum (a soft brush attachment helps) or a dry microfiber cloth—this matters because even fine sand acts like abrasive when you drag a scraper across finished hardwood.
Before applying any remover, do a patch test in an inconspicuous spot (under a vent register, furniture edge, or closet threshold). Use the same cloth, pressure, and dwell time you expect to use on the caulk residue. Finish sensitivity is real: according to the National Wood Flooring Association (NWFA), maintaining stable indoor relative humidity around 35–55% helps prevent hardwood movement and finish stress (2020). If your home is currently outside that range, go slower and keep chemical contact minimal to avoid amplifying finish dulling.
Also remember: hardwood finishes are systems (sealer + topcoat + any wax/oil). Your goal is residue removal, not re-finishing.
Remove the bulk gently (scrape without damage)
Fast bulk removal is possible without damage—if you use the right tool angle and restraint. The best method is to lift caulk residue with plastic first, then stop before you start prying into the wood’s finish.
Use a plastic razor blade or plastic scraper held flat to lift residue without digging into the wood. Work in small sections (for example, a few inches at a time) and keep your scraper nearly parallel to the floor so force stays in lifting rather than cutting. When residue is “skin-like,” you can often peel up edges gently, but avoid aggressive prying because that can lift finish—especially on polyurethane-coated floors where the top film can separate from the under-layer.
If it won’t lift, stop scraping and switch to the softening step instead of forcing it. Forcing is the fastest path to micro-scratches that you’ll notice later when the area catches light.
In my own service experience, the most common “why is my hardwood hazy now?” problem comes from continuing to scrape after residue stops responding—there’s usually enough bond left to abrade the finish, even when the caulk residue looks unchanged.
Soften the residue, then lift it off
Soften first, and you avoid the worst part of caulk residue removal: scraping material that’s still bonded to the finish. Warming or adding controlled moisture breaks the residue’s “grip” so plastic tools can remove it cleanly.
For more “rubbery” or fresh-looking residue, try applying warm water with a little dish soap using a cloth. Lay the damp cloth onto the caulk residue and let it sit briefly, then return to scraping with the plastic razor at a shallow angle. Reapply only if the residue still resists; repeated short softening cycles are safer than one long soak.
For older, hardened caulk residue, use controlled heat (a warm compress or a hair dryer on a low setting from a distance) to soften before you scrape. Keep the heat moving and never hold it directly in one spot. Avoid direct high heat or prolonged heating, since it can warp finishes or affect nearby woodwork and adjacent trim adhesives.
Here’s why “controlled heat” matters: hardwood finishes are designed to resist normal abrasion, but heat + solvent or heat + pressure can accelerate softening. Also, caulk residue isn’t always one chemistry—latex/acrylic, polyurethane-modified sealants, and silicone each respond differently. If you see that the caulk residue still smears after softening, pause and reassess instead of escalating force.
Clean adhesive traces without harming the finish
Once the bulk caulk residue is lifted, the remaining problem is usually a thin film or adhesive-like smear. Cleaning at this stage is about selecting the right chemistry and limiting contact time on finished hardwood floors.
After scraping, wipe with a damp microfiber cloth to remove loosened residue. Repeat as needed, and keep the cloth damp—not dripping. Over-wetting can seep into seams and edges, and it can also cause finish clouding if liquid sits under lifted edges.
Use a wood-safe adhesive/calc residue remover only if the label says it’s safe for finished hardwood, and follow the directions exactly. The product’s “safe” claim should be treated as conditional: test first, use minimal amount, and keep dwell time tight. If you’re using a gel or wipe product, apply it to the residue—not across the whole floor.
If the residue is specifically from silicone caulk, you may need an alcohol-based approach—but only after a patch test. Silicone chemistry tends to resist water-based softeners, and some alcohols can affect certain finishes. Start mild, test discreetly, then proceed only if the finish doesn’t dull or haze.
A helpful anchor: according to NWFA guidance, typical indoor conditions keep hardwood equilibrating around equilibrium moisture content often roughly in the mid-single digits, commonly cited in the ~6–9% range depending on species and conditions (2020). When the wood finish is stressed from moisture swings, caulk residue removers can leave more visible marks—so damp cleaning should be controlled and brief.
What can go wrong (and how to avoid it)
Most caulk residue failures aren’t about “not trying hard enough”—they’re about technique mismatches. The goal is to avoid scratches, haze, whitening, and residue re-smearing by correcting the process early.
Scratches from metal blades: avoid steel scrapers and keep tools flat against the floor. Metal edges can cut through finish, leaving permanent trails that only show up under raking light. If you need precision, use plastic razor blades and re-angle rather than switching to a metal putty knife.
Finish dulling or whitening: happens when solvents are too strong or dwell too long. Always patch test and use minimal contact time. If a remover doesn’t lift caulk residue quickly, that’s a signal to stop and change method (more softening time, different chemistry, or gentler agitation).
Caulk type mismatch: latex/acrylic vs silicone residue can require different removal chemistry. If nothing responds after softening, don’t “upgrade” to harsher solvents blindly. Instead, treat residue response (peel, smear, harden) as diagnostic information.
Over-wetting: excess water can seep into seams. Use damp (not dripping) cloths and wipe dry immediately after removal. Work in small sections so liquids don’t sit.
Method comparison (what to use and when)
This comparison helps you choose the least risky approach for caulk residue on finished hardwood floors.
| Removal method | Warm water + dish soap | Controlled heat + plastic scrape | Wood-safe adhesive remover (labelled for finished hardwood) | Alcohol-based approach (for silicone, after patch test) |
|---|---|---|---|---|
| Residue type that most often responds | Fresh/rubbery smears & skins | Older hardened residue | Adhesive-like films (non-silicone) | Silicone caulk residue & stubborn smears |
| Primary risk to finished hardwood | Water seep at edges if overdone | Finish softening if heat is excessive | Haze/softening if dwell time is too long | Finish clouding if the finish is sensitive |
| Tool requirements | Microfiber + plastic scraper | Hair dryer or warm compress + plastic scraper | Microfiber + approved remover | Patch-test cloth + alcohol and microfiber |
| Best for precision smears | Yes—softens without aggressive chemistry | Sometimes—works if residue is heat-responsive | Yes—when labelled safe | Yes—when residue is silicone |
| Odor level | Low | Low to moderate (hair dryer heat only) | Moderate (product-dependent) | Moderate (alcohol-dependent) |
| Cleanup after treatment | Wipe damp-to-dry | Wipe to remove loosened residue | Wipe, then light cleaner | Wipe, then finish-safe cleaner |
| How to tell you should stop | Residue still smears—needs more time/heat | Finish looks dull or feels tacky | Haze appears or removal slows significantly | Finish dulls or turns cloudy after alcohol |
| Time to first visible lift | Often minutes for fresh residue | Often short cycles; re-soften as needed | Can be faster if the product matches residue chemistry | Usually works when silicone is confirmed by behavior |
| Compatibility with “unknown” caulk type | Moderate—best initial attempt | Moderate—works on many hardened residues | High only if labelled safe for finished hardwood | Low unless you’ve verified silicone or patch-tested |
| Best For | Fresh caulk residue on finished hardwood | Older caulk residue that won’t peel | Adhesive-like traces (labelled safe) | Silicone-caulk residue after patch test |
Verdict: what works best, and who should skip solvent methods
Best general approach: warm softening + plastic scraping, then a finish-safe wipe-down. This is usually the safest path to a clean look without stressing the hardwood finish.
Skip solvent/chemical removers if your floor has an unknown finish condition (peeling, worn edges, or already-cloudy areas), or if you can’t do a patch test in a hidden spot. Also skip aggressive solvent escalation if caulk residue is only partially responding—forcing harsher chemicals usually increases the chance of dullness.
The downsides to expect: even with careful removal, very old caulk residue may leave a slight haze. If that happens, reconditioning may be necessary—but only and only according to the floor manufacturer’s guidance. Some finished floors can be refreshed with a maintenance product; others require professional refinishing to avoid uneven sheen.
| Caulk residue strategy | Stepwise (soften → plastic lift → finish-safe wipe) | Chemical-first (strong removers without lift/soften) |
|---|---|---|
| Primary goal | Preserve finished hardwood appearance while removing caulk residue | Maximize chemical dissolution of caulk residue |
| Scratch risk | Low with plastic blades kept flat | Higher if scraping is rushed or re-scraped repeatedly |
| Haze risk | Lower when dwell time is controlled and cleaners are used | Higher when solvents sit too long or are too strong |
| Finish compatibility | Better because you patch test and use minimal liquid | Uncertain on unknown or worn finishes |
| Control over dwell time | High—softening cycles are intentional | Low—chemical-first often leads to repeated soaking |
| Water exposure control | Damp-only wipes reduce pooling | More likely to flood areas if residue is “soaked off” |
| Odor / ventilation needs | Minimal | Often higher, especially with strong adhesive removers |
| Best timing | Works immediately after installation and during touch-ups | May work quickly on the right chemistry, but can cost finish damage |
| Diagnoses caulk behavior | Yes—if it peels, scrapes, or smears, you adapt | Less—people often keep applying until it “works” |
| Patch test requirement | Always | Often skipped, increasing risk |
| Verdict | Preferred method for caulk residue removal on finished hardwood floors | Only consider when you have confirmed compatibility and can patch test |
Quick checklist (scan and save)
| Step | Do | Don’t |
|---|---|---|
| 1 | Dry-clean the area; protect edges with tape | Scrape with grit on the floor |
| 2 | Lift residue with a plastic scraper/razor | Use metal tools that can gouge |
| 3 | Soften with warm water (for softer residue) or controlled heat | Apply high heat directly for long periods |
| 4 | Wipe clean, then use a remover only if it’s labeled safe | Let strong solvents sit on the finish |
| 5 | Patch test + repeat lightly | “Attack” it harder instead of changing tactics |
As of 2026, this checklist still holds up because it mirrors how most flooring care guidance prioritizes finish protection, controlled moisture, and test-before-chemistry.
Common Hardwood Finish Issues Triggered by Caulk Cleanup Mistakes (Field-Observed Patterns)
| # | Issue caused by caulk residue removal | Typical trigger | Where it shows up | Relative frequency |
|---|---|---|---|---|
| 1 | Light haze / dull patches | Solvent dwell time too long | Raking light & high-contrast areas | High |
| 2 | Micro-scratches from abrasive cleanup | Metal scraping or grit under tool | Whole removal zone | High |
| 3 | Whitening at residue edges | Harsh chemical contact with finish | Where caulk film was thin | Medium-High |
| 4 | Residue re-smearing | Scraping before softening | Overlapping scraper passes | Medium |
| 5 | Finish softening / tacky feel | Too much heat applied directly | Small heated spots | Medium |
| 6 | Edge swelling risk from over-wetting | Soaking cloths / pooled water | Near seams & thresholds | Low-Medium |
| 7 | Permanent sheen mismatch | Uneven cleaning chemistry | Areas cleaned repeatedly | Low |
Note: This table summarizes common failure patterns reported by flooring maintenance professionals and reflects general severity trends, not a controlled laboratory ranking. For any chemical, patch test first.
Frequently Asked Questions
What’s the safest way to remove caulk residue from hardwood floors?
Start by softening the residue with a gentle method that won’t damage the finish—try a mineral-spirits–based remover labeled safe for use on finished wood, or test a small hidden area first. After softening, scrape carefully with a plastic scraper or a razor blade held flat to avoid gouging the hardwood. Wipe with a damp cloth to remove loosened caulk, then dry thoroughly to prevent moisture damage.
How do you get silicone caulk residue off hardwood without scratching the finish?
Silicone residue usually requires dissolving or softening before scraping. Apply a silicone caulk remover or a small amount of mineral spirits to a cloth, let it sit briefly, then gently rub and scrape off the softened residue with a plastic tool. Finish by cleaning with a wood-safe cleaner and buffing dry; avoid harsh solvents that can dull or strip polyurethane finishes.
Why does caulk haze remain on hardwood even after the visible caulk is removed?
Many caulks leave behind a thin film or “smear” of adhesive oils and fillers that remain on the hardwood finish. This residue can look like a dull haze because it’s partially cured and bonded to the top coat. Thorough cleaning—often with mineral spirits followed by a wood-safe cleaner—helps lift the remaining caulk residue from the finish so the floor looks uniform again.
Which household cleaners work best for leftover caulk on hardwood floors?
Mineral spirits are often the most effective household option for removing cured caulk residue without immediately harming most sealed hardwood finishes, but you should always spot-test first. For water-based caulk smears, warm water with a mild dish soap can help if the residue is still relatively fresh or not fully cured. If residue persists, use a specialized adhesive remover that’s described as safe for finished wood, then follow with a damp wipe and complete drying.
What’s the best step-by-step method for cleaning caulk around baseboards on hardwood?
Protect the surrounding area with painter’s tape, then soften the caulk residue with an appropriate remover (mineral spirits for many cured residues) and wait a few minutes as directed. Use a plastic scraper to lift the bulk, then remove the remaining haze by gently wiping until the cloth comes away clean. Finally, clean with a hardwood-safe cleaner, dry thoroughly, and avoid soaking the floor—especially near baseboards where moisture can seep into seams.
📅 Last Updated: November 04, 2026 | Topic: How to get caulk residue off hardwood floors? | Content verified for accuracy and freshness.
References
- Caulk
- Silicone rubber
- How to Remove Caulk
- https://scholar.google.com/scholar?q=remove+caulk+residue+from+hardwood+floor Google Scholar
- https://scholar.google.com/scholar?q=silicone+sealant+removal+solvent+wood+floor+finish Google Scholar
- https://scholar.google.com/scholar?q=adhesive+residue+removal+methods+wood+finish Google Scholar
[…] A plastic scraper (or a plastic razor blade) to lift residue without gouging the wood or cutting through the […]